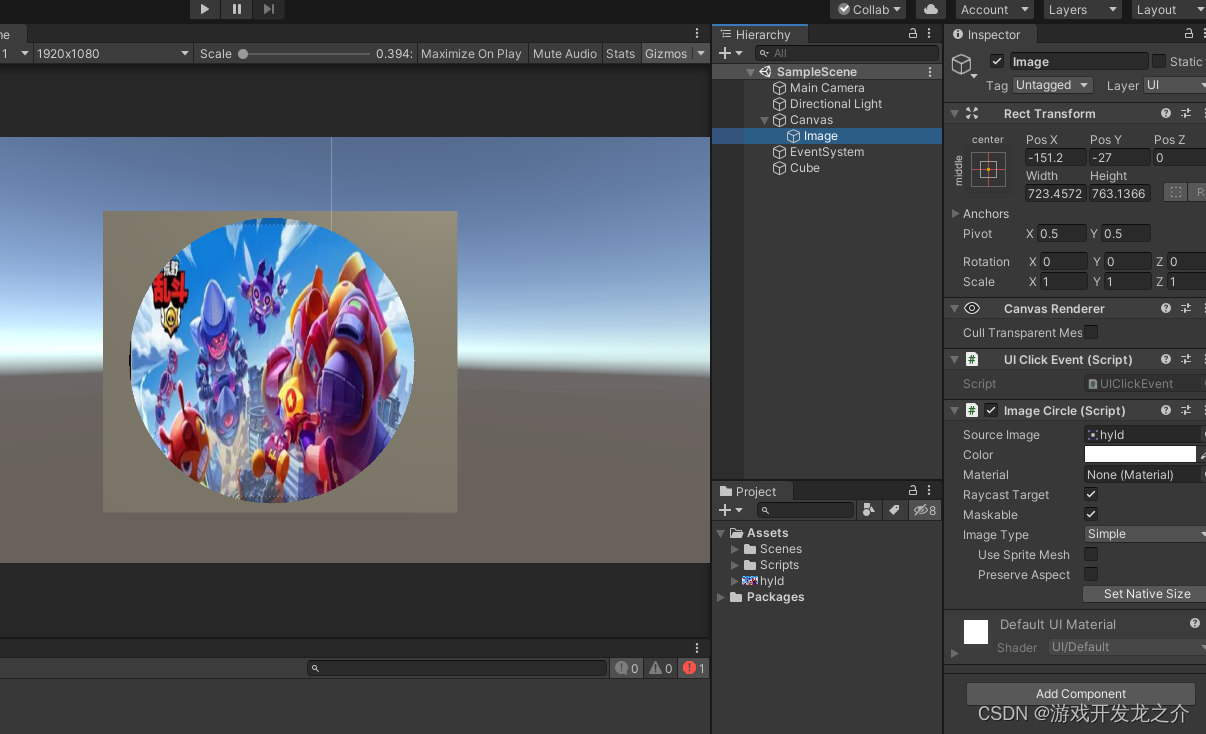
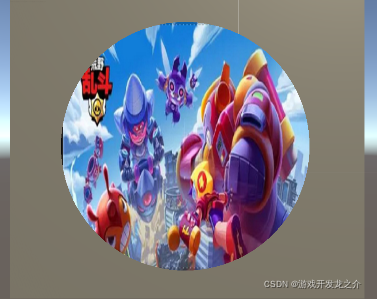
下图是最终成品

OnPopulateMesh这个函数的主要作用就是用于构建Mesh。
 然后参数VertexHelper就是一个容器,存放需要渲染的mesh信息。
具体可以看https://zhuanlan.zhihu.com/p/33827367这篇文章介绍OnPopulateMesh的
这个函数本来就只是绘制一个矩形(两个三角形就搞定了)。但是如果我们可以override它来实现不同的性状。
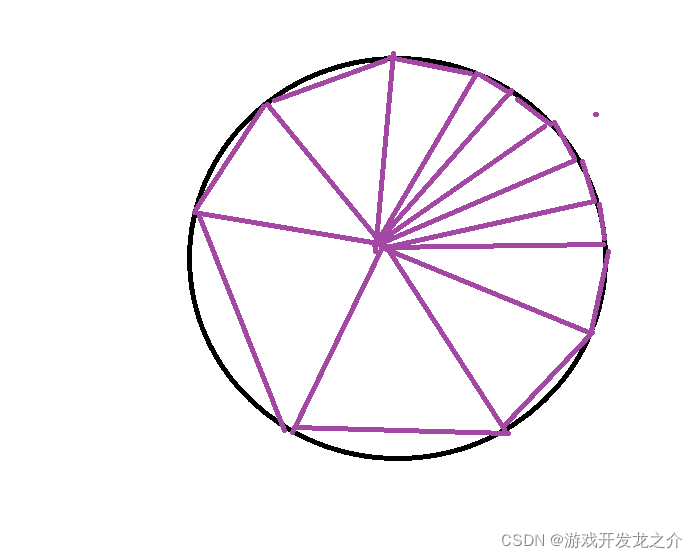
那么如何绘制一个?呢?首先我们需要知道一个?是怎么组成的(指由三角形)

没错,?是由一圈三角形组成,如果三角形面数越多,抗锯齿能力越强。
好的,那么现在问题就变成了,如何找到这些三角形。
首先我们先确定一个image的坐标系。我们简单的测试一下。画一个矩形出来(用到四个顶点)
[toFill.AddVert的函数代表向容器增加一个点]
[toFill.AddTriangle代表向容器增加一个三角形面,注意,三个索引一定要顺时针不然代表反面不渲染]
public class ImageCircle :Image
{
    private int segements=360;
    protected override void OnPopulateMesh(VertexHelper toFill)
    {
        base.OnPopulateMesh(toFill);
        toFill.Clear();
        float width = rectTransform.rect.width/2;
        float height = rectTransform.rect.height/2;
        toFill.AddVert(new Vector3(-width,-height),Color.red,Vector2.zero);
        toFill.AddVert(new Vector3(-width, height), Color.blue, Vector2.zero);
        toFill.AddVert(new Vector3(width, height), Color.yellow, Vector2.zero);
        toFill.AddVert(new Vector3(width, -height), Color.green, Vector2.zero);
        toFill.AddTriangle(0, 1, 2);
        toFill.AddTriangle(0, 2, 3);
    }

}
运行结果如下:

哇呜!所以他的(0,0)是中心点,左下角的点是(-width,-height),右上角的点是(width, height)
那么,圆心完全可以确定了就是(0,0);
然后下一个问题是如何找到绕圆心一圈的其他点呢?
假设我们知道圆上的某个点的弧度θ,以及圆的半径r那么可以轻易的算出这个点的位置为(rsinθ,rcosθ)
那么所有点都能通过这个求出来,至于半径r是多少自定义就行了。
那θ呢,取决于三角形面数,如果有n个三角形,那么需要n+1个顶点。这个也是自定义。
完美,这下所有的点都能算出来了。

最后是三角形生成。我们知道三角形的点是需要顺时针的。而且每个三角形必然经过圆心。那么规律很容易就能找到了
是(id,0,id+1).
 理论搞定之后就是代码时间。
using UnityEngine;
using UnityEngine.UI;
using UnityEngine.Sprites;

public class ImageCircle :Image
{
    /// <summary>
    /// 三角形面数
    /// </summary>
    private int segements;
    protected override void OnPopulateMesh(VertexHelper toFill)
    {
        base.OnPopulateMesh(toFill);
        toFill.Clear();
        segements = 100;
        ///先获得rect的宽高
        float width = rectTransform.rect.width;
        float height = rectTransform.rect.height;

        ///绘制圆形,所以需要知道弧度制。
        ///segements代表有几个三角形面
        ///一周的弧度为2Π,所以每一个三角形面的弧度为2Π/segements
        ///圆形的半径的定义比较模糊,建议随便定义。
        float radian = (2 * Mathf.PI) / segements;
        float radius = width * 0.5f;


        ///然后需要算出各个顶点坐标。
        ///1,先算出圆心坐标
        UIVertex origin = new UIVertex();
        origin.color = color;
        origin.position = Vector3.zero;
        toFill.AddVert(origin);

        ///2.依次算出其他点,每次弧度值会+=radian
        int vertexCount = segements + 1;///顶点数比面数多一
        float curRadian = 0;
        for (int i = 0; i < vertexCount; i++)
        {
            float x = Mathf.Cos(curRadian) * radius;
            float y = Mathf.Sin(curRadian) * radius;
            curRadian += radian;

            UIVertex tempV = new UIVertex();
            tempV.color = color;
            tempV.position = new Vector2(x, y);
            toFill.AddVert(tempV);
        }

        ///最后把由顶点生成各个三角形面
        ///三角形面由三个点组成,取决于你给的索引。索引取决于addVert的顺序
        ///如果是三个点是顺时针排列就是正面,否则是反面。
        ///反面不会绘制。
        ///所以圆心的索引是0,然后其他顶点围着圆心,依次+1
        ///故(i,0,i+1)组成一个三角形面
        int id = 1;
        for (int i = 0; i < segements; i++)
        {
            toFill.AddTriangle(id, 0, id + 1);
            id++;
        }
    }

}

嗯,很不错,我们成功的把一个矩形的image变成了一个圆形的image。
但是现在还有缺陷!SourceImage貌似不起作用,因为uv图没有映射上去。uv图实际上就是一个坐标范围在[0,1]的一个u,v纹理贴图坐标。
它定义了图片上每个点的位置的信息。

所以我们应该把width和height映射到uv图[0-1]范围,这样就能得到所有贴图信息。
并且别忘了,实际坐标是(-width,-height)到(width.height).所以这两个相对坐标不一样,还需要做个额外的中心点偏移。
这样就能实现简单的映射了
代码如下:
using UnityEngine;
using UnityEngine.UI;
using UnityEngine.Sprites;

public class ImageCircle :Image
{
    /// <summary>
    /// 三角形面数
    /// </summary>
    private int segements;
    protected override void OnPopulateMesh(VertexHelper toFill)
    {
        base.OnPopulateMesh(toFill);
        toFill.Clear();
        ///先获得rect的宽高
        float width = rectTransform.rect.width;
        float height = rectTransform.rect.height;

        ///再获得uv
        ///overrideSprite 用于修改图片,但是不会把原来的图片给消除掉
        ///uv的四个坐标相对于uv的四个顶点[x,y,z,w]
        ///然后求出uv宽高映射到实际宽高
        Vector4 uv = overrideSprite != null ? DataUtility.GetOuterUV(overrideSprite) : Vector4.zero;
        float uvWidth = uv.z - uv.x;
        float uvHeight = uv.w - uv.y;
        Vector2 uvCenter = new Vector2(uvWidth * 0.5f, uvHeight * 0.5f);
        Vector2 converRatio = new Vector2(uvWidth / width, uvHeight / height);

        toFill.AddVert(new Vector3(-width, -height), color, uvCenter + new Vector2(-width,-height) * converRatio);
        toFill.AddVert(new Vector3(-width, height), color, uvCenter + new Vector2(-width, height) * converRatio);
        toFill.AddVert(new Vector3(width, height), color, uvCenter + new Vector2(width, height) * converRatio);
        toFill.AddVert(new Vector3(width, -height), color, uvCenter + new Vector2(width, -height) * converRatio);
        toFill.AddTriangle(0, 1, 2);
        toFill.AddTriangle(0, 2, 3);
    }

}

因为图片问题,导致边界非常的失真,悲
ok,现在把uv映射加入到之前的画圆
代码如下:
using UnityEngine;
using UnityEngine.UI;
using UnityEngine.Sprites;

public class ImageCircle :Image
{
    /// <summary>
    /// 三角形面数
    /// </summary>
    private int segements;
    protected override void OnPopulateMesh(VertexHelper toFill)
    {
        base.OnPopulateMesh(toFill);
        toFill.Clear();
        segements = 100;
        ///先获得rect的宽高
        float width = rectTransform.rect.width;
        float height = rectTransform.rect.height;

        ///再获得uv
        ///overrideSprite 用于修改图片,但是不会把原来的图片给消除掉
        ///uv的四个坐标相对于uv的四个顶点[x,y,z,w]
        ///然后求出uv宽高映射到实际宽高
        Vector4 uv = overrideSprite != null ? DataUtility.GetOuterUV(overrideSprite) : Vector4.zero;
        float uvWidth = uv.z - uv.x;
        float uvHeight = uv.w - uv.y;
        Vector2 uvCenter = new Vector2(uvWidth * 0.5f, uvHeight * 0.5f);
        Vector2 converRatio = new Vector2(uvWidth / width, uvHeight / height);

        ///绘制圆形,所以需要知道弧度制。
        ///segements代表有几个三角形面
        ///一周的弧度为2Π,所以每一个三角形面的弧度为2Π/segements
        ///圆形的半径的定义比较模糊,建议随便定义。
        float radian = (2 * Mathf.PI) / segements;
        float radius = width * 0.5f;


        ///然后需要算出各个顶点坐标。
        ///1,先算出圆心坐标
        UIVertex origin = new UIVertex();
        origin.color = color;
        origin.position = Vector2.zero;
        origin.uv0 = uvCenter + origin.position * converRatio;
        toFill.AddVert(origin);

        ///2.依次算出其他点,每次弧度值会+=radian
        int vertexCount = segements + 1;///顶点数比面数多一
        float curRadian = 0;
        for (int i = 0; i < vertexCount; i++)
        {
            float x = Mathf.Cos(curRadian) * radius;
            float y = Mathf.Sin(curRadian) * radius;
            curRadian += radian;

            UIVertex tempV = new UIVertex();
            tempV.color = color;
            tempV.position = new Vector2(x, y);
            tempV.uv0 = uvCenter + tempV.position * converRatio;
            toFill.AddVert(tempV);
        }

        ///最后把由顶点生成各个三角形面
        ///三角形面由三个点组成,取决于你给的索引。索引取决于addVert的顺序
        ///如果是三个点是顺时针排列就是正面,否则是反面。
        ///反面不会绘制。
        ///所以圆心的索引是0,然后其他顶点围着圆心,依次+1
        ///故(i,0,i+1)组成一个三角形面
        int id = 1;
        for (int i = 0; i < segements; i++)
        {
            toFill.AddTriangle(id, 0, id + 1);
            id++;
        }
    }

}
成品帅帅的。
