引言
好吧,“元素等待框”,又是一个一看就不知所以然的名词……
不巧的是,这个元素控件并没有出现在任何一个常见的GUI框架中,winui本身也没有。那些GUI框架只有通过样式编辑来实现“占位覆盖等待控件”,当然,通过画布也可以实现这个动画提示类控件。不过很明显,常见的GUI框架中确实没有关于这种控件的官方说明。那我来浅说一下。
元素等待框(waitframe)和一些等待提示类控件很像,都是用在耗时任务的时候。不过,元素等待框会覆盖接下来希望展示的控件,比如文本段、文本框、图片等信息展示控件。这样可以避免加载时被误认为卡死的尴尬。
元素等待框是一个占位、动画、提示、可填充、重复使用的控件:
-
占位,也就是说这个的大小是由编者自行调控的,并且建议完全覆盖加载信息的控件。
-
动画,也就是等待动画,这样使用者就可以指定程序是不是真的卡死了。
-
提示,就是等待提示。
-
可填充,除了动画元素外,这个框架就是一个UI框架,可以写入其它元素控件。
-
重复使用,可将此作为模板,多次使用。
说了这么多,那就按照这个标准开工吧。其实根本就没有标准。
布局
函数结构
    def add_waitframe(self,pos:tuple,width=300,height=300,fg='#e0e0e0',bg='#ececee'):#元素等待框
    '''
    pos-位置
    width-宽度
    height-高度
    fg-前置标识符颜色
    bg-后置标识符颜色
    '''
等待框架
其实很简单,因为我们需要做的是通过这个元素控件覆盖住我们想要的所有组件,因此必须让这个等待框能够前置。所以,我们直接使用BasicTinUI类来作为框架。
        frame=BasicTinUI(self,width=width,height=height,bg=bg)
        frameid=self.create_window(pos,window=frame,width=width,height=height,anchor='nw')
        uid='waitframe'+str(frameid)
        self.addtag_withtag(uid,frameid)
一般情况下,我们不会一上来就使用元素等待框,或者说是为了更好地重复使用,因此在创建完成后,也就是最后一行,让该控件处于隐藏模式。
        #...
        self.itemconfig(uid,state='hidden')
标识元素
首先讲讲TinUI的waitframe的两个元素。
这两个元素实际上一模一样,只不过颜色不同。两个标识元素更替运动,就可以产生动画。运动路径是从左上角到右下角,每次移动距离为横宽各自的“1/40”。
        itemfg=frame.create_polygon((0,0,width,0,width,height,0,height),outline=fg,fill=fg,width=21)
        itembg=frame.create_polygon((0,0,width,0,width,height,0,height),outline=bg,fill=bg,width=21)
        frame.move(itemfg,-width,-height)
        mx=width/40
        my=height/40
        nowmove=itemfg#当前移动元素
        nowx=0#当前移动元素的横向移动量
移动动画
运动动画逻辑,以itemfg作为先开始元素:
True
False
不足width
大于width
__start函数
判断wait值
判断nowx移动距离
隐藏并退出after
继续调用__start
切换动画标识元素
用代码表示:
        def __start():
            nonlocal nowx,nowmove
            if wait==True:
                if nowx>=width:#移动到位
                    nowx=0
                    #切换移动元素,重新调整层级
                    if nowmove==itemfg:
                        frame.lower(itemfg)
                        frame.move(itembg,-width,-height)
                        nowmove=itembg
                    else:
                        frame.lower(itembg)
                        frame.move(itemfg,-width,-height)
                        nowmove=itemfg
                frame.move(nowmove,mx,my)
                nowx+=mx
                frame.after(25,__start)
            else:
                self.itemconfig(uid,state='hidden')
除此之外,我还为编写者提供了两个方便调用的顶层函数。
        def start():
            nonlocal wait
            wait=True
            self.itemconfig(uid,state='normal')
            __start()
        def end():
            nonlocal wait
            wait=False
完整函数代码
    def add_waitframe(self,pos:tuple,width=300,height=300,fg='#e0e0e0',bg='#ececee'):#元素等待框
        def __start():
            nonlocal nowx,nowmove
            if wait==True:
                if nowx>=width:#移动到位
                    nowx=0
                    #切换移动元素,重新调整层级
                    if nowmove==itemfg:
                        frame.lower(itemfg)
                        frame.move(itembg,-width,-height)
                        nowmove=itembg
                    else:
                        frame.lower(itembg)
                        frame.move(itemfg,-width,-height)
                        nowmove=itemfg
                frame.move(nowmove,mx,my)
                nowx+=mx
                frame.after(25,__start)
            else:
                self.itemconfig(uid,state='hidden')
        def start():
            nonlocal wait
            wait=True
            self.itemconfig(uid,state='normal')
            __start()
        def end():
            nonlocal wait
            wait=False
        frame=BasicTinUI(self,width=width,height=height,bg=bg)
        frameid=self.create_window(pos,window=frame,width=width,height=height,anchor='nw')
        uid='waitframe'+str(frameid)
        self.addtag_withtag(uid,frameid)
        itemfg=frame.create_polygon((0,0,width,0,width,height,0,height),outline=fg,fill=fg,width=21)
        itembg=frame.create_polygon((0,0,width,0,width,height,0,height),outline=bg,fill=bg,width=21)
        frame.move(itemfg,-width,-height)
        mx=width/40
        my=height/40
        nowmove=itemfg#当前移动元素
        nowx=0#当前移动元素的横向移动量
        wait=False
        funcs=FuncList(2)
        funcs.start=start
        funcs.end=end
        self.itemconfig(uid,state='hidden')
        #start()
        return frame,itemfg,itembg,funcs,uid
效果
测试代码
def test11_1(e):
    wffunc.start()
def test11_2(e):
    wffunc.end()
#...
    b.add_button((1220,650),text='获取TinUI相关信息',command=test11_1)
    wf,_,_,wffu...nc,_=b.add_waitframe((1220,700),height=250)
    wf.add_paragraph((150,100),text='Loading . . .',anchor='n')
    wf.add_button2((150,150),text='取消等待?',anchor='n',command=test11_2)
#...
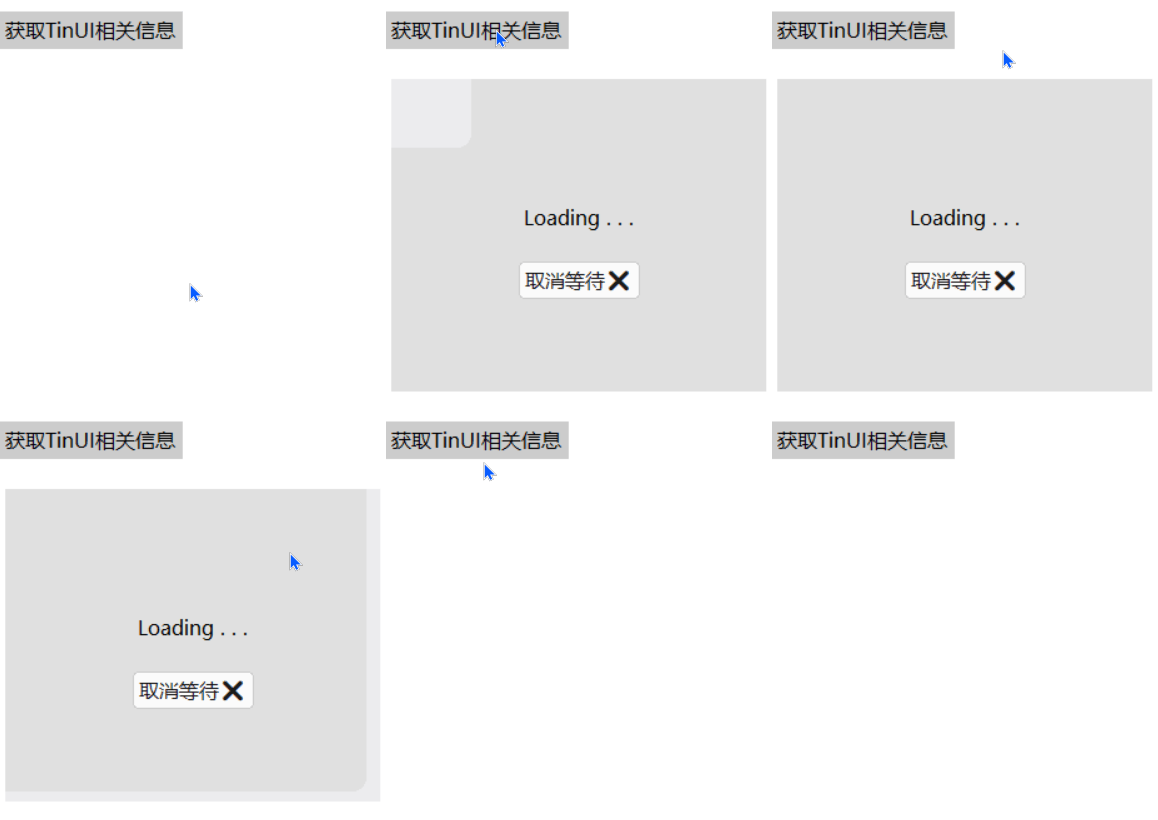
最终效果

github项目
pip下载
pip install tinui
结语
waitframe之所以被称为元素等待框,就是因为它本质上是一个BasicTinUI控件,两个标识符在最底层,编写者可以根据自己的需要在其中添加任何TinUI元素控件。范例里面的按钮和提示文本就是一个简单例子。
🔆tkinter创新🔆