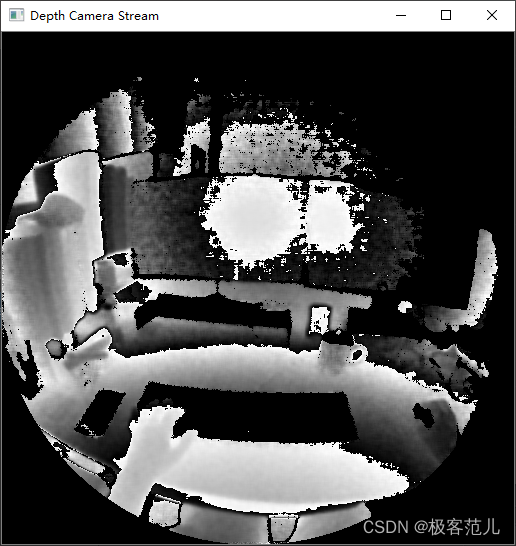
关于HoloLens 2设备提供了研究社模式,便于开发者访问传感器的原始数据,进行科研开发,本博客根据github项目在线获得图像数据,但是目前达不到实时传输的效果,延迟很高,期望以后的深入学习可以解决。
一、实验准备
1、实验条件
- Windows 10 SDK 10.0.18362.0
- HoloLens 2 设备
- Unity 2020.3.31f1c1配置好MRTK混合现实开发包
- Visual Studio 2019
- Python3.9(opencv-python)
2、下载Github工程
HoloLens2-Unity-ResearchModeStreamer
3、打开HoloLens 2研究者模式
二、配置过程
1、配置VS环境
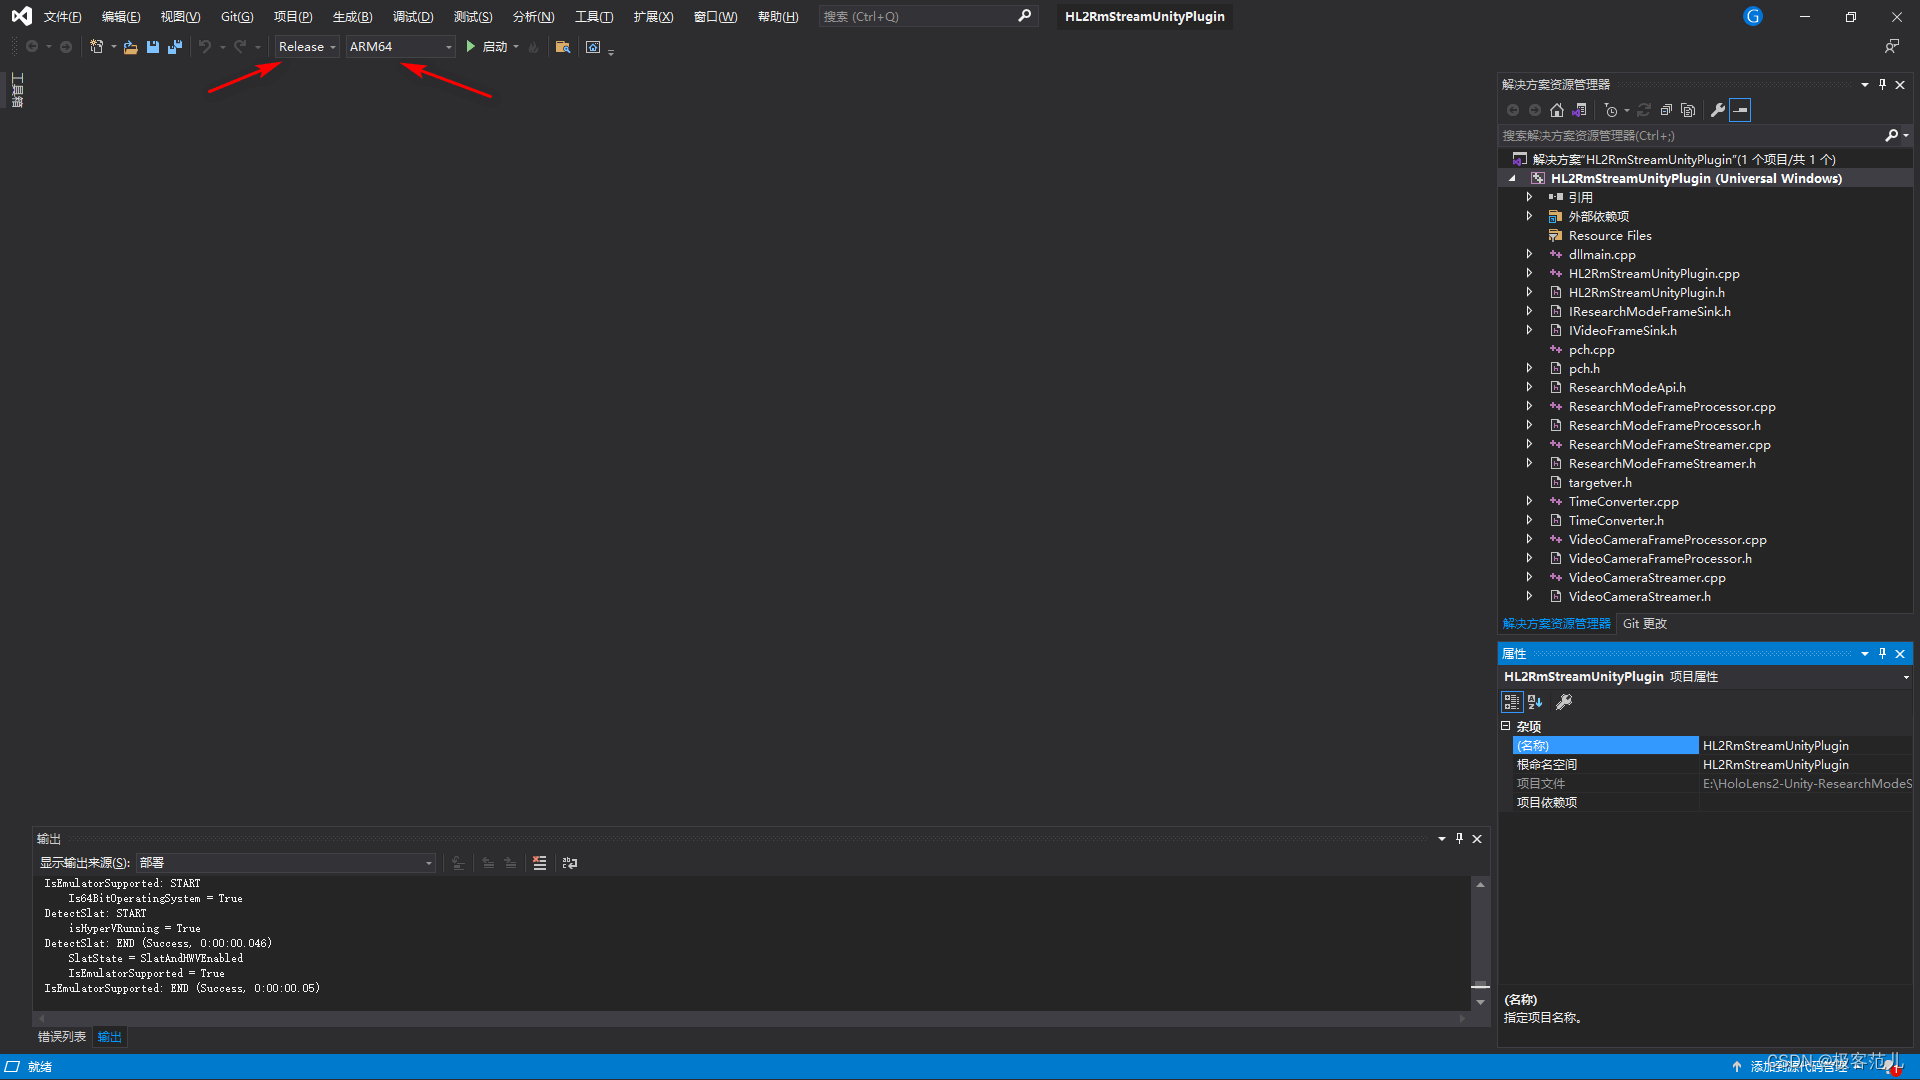
设置项目属性为release 和ARM64
Release+ARM64
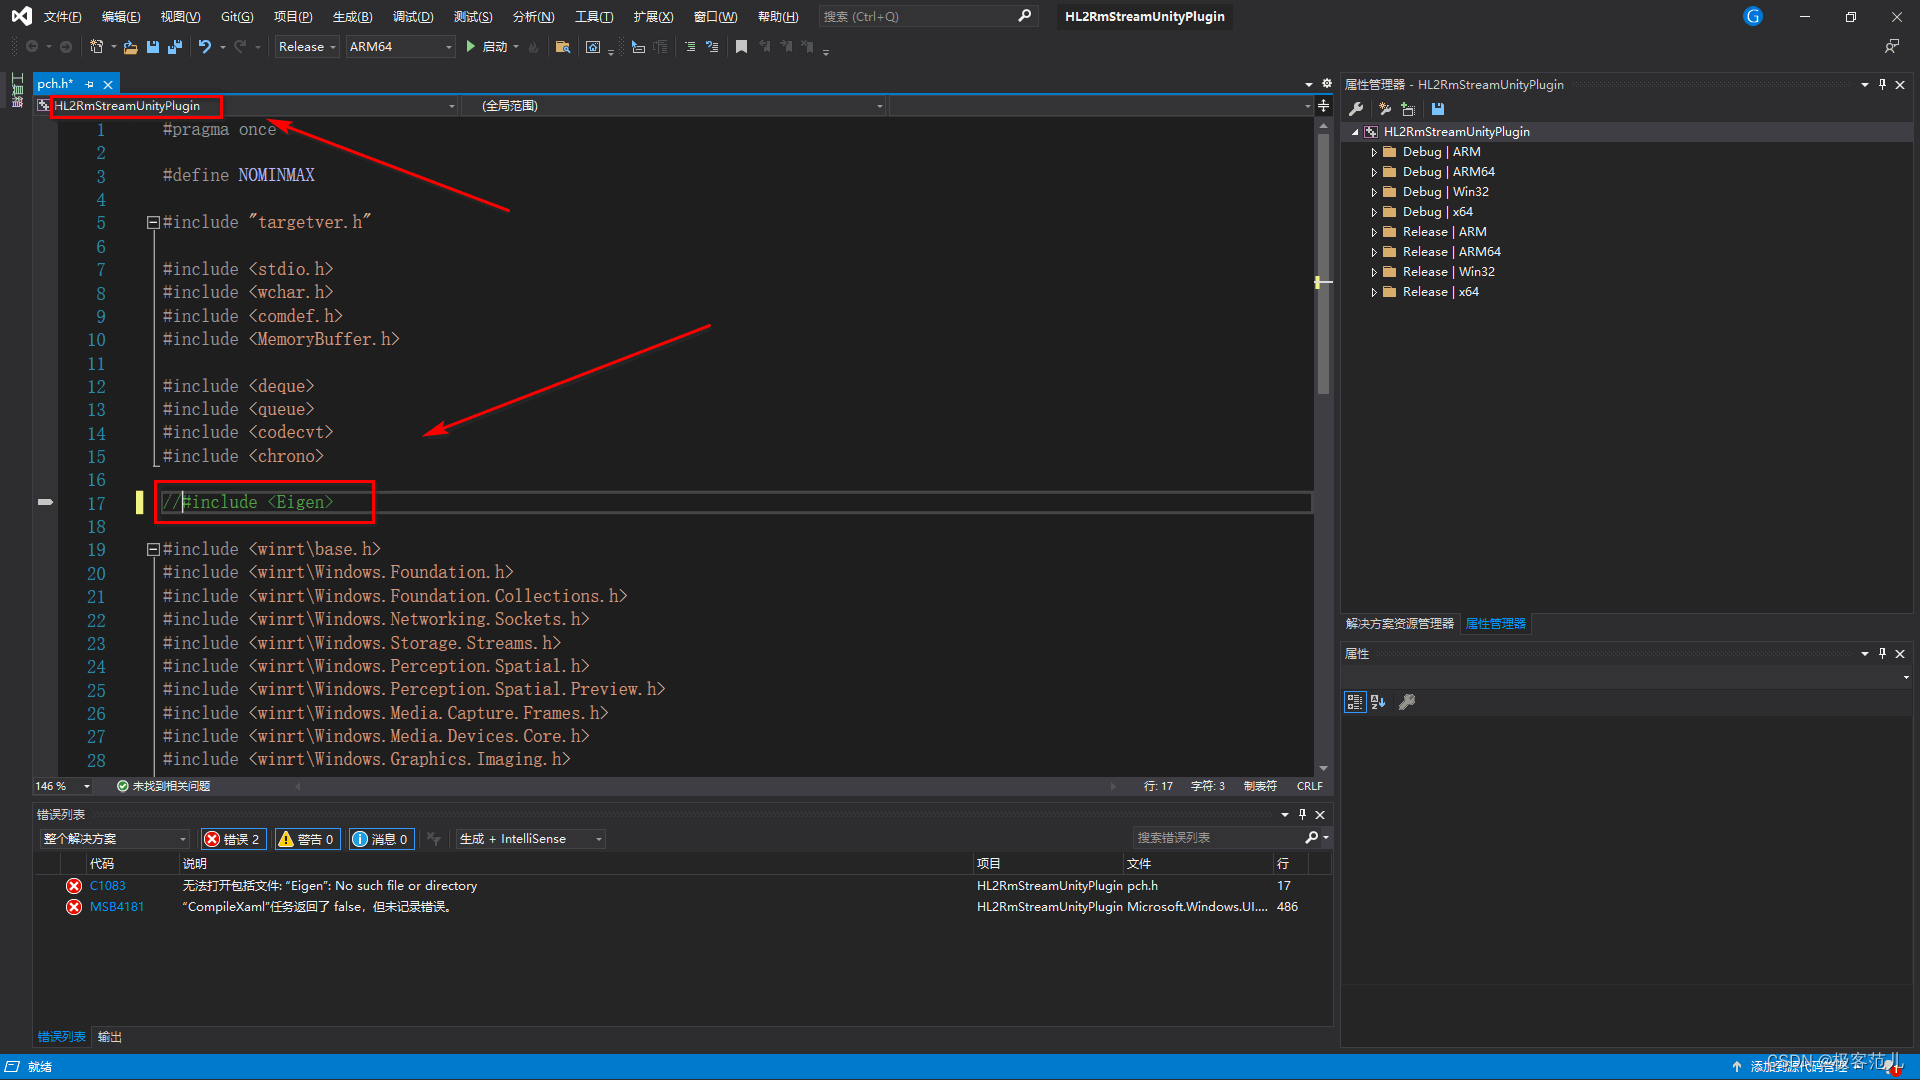
2、注释工程项目中Eigen库
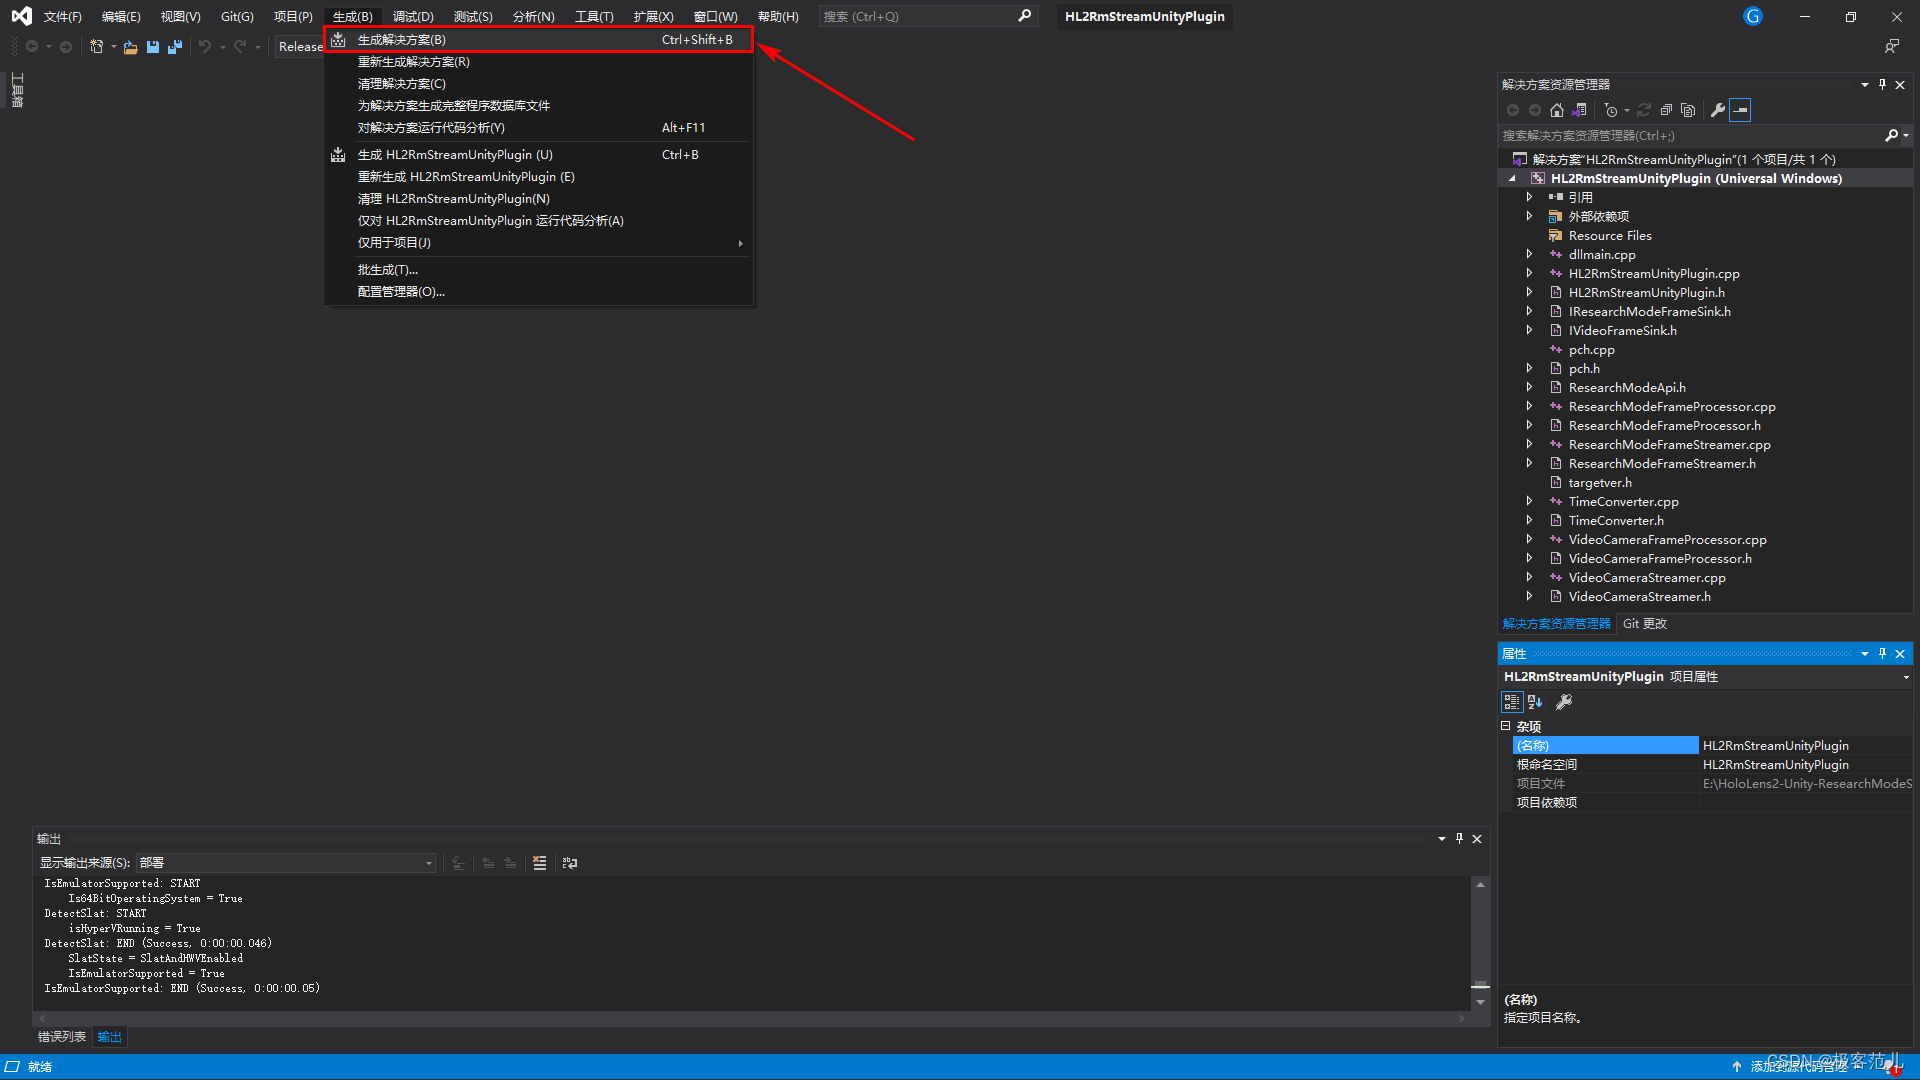
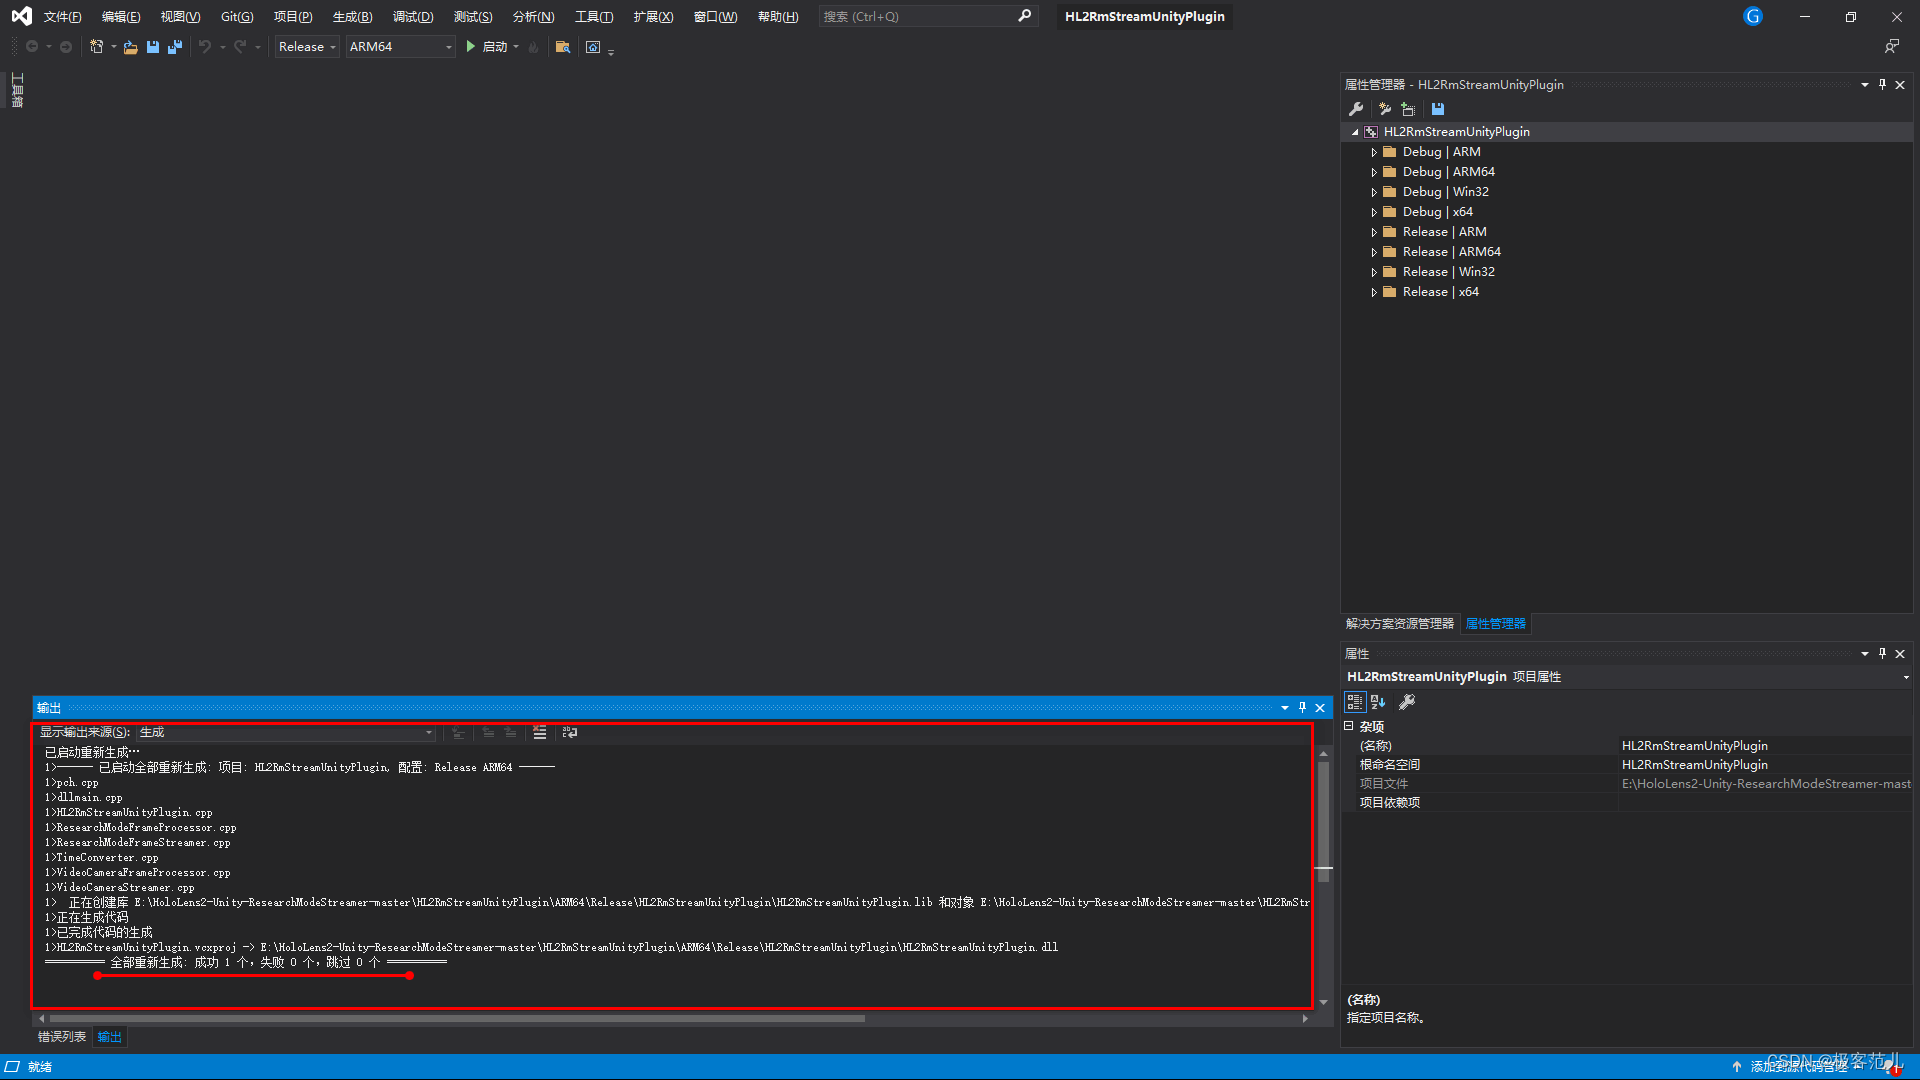
2、生成解决方案
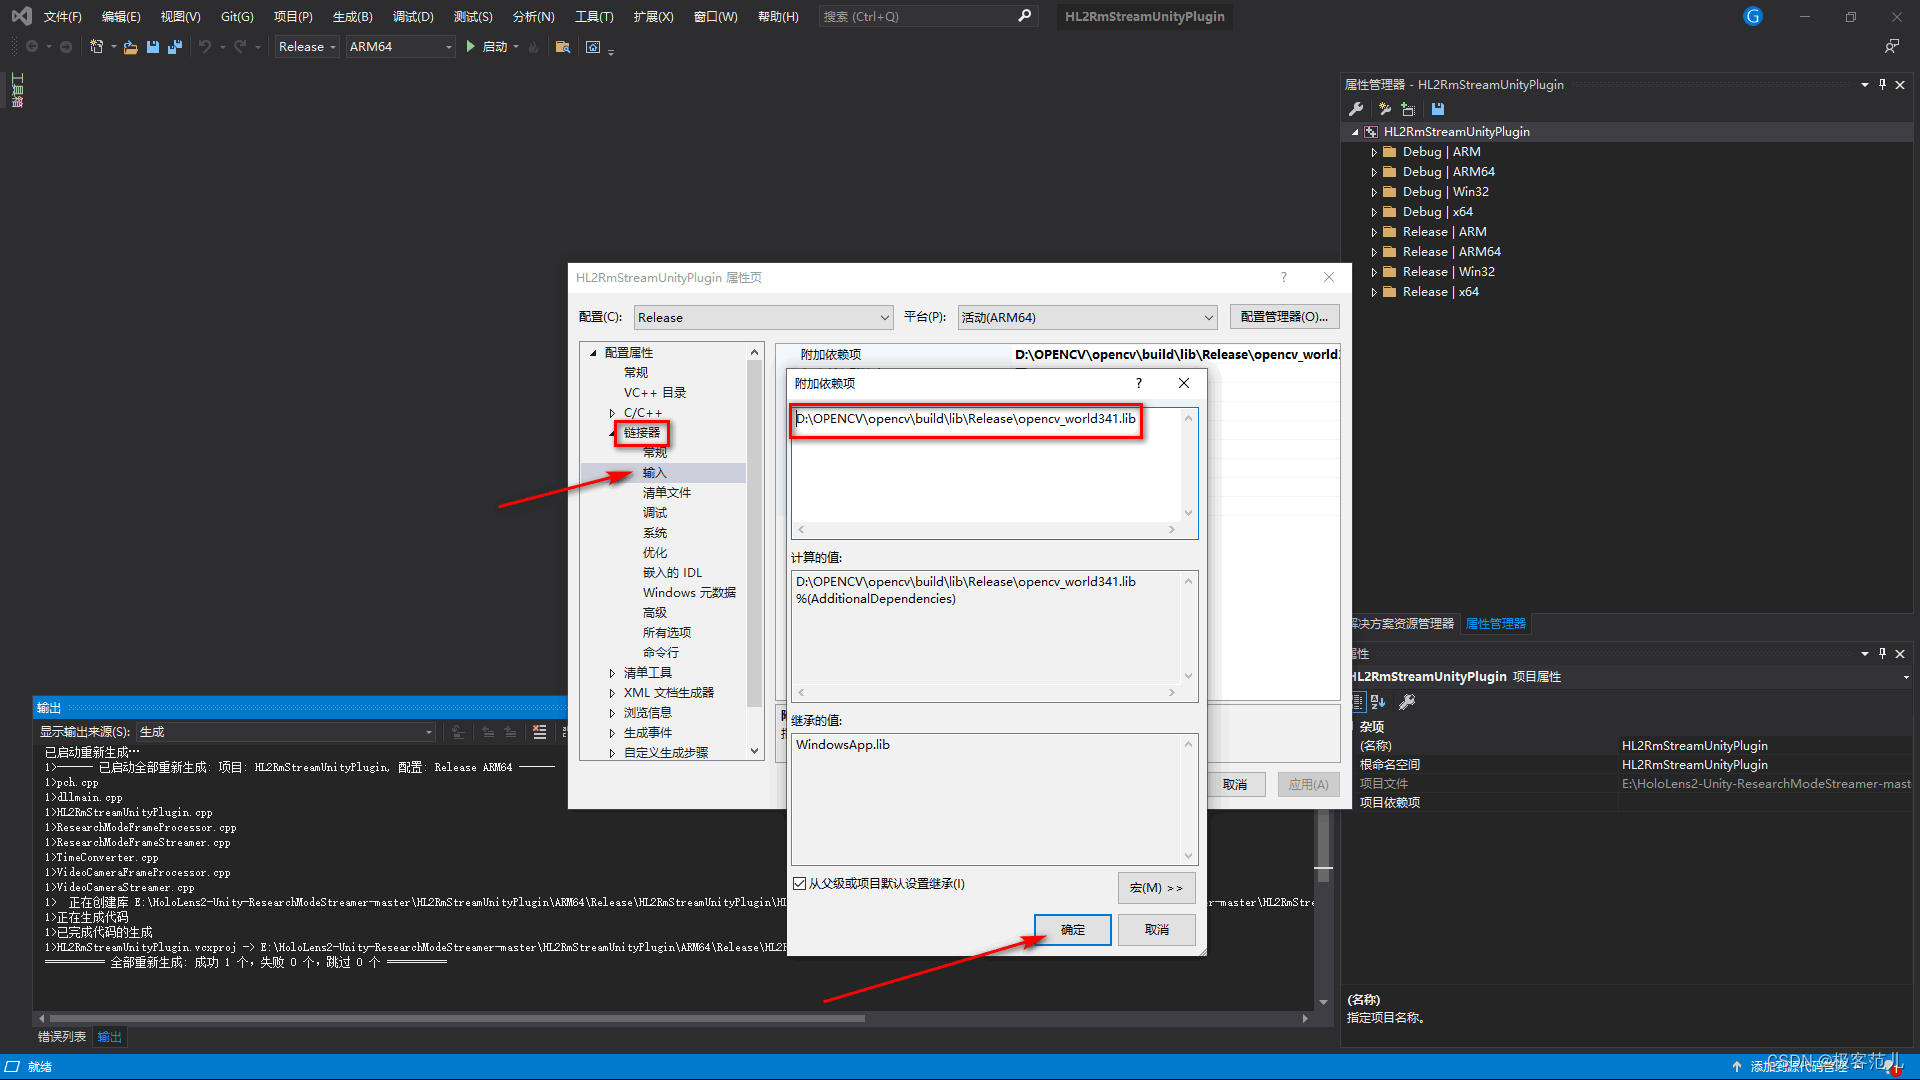
3、更换Lib库
lib库里放了Opencv4.X的库,根据需要把附加依赖项直接换成opencv_world341.lib,这个文件包括项目所需所有lib
三、配置Unity项目
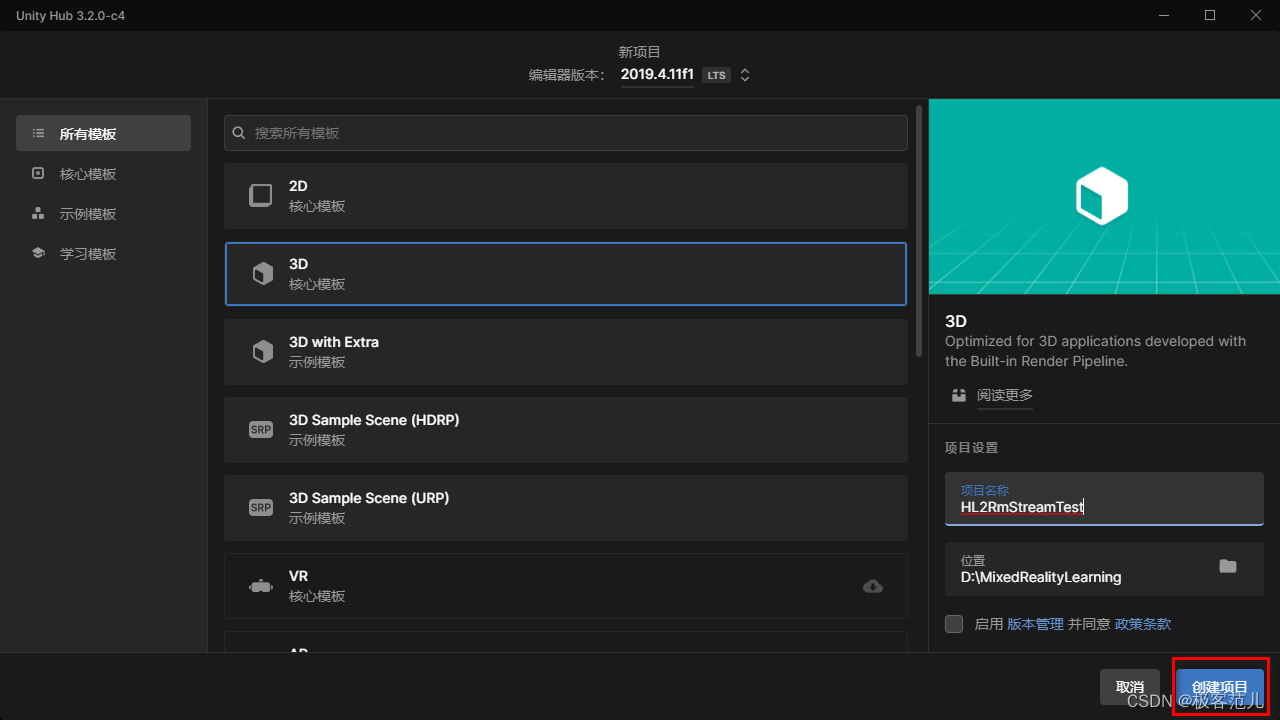
1、新建Unity的3D项目
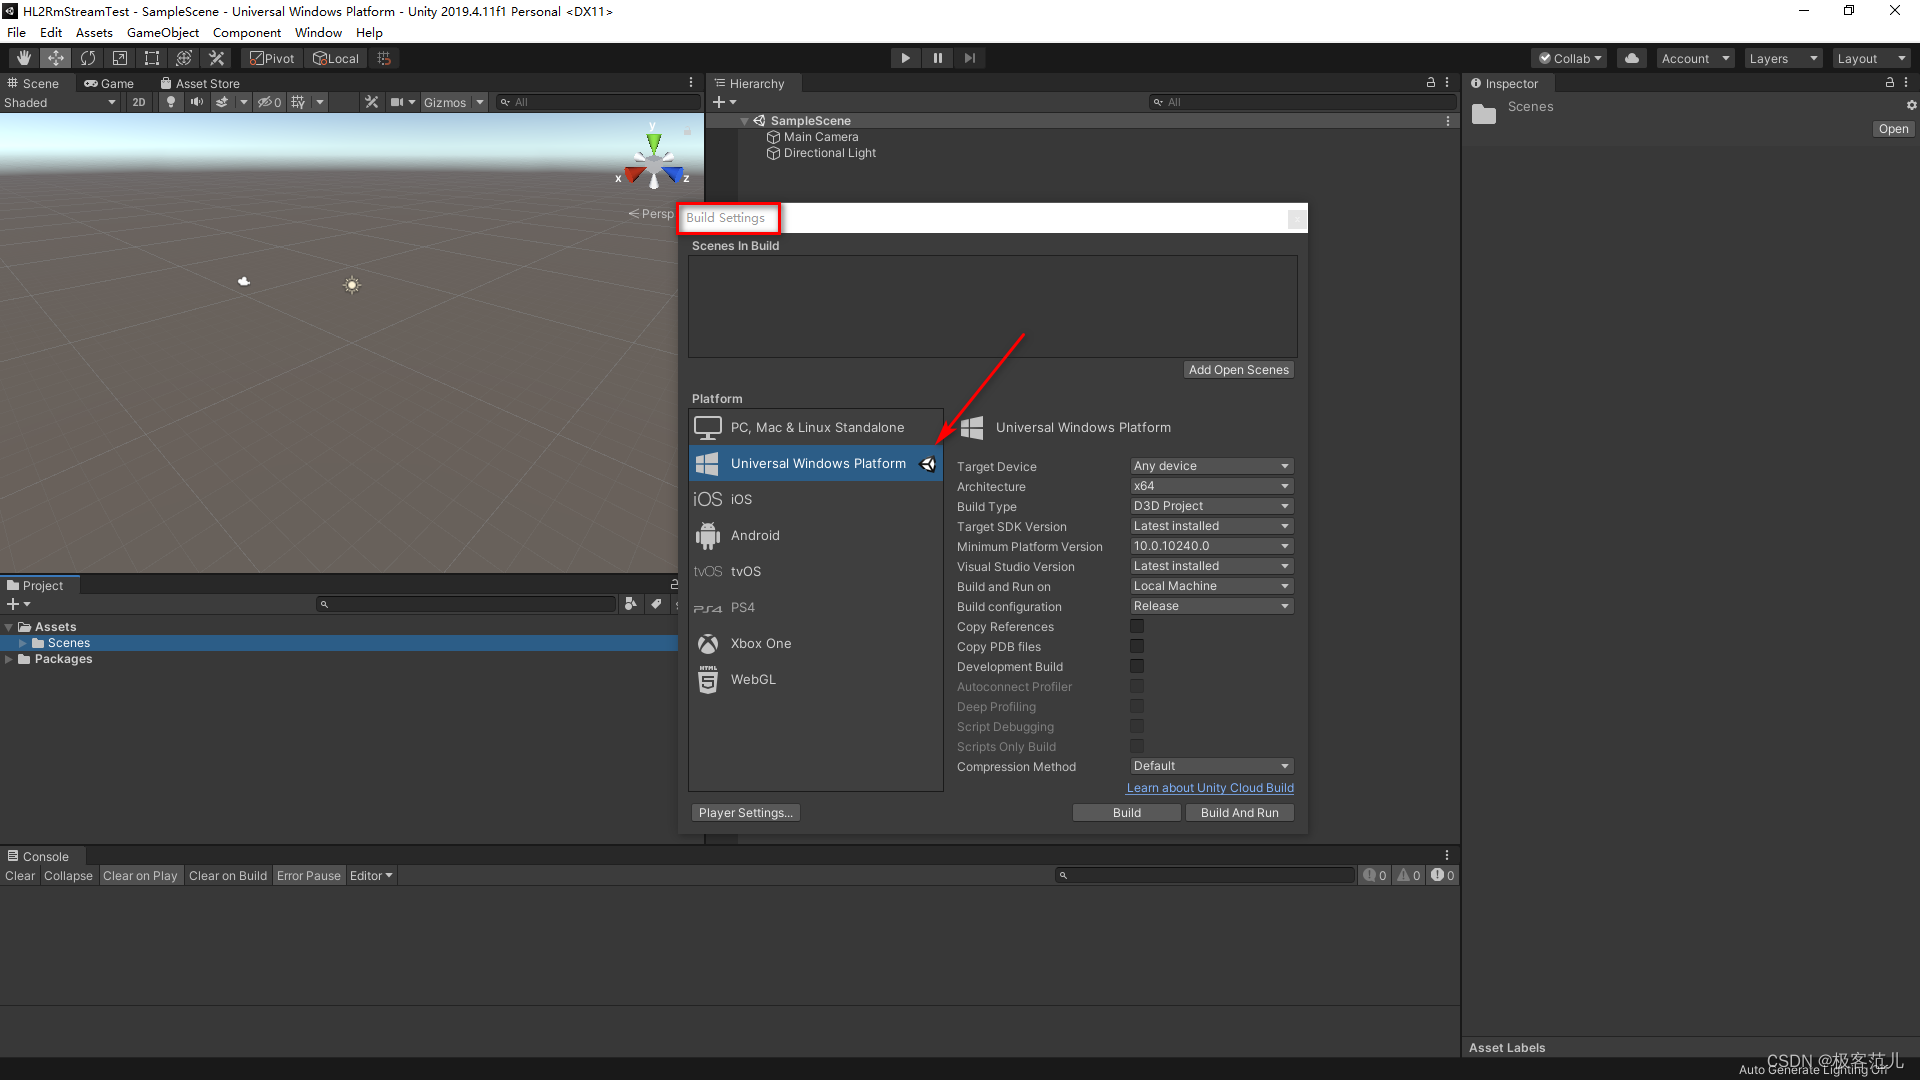
2、将项目切换到Universal windows patform平台
3、新建路径
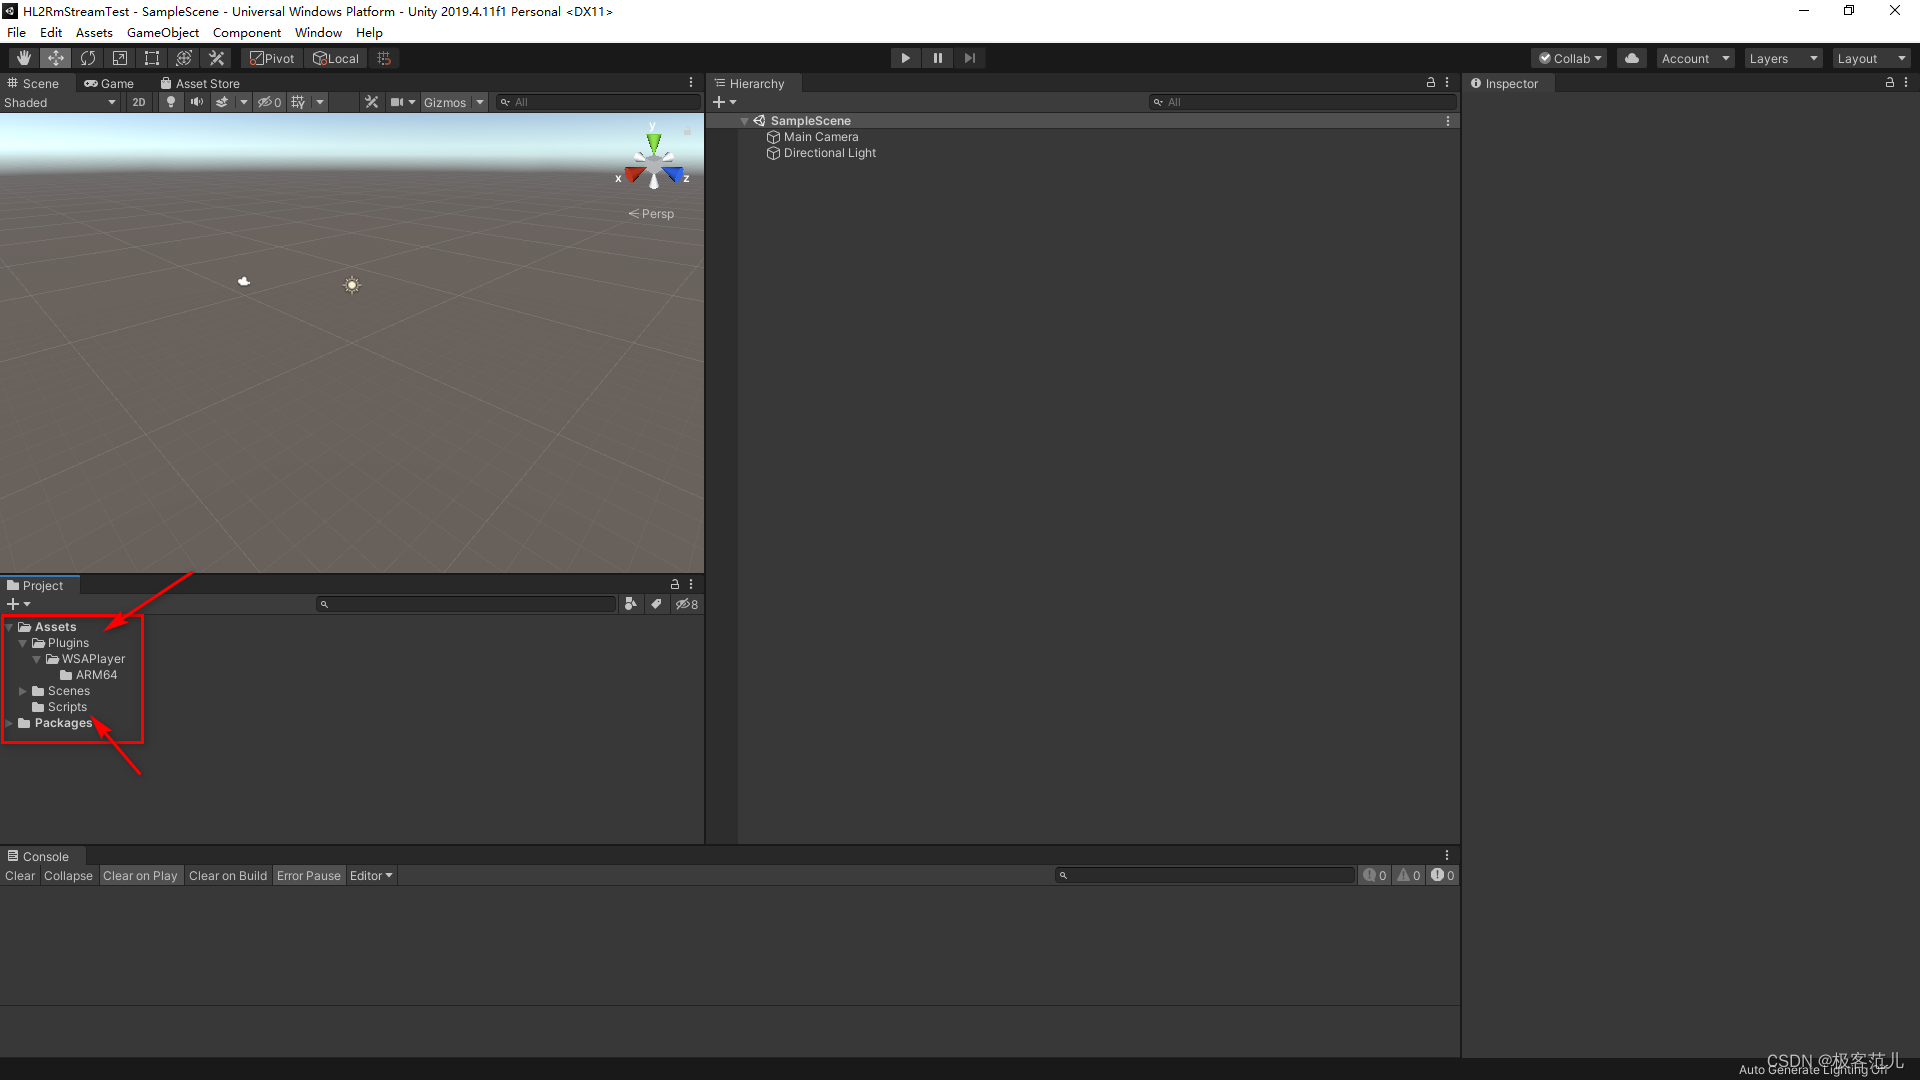
4、将前面编译好的文件拷贝到新建的Plugins文件夹下
E → HoloLens2-Unity-ResearchModeStreamer-master → HL2RmStreamUnityPlugin → ARM64 → Release → HL2RmStreamUnityPlugin
5、新建一个StreamerHL2.cs
复制下面代码到脚本里面
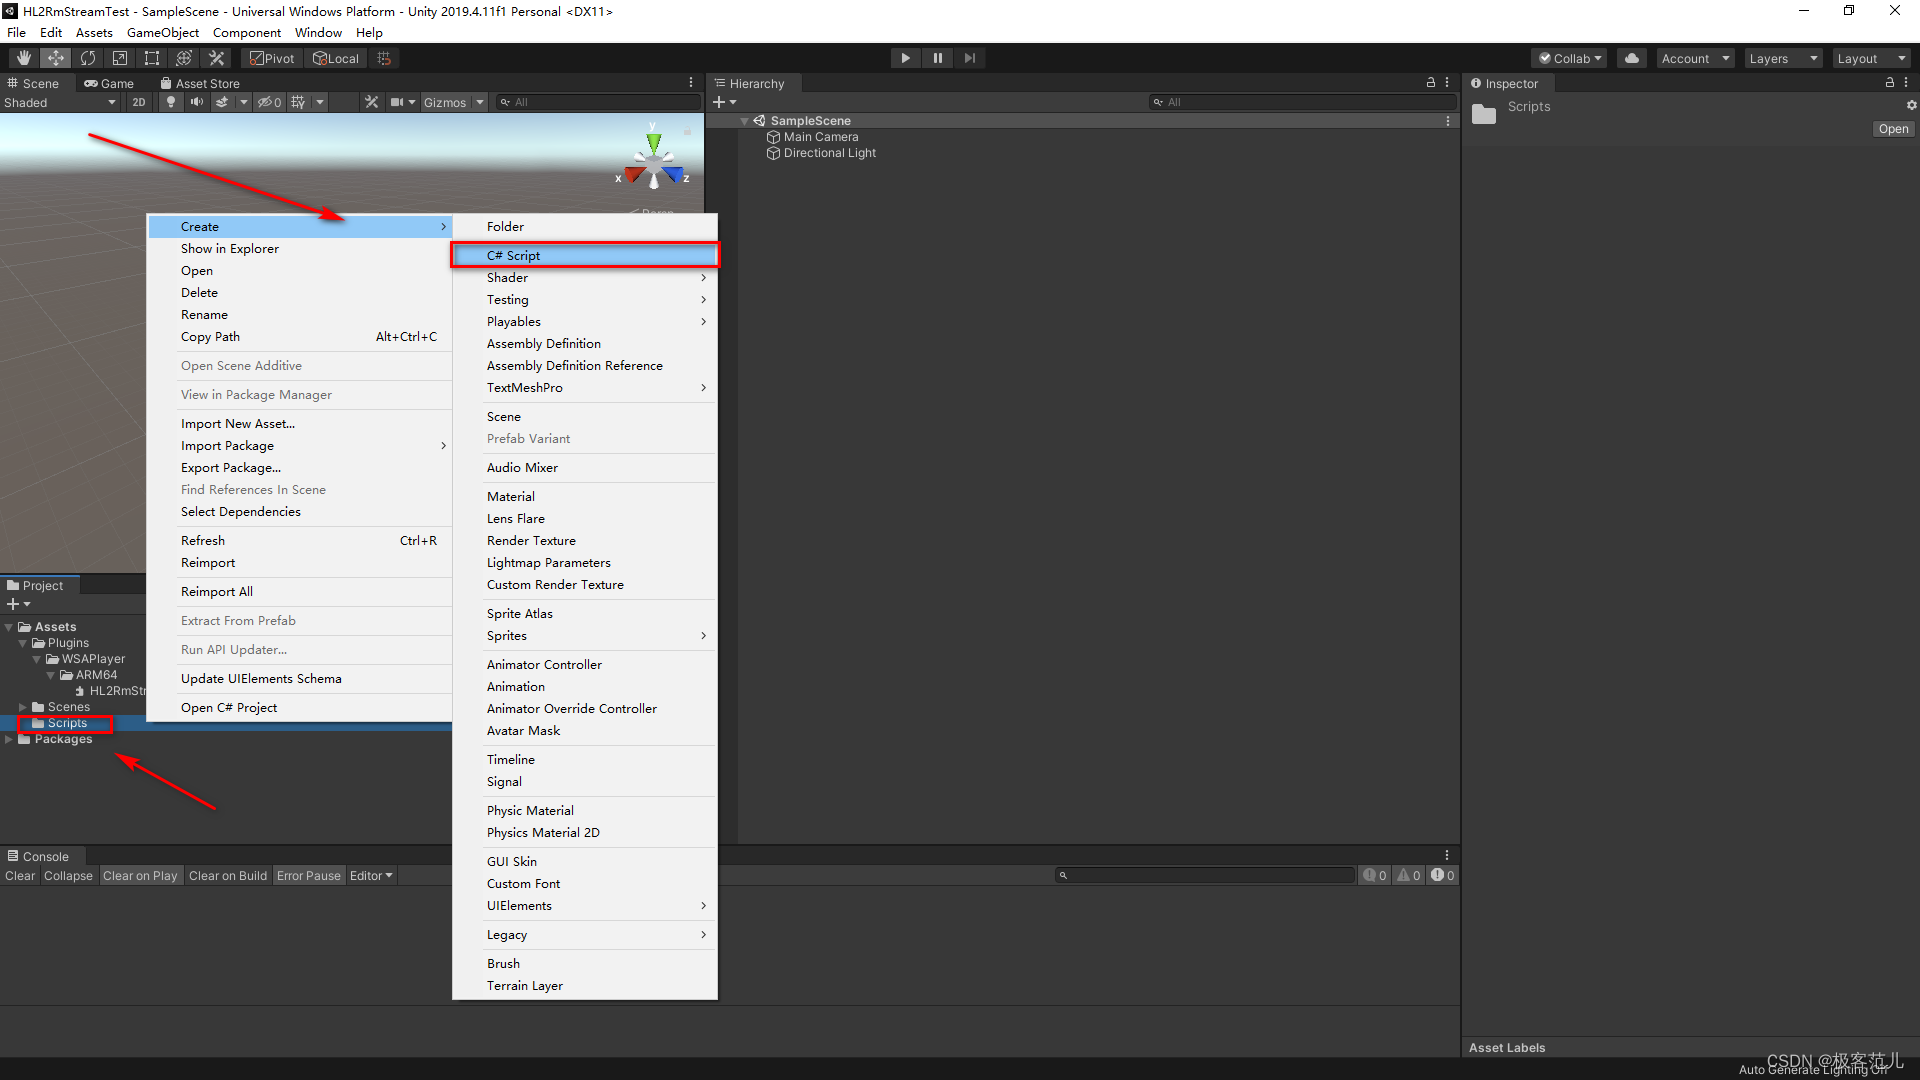
在这里插入代码片
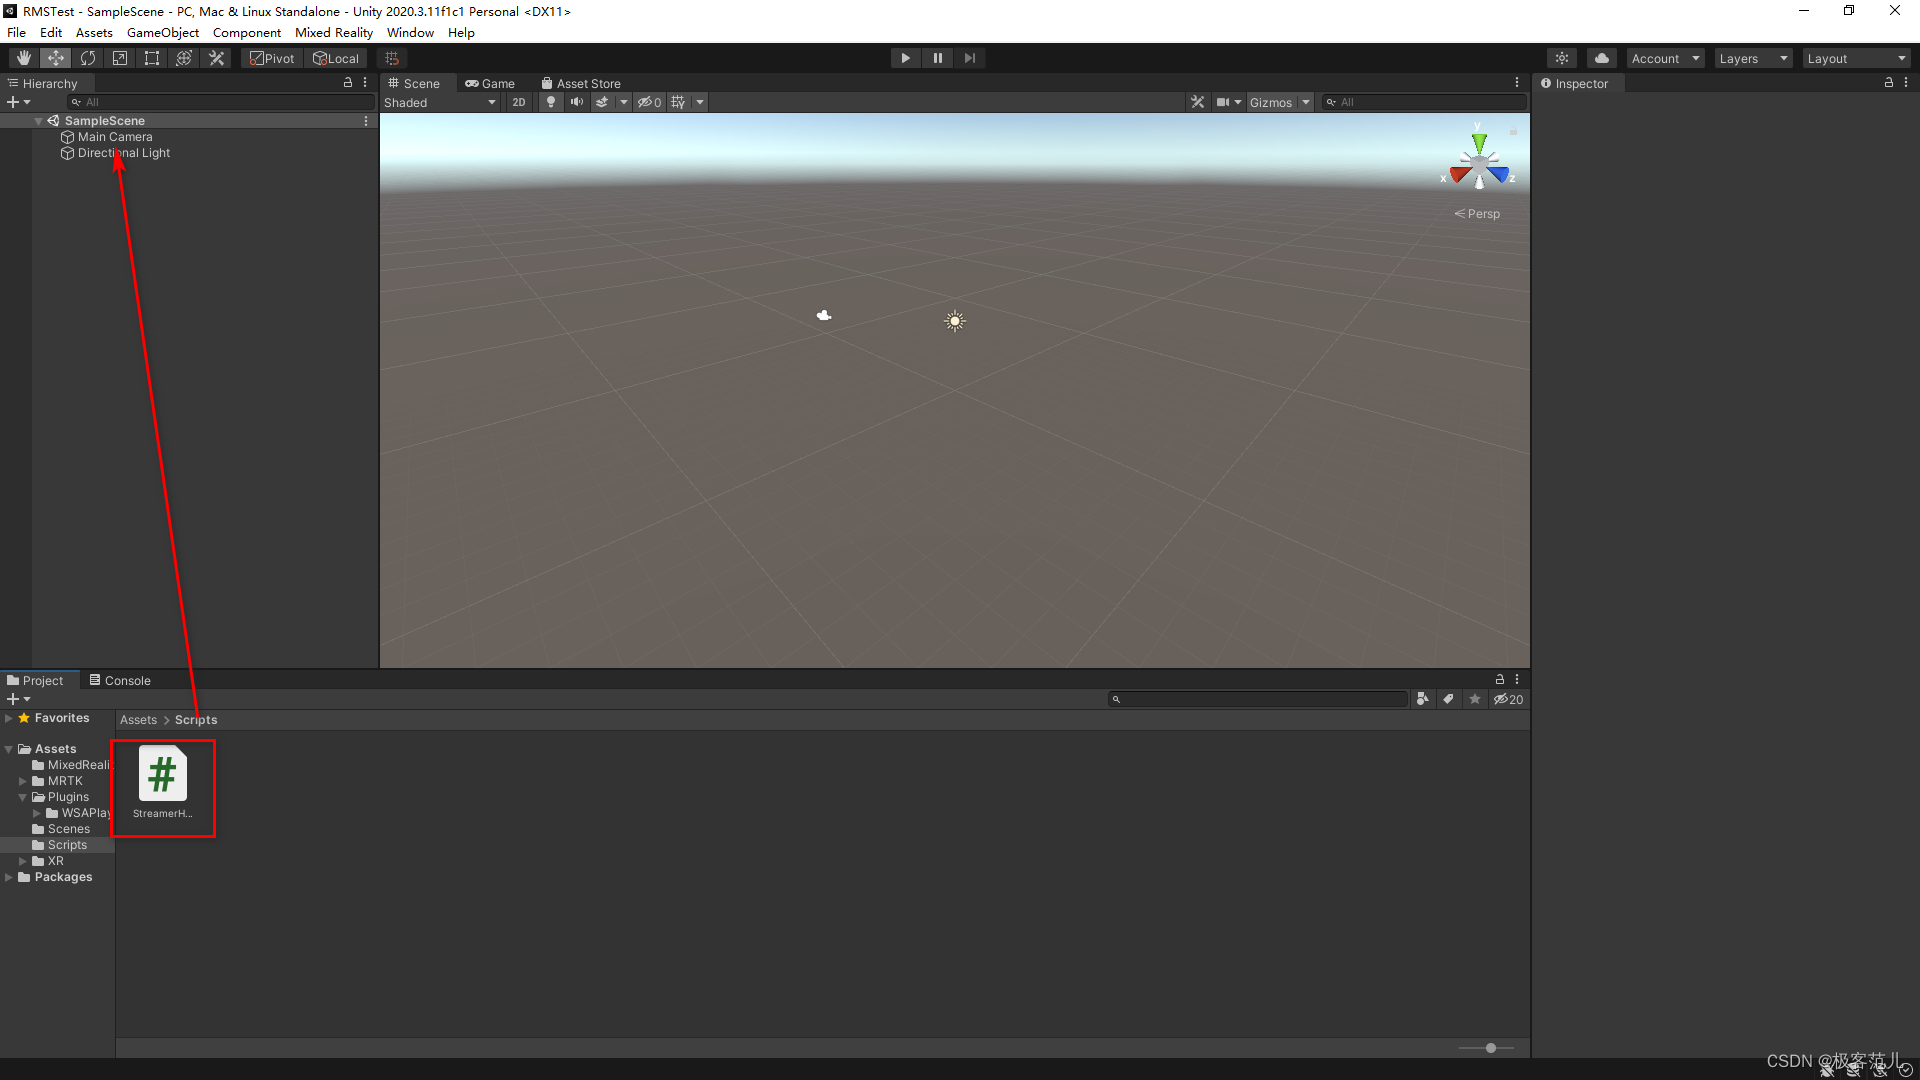
6、将脚本随便挂在在一个对象上,我挂载的是主相机
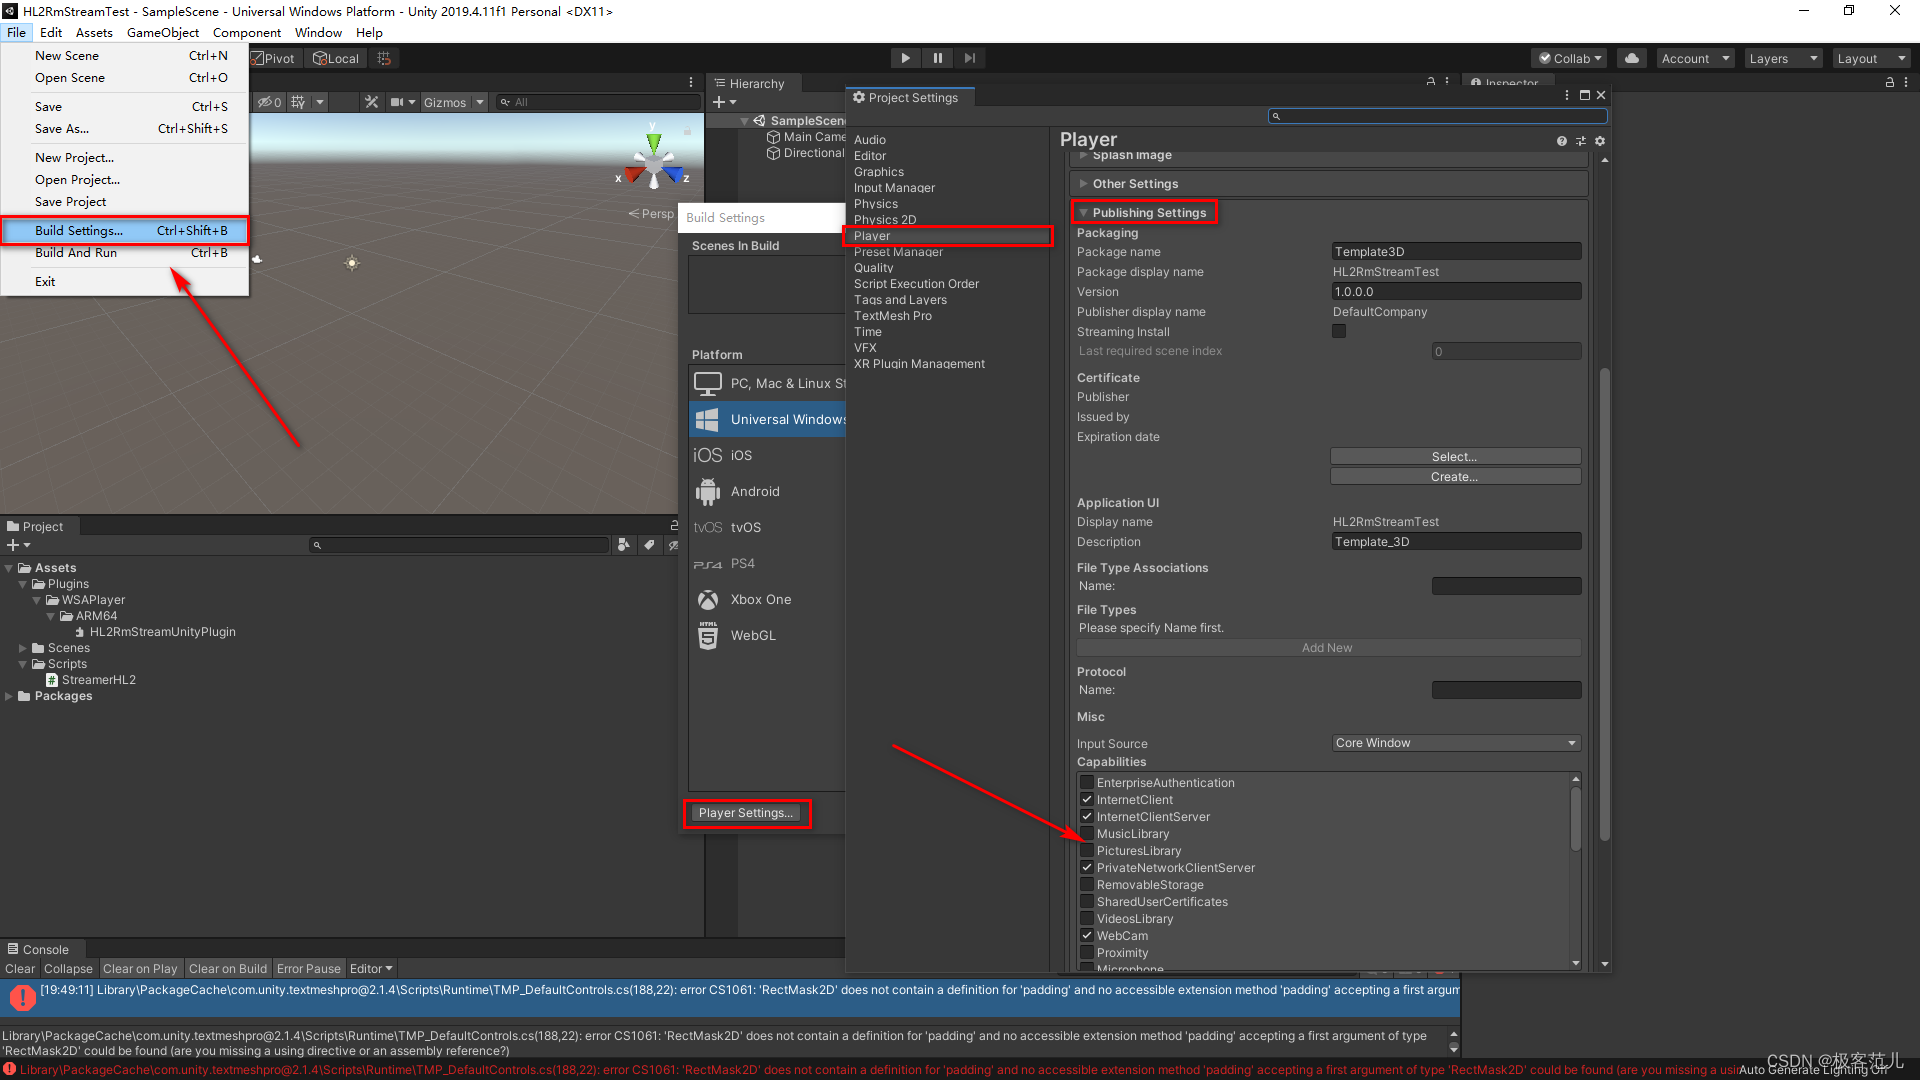
7、设置Unity 项目的兼容性
勾选
InternetClient, InternetClientServer, PrivateNetworkClientServer, WebCam, SpatialPerception 5个位置
8、编译unity工程
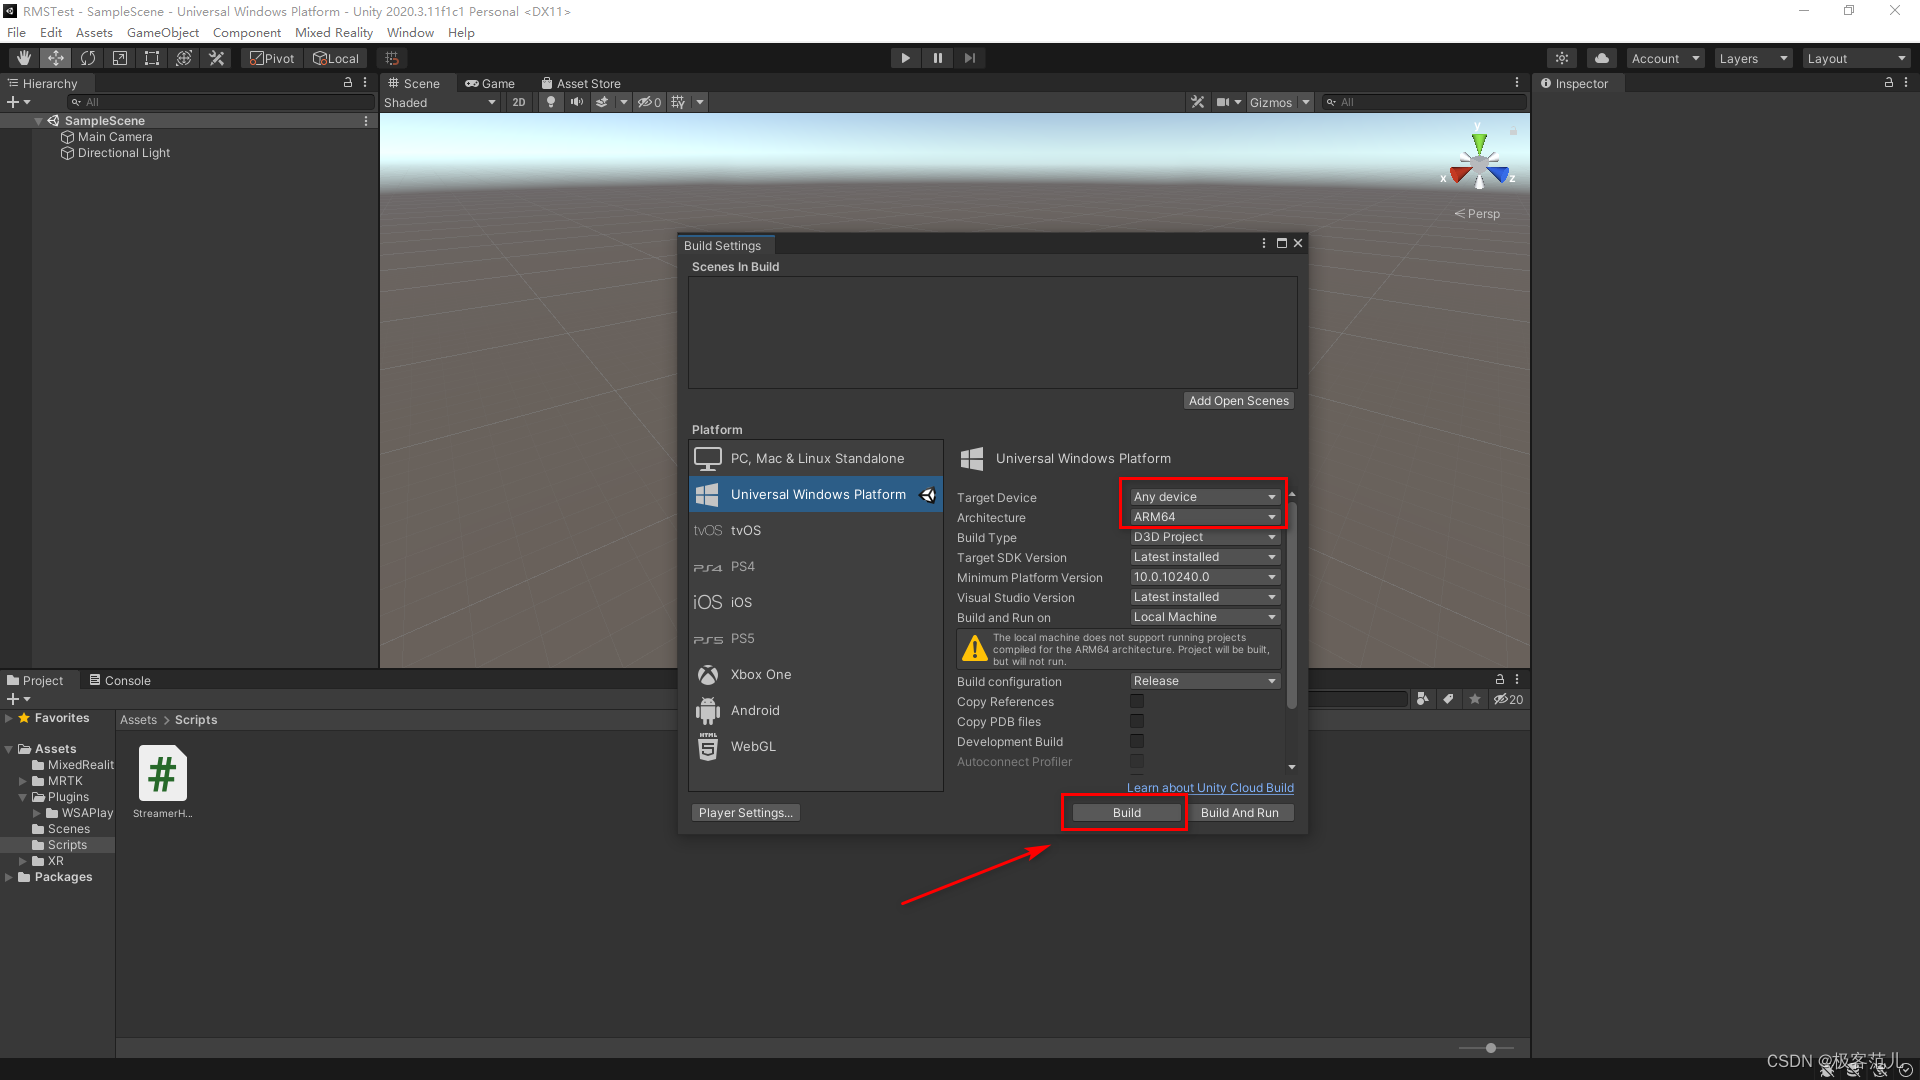
9、配置package文件中的兼容性
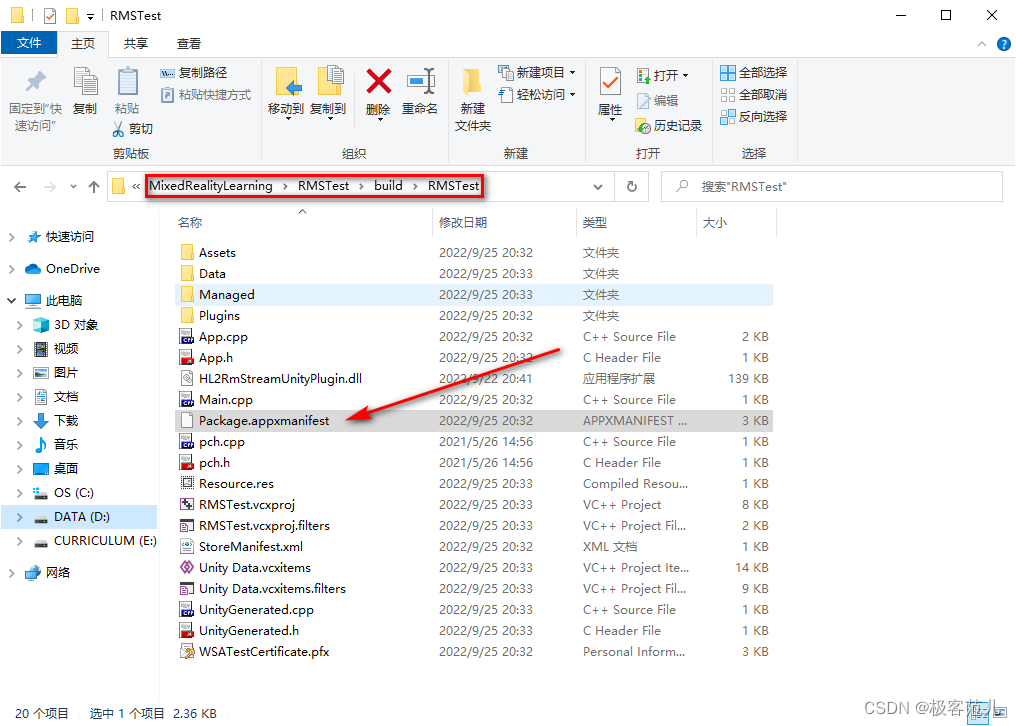
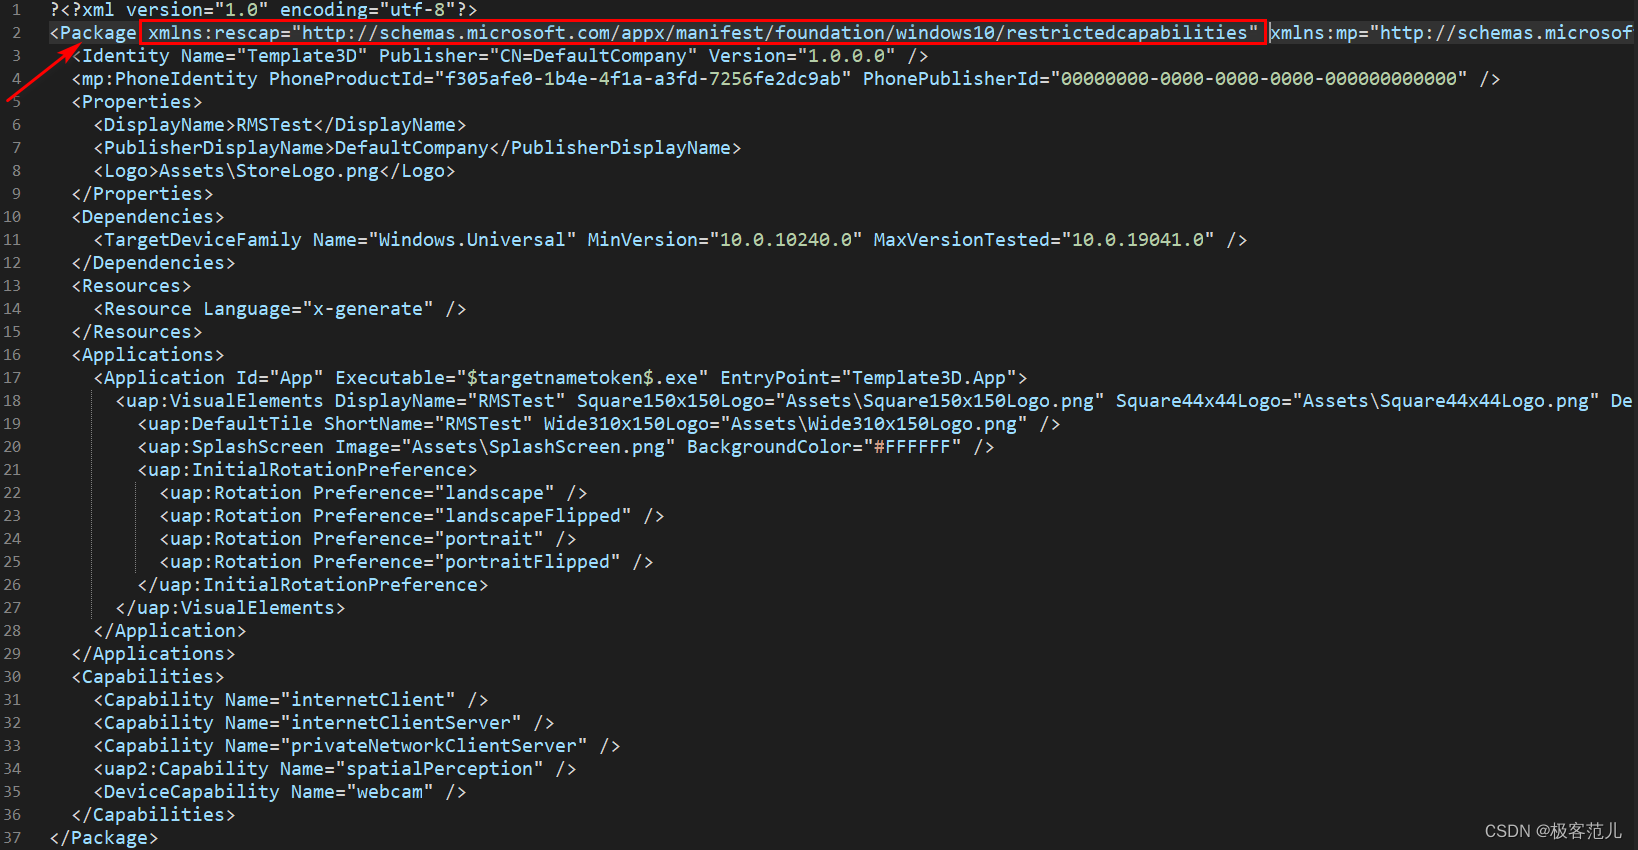
10、将如下字段添加到 Package 中
xmlns:rescap="http://schemas.microsoft.com/appx/manifest/foundation/windows10/restrictedcapabilities"
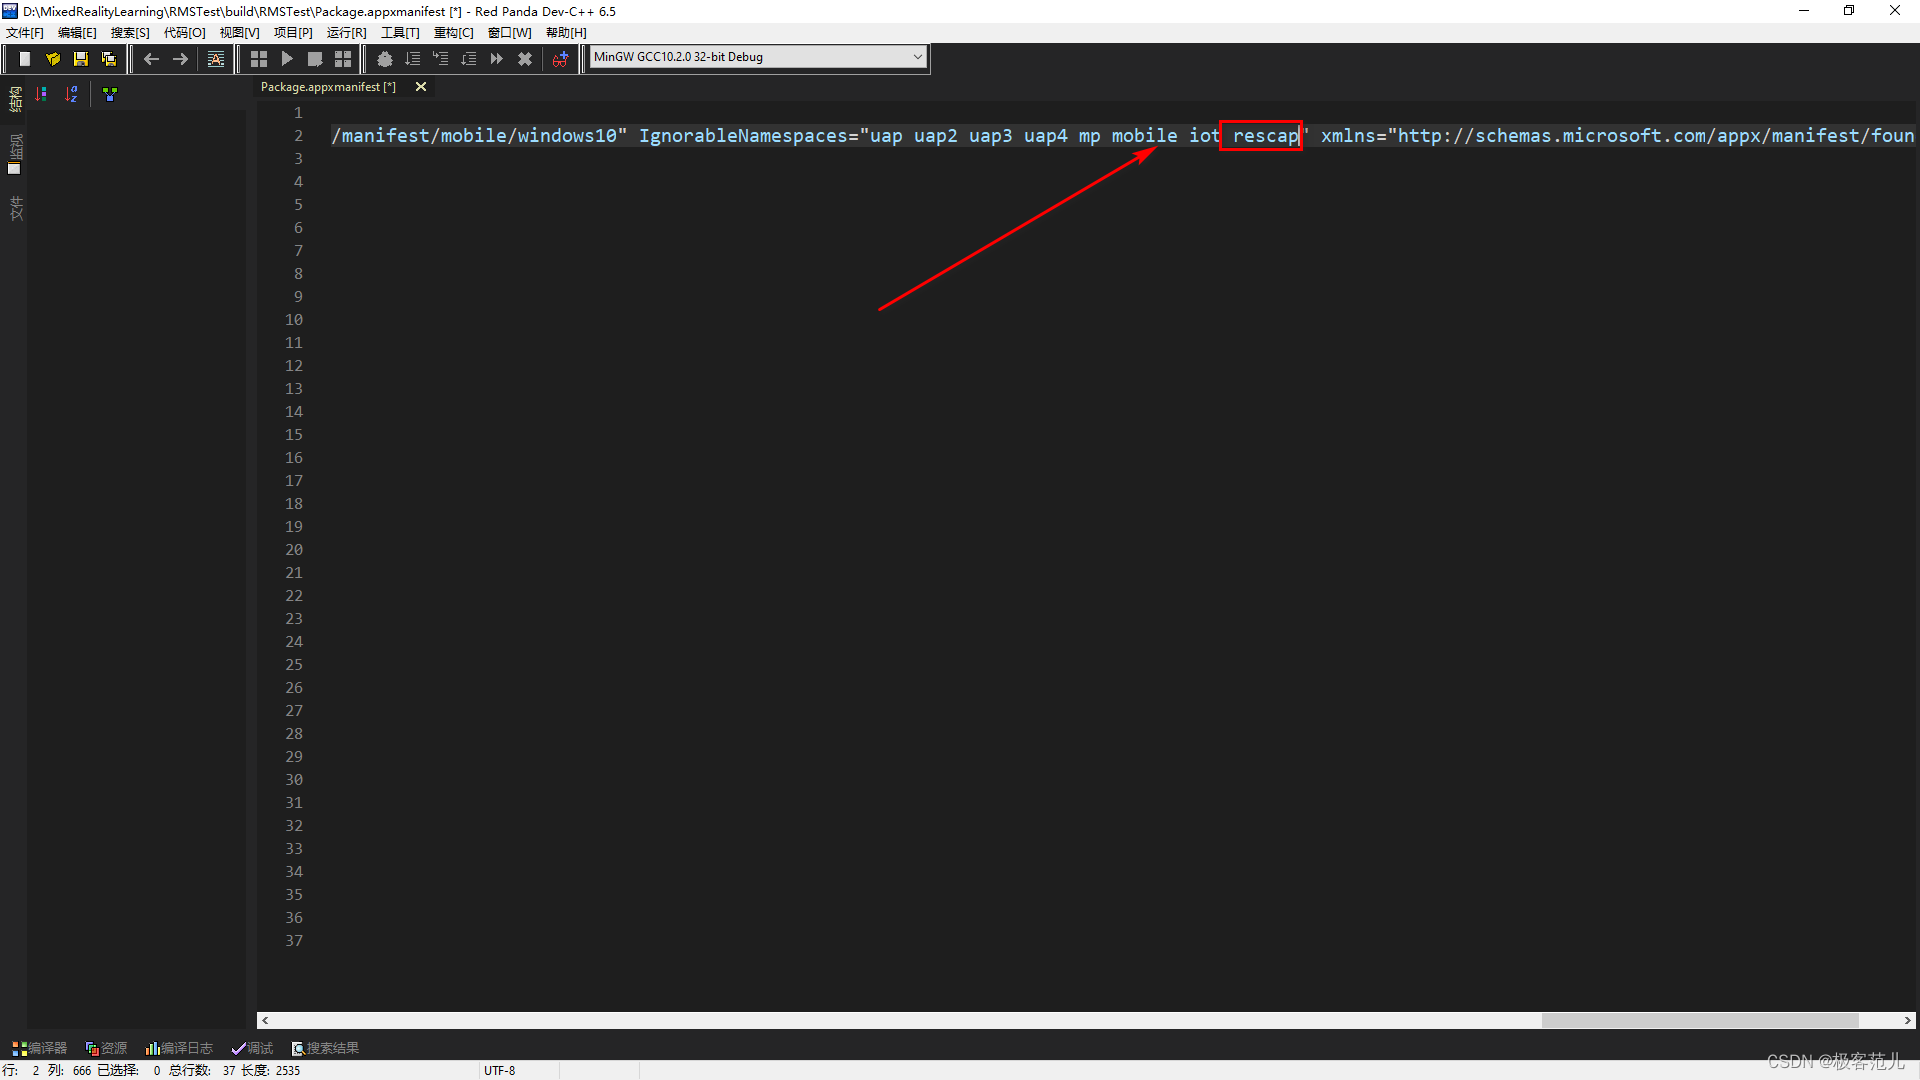
11、在Package这一行中,找到"IgnorableNamespaces"的属性,添加“rescap”字段
12、在 Capabilityes添加如下字段
<rescap:Capability Name="perceptionSensorsExperimental" />
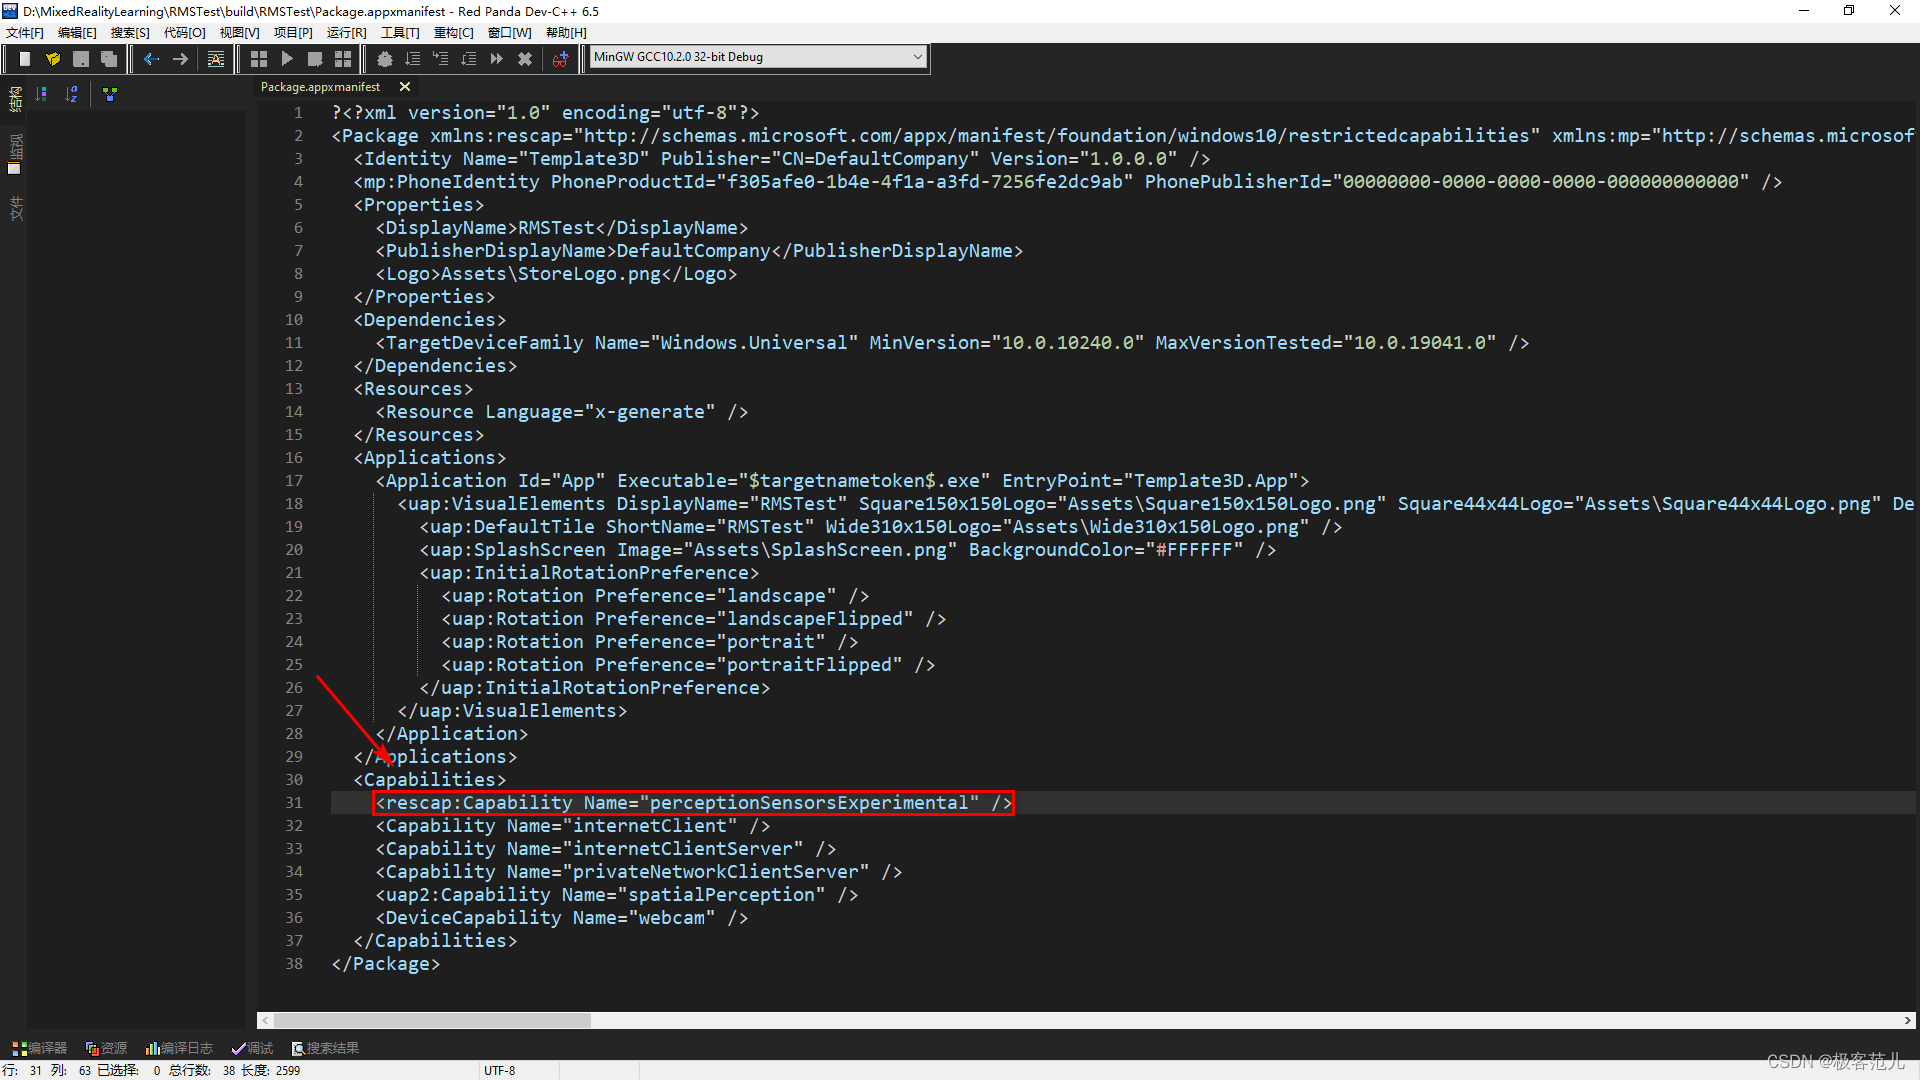
Package.appxmanifest文件全揽,RMSTest可更换文件名
<?xml version="1.0" encoding="utf-8"?>
<Package xmlns:rescap="http://schemas.microsoft.com/appx/manifest/foundation/windows10/restrictedcapabilities" xmlns:mp="http://schemas.microsoft.com/appx/2014/phone/manifest" xmlns:uap="http://schemas.microsoft.com/appx/manifest/uap/windows10" xmlns:uap2="http://schemas.microsoft.com/appx/manifest/uap/windows10/2" xmlns:uap3="http://schemas.microsoft.com/appx/manifest/uap/windows10/3" xmlns:uap4="http://schemas.microsoft.com/appx/manifest/uap/windows10/4" xmlns:iot="http://schemas.microsoft.com/appx/manifest/iot/windows10" xmlns:mobile="http://schemas.microsoft.com/appx/manifest/mobile/windows10" IgnorableNamespaces="uap uap2 uap3 uap4 mp mobile iot rescap" xmlns="http://schemas.microsoft.com/appx/manifest/foundation/windows10">
  <Identity Name="Template3D" Publisher="CN=DefaultCompany" Version="1.0.0.0" />
  <mp:PhoneIdentity PhoneProductId="edd907fa-2c4f-49b2-89a0-9fa371043c33" PhonePublisherId="00000000-0000-0000-0000-000000000000" />
  <Properties>
    <DisplayName>RMSTest</DisplayName>
    <PublisherDisplayName>DefaultCompany</PublisherDisplayName>
    <Logo>Assets\StoreLogo.png</Logo>
  </Properties>
  <Dependencies>
    <TargetDeviceFamily Name="Windows.Universal" MinVersion="10.0.10240.0" MaxVersionTested="10.0.19041.0" />
  </Dependencies>
  <Resources>
    <Resource Language="x-generate" />
  </Resources>
  <Applications>
    <Application Id="App" Executable="$targetnametoken$.exe" EntryPoint="Template3D.App">
      <uap:VisualElements DisplayName="RMSTest" Square150x150Logo="Assets\Square150x150Logo.png" Square44x44Logo="Assets\Square44x44Logo.png" Description="Template_3D" BackgroundColor="transparent">
        <uap:DefaultTile ShortName="RMSTest" Wide310x150Logo="Assets\Wide310x150Logo.png" />
        <uap:SplashScreen Image="Assets\SplashScreen.png" BackgroundColor="#FFFFFF" />
        <uap:InitialRotationPreference>
          <uap:Rotation Preference="landscape" />
          <uap:Rotation Preference="landscapeFlipped" />
          <uap:Rotation Preference="portrait" />
          <uap:Rotation Preference="portraitFlipped" />
        </uap:InitialRotationPreference>
      </uap:VisualElements>
    </Application>
  </Applications>
  <Capabilities>
	<rescap:Capability Name="perceptionSensorsExperimental" />
    <Capability Name="internetClient" />
    <Capability Name="internetClientServer" />
    <Capability Name="privateNetworkClientServer" />
    <uap2:Capability Name="spatialPerception" />
    <DeviceCapability Name="webcam" />
  </Capabilities>
</Package>
四、VS编译与部署
1、打开下载好的github工程中的hololens2_simpleclient.py文件
E: → HoloLens2-Unity-ResearchModeStreamer-master → py
2、修改局域网IP
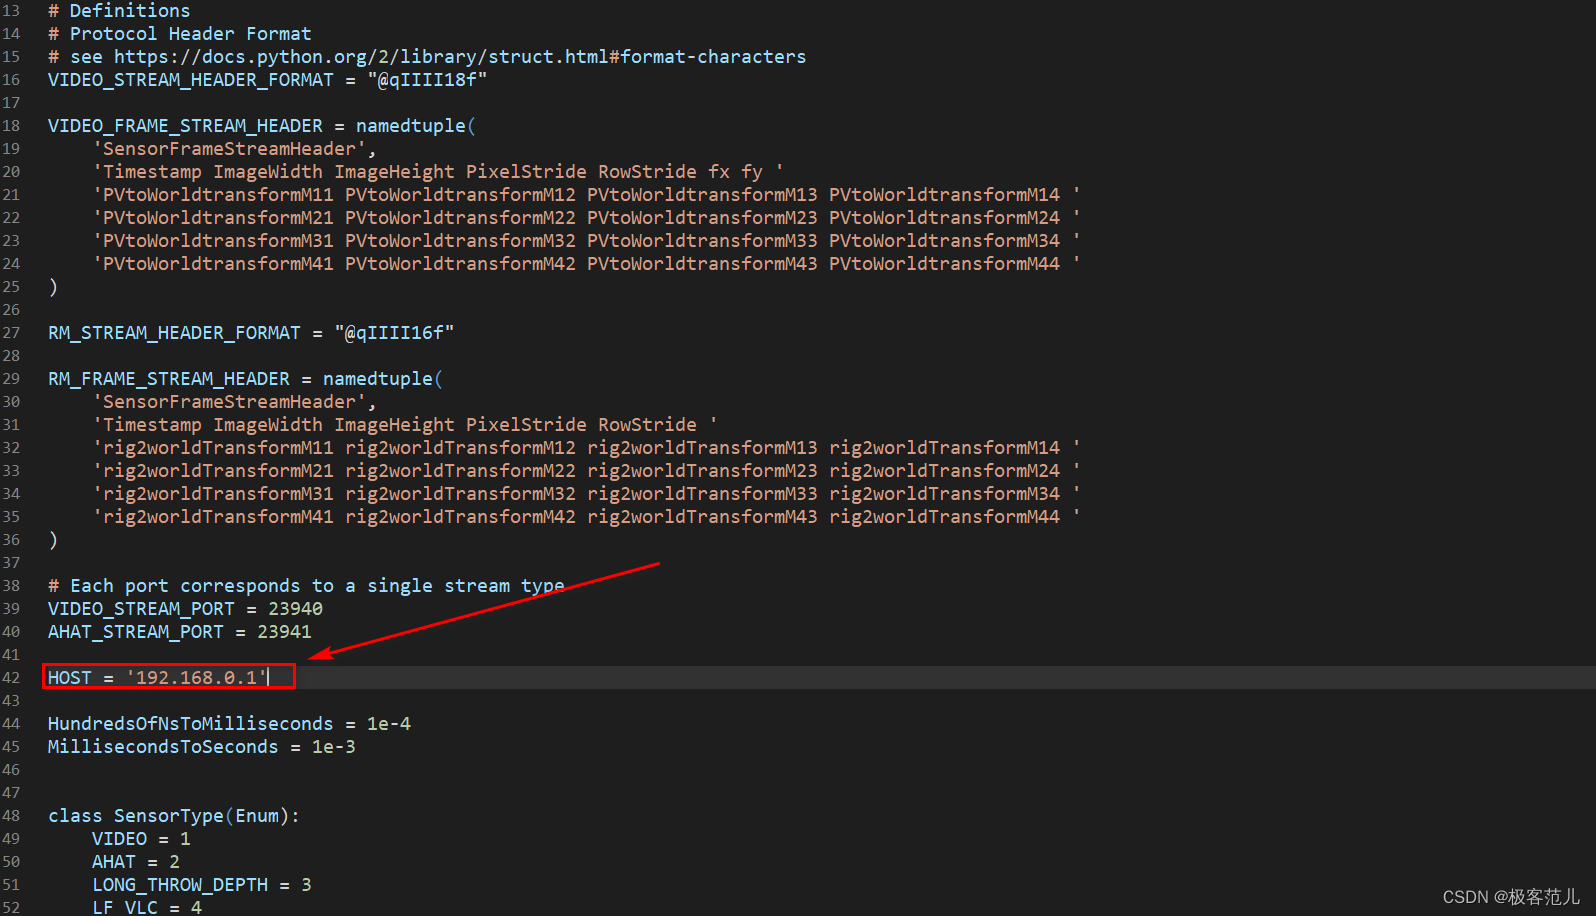
五、连接运行
1、将PC与HoloLens 2连接至同一局域网
2、vs部署HoloLens 2项目
D→MixedRealityLearning→RMSTest→build
3、选择项目配置
在项目属性页Release和ARM64下,选择调试,计算机名为HoloLens的IP
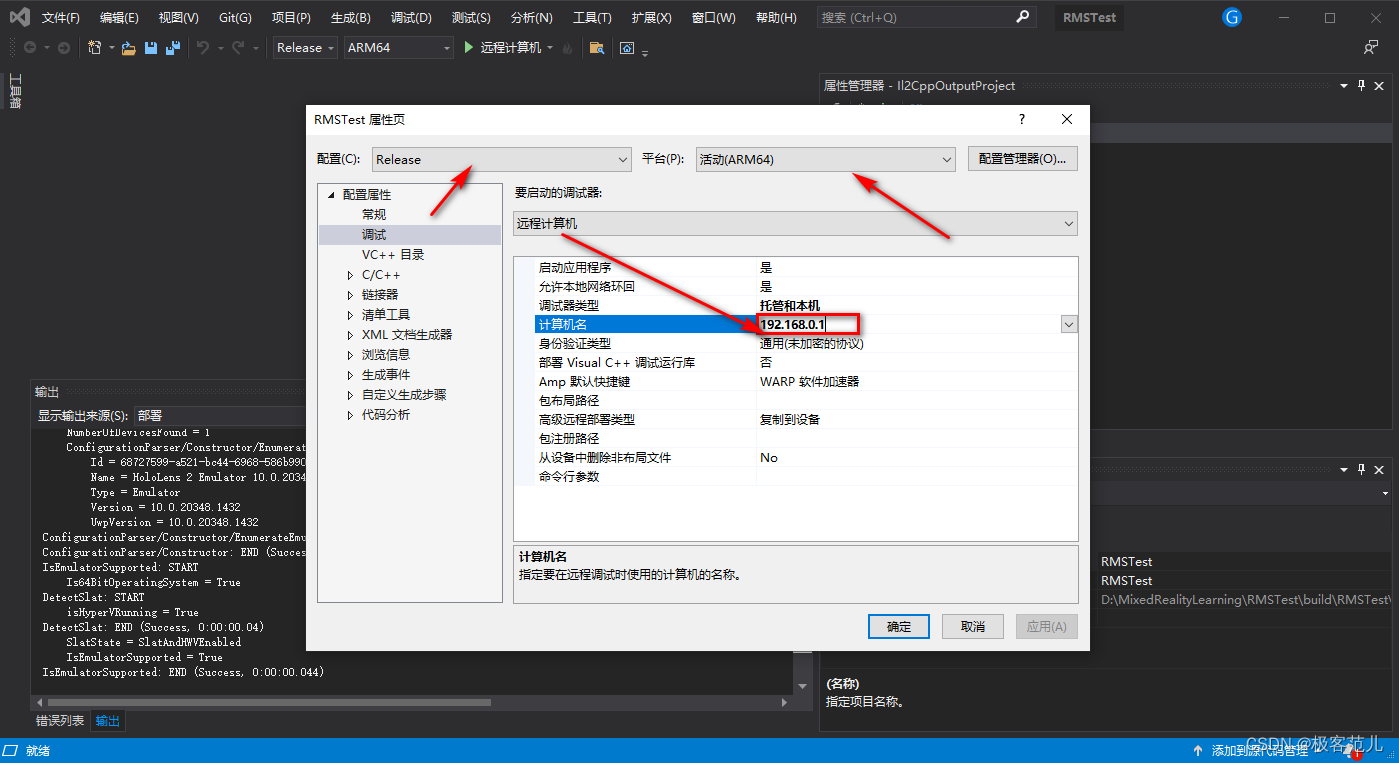
4、部署到HoloLens 2上
打开APP
5、运行hololens2_simpleclient.py文件
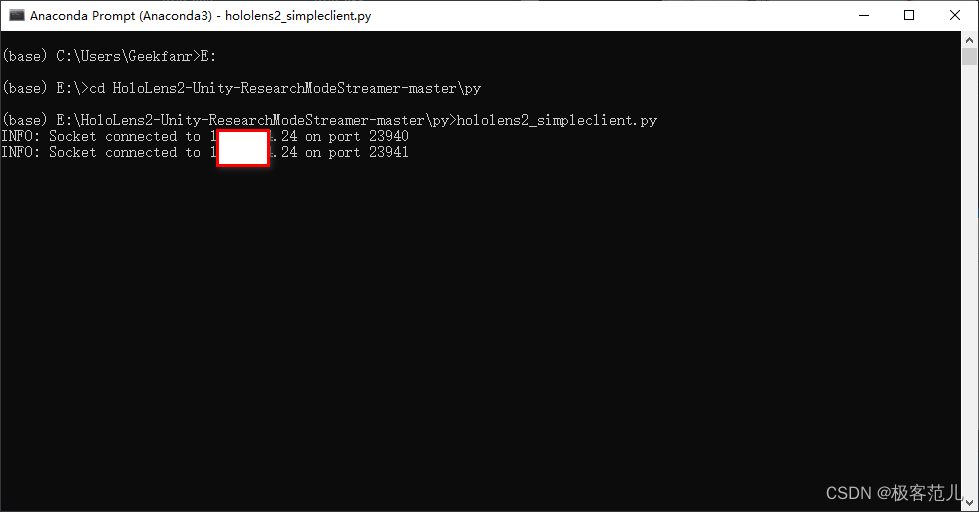
6、查看结果
(1)HoloLens 2彩色数据流
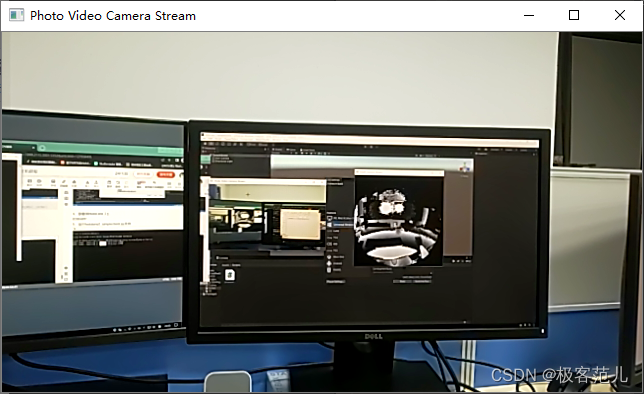
(2)HoloLens 2深度数据流
