CubeMax添加Rtthread操作系统 组件STM32F103
本篇主要介绍,怎么使用STM32CubeMx工具,添加RT-Thread操作系统组件,码代码的IDE是keil。快速移植RT-Thread实时操作系统,所用的IDE可自行官网下载最新版。
CubeMax官网下载链接
RTthread 文档中心
一、建立工程
在开始之前我们可以先建立一个简单过程
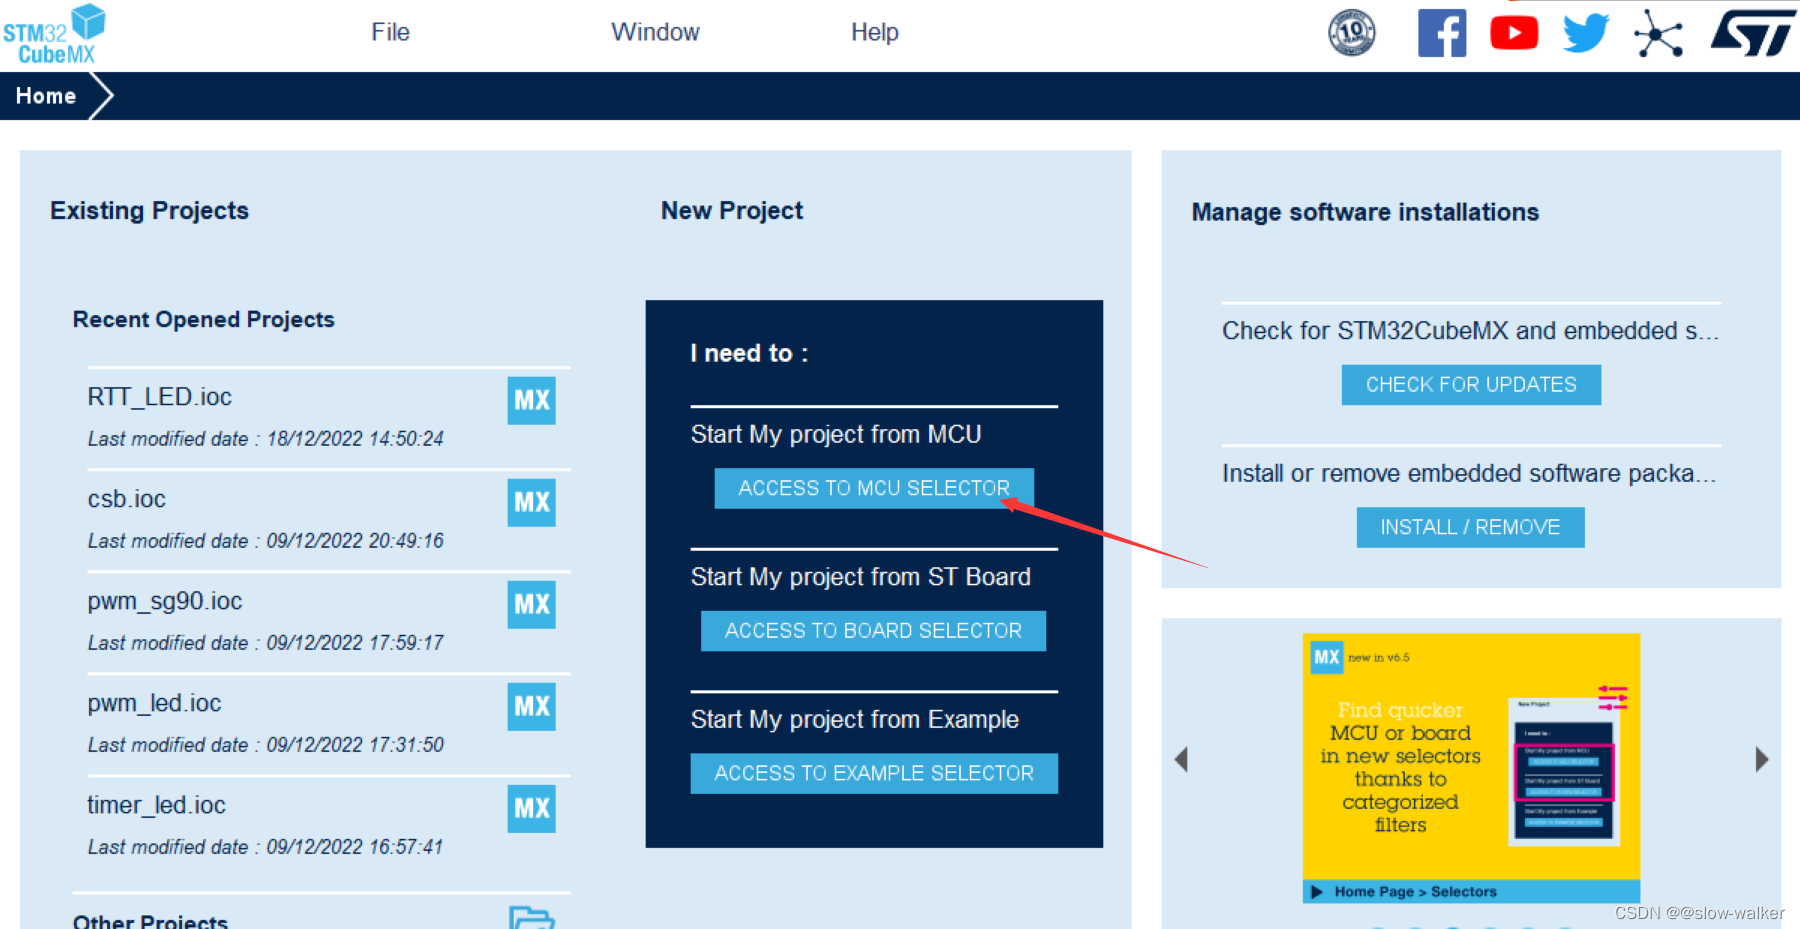
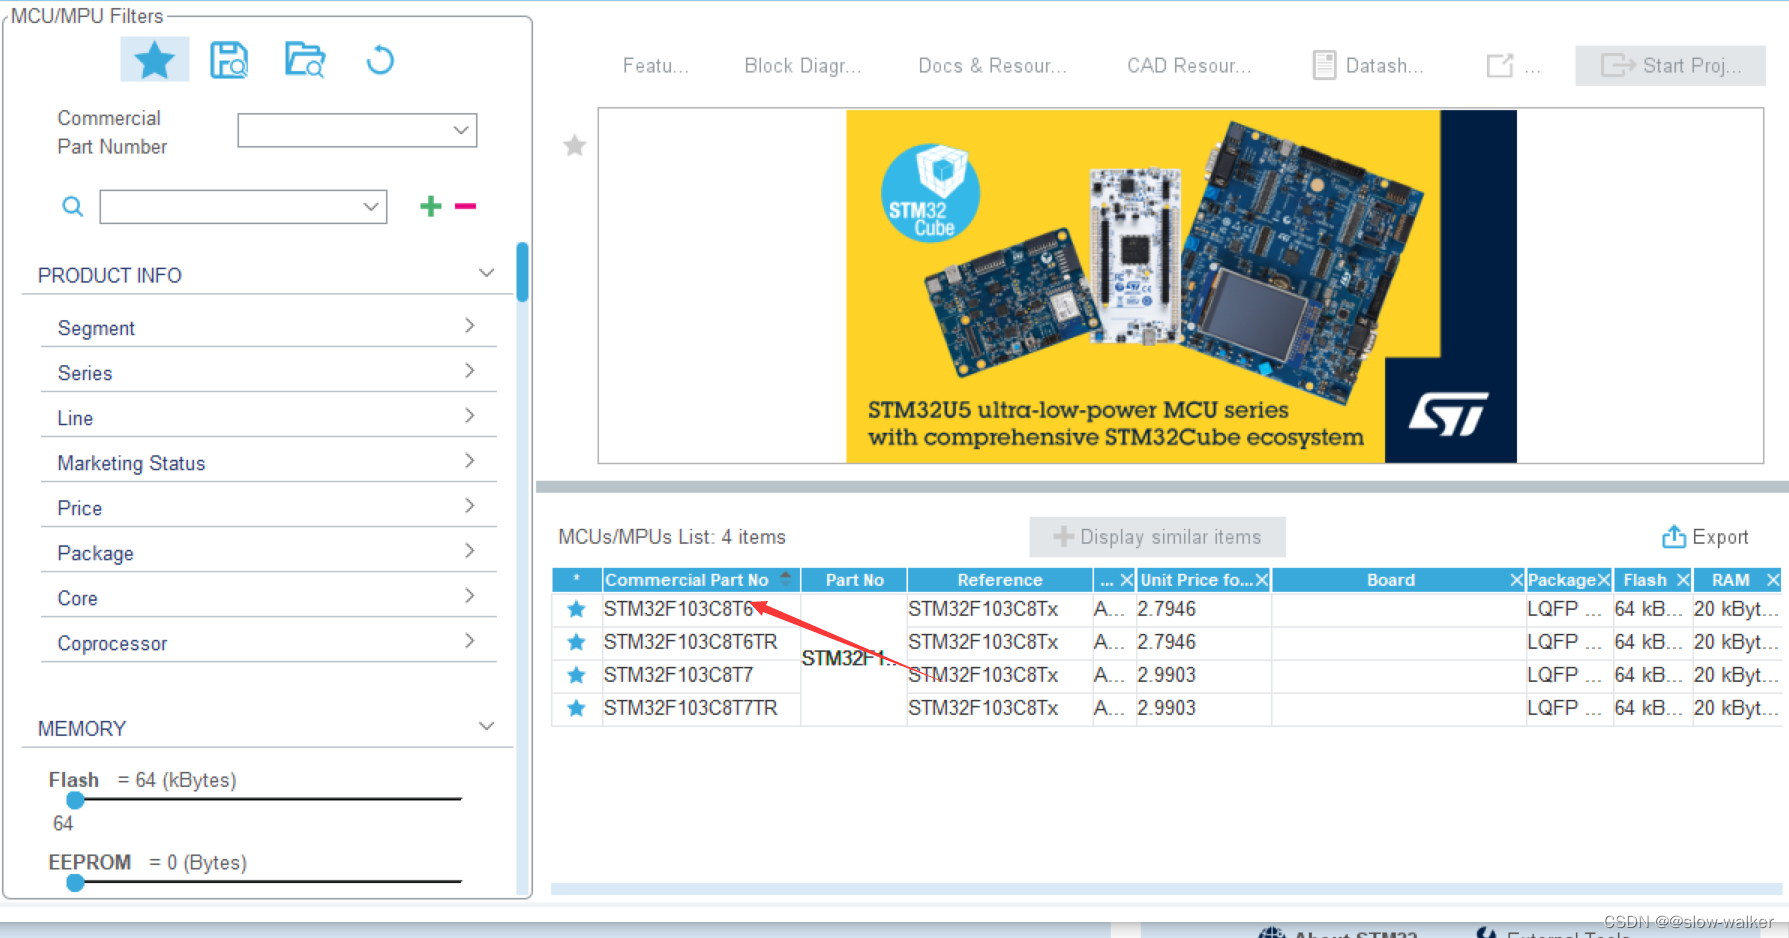
选择对应型号的芯片这里是STM32F103C8T6
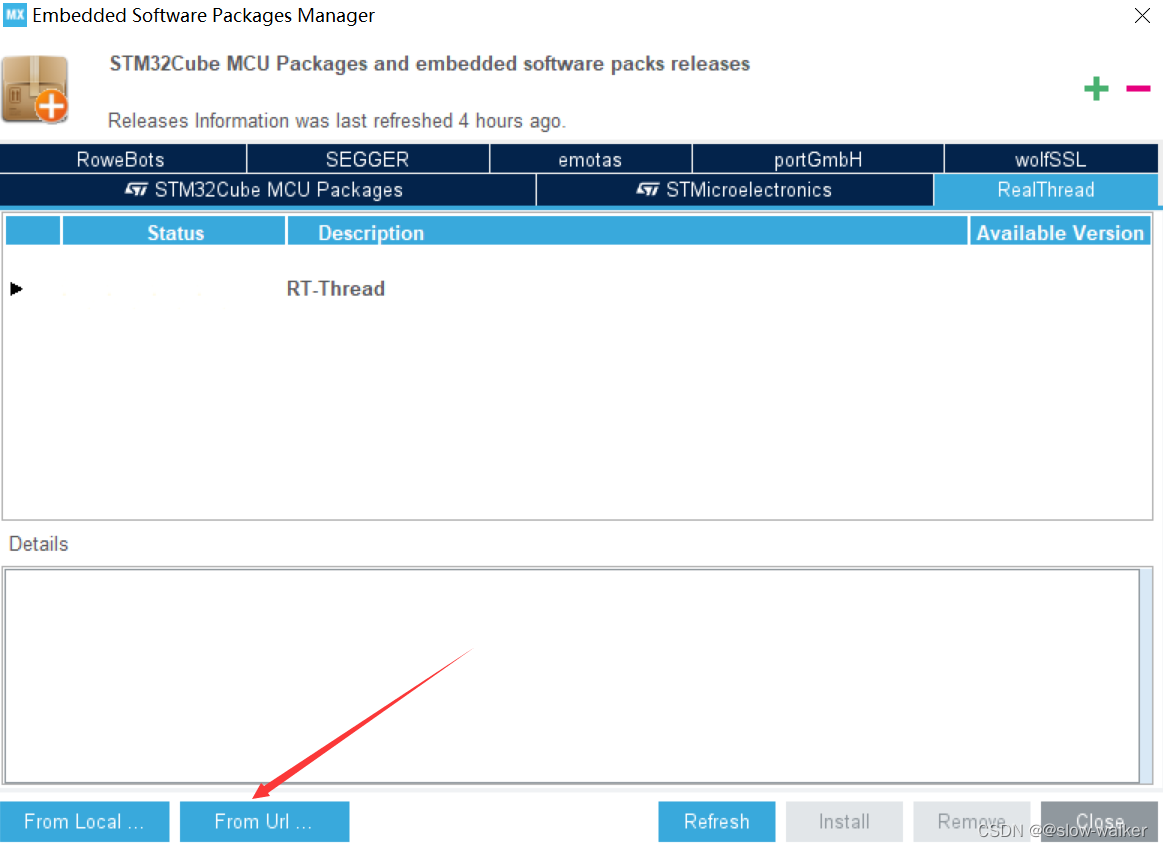
二、下载RTT相关组件
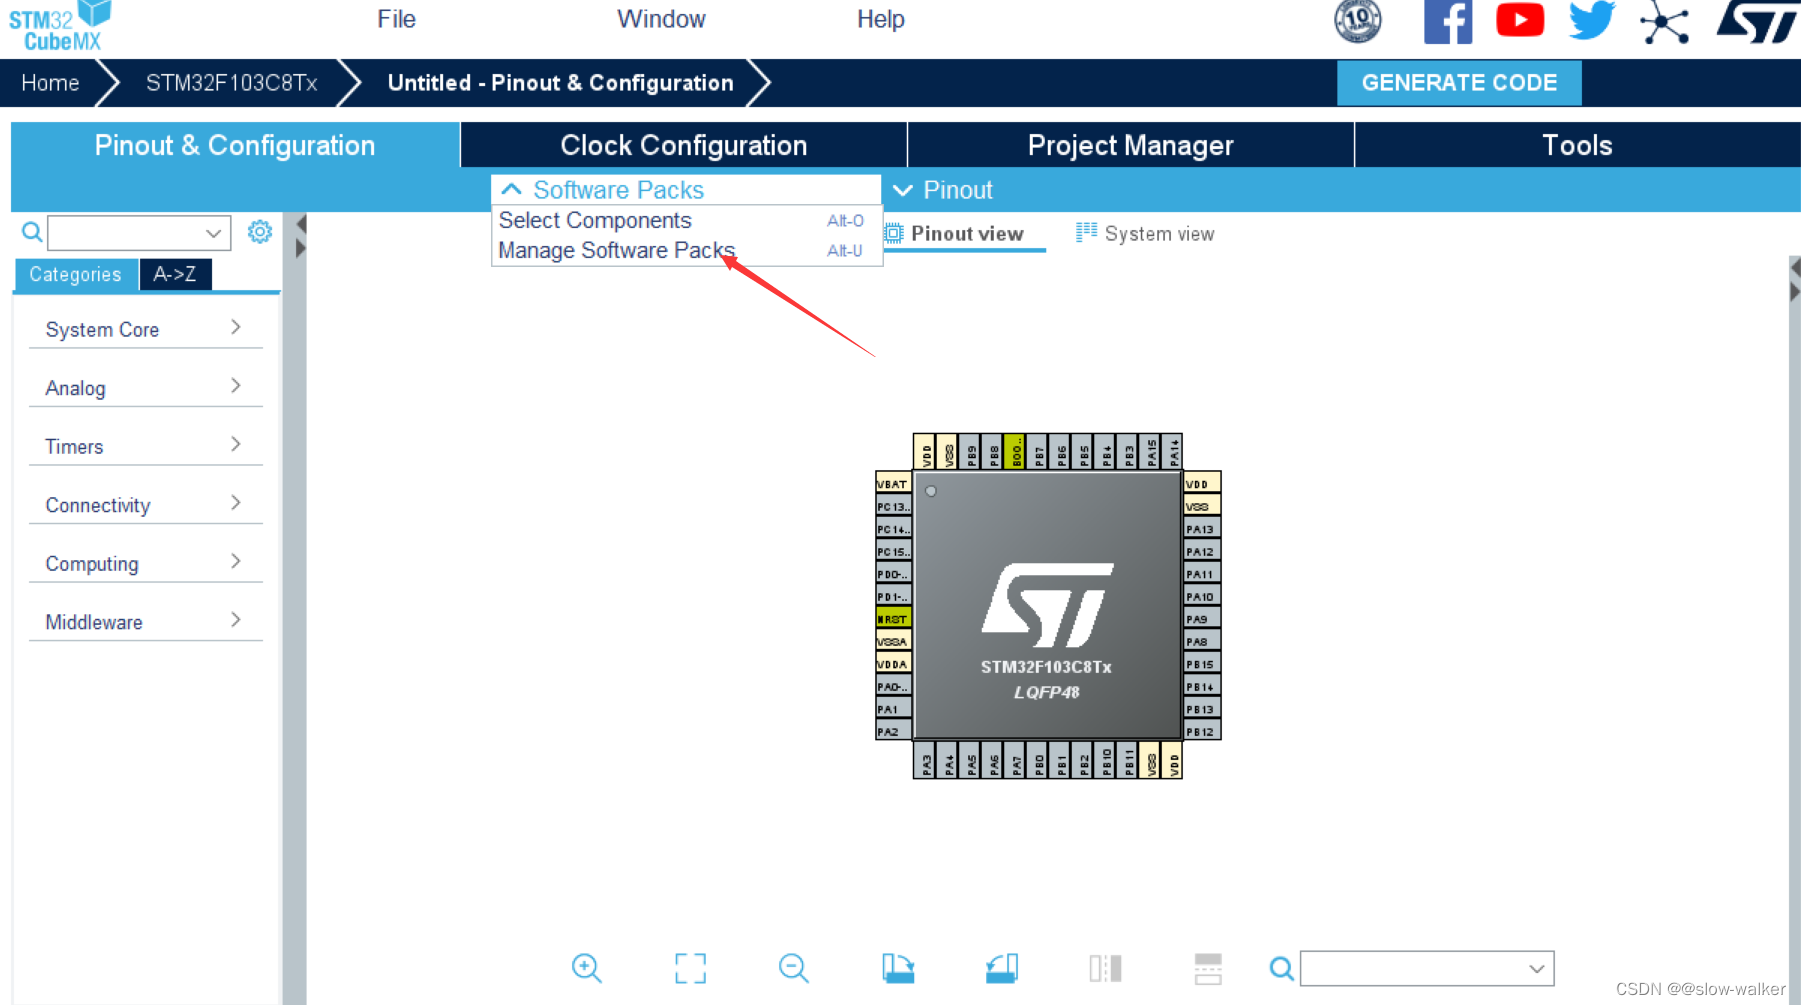
获取 RT-Thread NANO软件包,https://www.rt-thread.org/download/cube/RealThread.RT-Thread.pdsc 这里我们可以直接下载然后从本地添加进去,也可以直接在线添加 输入该网址即可。 点击Software Packs 选择里面的Manage Software Packs
我这里已经添加过来 所以下面有显示
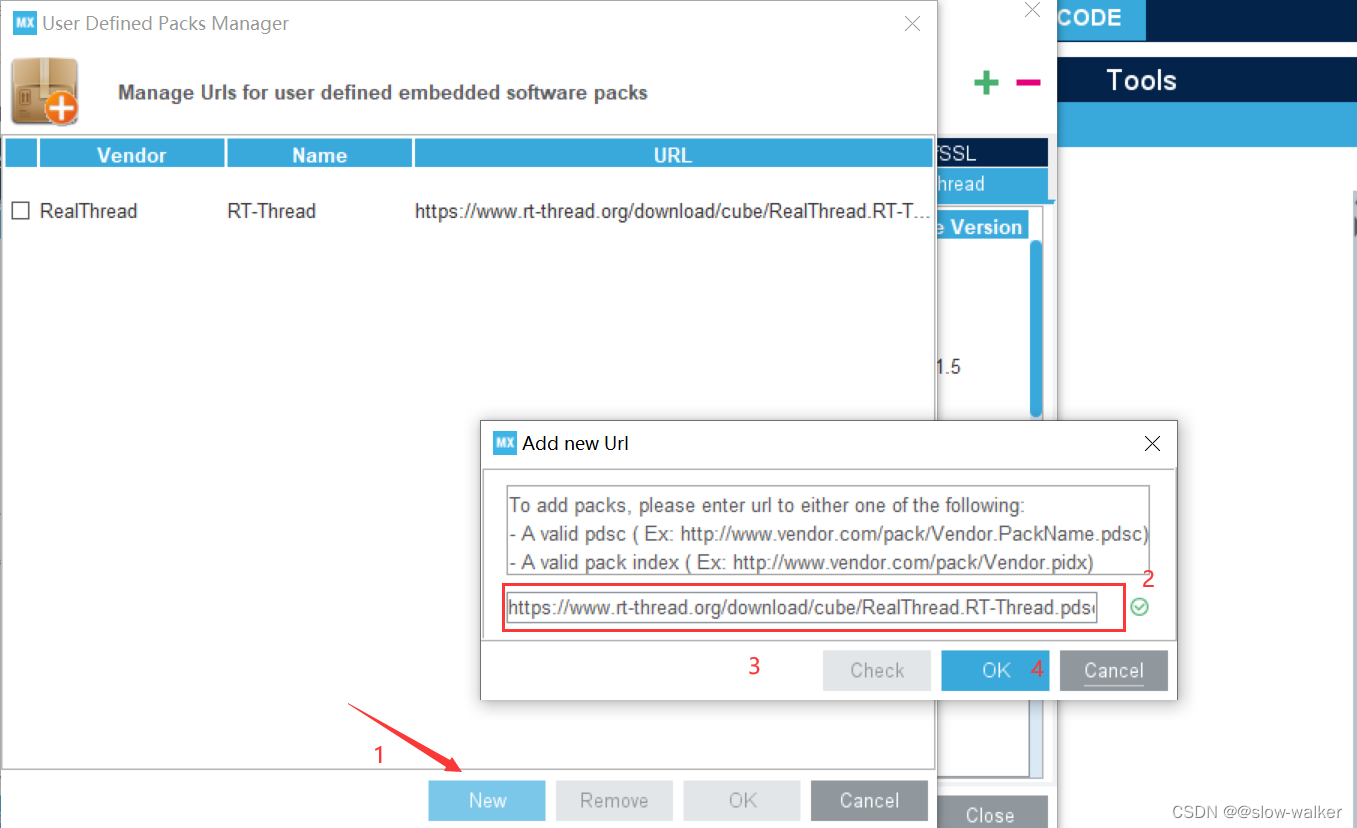
安装成功的显示
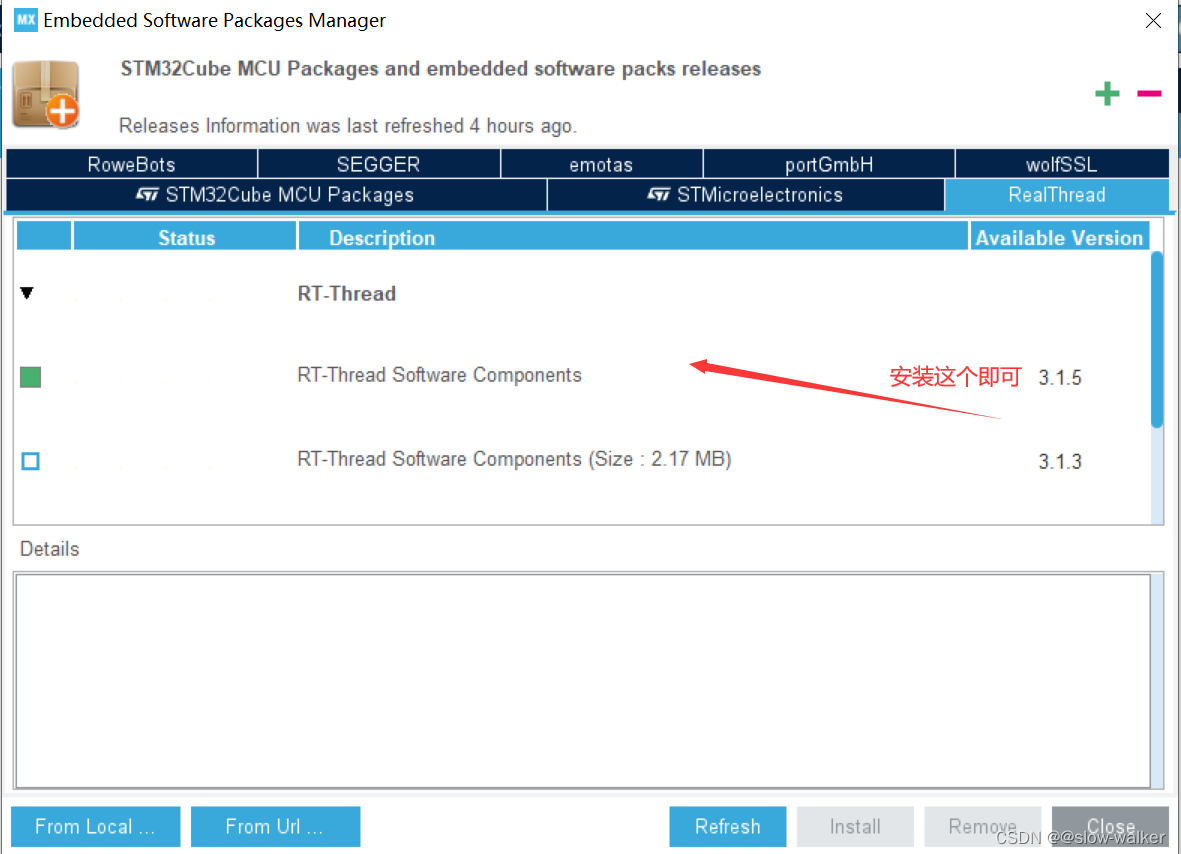
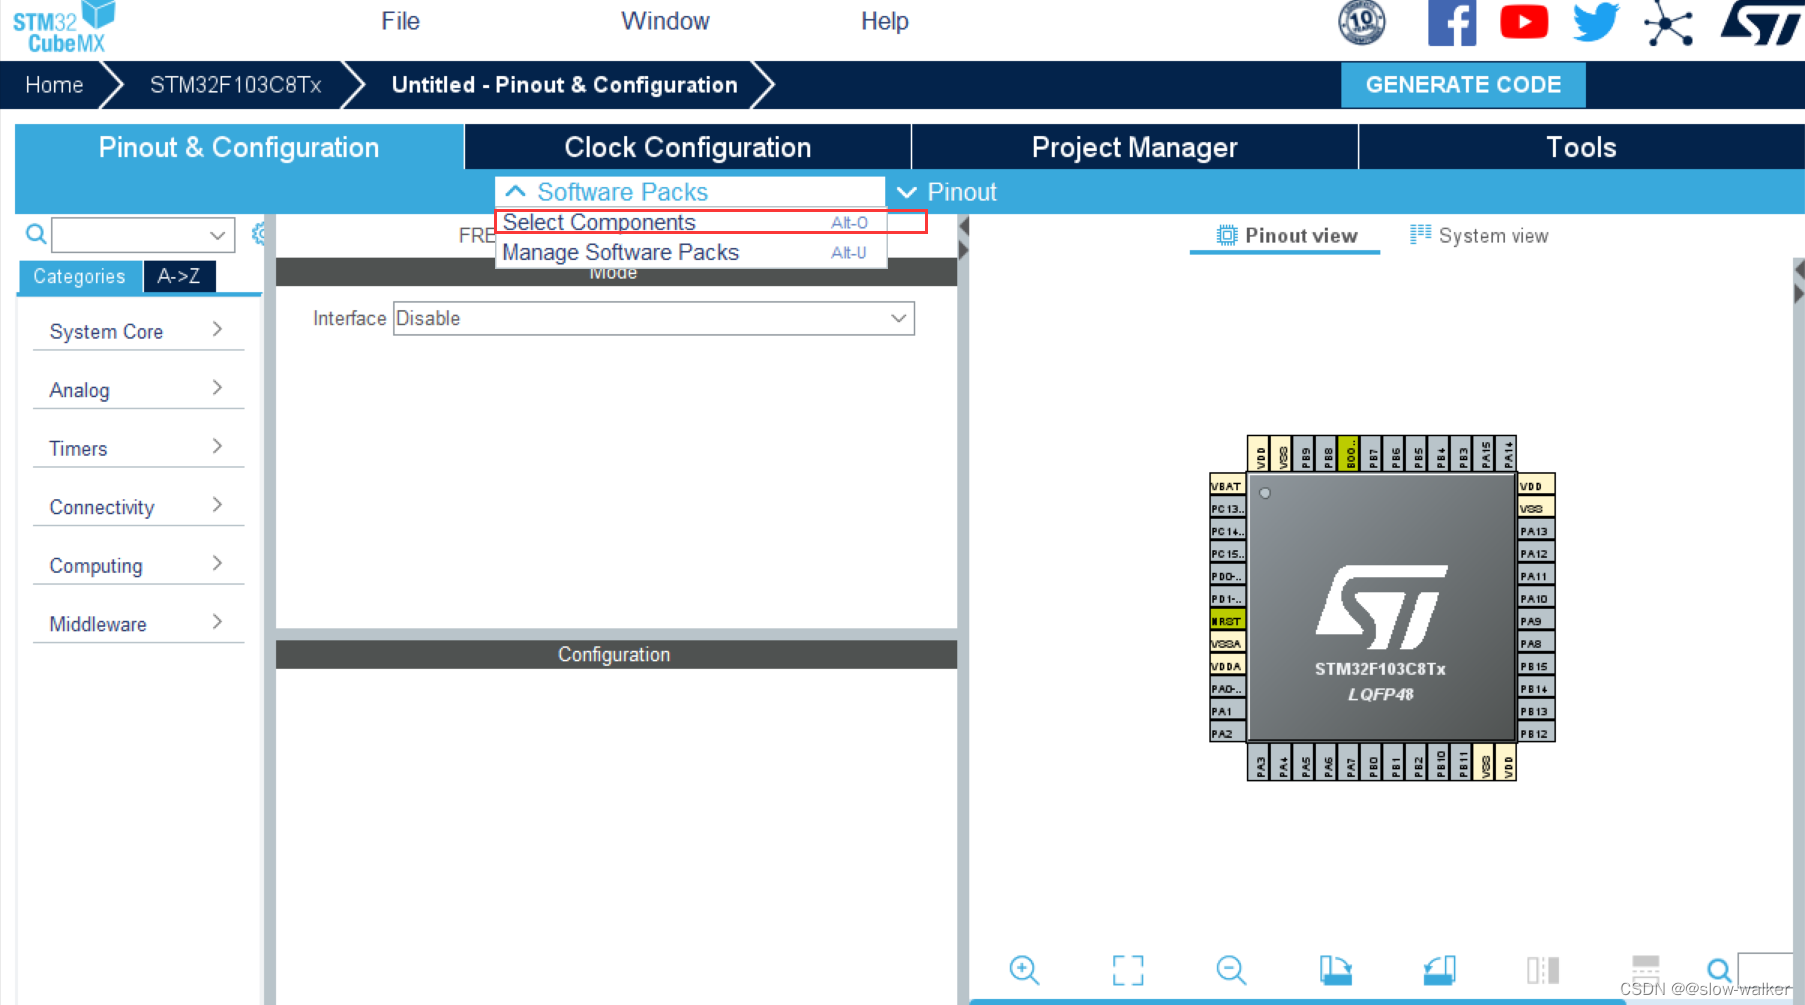
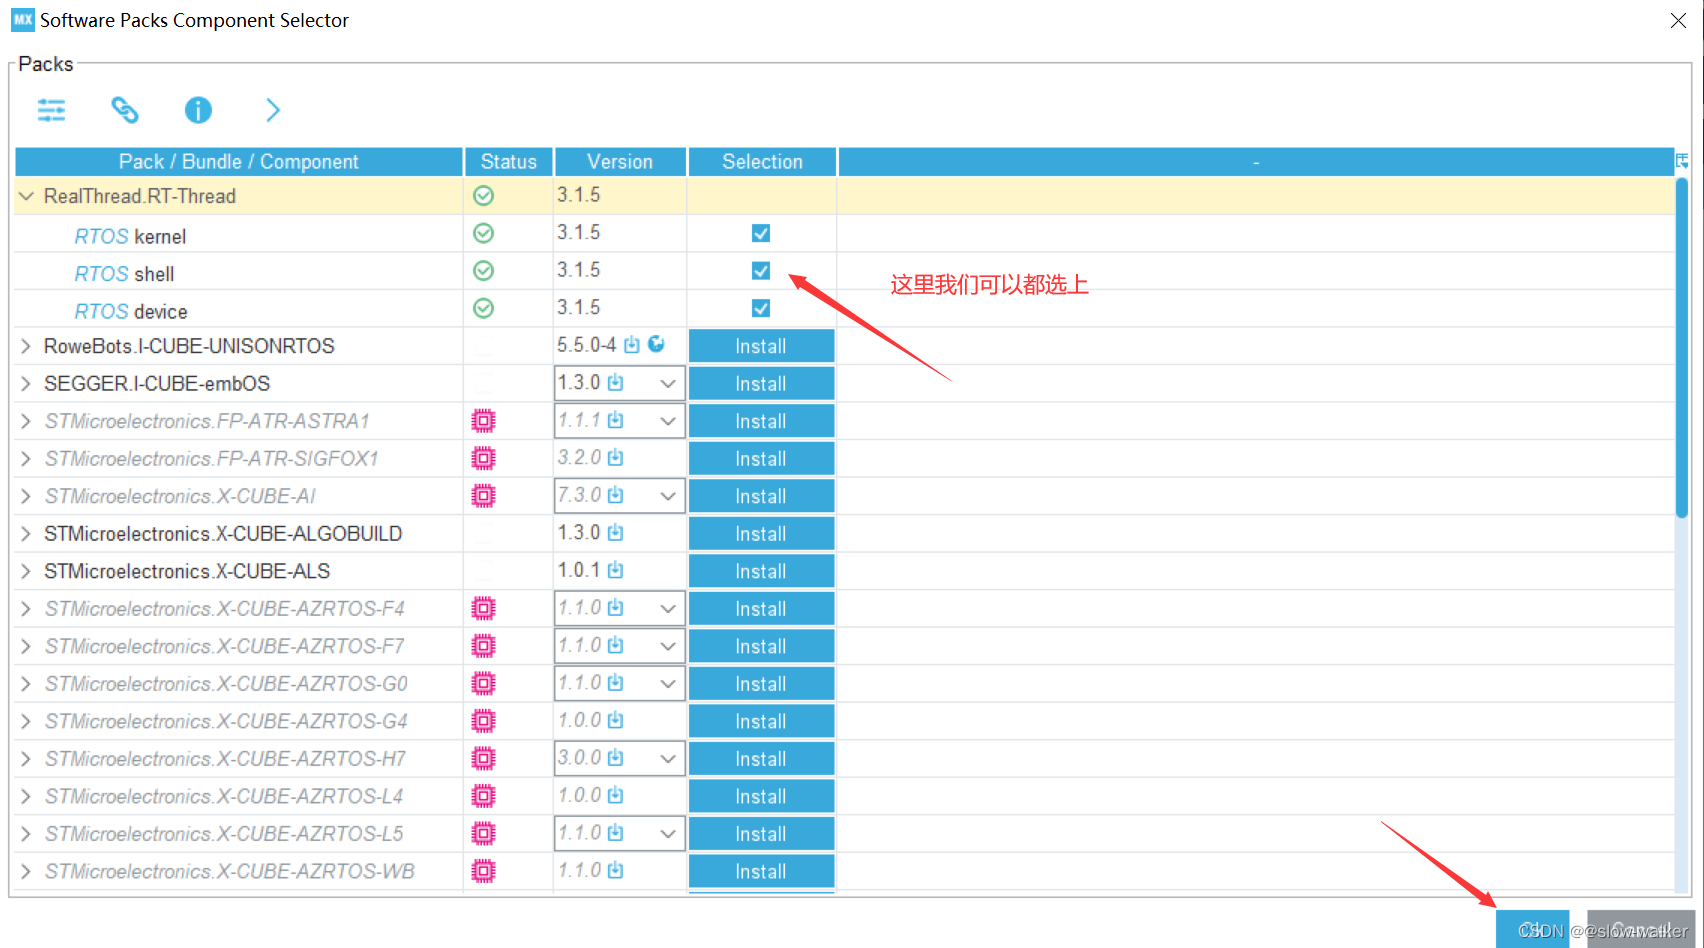
然后就有RTT相关的包了
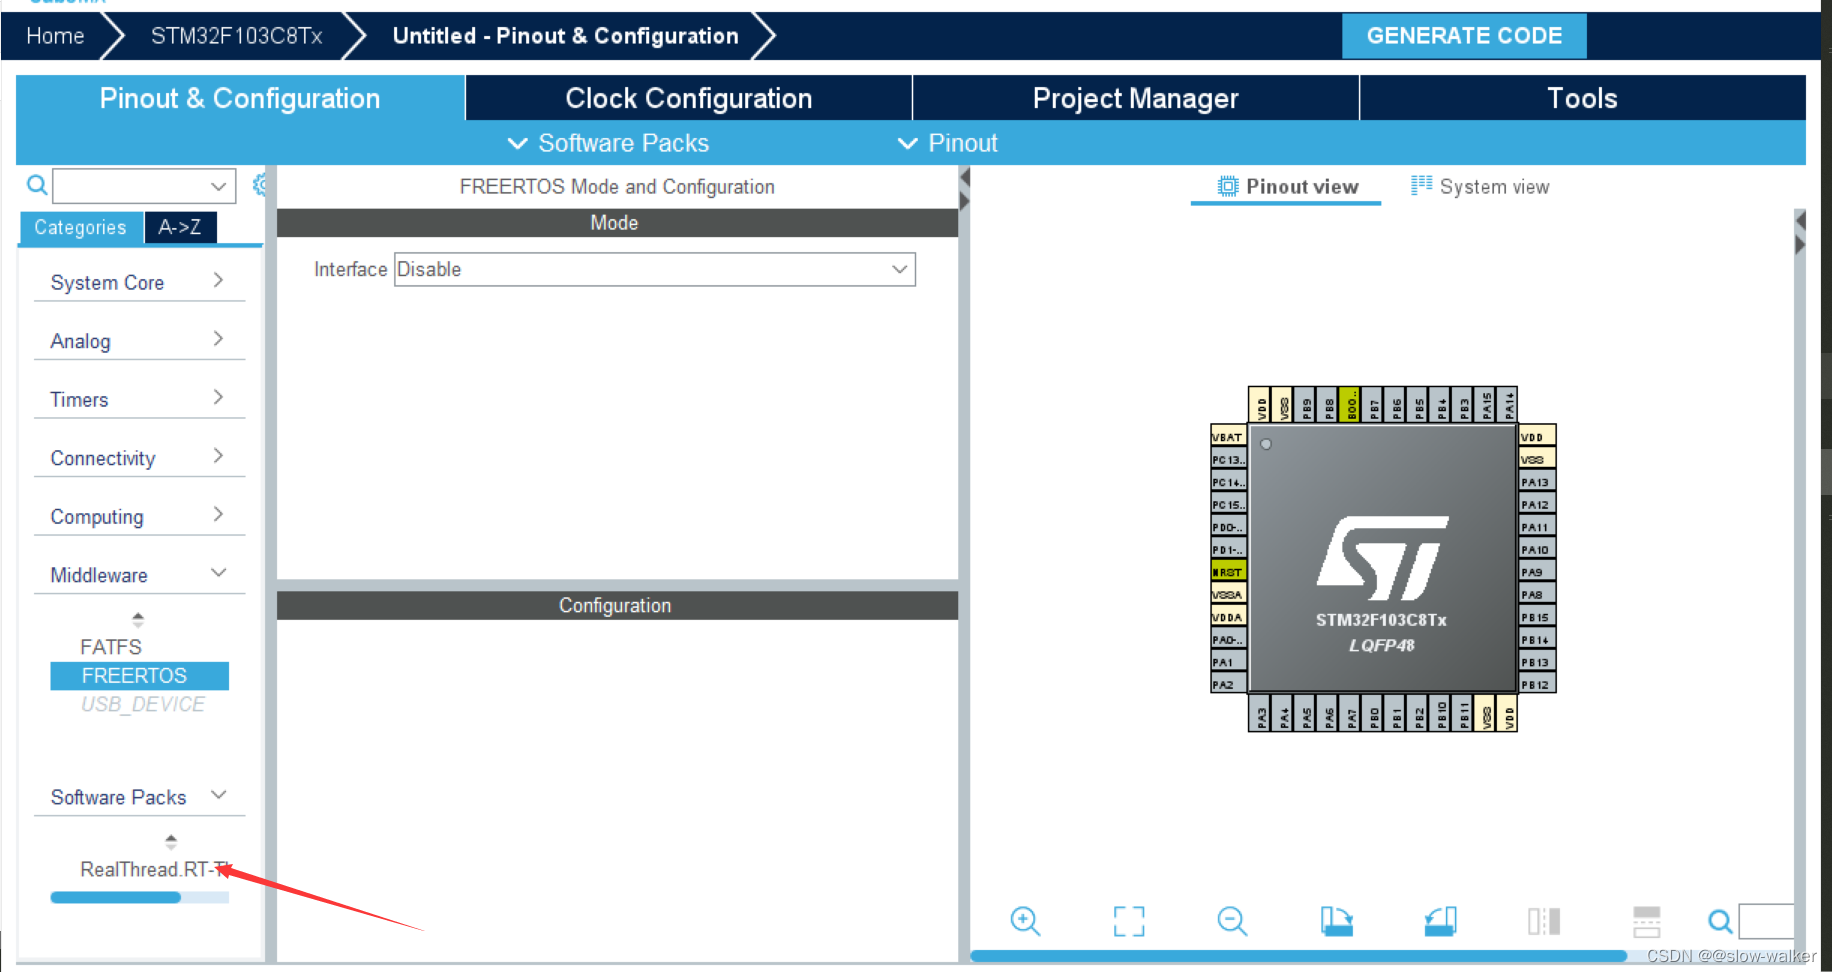
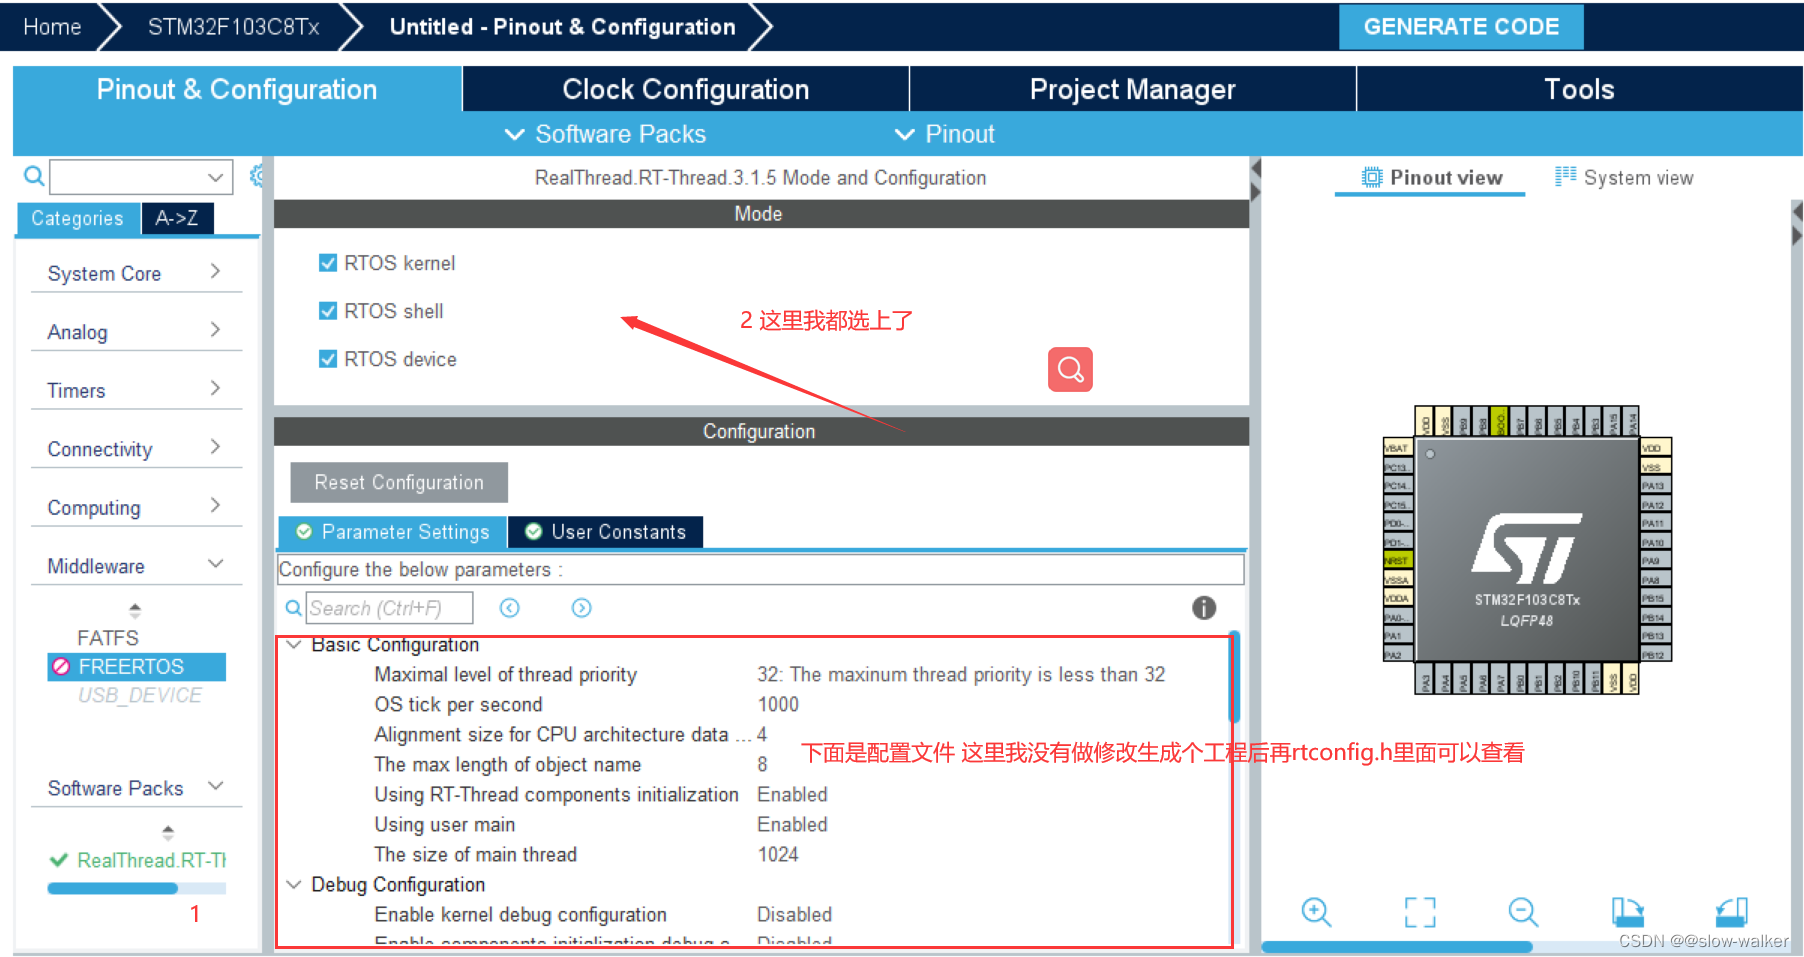
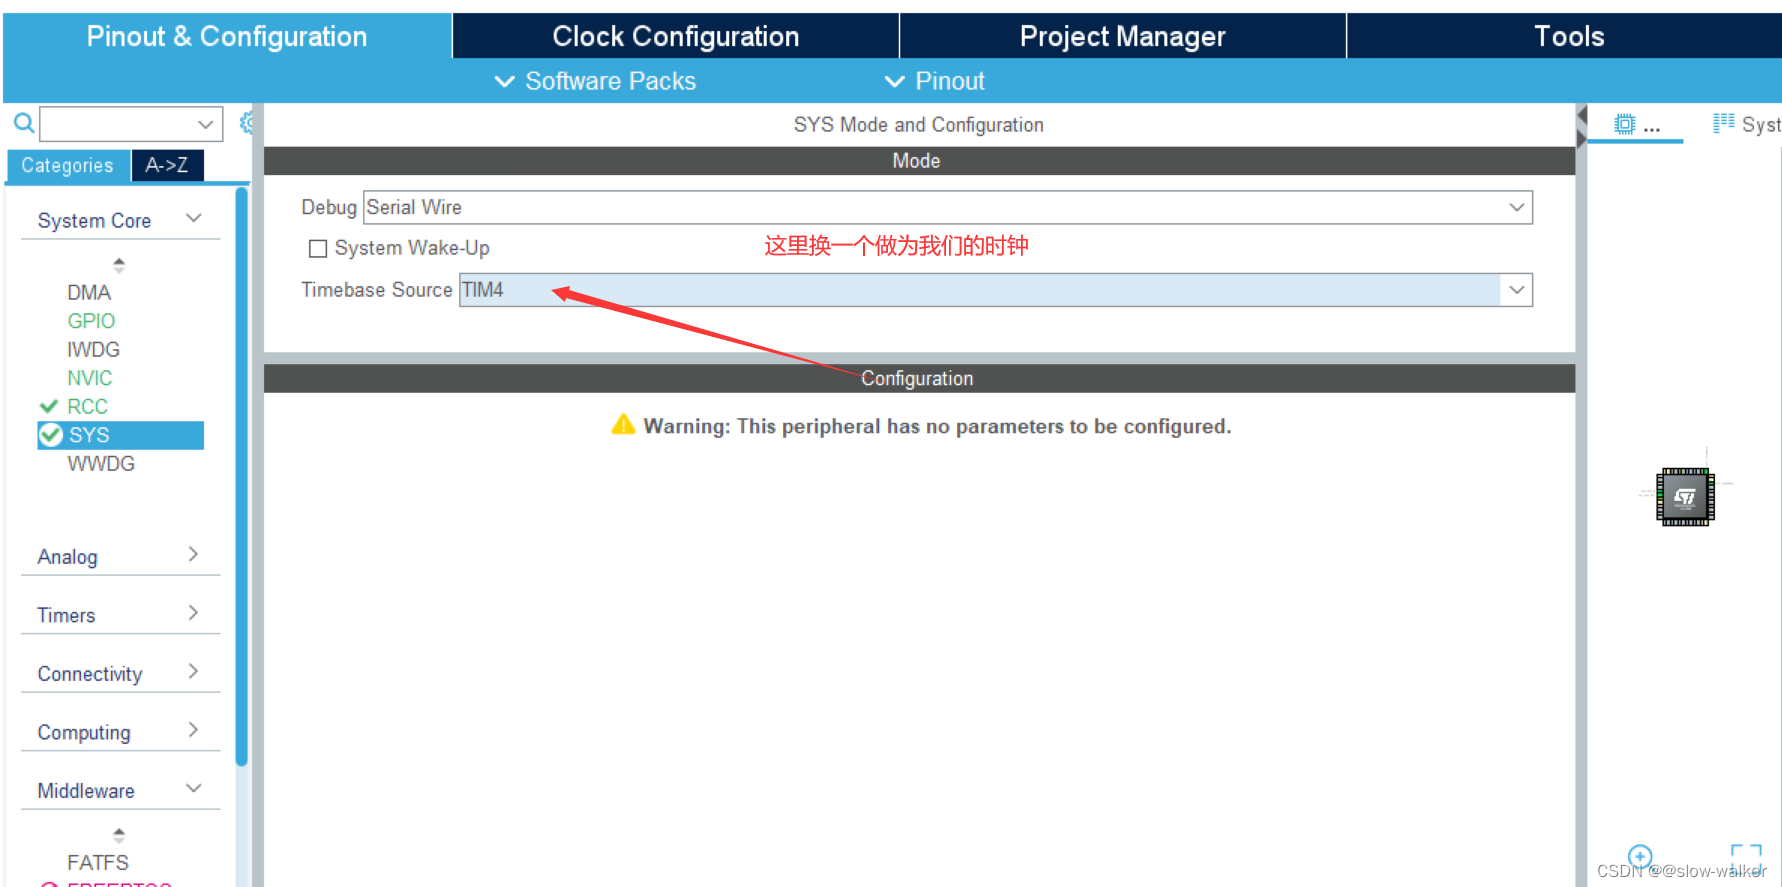
注意NVIC里面有几个配置需要我们屏蔽掉 在THthread里面有相同的配置
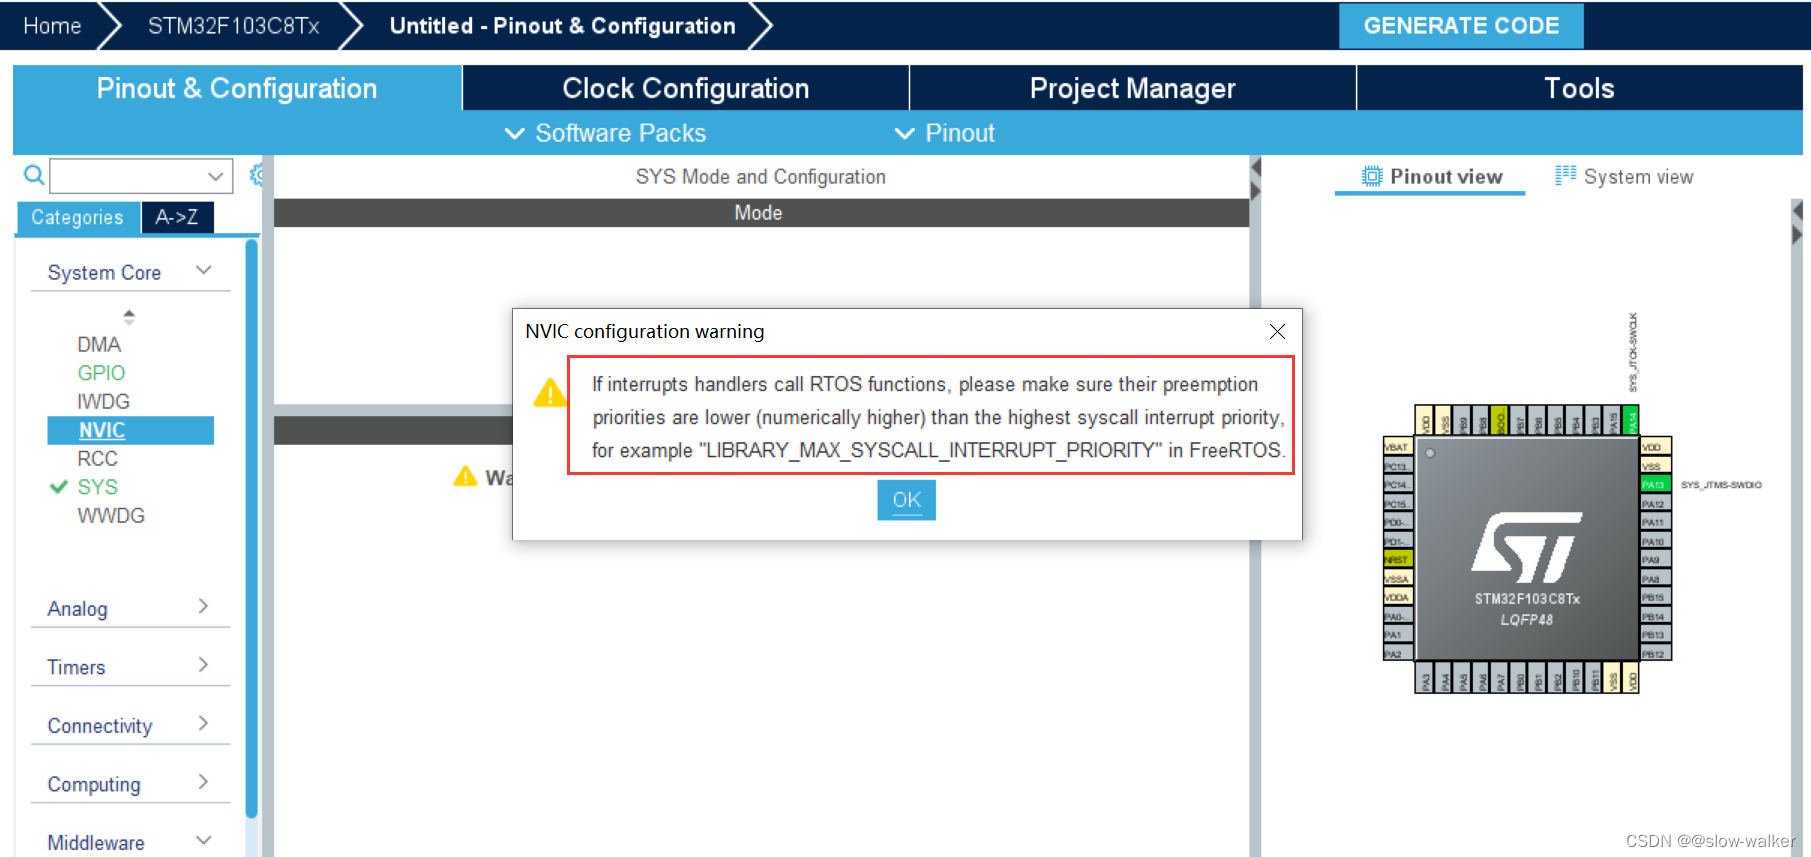
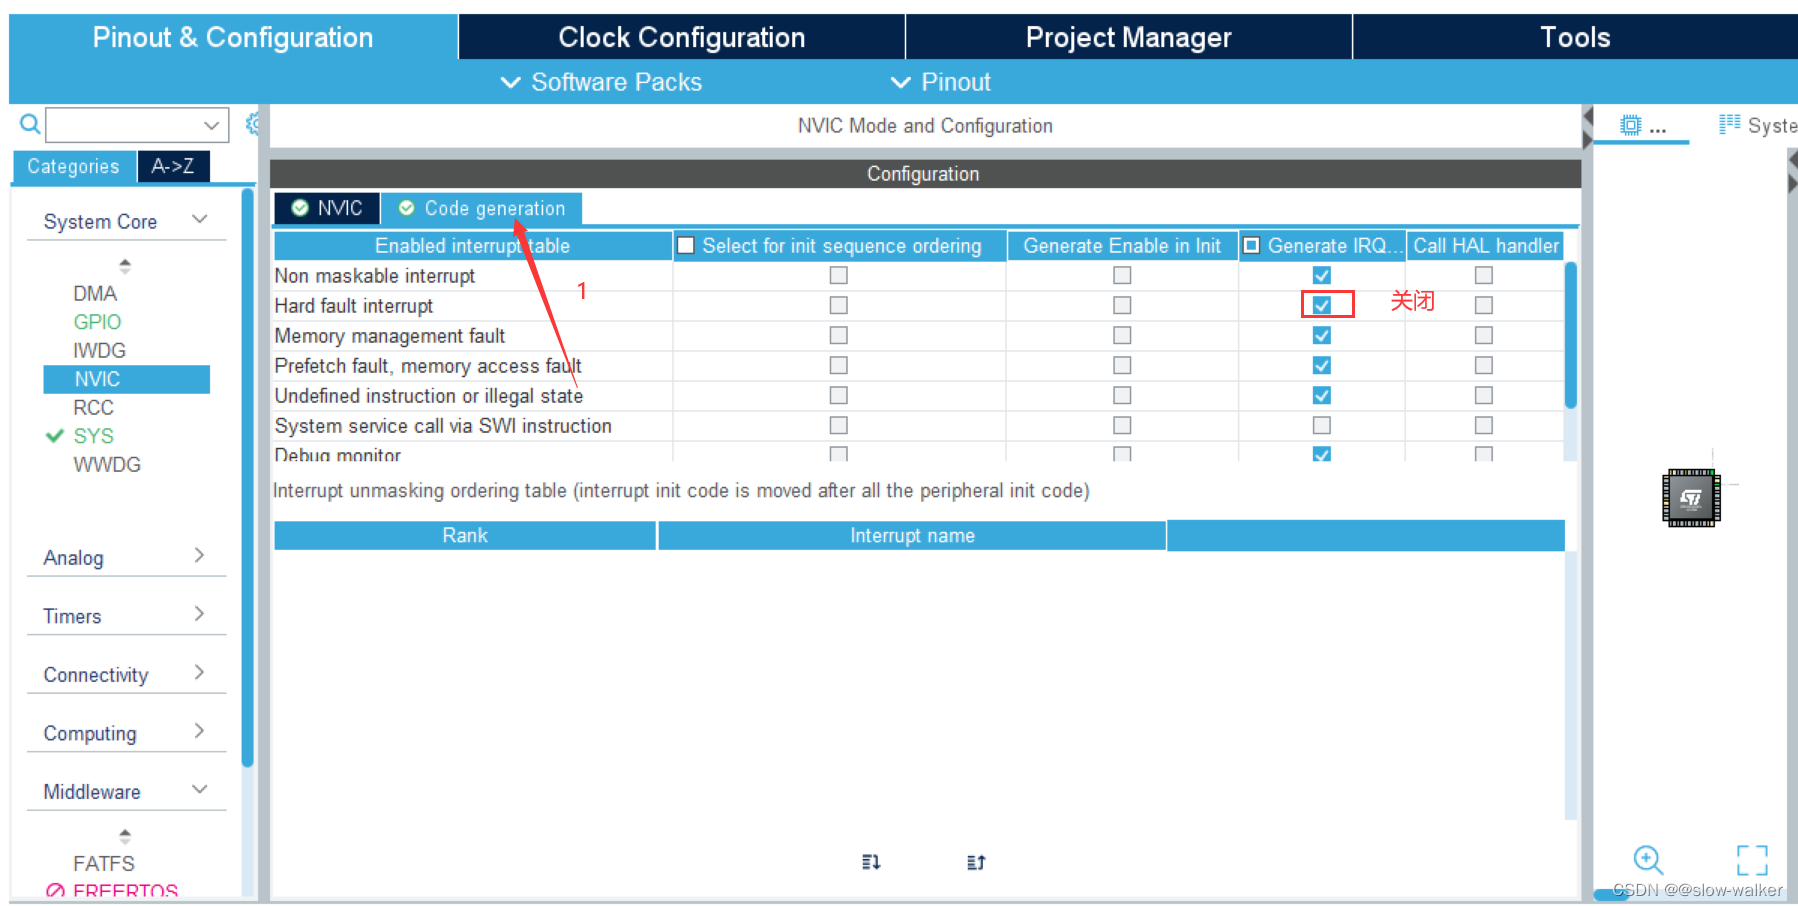
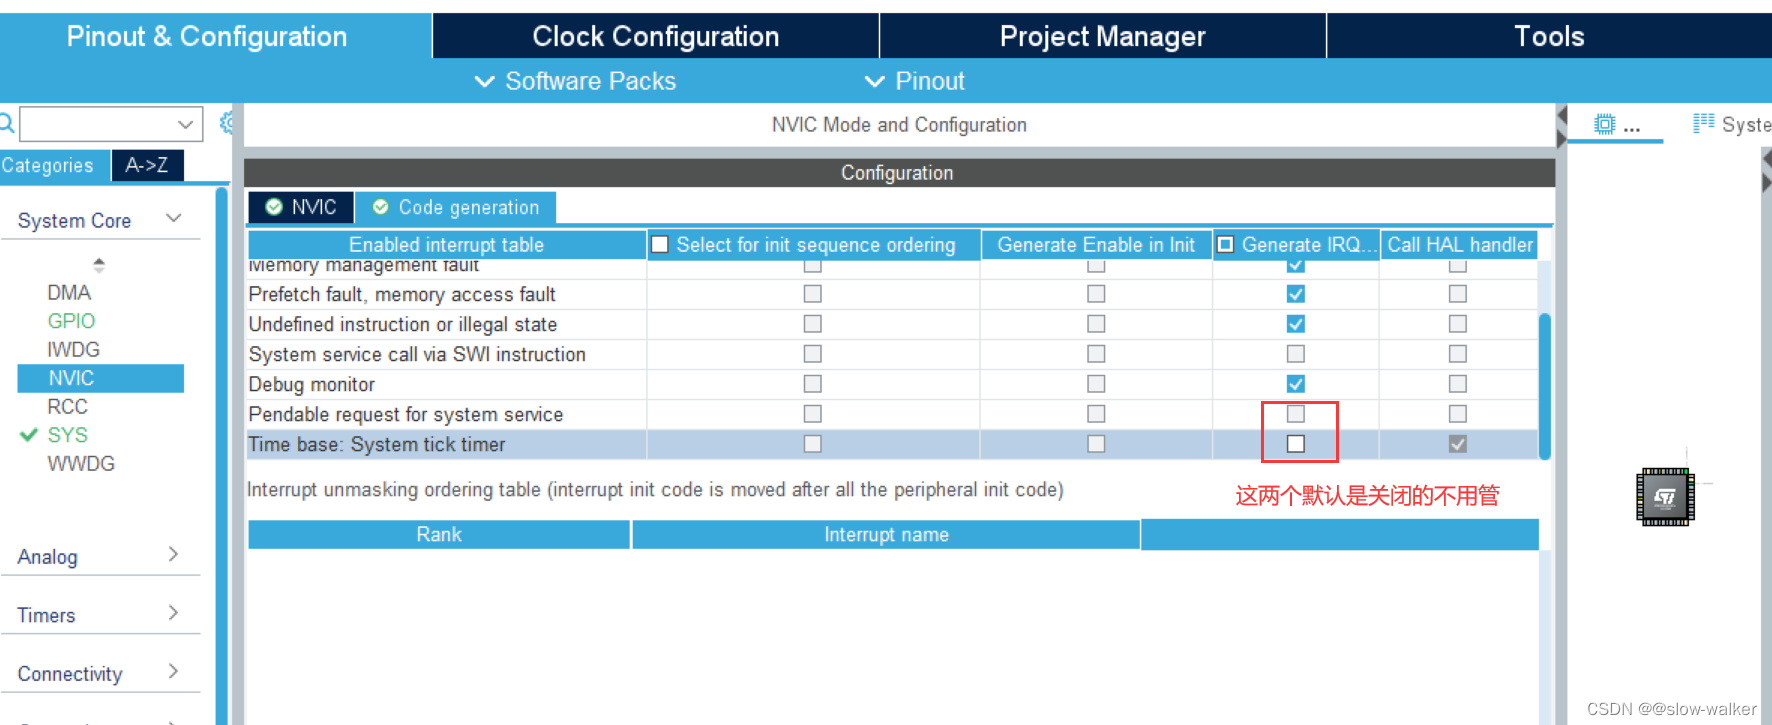
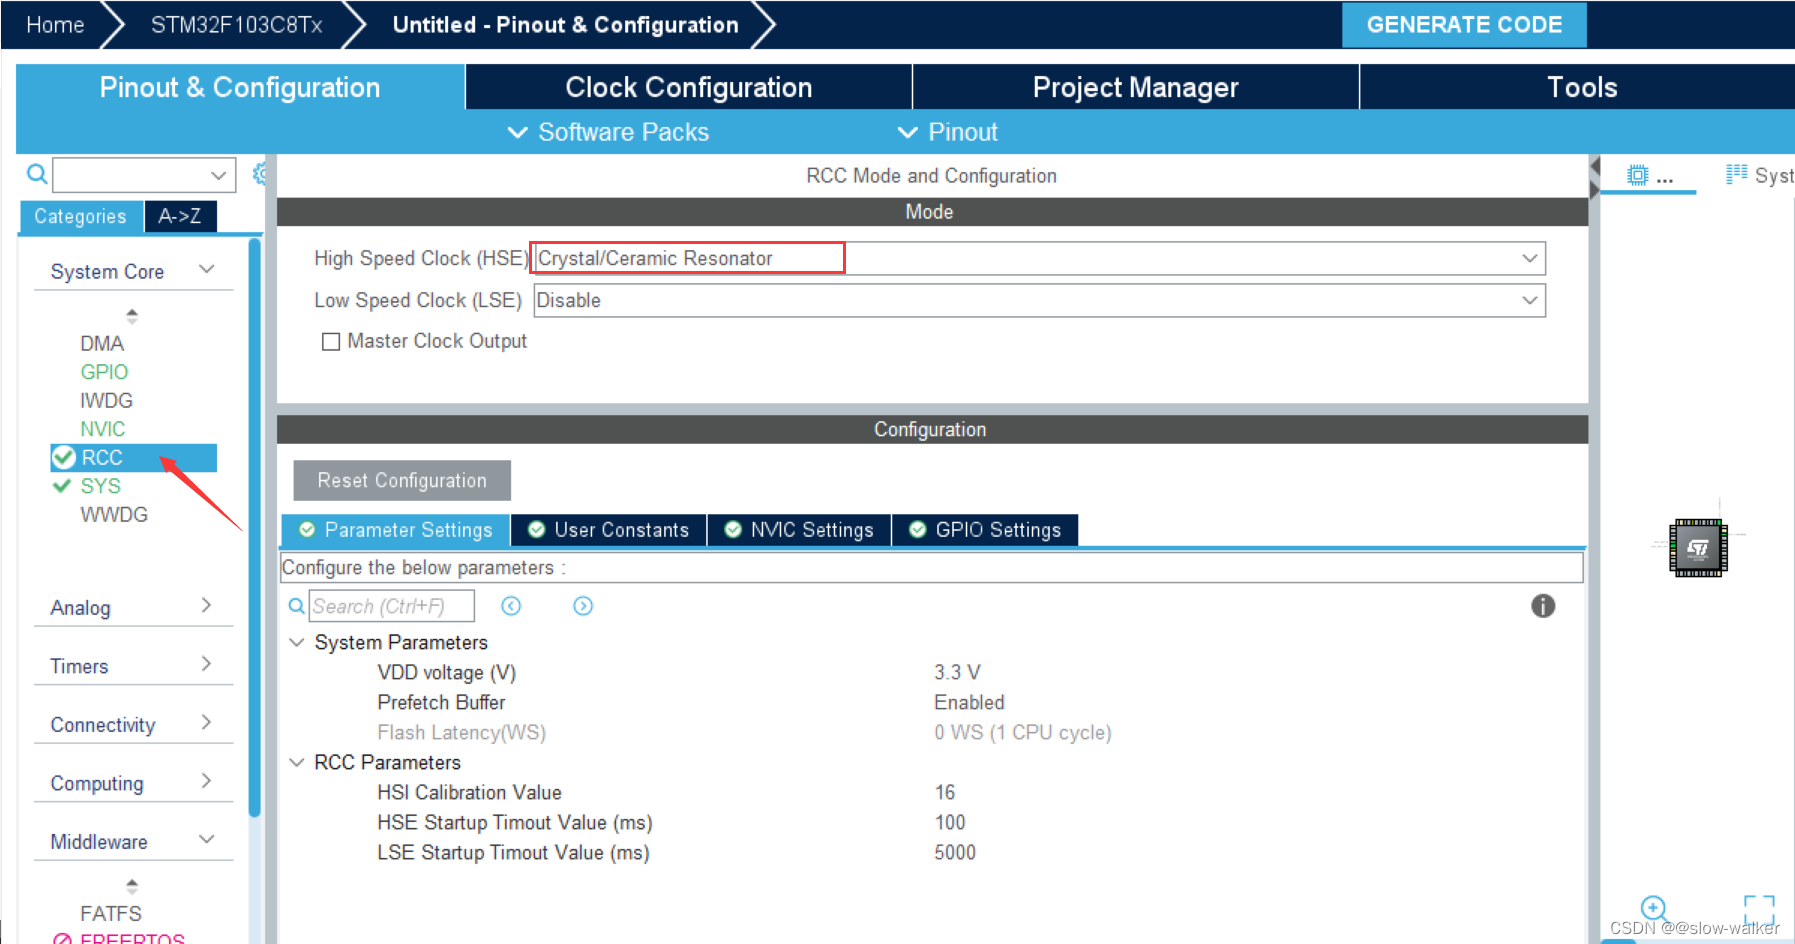
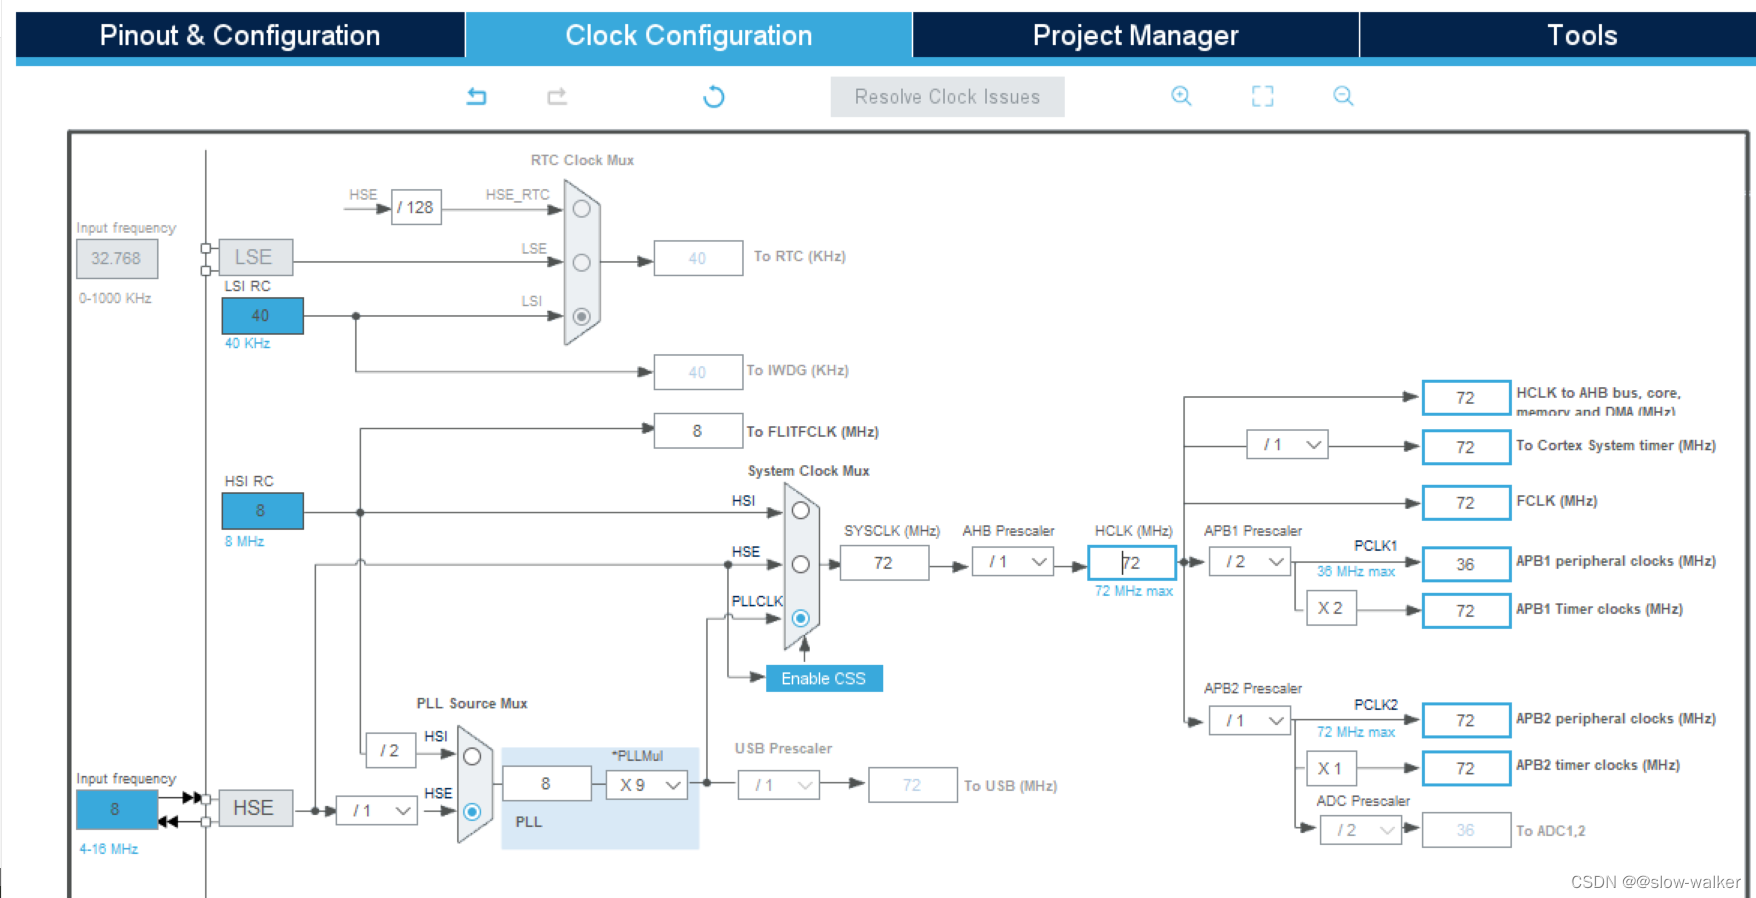
下面进行时钟和引脚的配置 后就可以生成工程了
引脚配置为PC13 LED为例
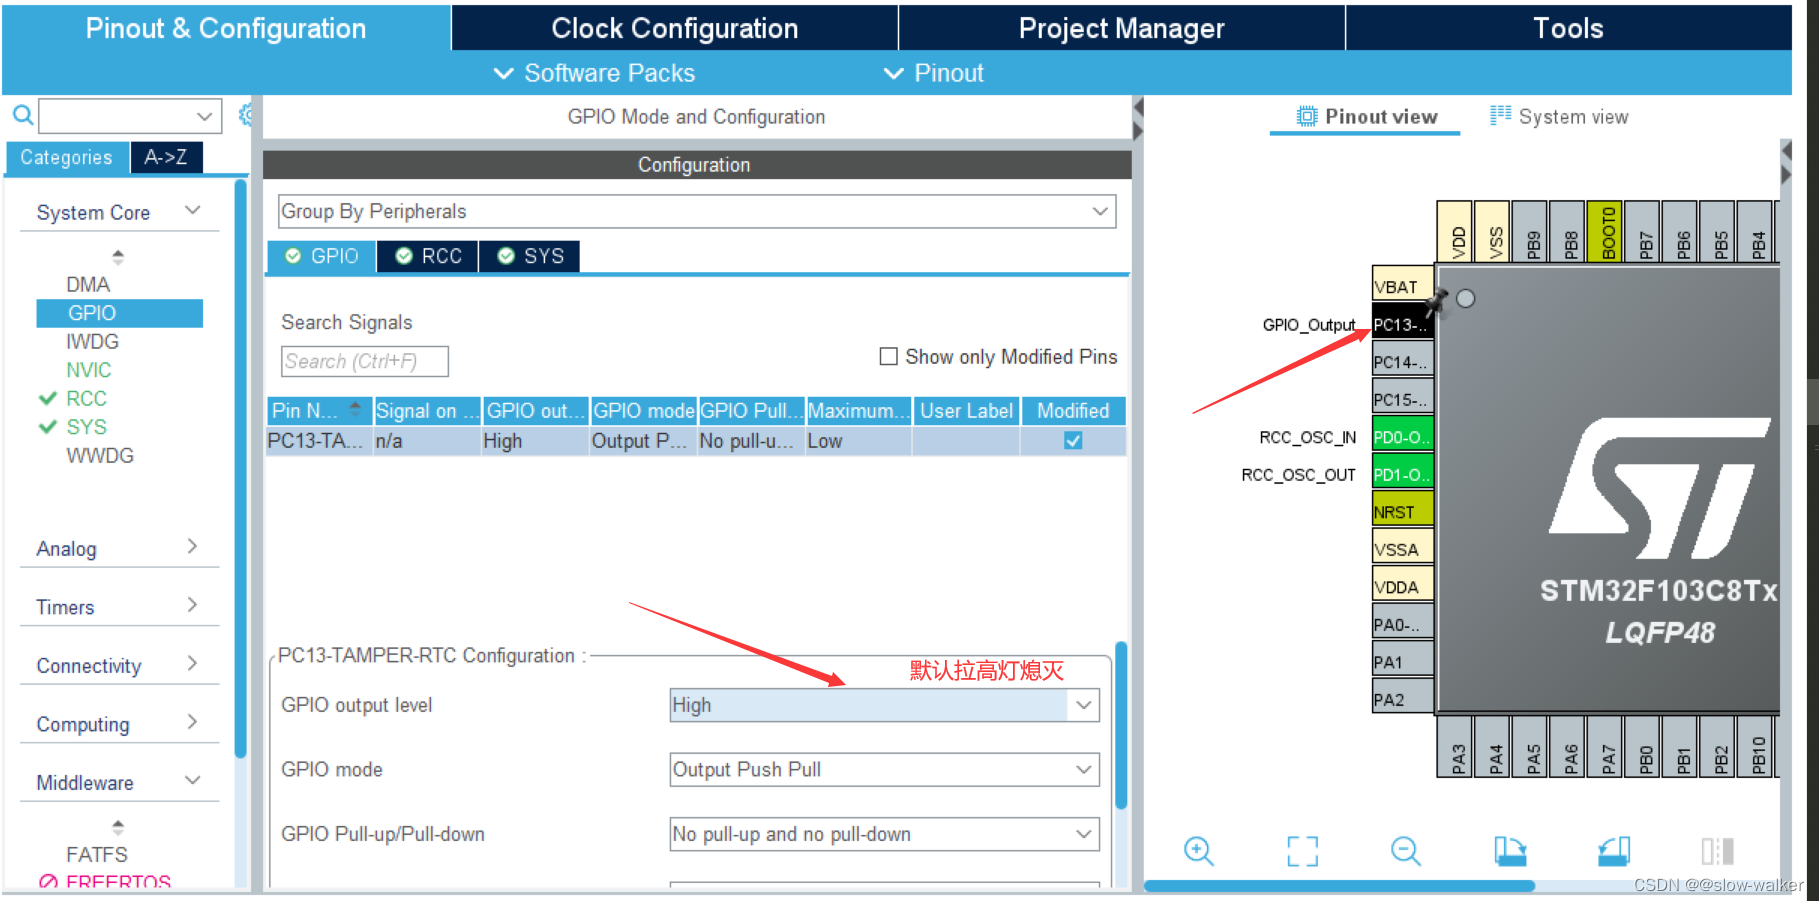
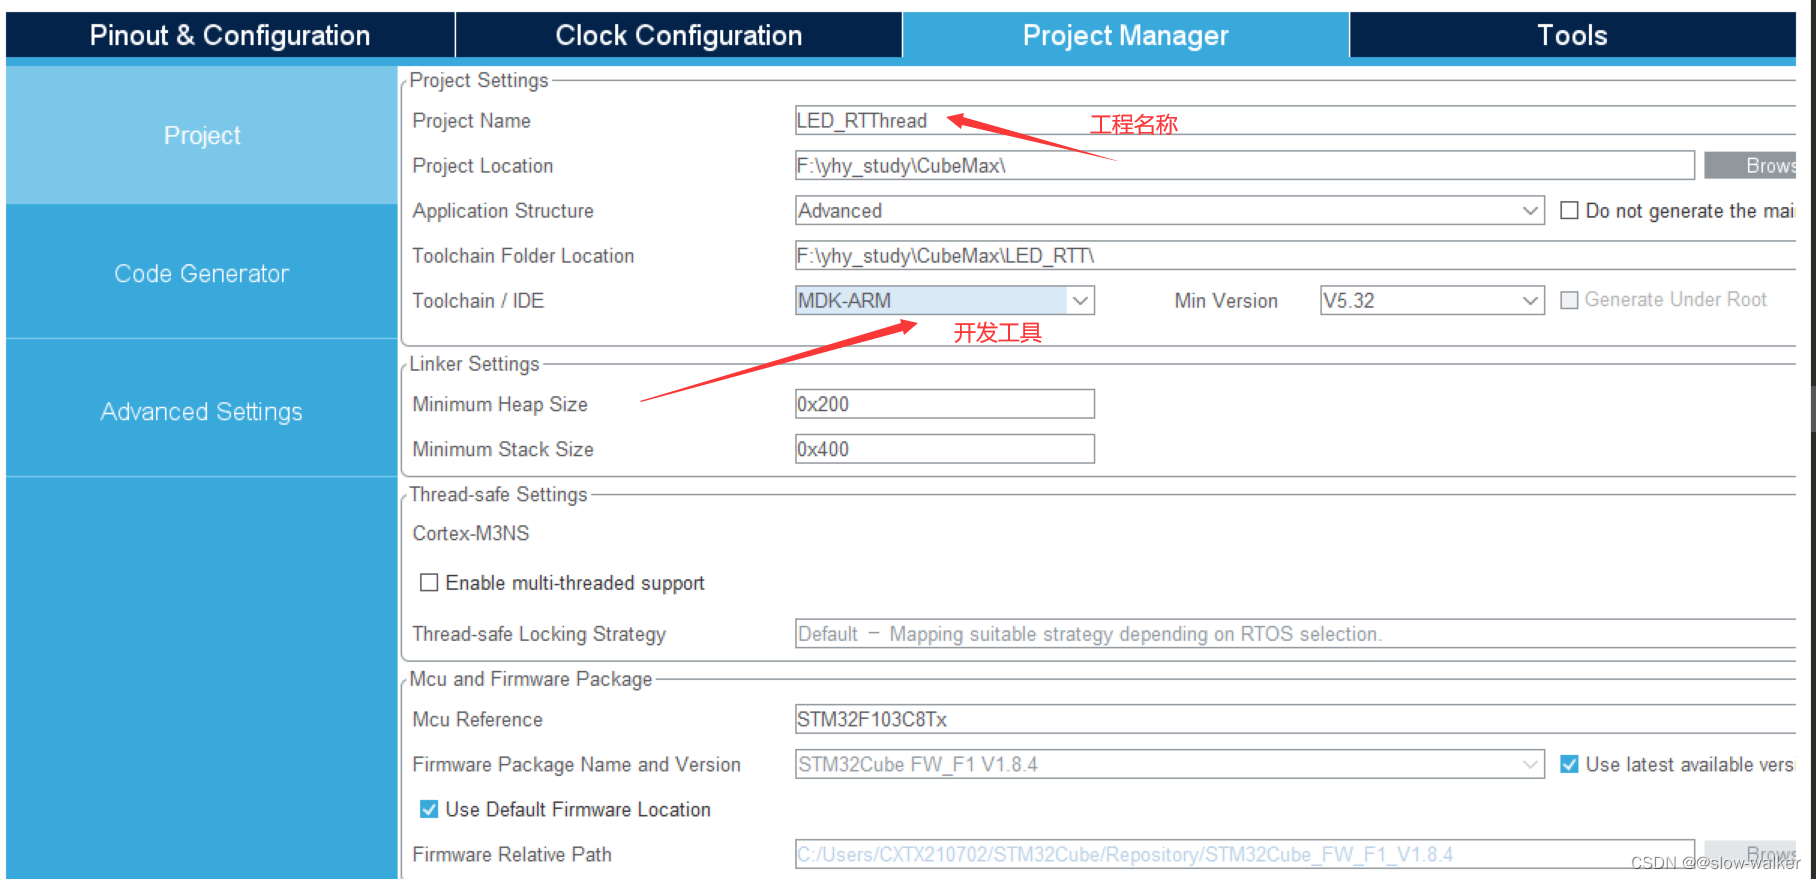
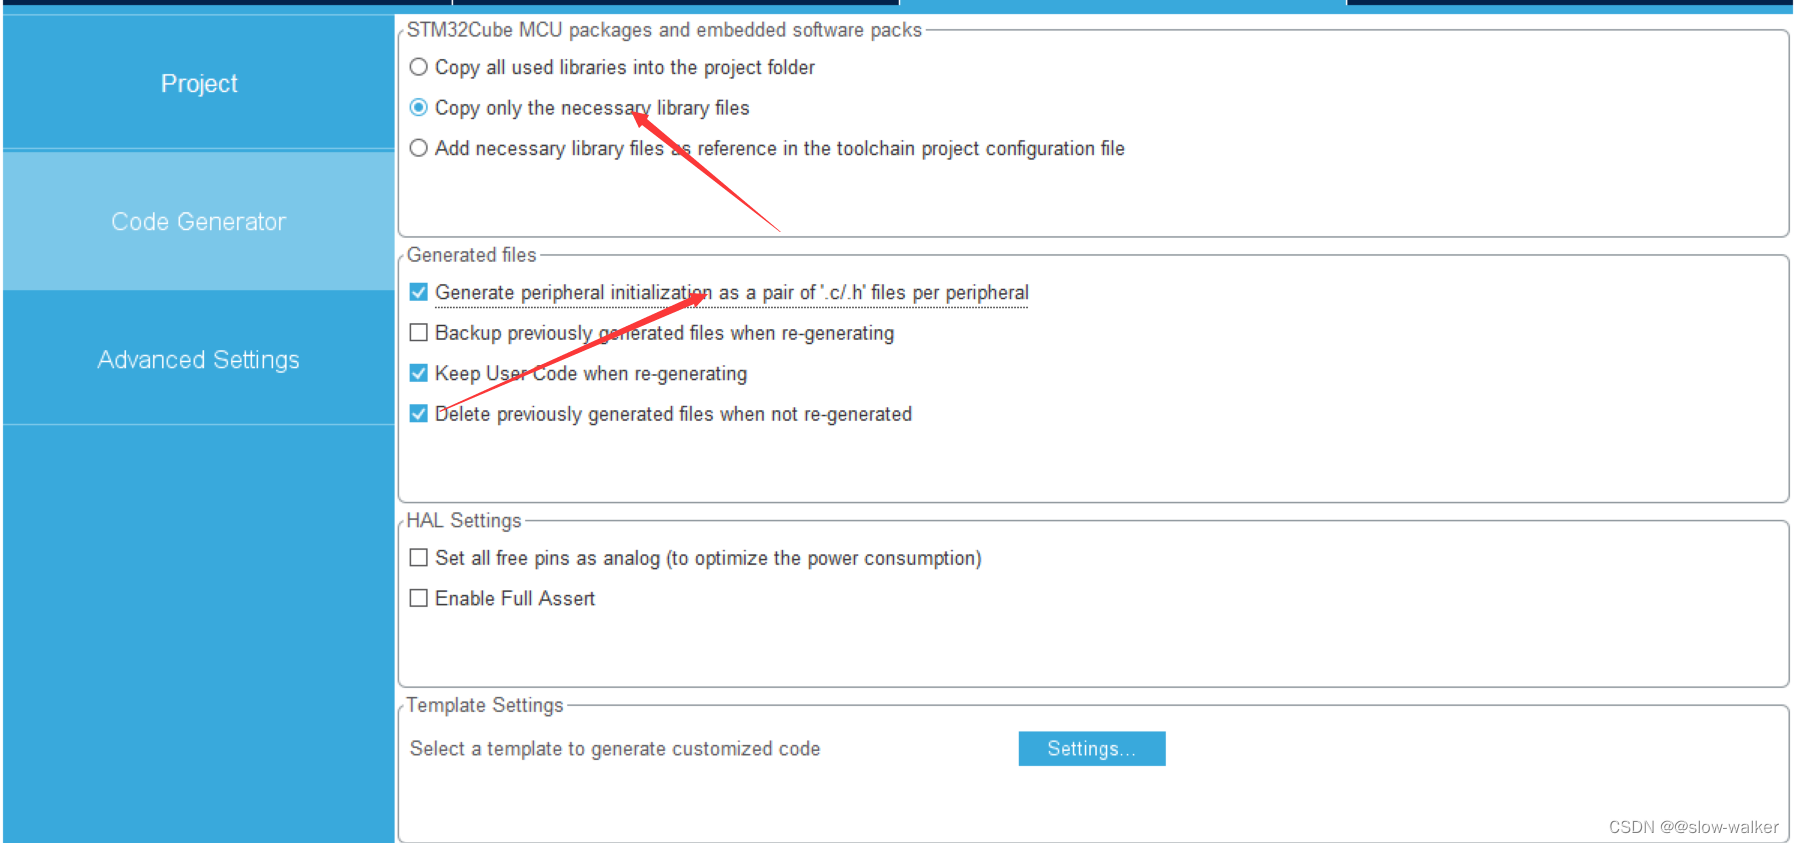
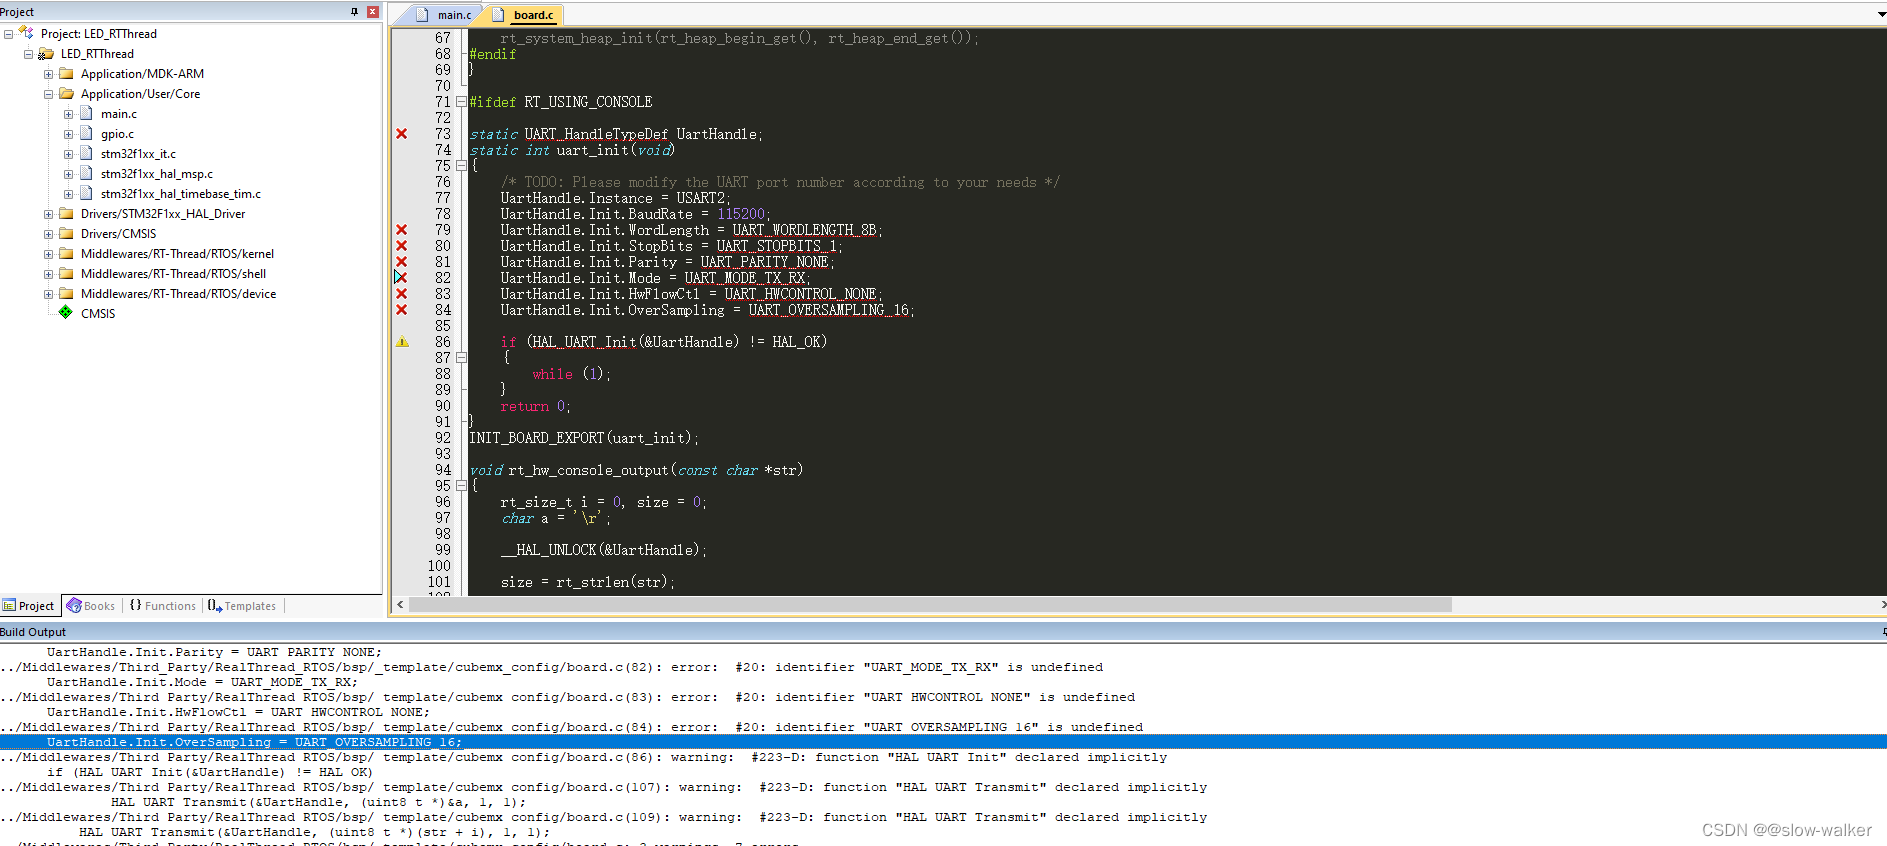
最后在生成代码即可,成功后打开工程 编译完发现有几个串口相关的错误,原因是在RTT中有使用串口,我们在MX中并没有进行配置
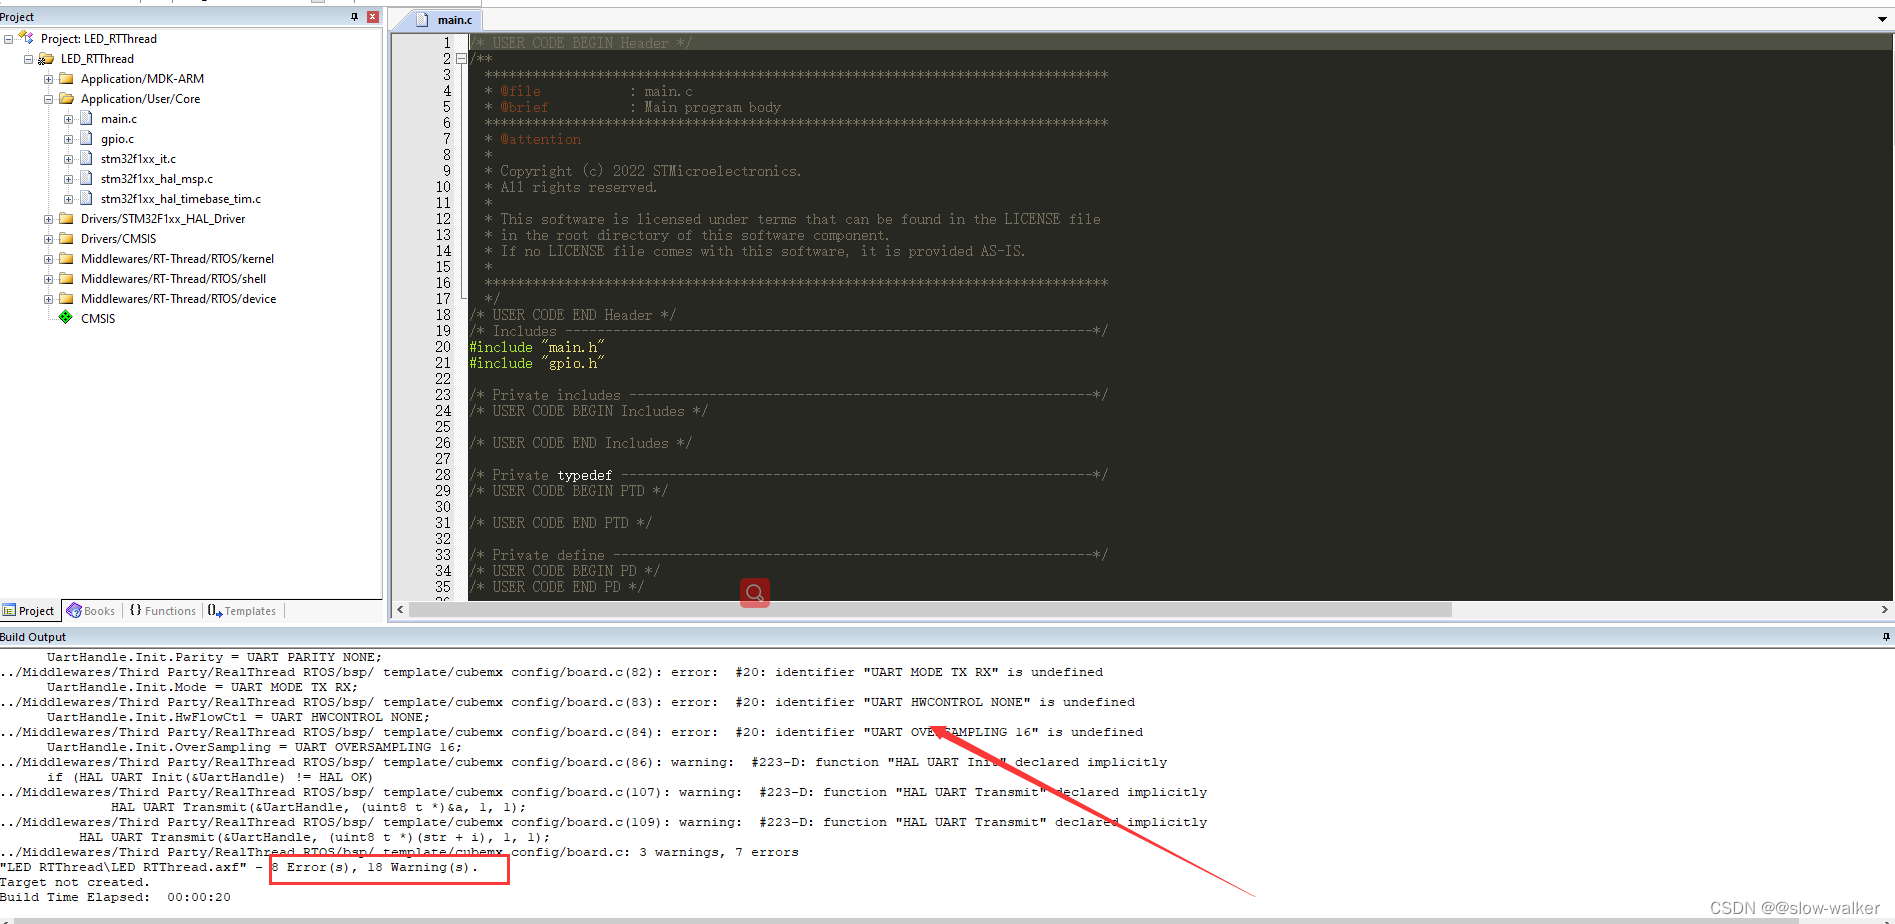
查看从错误可知 配置为串口2 我们去CubeMax中进行配置 重新生成个成功在编译即可
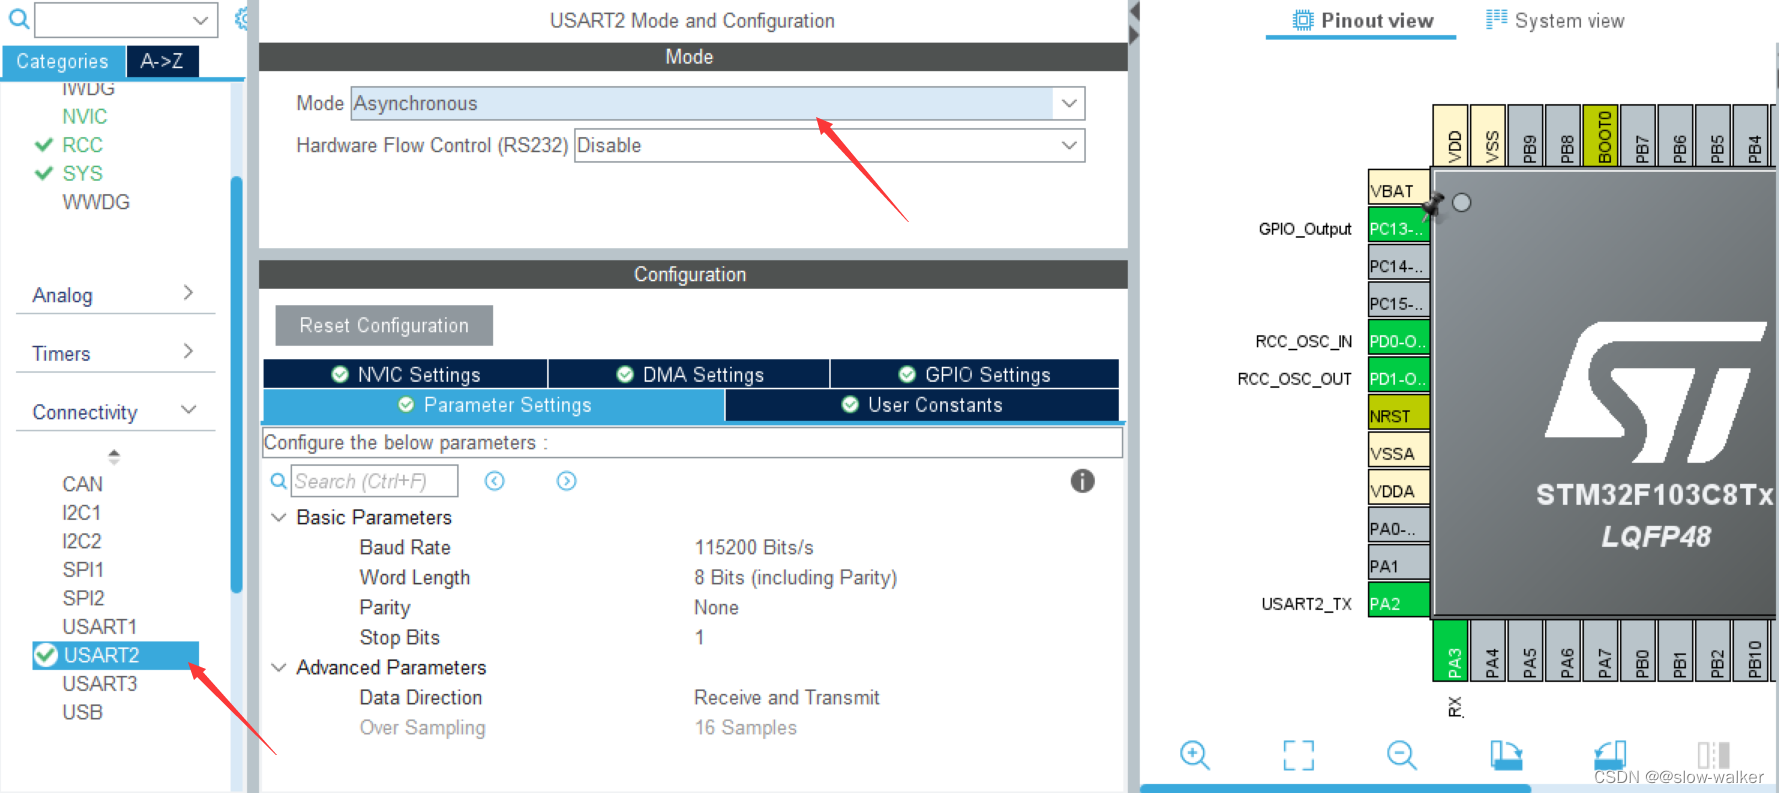
编译完之前的串口相关的错误就没有了,还剩下一个错误
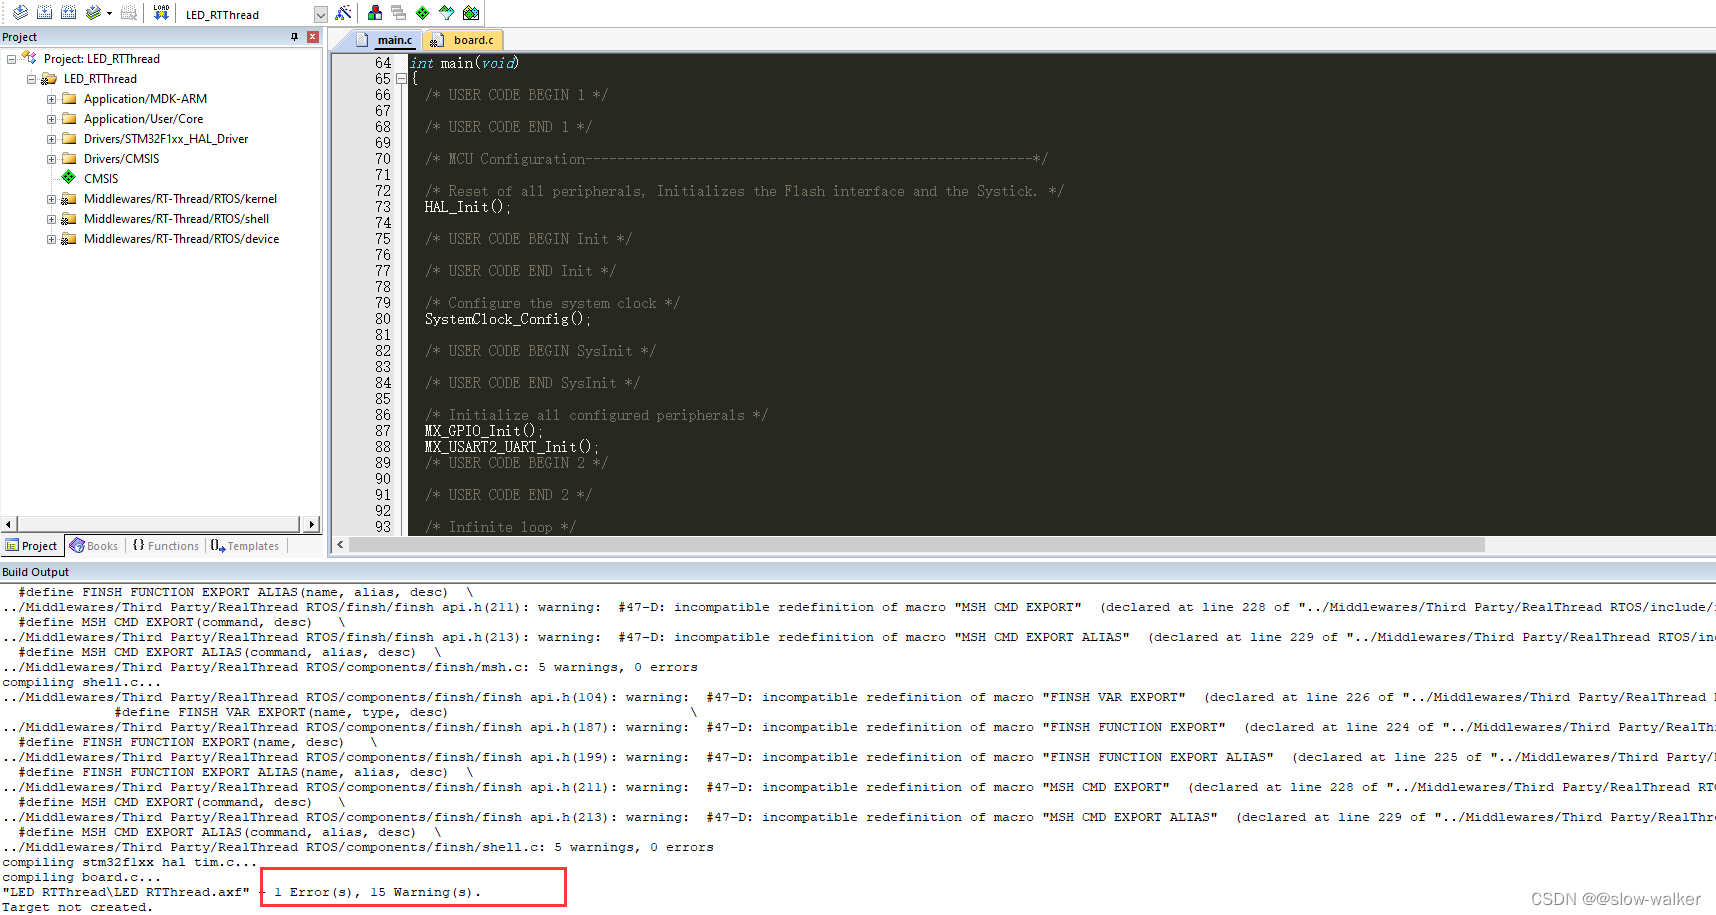
…/Middlewares/Third_Party/RealThread_RTOS/components/finsh/finsh_port.c(14): error: #35: #error directive: Please uncomment the line <#include “finsh_config.h”> in the rtconfig.h

解决方法

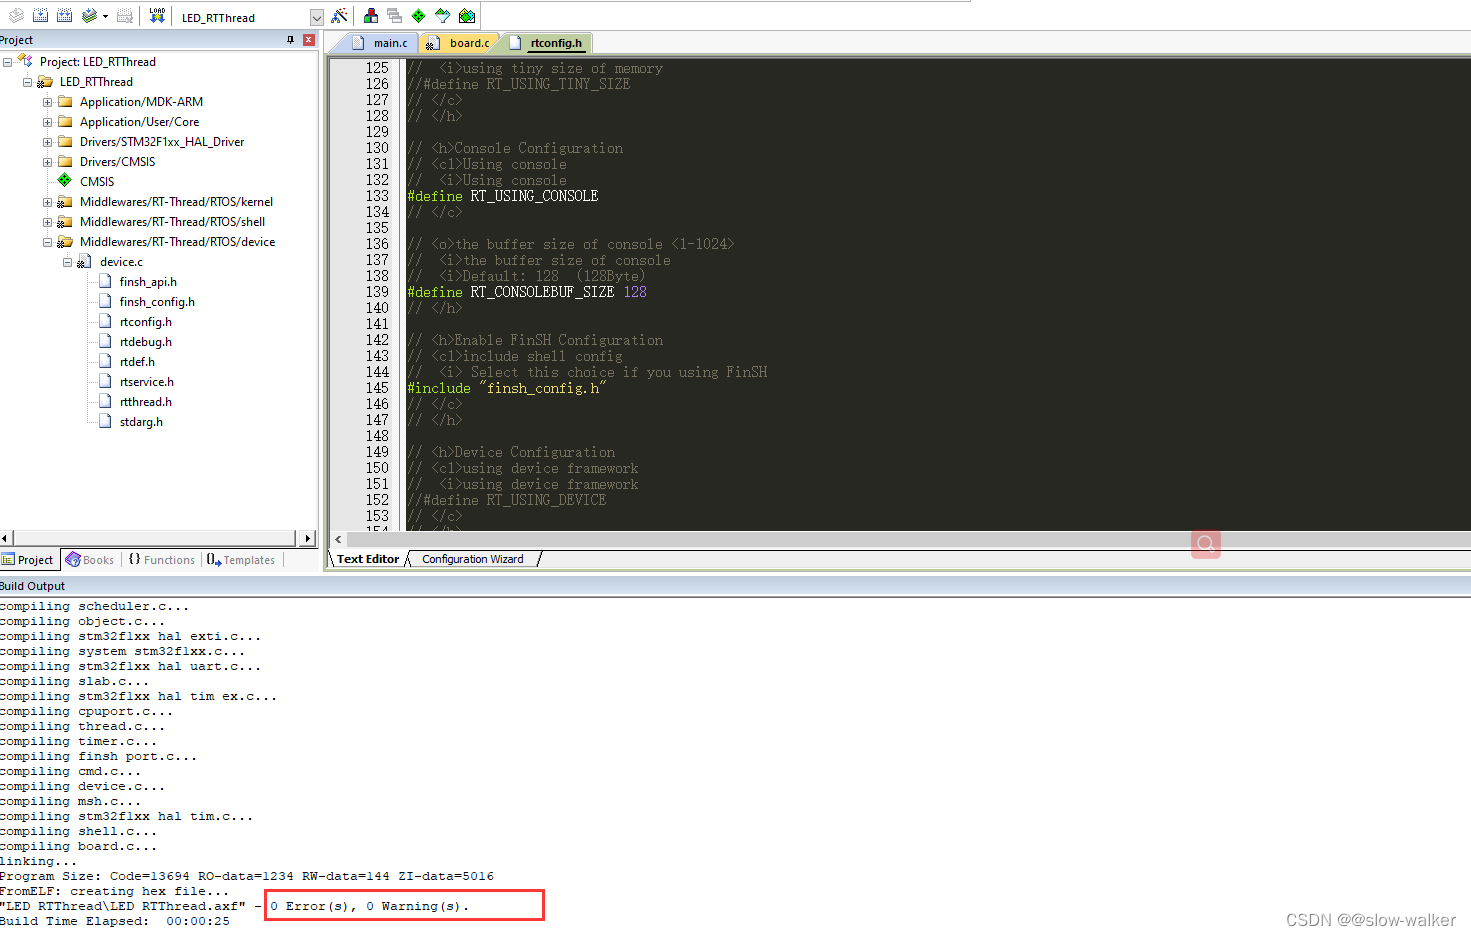
app_rt_thread.c
添加app_rt_thread.c 和app_th_thread.h 应用文件 在里面实现点灯操作
#include "rtthread.h"
#include "app_rt_thread.h"
#include "stdio.h"
#include "main.h"


struct rt_thread led_thread;
rt_uint8_t rt_led_thread_stack[128];
void led_task_entry(void *parameter);

//初始化线程函数
void MX_RT_Thread_Init(void)
{
	//初始化LED线程
	rt_thread_init(&led_thread,"led",led_task_entry,RT_NULL,&rt_led_thread_stack[0],sizeof(rt_led_thread_stack),3,20);
	//开启线程调度
	rt_thread_startup(&led_thread);
}


//LED任务
 void led_task_entry(void *parameter)
{
	while(1)
	{
		HAL_GPIO_WritePin(GPIOC,GPIO_PIN_13,GPIO_PIN_SET);

		rt_thread_delay(500);
		HAL_GPIO_WritePin(GPIOC,GPIO_PIN_13, GPIO_PIN_RESET);
		rt_thread_delay(500);
	}
}
app_rt_thread.h
#ifndef _APP_RT_THREAD_H_
#define _APP_RT_THREAD_H_

void MX_RT_Thread_Init(void);
#endif
main.c
/* USER CODE BEGIN Header */
/**
  ******************************************************************************
  * @file           : main.c
  * @brief          : Main program body
  ******************************************************************************
  * @attention
  *
  * Copyright (c) 2022 STMicroelectronics.
  * All rights reserved.
  *
  * This software is licensed under terms that can be found in the LICENSE file
  * in the root directory of this software component.
  * If no LICENSE file comes with this software, it is provided AS-IS.
  *
  ******************************************************************************
  */
/* USER CODE END Header */
/* Includes ------------------------------------------------------------------*/
#include "main.h"
#include "usart.h"
#include "gpio.h"

/* Private includes ----------------------------------------------------------*/
/* USER CODE BEGIN Includes */
#include "app_rt_thread.h"         //添加应用程序头文件
/* USER CODE END Includes */

/* Private typedef -----------------------------------------------------------*/
/* USER CODE BEGIN PTD */

/* USER CODE END PTD */

/* Private define ------------------------------------------------------------*/
/* USER CODE BEGIN PD */
/* USER CODE END PD */

/* Private macro -------------------------------------------------------------*/
/* USER CODE BEGIN PM */

/* USER CODE END PM */

/* Private variables ---------------------------------------------------------*/

/* USER CODE BEGIN PV */

/* USER CODE END PV */

/* Private function prototypes -----------------------------------------------*/
void SystemClock_Config(void);
/* USER CODE BEGIN PFP */

/* USER CODE END PFP */

/* Private user code ---------------------------------------------------------*/
/* USER CODE BEGIN 0 */

/* USER CODE END 0 */

/**
  * @brief  The application entry point.
  * @retval int
  */
int main(void)
{
  /* USER CODE BEGIN 1 */
	MX_RT_Thread_Init();             //初始化线程
  /* USER CODE END 1 */

  /* MCU Configuration--------------------------------------------------------*/

  /* Reset of all peripherals, Initializes the Flash interface and the Systick. */
  HAL_Init();

  /* USER CODE BEGIN Init */

  /* USER CODE END Init */

  /* Configure the system clock */
  SystemClock_Config();

  /* USER CODE BEGIN SysInit */

  /* USER CODE END SysInit */

  /* Initialize all configured peripherals */
  MX_GPIO_Init();
  MX_USART2_UART_Init();
  /* USER CODE BEGIN 2 */

  /* USER CODE END 2 */

  /* Infinite loop */
  /* USER CODE BEGIN WHILE */
  while (1)
  {
    /* USER CODE END WHILE */
    /* USER CODE BEGIN 3 */
  }
  /* USER CODE END 3 */
}
实验现象LED以500ms间隔亮灭
工程源码需要可自行下载
链接:https://pan.baidu.com/s/1cuteK0HZfUVrvzoYAzlh9w?pwd=9u4t
提取码:9u4t
–来自百度网盘超级会员V5的分享
