背景
业务
我们公司为甲方做一个报价类的小程序,别人报价可以实时的监听到,这样就肯定需要消息通讯机制,并且我们这个业务是双端同时操作的,也就是网页端有网页端的报价功能,小程序有小程序的,而且内容是一个的,也就是同时可以在小程序和网页端报价,这里websocket就离不开了
问题
因为一般牵扯到websocket就应该要想到实现断线重连和心跳机制的问题,毕竟websocket是一个长连接,需要一直保持连接的,当服务端(服务器挂掉了)或者客户端(断网)断开连接的时候,如果不采取相关的措施,服务端还好,服务端监听不到连接会自动断开,但是客户端就不一样了,客户端首先会有相关的报错
VM8 asdebug.js:1 WebSocket connection to 'ws://192.168.1.30:8090/mxshop/websocket/jjbidsocket?userid=83_YN240113_1629249993053' failed: Error in connection establishment: net::ERR_INTERNET_DISCONNECTED(env: Windows,mp,1.05.2107222; lib: 2.17.0)
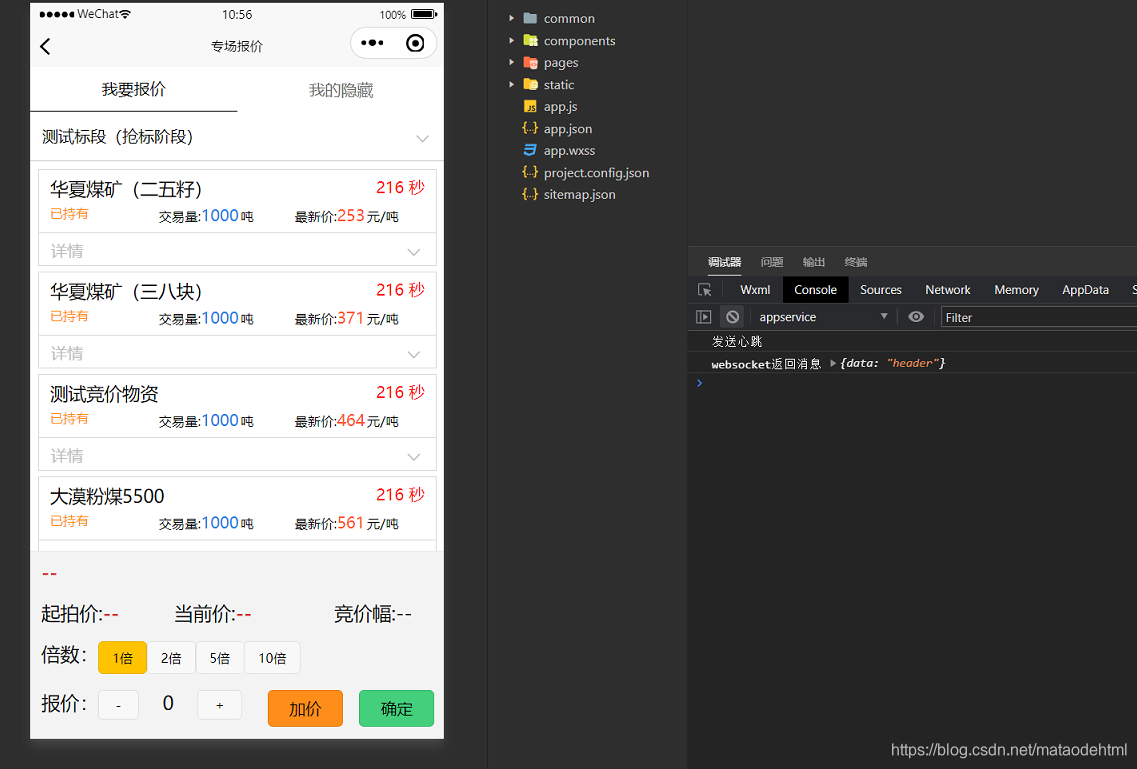
这里就会直接其实连不上websocket了。然后我们的页面是这样(下图),这里用户的感觉就是明明啥都没有,倒计时还在走,但是其实服务器已经断开连接了,而且别人再去报价也监听不到了。
 针对以上的问题,websocket的断线重连和心跳机制就显得尤为重要了。
这里为大家解释一下我理解的断线重连和心跳机制
断线重连
??断线重连的意思就是在使用websocket的时候自己的网络不稳定,导致客户端websocket断开连接获取连接不上,这时候我们开发人员就需要在连接机制中加入断线重连机制,不需要用户手动去刷新页面,我们的做法就是连接不上的时候获取自动断开的时候可以重新的自动进行轮训连接,定时器定时去连接,连接成功之后就自动关闭定时器。
心跳机制
??心跳机制的作用就是监听服务端是否正常,一般来说服务器都是相对稳定的,但是也有特别情况,比如服务器停电了,服务器停电了客户端如果一直在页面不懂,websocket其实已经无法与后端进行长连接了,这时候及时别人操作系统,你还是没有得到任何反馈的,心跳机制的意义就在于客户端和服务端每隔一段时间就主动发消息一次,说明服务端还在,如果当前客户端发送消息没有得到反馈,那么就可以判定服务器出现了问题,这时候就需要去和用户提示服务器挂了,然后开启定时重连机制,一直到服务器能连上为止。
官网方案
说到官网,大家都知道,任何一个产品都有自己的api,当然uniapp也不例外,但是一般api都能看懂,但是用起来就知道都有相关的问题。官网没有对断线重连和心跳机制进行补充,只有对应的连接方案,没有断线和心跳的处理方案:
//开启链接
uni.connectSocket({
    url: 'wss://www.example.com/socket',
    data() {
        return {
            x: '',
            y: ''
        };
    },
    header: {
        'content-type': 'application/json'
    },
    protocols: ['protocol1'],
    method: 'GET'
});
//开启后回调
uni.onSocketOpen(function (res) {
  console.log('WebSocket连接已打开!');
});
//链接失败
uni.onSocketError(function (res) {
  console.log('WebSocket连接打开失败,请检查!');
});
//发送消息
uni.sendSocketMessage({
      data: msg
});
//收到消息
uni.onSocketMessage(function (res) {
  console.log('收到服务器内容:' + res.data);
});
//关联链接
uni.closeSocket();
//关闭的回调
uni.onSocketClose(function (res) {
  console.log('WebSocket 已关闭!');
});
我的方案
我自己的解决方案就是按照官网的例子,然后根据断线重连机制和心跳机制原理来操作的,上代码:
		data(){
				return {
					reTimenum:2000,//3秒一次重新链接
					reTimer:null,//重新链接的对象
					headerTimer:null, //心跳定时器对象
					headerTime:2000, //心跳时间
					closeTimer:null, //自动关闭连接定时器对象
					closeTime:3000, //自动关闭时间

					showWarn:false,//是否展示网络不稳定警告
				}
}
methods
	getConnectWebSocket(){
				var that = this
				that.connectWebSocket()
				uni.onSocketOpen(function (res) {
				  console.log('WebSocket连接已打开!');
				  //链接打开,开启心跳
				  that.sendHeader()
				  //心跳没有返回,则自动关闭链接
				  that.closeConn()
				});
				uni.onSocketMessage(function (msg) {
					console.log("websocket返回消息",msg)
					if(msg.data=='SUCCESS' || msg.data=='header'){
						//心跳机制,不做业务处理
						//有心跳删除关闭连接定时器
						clearTimeout(that.closeTimer)
						//删除当前定时的后在打开新的一个定时的
						that.closeConn()
						//判断是否需要重新加载数据
						if(msg.data == "SUCCESS"){
							//链接成功
							if(that.showWarn){
							//判断是否是重连的,是的话就刷新页面
								that.loadData()
							}
							//显示网络不稳定提示
							that.showWarn = false
						}
						return
					}
				  //下面是业务处理
				   ......
				});
				uni.onSocketError(function (res) {
				  console.log('WebSocket连接打开失败,请检查!');
				});
				uni.onSocketClose(function(res){
					//关闭心跳  并重新链接
					 clearInterval(that.headerTimer)
					 console.log('WebSocket连接关闭,请检查!',res);
					 if(res.code!=null && res.code!=1000){
						 //非正常关闭  提示网络异常并开始重新链接
						 that.showWarn = true
						 //清除物资倒计时
						 that.showList.map(item=>{
							 clearInterval(that.wzTimer[item.id])
						 })
						 //开启重复重连机制
						 that.reConnectWebSocket()
					 }
				})
			},
			//重连
			reConnectWebSocket(){
				var that = this
				this.reTimer = setTimeout(()=>{
					//重新连接websocket,连接成功后关闭重新链接对象
					that.connectWebSocket()
				},this.reTimenum)
			},
			connectWebSocket(){
				uni.connectSocket({
				    url: BASE_URL.WEB_SOCKET_URL+"?userid="+this.bidid+"_"+this.supplyno+"_"+new Date().getTime(),//这里是自己的地址
				    method: 'GET',
					success(data) {
						console.log("websocket连接返回",data);
					},
				});
			},
			//心跳
			sendHeader(){
				console.log("发送心跳sendHeader")
			    var that = this
				clearInterval(this.headerTimer)
				this.headerTimer = setInterval(()=>{
					console.log("发送心跳")
				        uni.sendSocketMessage({
				        	data: "header"
				        });
				    },this.headerTime)
			},
			//关闭
			closeConn(){
				//6秒后没有心跳则  关闭链接
				this.closeTimer = setTimeout(()=>{
					console.log("执行关闭定时器内容")
					uni.closeSocket({
						code:1001,
						reason:'断线',
						complete(res) {
							console.log("websocket关闭complete",res)
						}
					})
				},this.closeTime)
			},
我的运行结果:
正常连接的页面:
 网络断开的页面
 网络重新连接上的页面

本来本地使用微信开发者工具测试好好地,但是当小程序发布到微信后台,使用体验版测试的时候发现:当手动断网之后,小程序会提示:
(in promise)MiniProgramError(“errMsg”:"request:fail-105;net::ERR_NAME_NOT_…
然后页面重新连接的定时器就直接没有了。。。。 导致没办法重新进行连接了。。。坑死人了
大神方案
然后就在网上使劲的找解决方案,然后就找到了这篇文章小程序websocket心跳库――websocket-heartbeat-miniprogram,我也是抱着试一试的态度,我本地代码直接优化了一百多行,虽然引入了一个node_modules插件,代码修改之后的代码:
			getHeaderConnect() {
				var that = this
				 WebsocketHeartbeat({
						miniprogram: wx,
						connectSocketParams: {
							url: BASE_URL.WEB_SOCKET_URL + "?userid=" + this.bidid + "_" + this.supplyno + "_" +new Date().getTime(),
						},
						pingTimeout: this.headerTime,
						pongTimeout: this.closeTime,
						reconnectTimeout: this.reTimenum, //多少秒一次重新链接
						pingMsg: 'header'
					})
					.then(task => {
						that.wxHeadObj = task
						task.onOpen = () => { //钩子函数
							console.log('open');
						};
						task.onClose = () => { //钩子函数
							console.log('close');
							//非正常关闭  提示网络异常并开始重新链接
							that.showWarn = true
							//清除物资倒计时
							clearInterval(that.countTimer)
							that.showList.map(item => {
								clearInterval(that.wzTimer)
							})
						};
						task.onError = e => { //钩子函数
							console.log('onError:', e);
						};
						task.onMessage = msg => { //钩子函数
							console.log('onMessage', msg);
							if (msg.data == 'SUCCESS' || msg.data == 'header') {
								//判断是否需要重新加载数据
								if (msg.data == "SUCCESS") {
									//链接成功  判断是否是重连链接的,是的话重新加载数据
									if (that.showWarn) {
										that.loadData()
									}
									that.showWarn = false
								}
								return
							}
							//业务处理
							......
						};
						task.onReconnect = () => { //钩子函数
							console.log('reconnect...');
						};
						task.socketTask.onOpen(data => { //原生实例注册函数,重连后丢失
							console.log('socketTask open');
						});
						task.socketTask.onMessage(data => { //原生实例注册函数,重连后丢失
							console.log('socketTask data');
						});
					})
			},
其实一看就知道,简化了很多的代码,只是给封装起来了,然后本地运行的效果和上面的一样,然后就尝试发布到微信服务器,使用体验版进行测试,发现定时器还在!!! 完美的解决了我的问题!! 哎 别人封装好的东西就是厉害,厉害大牛!!
记录一下,下次就不会走那么多弯路了