?SpringSecurity权限框架(终?章)
终?章
一、JWT
1、常用的WEB集中认证机制
- ① HTTP Basic Auth:每次请求会把用户名密码透露处理,导致安全性很低,所以现在很少使用
- ② Cookie Auth :有HTTP的缺点而诞生,配合Session,Session中保存用户名密码,Cookie则负责保存SeesionID,Cookie保存在客户端,默认在我们关闭客户端时自动删除
- ③ OAuth:一个开放的授权标准,使用令牌,不用用户名和密码来访问用户资源 缺点:过重
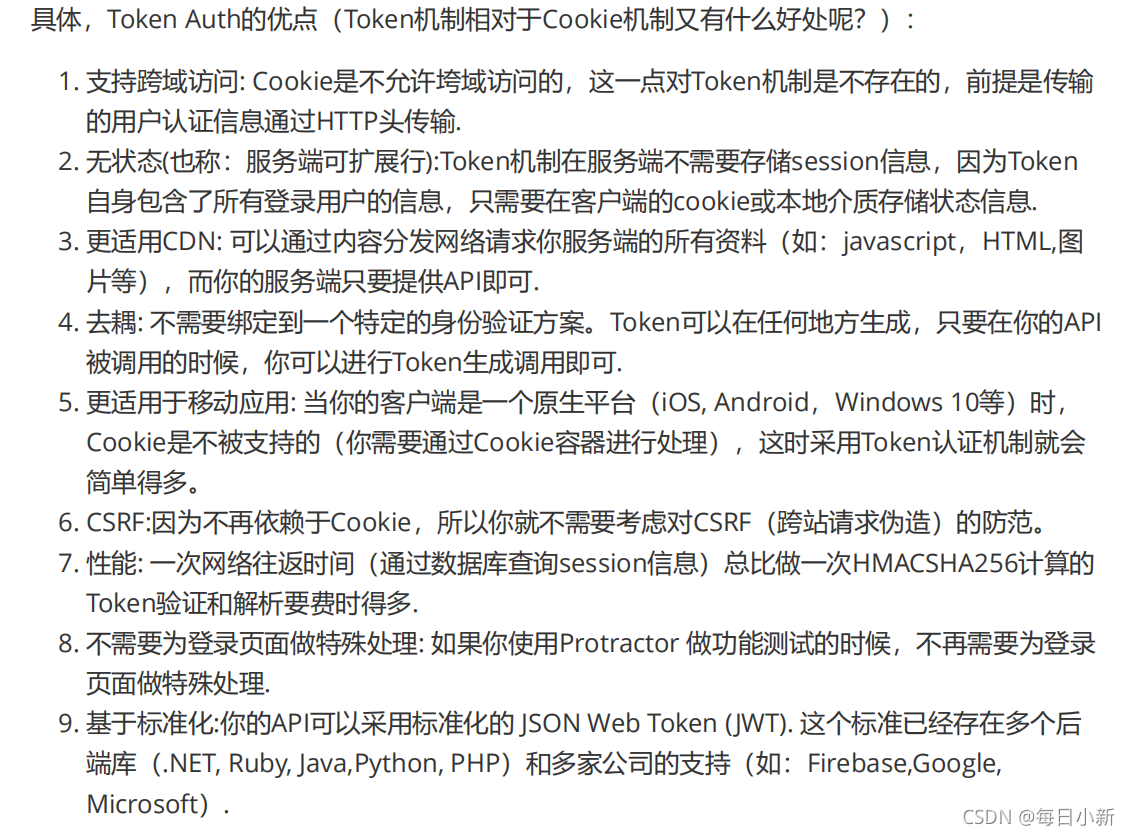
- ④ Token Auth:基于Token的身份验证,流程是:用户请求登录,服务器验证无误返回用户一个Token,Token会被存放起来,比如Cookie中,当用户访问时,服务器就会验证Token,验证无误,则返回数据给用户。
比第一种方式更安全,比第二种方式更节约服务器资源,比第三种方式更加轻量

2、什么是JWT?
JSON Web Token(JWT) 是一个开放的行业标准(RFC 7519),它定义了一种简介的、自包含的协议格式,用于在通信双方传递json对象,传递的信息经过数字签名可以被验证和信任。JWT可以使用HMAC算法或使用RSA的公钥/私钥对来签名,防止被篡改。一个JWT实际上就是一个字符串,它由三部分组成,头部、载荷与签名。
? 优点
- jwt基于json,非常方便解析。
- 可以在令牌中自定义丰富的内容,易扩展。
- 通过非对称加密算法及数字签名技术,JWT防止篡改,安全性高。
- 资源服务使用JWT可不依赖认证服务即可完成授权。
? 缺点
- JWT令牌较长,占存储空间比较大
? 整体三部分
头部:》》》

负载存放内容的地方,有公共生命,私有声明(这个指的就是自定义的claim)
标准中注册的声明:(建议不强制使用)
iss: jwt签发者
sub: jwt所面向的用户
aud: 接收jwt的一方
exp: jwt的过期时间,这个过期时间必须要大于签发时间
nbf: 定义在什么时间之前,该jwt都是不可用的.
iat: jwt的签发时间
jti: jwt的唯一身份标识,主要用来作为一次性token,从而回避重放攻击。
提示:声明中不要放一些敏感信息。
签证:由 1.header (base64后的) 2. payload (base64后的) 3. secret(盐,一定要保密)组成
总的来说就是三者组合到一起,在进行加密得出相似如下的字符串:
eyJhbGciOiJIUzI1NiIsInR9cCI6IkpXVCJ9.eyJzdWIiOiIxMjM0NTY3ODkwIiwibmFtZSI
6I kpvaG4gRG9lIiwiaWF0IjoxNTE2MjM5MDIyfQ.8HI-
Lod0ncfVDnbKIPJJqLH998duF9DSDGkx3gRPNVI
注意: secret 是保存在服务器端的, jwt 的签发生成也是在服务器端的, secret 就是用来进行 jwt 的签发和 jwt 的验证,所以,它就是你服务端的私钥,在任何场景都不应该流露出去。一旦客户端得知这个 secret , 那就意味着客户端是可以自我签发 jwt 了
3、JWT快速入门
① 引入依赖
  <parent>
    <groupId>org.springframework.boot</groupId>
    <artifactId>spring-boot-starter-parent</artifactId>
    <version>2.2.2.RELEASE</version>
    <relativePath/>
    <!-- lookup parent from repository -->
  </parent>

 <!--JWT依赖-->
    <dependency>
      <groupId>io.jsonwebtoken</groupId>
      <artifactId>jjwt</artifactId>
      <version>0.9.0</version>
    </dependency>
     <dependency>
      <groupId>org.springframework.boot</groupId>
      <artifactId>spring-boot-starter-web</artifactId>
    </dependency>
    <dependency>
      <groupId>org.springframework.boot</groupId>
      <artifactId>spring-boot-starter-test</artifactId>
      <scope>test</scope>
      <exclusions>
        <exclusion>
          <groupId>org.junit.vintage</groupId>
          <artifactId>junit-vintage-engine</artifactId>
        </exclusion>
      </exclusions>
    </dependency>
② 编写测试类
Jwtest.java
/*令牌测试*/
public class Jwtest {

    @Test
    public void test(){
        /*
        * 创建token
        * */
        //设置有效时间
       long time= System.currentTimeMillis()+60*1000*5;
       //创建一个JwtBuilder对象
        JwtBuilder jwtBuilder = Jwts.builder()
                //声明的标识{"jti":"888"}
                .setId("888")
                //主体,用户{"sub":"Rose"}
                .setSubject("Rose")
                //创建日期{"ita":"yjxxtxx"}
                .setIssuedAt(new Date())
                //签名手段,参数1:算法,参数2:盐
                .signWith(SignatureAlgorithm.HS256,"yjxxt")
                //自定义内容
                .claim("name","李四")
                .claim("age",20)
                //设置有效时间
                .setExpiration(new Date(time));
        //获取jwt的token
        String token = jwtBuilder.compact();
        System.out.println(token);
        //三部分的base64解密 System.out.println("--------------------");
        String[] split = token.split("\\.");
        System.out.println(Base64Codec.BASE64.decodeToString(split[0]));
        System.out.println(Base64Codec.BASE64.decodeToString(split[1]));
        //无法解密
        System.out.println(Base64Codec.BASE64.decodeToString(split[2]));
    }

    /*
    * Token解密
    * */
    @Test public void testParseToken(){
        //token
        String token = "eyJhbGciOiJIUzI1NiJ9.eyJqdGkiOiI4ODgiLCJzdWIiOiJSb3NlIiwiaWF0IjoxNjM2MTY2NzQ1LCJuYW1lIjoi5p2O5ZubIiwiYWdlIjoyMCwiZXhwIjoxNjM2MTY3MDQ1fQ.8fAPDicsFGg7-wg7dVSQbhqVPYm9TTrOdhdwOpO1leE";
//MalformedJwtException代表token被修改过
//ExpiredJwtException代笔token已经失效

        // 解析token获取负载中的声明对象
        Claims claims = Jwts.parser()
                .setSigningKey("yjxxt")
                .parseClaimsJws(token)
                .getBody();
        //打印声明的属性
        System.out.println("id:"+claims.getId());
        System.out.println("subject:"+claims.getSubject());
        System.out.println("issuedAt:"+claims.getIssuedAt());
        System.out.println(claims.get("name"));
        System.out.println(claims.get("age"));
    }
}


Token,不能修改,一但有一点不一样则会报错,案例里还设置了有效时间,一旦过期也会报错,还有自定义内容claim()的添加
二、Spring Security Oauth2 整合JWT
1、JWT整合(基于Oauth密码模式修改)
① 添加JWT配置文件
JwtConfig .java
@Configuration
public class JwtConfig {
    /*** 使用Jwt存储token的配置 ** @since 1.0.0 */
   @Bean
   public TokenStore jwtTokenStore(){
        return new JwtTokenStore(jwtAccessTokenConverter());
   }
   @Bean
   public JwtAccessTokenConverter jwtAccessTokenConverter(){
       JwtAccessTokenConverter accessTokenConverter = new JwtAccessTokenConverter();
       //配置JWT使用的秘钥
       accessTokenConverter.setSigningKey("ailike");
       return accessTokenConverter;
   }
}
② 认证服务器配置中指定令牌的存储策略为JWT
/**
 * 授权服务器配置
 *
 * @since 1.0.0
 */
@Configuration
@EnableAuthorizationServer
public class AuthorizationServerConfig extends AuthorizationServerConfigurerAdapter {

    @Autowired
    private PasswordEncoder passwordEncoder;

    @Autowired
    private AuthenticationManager authenticationManager;//认证管理器

    @Resource
    private UserService userService;

    @Autowired
    @Qualifier("jwtTokenStore") //预选
    private TokenStore tokenStore;

    @Autowired
    private JwtAccessTokenConverter jwtAccessTokenConverter;//Jwt 访问令牌转换器

    /**
     * 密码模式
     * @param endpoints
     * @throws Exception
     */
    @Override
    public void configure(AuthorizationServerEndpointsConfigurer endpoints) throws Exception {
        endpoints.authenticationManager(authenticationManager)
                .userDetailsService(userService)
                //配置存储令牌策略
                .tokenStore(tokenStore)
                .accessTokenConverter(jwtAccessTokenConverter);
    }

    @Override
    public void configure(ClientDetailsServiceConfigurer clients) throws Exception {
        clients.inMemory()
                //配置client_id
                .withClient("admin")
                //配置client-secret
                .secret(passwordEncoder.encode("112233"))
                //配置redirect_uri,用于授权成功后跳转
                .redirectUris("http://www.baidu.com")
                //配置申请的权限范围
                .scopes("all")
                //配置grant_type,表示授权类型
                .authorizedGrantTypes("authorization_code","password");
    }
}
使用密码模式测试:

拿令牌到jwt.io官网解密:

2、扩展JWT中存储的内容
① 创建JwtPlus.java继承TokenEnhancer实现一个JWT内容增强器
/*JWT内容增强器*/
public class JwtPlus implements TokenEnhancer {
    @Override
    public OAuth2AccessToken enhance(OAuth2AccessToken accessToken, OAuth2Authentication authentication) {
        Map<String,Object> info = new HashMap<>();
        info.put("enhance","enhance info");
        ((DefaultOAuth2AccessToken)accessToken)
                .setAdditionalInformation(info);
        return accessToken;
    }
}
② JwtConfig.java中增加配置
//配置对象
@Bean
    public JwtPlus jwtTokenEnhancer() {
       return new JwtPlus();
   }
③ 在认证服务器配置中配置JWT的内容增强器
	@Autowired
    private JwtPlus jwtPlus;

	@Override
    public void configure(AuthorizationServerEndpointsConfigurer endpoints) throws Exception {
        TokenEnhancerChain enhancerChain = new TokenEnhancerChain();
        List<TokenEnhancer> delegates = new ArrayList<>();
        //配置JWT的内容增强器
        delegates.add(jwtPlus);
        delegates.add(jwtAccessTokenConverter);
        enhancerChain.setTokenEnhancers(delegates);
        endpoints.authenticationManager(authenticationManager)
                .userDetailsService(userService)
                //配置存储令牌策略
                .tokenStore(tokenStore)
                .accessTokenConverter(jwtAccessTokenConverter)
                .tokenEnhancer(enhancerChain);
    }
密码模式方式进行测试:


3、 Java中解析JWT中的内容
修改Controller层,使用jjwt工具类来解析Authorization头中存储的JWT内容。
@RequestMapping("user")
@Controller
public class UserController {
    //返回当前用户的信息
    @GetMapping("getCurrentUser")
    @ResponseBody
    public Object getCurrentUser(Authentication authentication){
        return authentication.getPrincipal();
    }

    @GetMapping("getParsing")
    @ResponseBody
    public Object getParsing(Authentication authentication,HttpServletRequest request){
        String header = request.getHeader("Authorization");
        String token = header.substring(header.indexOf("bearer") + 7);
        return Jwts.parser()
                .setSigningKey("ailike".getBytes(StandardCharsets.UTF_8))
                .parseClaimsJws(token)
                .getBody();
    }
}
将令牌放入Authorization头中,访问如下地址获取信息:访问http://localhost:8080/user/getParsing
先获取Token

添加至请求头中,再次发送进行解析


4、刷新令牌
在Spring Cloud Security 中使用oauth2时,如果令牌失效了,可以使用刷新令牌通过refresh_token的授权模式再次获取access_token。
只需修改认证服务器的配置,添加refresh_token的授权模式即可。
AuthorizationServerConfig.java增加权限模式
@Override
    public void configure(ClientDetailsServiceConfigurer clients) throws Exception {
        clients.inMemory()
                //配置client_id
                .withClient("admin")
                //配置client-secret
                .secret(passwordEncoder.encode("112233"))
                //配置访问token的有效期
                .accessTokenValiditySeconds(3600)
                //配置刷新token的有效期
                .refreshTokenValiditySeconds(86400)
                //配置redirect_uri,用于授权成功后跳转
                .redirectUris("http://www.baidu.com")
                //配置申请的权限范围
                .scopes("all")
                //配置grant_type,表示授权类型
                .authorizedGrantTypes("authorization_code","password","refresh_token");
    }
获取令牌测试:

三、 Spring Security Oauth2 整合单点登录(SSO)
这里使用的方法是服务端和客户端,服务端就用上面的配置即可,下面我们创建一个新项目作为客户端
1、创建客户端
①、引入依赖
<?xml version="1.0" encoding="UTF-8"?>

<project xmlns="http://maven.apache.org/POM/4.0.0" xmlns:xsi="http://www.w3.org/2001/XMLSchema-instance"
  xsi:schemaLocation="http://maven.apache.org/POM/4.0.0 http://maven.apache.org/xsd/maven-4.0.0.xsd">
  <modelVersion>4.0.0</modelVersion>

  <groupId>com.yjxxt.sso</groupId>
  <artifactId>SpringSecuritySSO</artifactId>
  <version>1.0-SNAPSHOT</version>

  <name>SpringSecuritySSO</name>
  <!-- FIXME change it to the project's website -->
  <url>http://www.example.com</url>

  <properties>
    <project.build.sourceEncoding>UTF-8</project.build.sourceEncoding>
    <maven.compiler.source>11</maven.compiler.source>
    <maven.compiler.target>11</maven.compiler.target>
    <spring-cloud.version>Greenwich.SR2</spring-cloud.version>
  </properties>

  <parent>
    <groupId>org.springframework.boot</groupId>
    <artifactId>spring-boot-starter-parent</artifactId>
    <version>2.2.2.RELEASE</version>
    <relativePath/>
    <!-- lookup parent from repository -->
  </parent>

  <dependencyManagement>
    <dependencies>
      <dependency>
        <groupId>org.springframework.cloud</groupId>
        <artifactId>spring-cloud-dependencies</artifactId>
        <version>${spring-cloud.version}</version>
        <type>pom</type>
        <scope>import</scope>
      </dependency>
    </dependencies>
  </dependencyManagement>

  <dependencies>
    <dependency>
      <groupId>org.springframework.cloud</groupId>
      <artifactId>spring-cloud-starter-oauth2</artifactId>
    </dependency>
    <dependency>
      <groupId>org.springframework.cloud</groupId>
      <artifactId>spring-cloud-starter-security</artifactId>
    </dependency>
    <dependency>
      <groupId>org.springframework.boot</groupId>
      <artifactId>spring-boot-starter-web</artifactId>
    </dependency>
    <dependency>
      <groupId>org.springframework.boot</groupId>
      <artifactId>spring-boot-starter-test</artifactId>
      <scope>test</scope>
    </dependency>

    <!--JWT依赖-->
    <dependency>
      <groupId>io.jsonwebtoken</groupId>
      <artifactId>jjwt</artifactId>
      <version>0.9.0</version>
    </dependency>
    <dependency>
      <groupId>org.springframework.boot</groupId>
      <artifactId>spring-boot-starter-test</artifactId>
      <scope>test</scope>
      <exclusions>
        <exclusion>
          <groupId>org.junit.vintage</groupId>
          <artifactId>junit-vintage-engine</artifactId>
        </exclusion>
      </exclusions>
    </dependency>
  </dependencies>


  <build>
    <plugins>
      <plugin>
        <groupId>org.springframework.boot</groupId>
        <artifactId>spring-boot-maven-plugin</artifactId>
      </plugin>
    </plugins>
  </build>
</project>
②、application.properties配置
server.port=8081
#防止Cookie冲突,冲突会导致登录验证不通过
server.servlet.session.cookie.name=OAUTH2-CLIENT-SESSIONID01
#授权服务器地址
oauth2-server-url: http://localhost:8080
#与授权服务器对应的配置
security.oauth2.client.client-id=admin
security.oauth2.client.client-secret=112233
security.oauth2.client.user-authorization-uri=${oauth2-server-url}/oauth/authorize
security.oauth2.client.access-token-uri=${oauth2-server-url}/oauth/token
security.oauth2.resource.jwt.key-uri=${oauth2-server-url}/oauth/token_key
③、Controller层编写和启动类
@RestController
@RequestMapping("/user")
public class UserController {
    @GetMapping("/getCurrentUser")
    public Object getCurrentUser(Authentication authentication) {
         return authentication;
    }
}
Start.java
@SpringBootApplication
@EnableOAuth2Sso
public class Start {
    public static void main(String[] args) {
        SpringApplication.run(Start.class, args);
    }
}
2、服务端配置修改
别搞错了,是修改服务端,别改客户端~
①、修改权限授权配置AuthorizationServerConfig.java
 @Override
    public void configure(ClientDetailsServiceConfigurer clients) throws Exception {
        clients.inMemory()
                //配置client_id
                .withClient("admin")
                //配置client-secret
                .secret(passwordEncoder.encode("112233"))
                //配置访问token的有效期
                .accessTokenValiditySeconds(3600)
                //配置刷新token的有效期
                .refreshTokenValiditySeconds(86400)
                //配置redirect_uri,用于授权成功后跳转
                //.redirectUris("http://www.baidu.com")
                //单点登录时配置
                .redirectUris("http://localhost:8081/login")
                //自动授权配置
                .autoApprove(true)
                //配置申请的权限范围
                .scopes("all")
                //配置grant_type,表示授权类型
                .authorizedGrantTypes("authorization_code","password","refresh_token");
    }

    @Override
    public void configure(AuthorizationServerSecurityConfigurer security) {
        // 获取密钥需要身份认证,使用单点登录时必须配置
        security.tokenKeyAccess("isAuthenticated()");
    }
服务端和客户端同时启动测试口http://localhost:8081/user/getCurrentUser


什么是单点登录,比如网页浏览京东,当我们打开一个不同功能页面,都是一个独立的小项目模块,都有独立的tomcat支撑其运行,当我们在不不同页面下单需要登录时,则这些服务器都会跳转一个专门登录的模块,无论是哪个模块,登录都会来这里登录,这便是单点登录。