目录
实验环境: Window 10 系统
开发工具: Visual Studio 2019
使用工具: Wireshark 3.2.6
一、C#实现Hello world程序
1. 任务
用C#编写一个命令行/控制台的简单hello world程序,实现如下功能:在屏幕上连续输出50行“hello cqjtu!重交物联2019级”;同时打开一个网络UDP 套接字,向另一台室友电脑发送这50行消息。
2. 项目创建
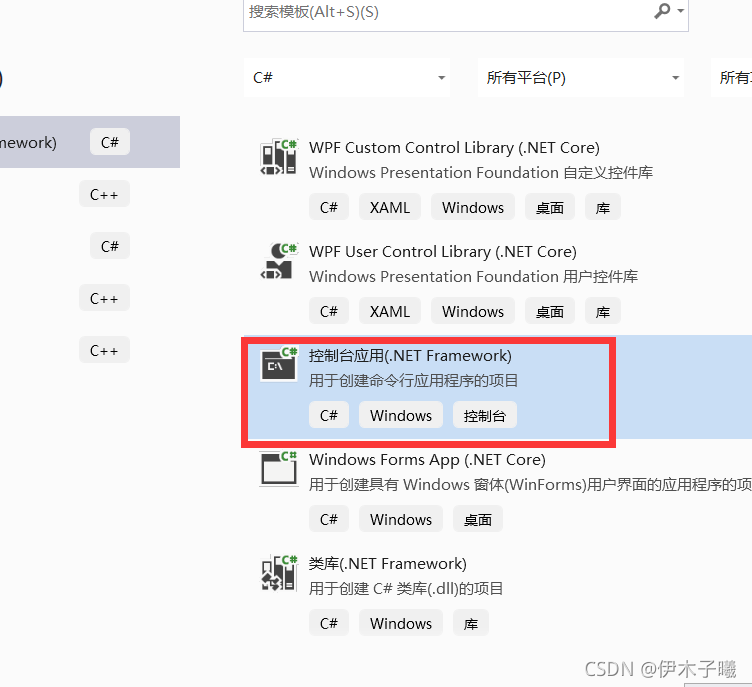
- 选择控制台应用

2. 项目创建成功初始界面
2.1 client创建

2.2 server创建同上
3. 代码编写
- client
代码:
namespace Client
{
    class Program
    {
        static void Main(string[] args)
        {
            //提示信息
            Console.WriteLine("按下任意按键开始发送...");
            Console.ReadKey();

            int m;

            //做好链接准备
            UdpClient client = new UdpClient();  //实例一个端口
            IPAddress remoteIP = IPAddress.Parse("10.60.79.28");  //假设发送给这个IP
            int remotePort = 8001;  //设置端口号
            IPEndPoint remotePoint = new IPEndPoint(remoteIP, remotePort);  //实例化一个远程端点

            for (int i = 0; i < 50; i++)
            {
                //要发送的数据:第n行:hello cqjtu!重交物联2019级
                string sendString = null;
                sendString += "第";
                m = i + 1;
                sendString += m.ToString();
                sendString += "行:hello cqjtu!重交物联2019级";

                //定义发送的字节数组
                //将字符串转化为字节并存储到字节数组中
                byte[] sendData = null;
                sendData = Encoding.Default.GetBytes(sendString);

                client.Send(sendData, sendData.Length, remotePoint);//将数据发送到远程端点
            }
            client.Close();//关闭连接

            //提示信息
            Console.WriteLine("");
            Console.WriteLine("数据发送成功,按任意键退出...");
            System.Console.ReadKey();
        }
    }
}
- server
代码:
namespace Server
{
    class Program
    {
        static void Main(string[] args)
        {
            //int result;
            //string str = "第50行:hello cqjtu!重交物联2019级";
            int i = 0;
            UdpClient client = new UdpClient(8001);
            string receiveString = null;
            byte[] receiveData = null;
            //实例化一个远程端点,IP和端口可以随意指定,等调用client.Receive(ref remotePoint)时会将该端点改成真正发送端端点
            IPEndPoint remotePoint = new IPEndPoint(IPAddress.Any, 0);
            Console.WriteLine("正在准备接收数据...");
            while (true)
            {
                receiveData = client.Receive(ref remotePoint);//接收数据
                receiveString = Encoding.Default.GetString(receiveData);
                Console.WriteLine(receiveString);
                //result = String.Compare(receiveString, str);
                i++;
                if (i==50)
                {
                    break;
                }
            }
            client.Close();//关闭连接
            Console.WriteLine("");
            Console.WriteLine("数据接收完毕,按任意键退出...");
            System.Console.ReadKey();
        }
    }
}
4. 运行程序
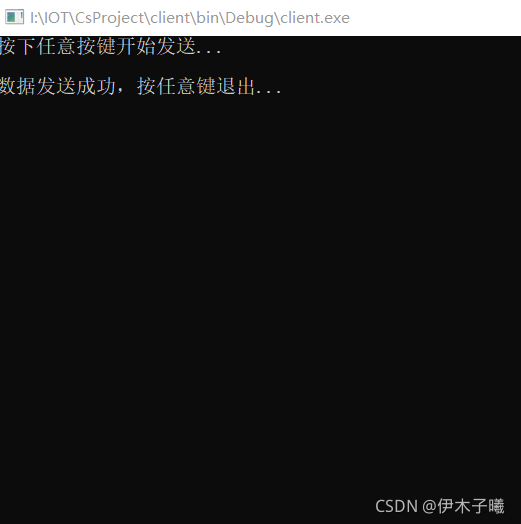
3.1 运行client 发送

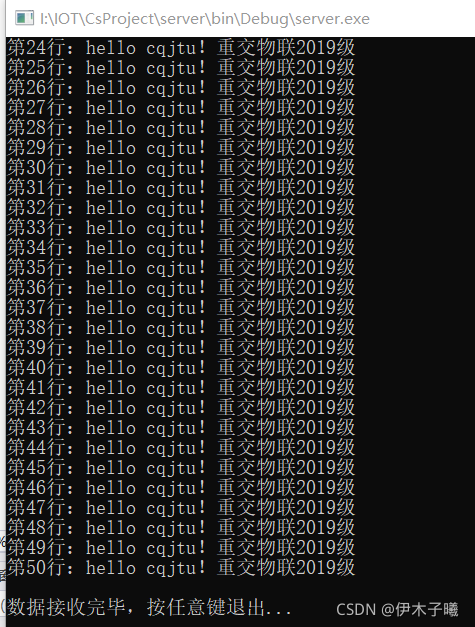
3.2 运行server接收数据

5. wireshark抓包分析
直接过滤端口


可知为第一行的数据,“第一行:hello cqjtu!重交物联2019级”
二、C#窗口程序,利用UDP套接字实现消息的发送
1. 任务
用VS2017/2019 的C#编写一个简单的Form窗口程序,有一个文本框 textEdit和一个发送按钮button,运行程序后,可以在文本框里输入文字,如“hello cqjtu!重交物联2019级”,点击button,将这些文字发送给室友电脑,采用UDP套接字;
2.项目创建
- 创建client
1.1 选择windows窗体应用

1.2 配置新项目

1.3 项目初始

1.4 设置消息显示界面属性:
- 首先往图形界面内拖动控件并进行摆放,如下图所示。
- 从工具箱内拖 2 个 TextBox 和 2 个 Button 控件。
- 选中一个 TextBox ,并点击黑色的小三角按钮,可以将单行文本框设置为多行文本框。

- 添加垂直滚动条:找到 ScrollBars 属性,设置参数为 Vertical

- 设置消息显示界面的 TextBox 不可编辑:找到 Enabled 属性,参数设为 False 。

1.5 设置消息输入框属性:
- 左键选中最下面的 TextBox ,并在右下角的属性中找到 Font 属性,并点击 “ … ”

1.6 设置发送消息按钮属性

1.7 设置窗体属性:
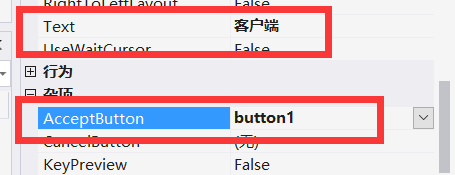
- 左击窗体选中它,在右下角的属性中找到 Text 属性,编辑为 “ 客户端 ” ,然后窗体的左上角,就显示为 “ 客户端 ”。
- 紧接着,有个 AcceptButton 属性,下拉框选中这个 button1 按钮,设置完这个属性后,当我们最后执行这个程序后,按下回车键 = 点击这个按钮。

- 创建server同上

3. 代码编写
- client
private void button1_Click(object sender, EventArgs e)
        {
            try
            {
                string sendString = textBox2.Text;
                showMsg(sendString);
                UdpClient client = new UdpClient();  //实例一个端口
                IPAddress remoteIP = IPAddress.Parse("10.60.79.28");  //假设发送给这个IP
                int remotePort = 8001;  //设置端口号
                IPEndPoint remotePoint = new IPEndPoint(remoteIP, remotePort);  //实例化一个远程端点

                for (int i = 0; i < 50; i++)
                {

                    byte[] sendData = null;
                    string str = sendString;
                    str = str + (i + 1);
                    sendData = Encoding.Default.GetBytes(str);

                    client.Send(sendData, sendData.Length, remotePoint);//将数据发送到远程端点
                }
            }
            catch
            {

            }
        }

        //客户端向服务器发送消息
        private void button2_Click_1(object sender, EventArgs e)
        {
            try
            {
                UdpClient client = new UdpClient();  //实例一个端口
                IPAddress remoteIP = IPAddress.Parse("10.60.79.28");  //假设发送给这个IP
                int remotePort = 8001;  //设置端口号
                IPEndPoint remotePoint = new IPEndPoint(remoteIP, remotePort);  //实例化一个远程端点
                showMsg("服务已连接");

            }
            catch
            {}

        }

        void showMsg(string str)
        {
            textBox1.AppendText(str + "\r\n");
        }
- server
        string receiveString = null;
        byte[] receiveData = null;
        private void button1_Click(object sender, EventArgs e)
        {
            try
            {
                UdpClient client = new UdpClient(8001);

                //实例化一个远程端点,IP和端口可以随意指定,等调用client.Receive(ref remotePoint)时会将该端点改成真正发送端端点
                IPEndPoint remotePoint = new IPEndPoint(IPAddress.Any, 0);
                showMsg("服务端已经开启");

                int i=0;
                while (true)
                {
                    receiveData = client.Receive(ref remotePoint);//接收数据
                    receiveString = Encoding.Default.GetString(receiveData);
                    showMsg(receiveString);
                    //result = String.Compare(receiveString, str);
                    i++;
                    if (i == 50)
                    {
                        break;
                    }
                }

            }
            catch { }


        }

        void showMsg(string str)
        {
            textBox1.AppendText(str + "\r\n");
        }
4. 运行程序
-
点击开启服务

-
点击开启连接服务

-
输入内容发送

4. wireshark抓包分析

查看第一条信息
