1 Gin简介
Gin是一个Golang写的web框架,具有高性能的优点,基于httprouter,提供了类似martini但更好性能的API服务。
官网:
https://github.com/gin-gonic/gin
2 Gin安装
Go get方式安装,输入命令:
go get github.com/gin-gonic/gin
go module方式引入依赖。
require github.com/gin-gonic/gin v1.7.7
3 Gin编程入门
Goland编辑器开发:
go V1.15
gin v1.7.7
POSTman请求验证。
3.1 hello world
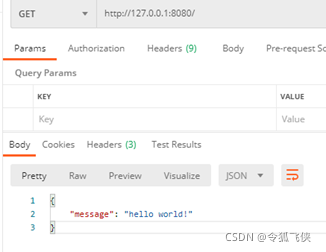
chapter1_1.go主要代码如下:
func main() {
   router := gin.Default()
   router.GET("/", func(context *gin.Context) {
      context.JSON(200, gin.H{
         "message": "hello world!",
      })
   })
   //启动端口8080的服务
   router.Run(":8080")
}
启动运行,server端日志如下:

POSTman请求验证:
3.2 简单的路由
主要代码chapter1_1.go
3.2.1 路由
进入商铺,代码如下::
router.GET("/shop", func(context *gin.Context) {
   context.JSON(200, gin.H{
      "message": "您已进入双11的活动商铺!",
   })
})
启动server,POSTman请求验证:

3.2.2 路由参数
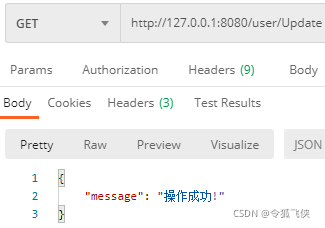
冒号:加上一个参数名组成路由参数,主要代码如下:
//获取路径参数
router.GET("/user/:action", func(context *gin.Context) {
   action:=context.Param("action")
   fmt.Println("action:" + action)
   context.JSON(200, gin.H{
      "message": "操作成功!",
   })
})
启动server,POSTman请求验证:
Server端的log如下:

可以到 :action 已经换成了 Update。
3.2.3 重定向
主要代码如下:
//重定向
router.GET("/google", func(context *gin.Context) {
   context.Redirect(http.StatusMovedPermanently, "/baidu")
})
router.GET("/baidu", func(context *gin.Context) {
   context.JSON(200, gin.H{
      "message": "中国第1搜索引擎!",
   })
})
POSTman请求验证:

可以看到,/google的请求重定向到/baidu了。
3.3 请求中带参数
主要代码在chapter1_3.go中。
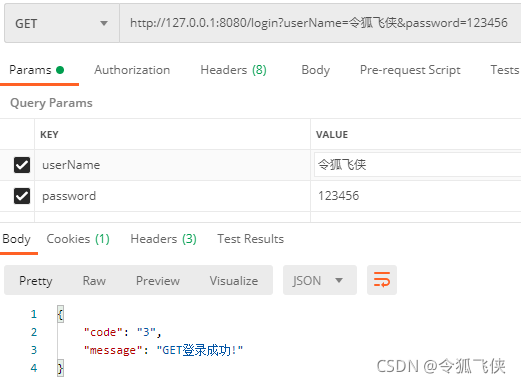
3.3.1 GET请求中带参数
主要代码如下:
//get请求带参数
router.GET("/login", func(context *gin.Context) {
   userName := context.Query("userName")
   fmt.Println("userName:" + userName)
   password := context.Query("password")
   fmt.Println("password:" + password)
   if userName == "" {
      context.JSON(200, gin.H{
         "code": "1",
         "message": "用户名不能为空!",
      })
   } else if password == "" {
      context.JSON(200, gin.H{
         "code": "2",
         "message": "用密码不能为空!",
      })
   }else{
      context.JSON(200, gin.H{
         "code": "3",
         "message": "GET登录成功!",
      })
   }

})
POSTman请求验证:
3.3.2 POST请求中带参数
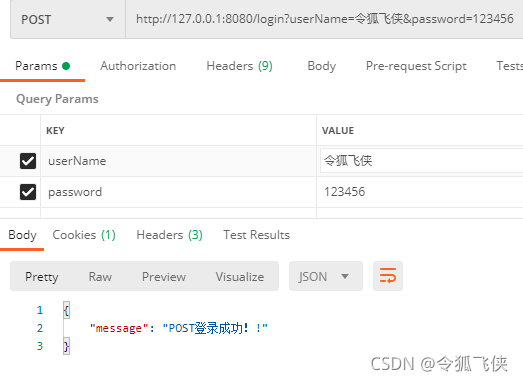
主要代码如下:
//post表单
router.POST("/login", func(context *gin.Context) {
   userName := context.PostForm("userName")
   fmt.Println("userName:" + userName)
   password := context.PostForm("password")
   fmt.Println("password:" + password)
   if userName == "" {
      context.JSON(200, gin.H{
         "code": "1",
         "message": "用户名不能为空!",
      })
   } else if password == "" {
      context.JSON(200, gin.H{
         "code": "2",
         "message": "用密码不能为空!",
      })
   }else{
      context.JSON(200, gin.H{
         "code": "3",
         "message": "POST登录成功!",
      })
   }
})
POSTman请求验证:
3.4 分组路由
主要代码在chapter1_4.go中。
第1步:定义用户分组路由;
groupRouter := gin.Default()
//所有用户相关请求API的路由
userRouter := groupRouter.Group("/user")
第2步:增加用户CRUD操作的API。
userRouter.GET("/Create", func(context *gin.Context) {
   context.JSON(200, gin.H{
      "message": "已增加一个新的用户!",
   })
})
userRouter.GET("/Retrieve", func(context *gin.Context) {
   context.JSON(200, gin.H{
      "message": "已找到用户!",
   })
})
userRouter.GET("/Update", func(context *gin.Context) {
   context.JSON(200, gin.H{
      "message": "已更新用户的信息!",
   })
})
userRouter.GET("/Delete", func(context *gin.Context) {
   context.JSON(200, gin.H{
      "message": "已删除用户!",
   })
})
启动server,POSTman验证。
如下为验证增加用户:

如下为修改用户的信息:

同理可以定义商品分组路由。
productRouter := groupRouter.Group("/product")
3.5 中间件
主要代码在chapter1_5.go中。
中间件可以记录log、错误处理、鉴权认证等。
中间件分为:
1) 单个路由中间件
2) 群组中间件
3) 全局中间件
首先定义中间件实现鉴权认证。
// 中间件实现鉴权认证
func MiddleWare() gin.HandlerFunc {
   return func(context *gin.Context) {
      cookie, err := context.Request.Cookie("userId")
      if err == nil {
         value := cookie.Value
         fmt.Println("userId:", value)
         if value == "admin" {
            context.Next()
            return
         }
      }
      context.JSON(
         http.StatusUnauthorized, gin.H{
            "message": "没有授权!",
         })

      context.Abort()
      return
   }
}
3.5.1 单个路由中间件
单个路由的鉴权认证,代码如下:
// 登录
router.GET("/login", func(context *gin.Context) {
   //保存cookie
   cookie := &http.Cookie{
      Name:     "user",
      Value:    "admin",
      Path:     "/",
      HttpOnly: true,
   }
   http.SetCookie(context.Writer, cookie)

   context.JSON(200, gin.H{
      "message": "登录成功!",
   })
})
// 单个路由的中间件
router.GET("/simple", MiddleWare(), func(context *gin.Context) {
   context.JSON(200, gin.H{
      "message": "单个路由的中间件!",
   })
})
启动server,POSTman验证:
如果直接发送http://127.0.0.1:8080/simple,会返回鉴权失败。

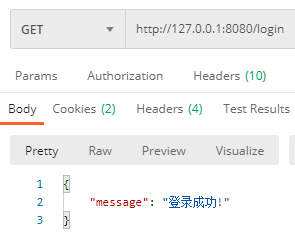
如果首先登录,然后接发送http://127.0.0.1:8080/simple,会返回鉴权通过。

3.5.2 群组路由中间件
群组路由中间主要代码:
// 路由
userRouter := groupRouter.Group("/user")
// 登录
userRouter.GET("/login", func(context *gin.Context) {
   //保存cookie
   cookie := &http.Cookie{
      Name:     "user",
      Value:    "admin",
      Path:     "/",
      HttpOnly: true,
   }
   http.SetCookie(context.Writer, cookie)

   context.JSON(200, gin.H{
      "message": "登录成功!",
   })
})
userRouter.Use(MiddleWare())
{
   userRouter.GET("/Create", func(context *gin.Context) {
      context.JSON(200, gin.H{
         "message": "已增加一个新的用户!",
      })
   })
   userRouter.GET("/Update", func(context *gin.Context) {
      context.JSON(200, gin.H{
         "message": "已更新用户的信息!",
      })
   })
}
如果直接访问http://127.0.0.1:8080/user/Create,会返回鉴权失败:

如果首先登录,然后接发送http://127.0.0.1:8080/user/Create,会返回鉴权通过。


3.5.3 全局路由中间件
主要代码:
// 全局中间件
func TestGloalMiddleware() {
   router := gin.Default()

   // 登录
   router.GET("/login", func(context *gin.Context) {
      //保存cookie
      cookie := &http.Cookie{
         Name:     "user",
         Value:    "admin",
         Path:     "/",
         HttpOnly: true,
      }
      http.SetCookie(context.Writer, cookie)

      context.JSON(200, gin.H{
         "message": "登录成功!",
      })
   })

   router.GET("/user", func(context *gin.Context) {
      context.JSON(200, gin.H{
         "message": "不受全局中间件的影响!",
      })
   })

   router.Use(MiddleWare())
   {
      router.GET("/shop", func(context *gin.Context) {
         context.JSON(200, gin.H{
            "message": "受全局中间件的影响!",
         })
      })
   }

   //启动端口8080的服务
   router.Run(":8080")
}
router.Use(MiddleWare())上面的路由不受中间件的影响。

router.Use(MiddleWare())里面的路由受到中间件的影响。
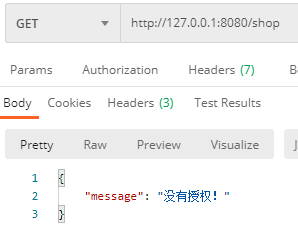
如果直接访问http://127.0.0.1:8080/shop,会返回鉴权失败:
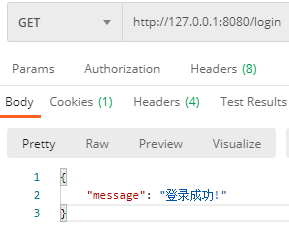
如果首先登录,然后接发送http://127.0.0.1:8080/shop,会返回鉴权通过。

3.6 同步和异步请求
主要代码在chapter1_6.go中。
3.6.1 同步请求
同步请求主要代码:
// 同步请求
router.GET("/syn", func(context *gin.Context) {
   time.Sleep(5* time.Second)
   fmt.Println("current URL:", context.Request.URL)
})
启动server,POSTman验证。
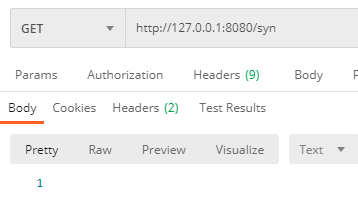
Server端的Log如下:

耗时5.0149966s。
3.6.2 异步请求
异步请求主要代码如下:
// 协程实现异步请求
router.GET("/asyn", func(context *gin.Context) {
   cContext:=context.Copy()
   go func() {
      // 协程的执行间隔
      time.Sleep(5* time.Second)
      fmt.Println("current URL:", cContext.Request.URL)
   }()
})
启动server,POSTman验证。
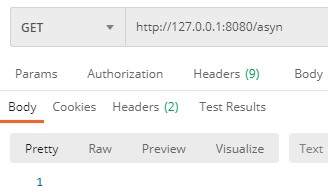
Server端的Log如下:

耗时0s。
3.7 自定义HttpServer
主要代码在chapter1_7.go中。
第1步定义router
//定义router
router := gin.Default()
router.GET("/", func(context *gin.Context) {
   context.JSON(200, gin.H{
      "message": "我是自定义http server的相应!",
   })
})
第2步自定义http Server
customHttp := &http2.Server{
   Addr:         ":8080",
   Handler:      router,
   ReadTimeout:  10 * time.Second,
   WriteTimeout: 10 * time.Second,
}
第3步启动http Server
//启动服务
customHttp.ListenAndServe()
启动server,POSTman验证。
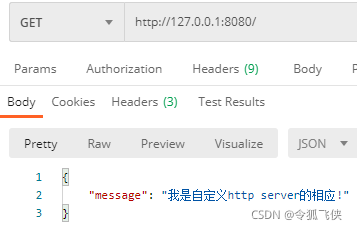
代码:
https://gitee.com/alifeidao/go-frame-simple/tree/master/chapter1