一、概述
计算机网络是指将地理位置不同的具有独立功能的多台计算机及其外部设备,通过通信线路连接起来,在网络操作系统,网络管理软件及网络通信协议的管理和协调下,实现资源共享和信息传递的计算机系统。
TCP/IP参考模型
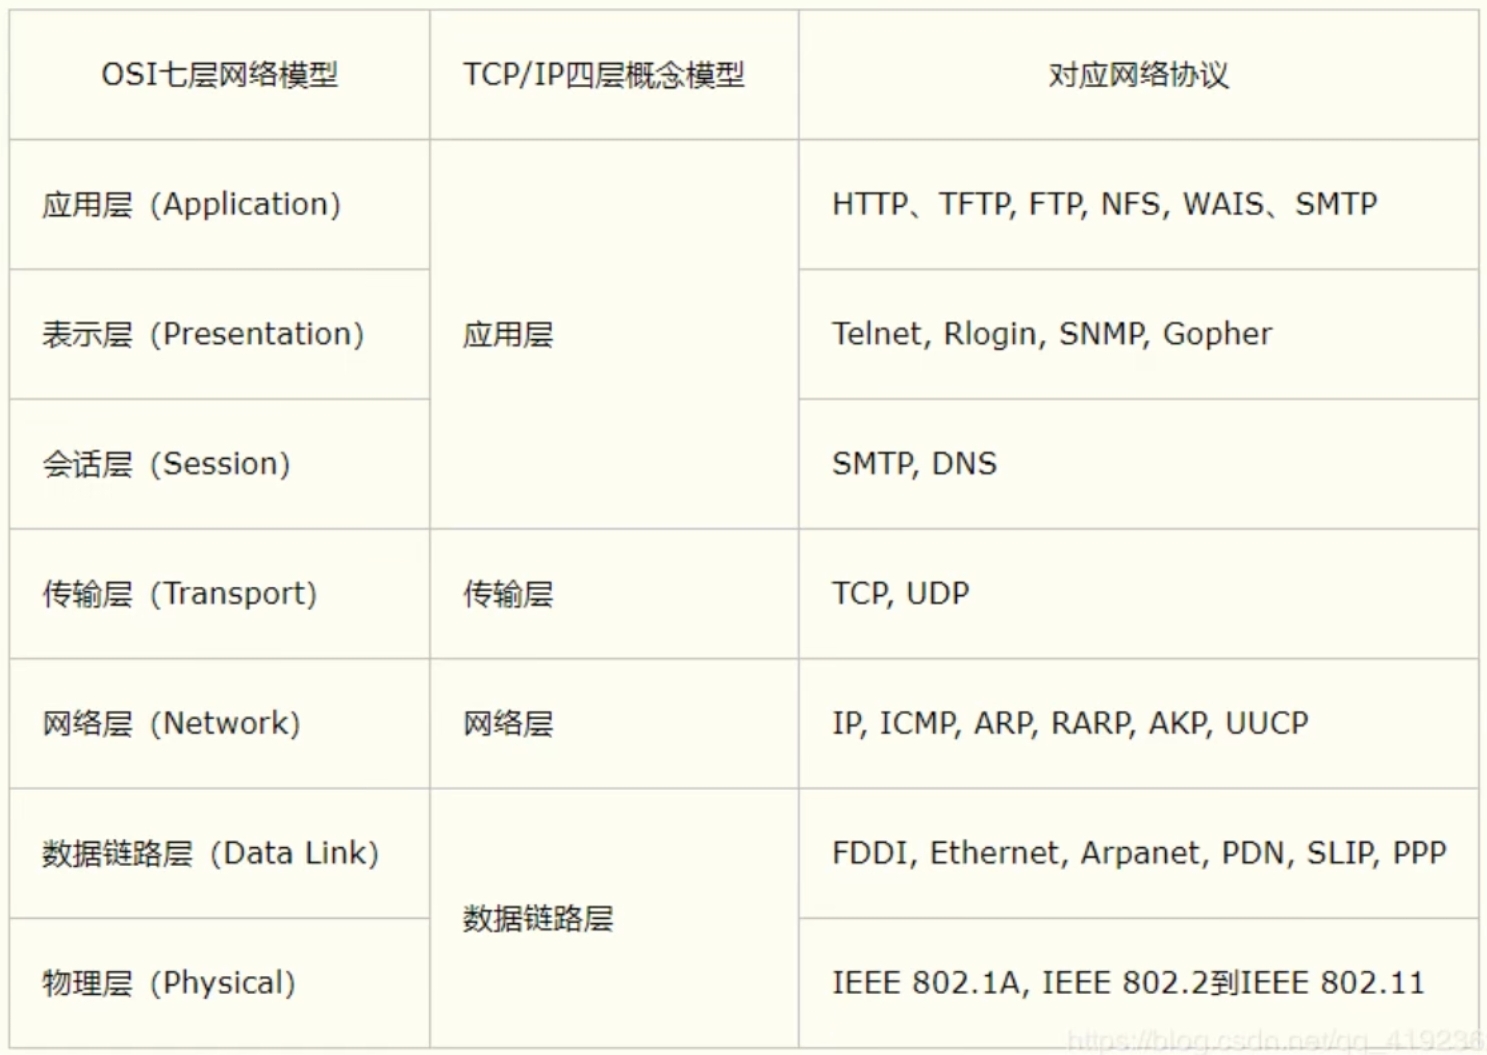

- 网络编程中两个主要的问题
- 如何准确的定位到网络上的一台或多台主机
- 找到主机后如何进行通信
- 网络编程的要素
- IP和端口号
- 网络通信协议:UDP、TCP
- 最后,万物皆对象
二、IP
Java中的ip类:IntAddress(此类表示Internet协议(IP)地址)
-
唯一定位一台网络上计算机
-
127.0.0.1:本地localhost
-
IP地址的分类
-
ipv4/ipv6
- ipv4:4个字节组成,0255,42亿,30亿在北美,2011年用尽
- ipv6:128位,8个无符号整数
-
公网(互联网)–私网(局域网)
-
ABCDE类地址
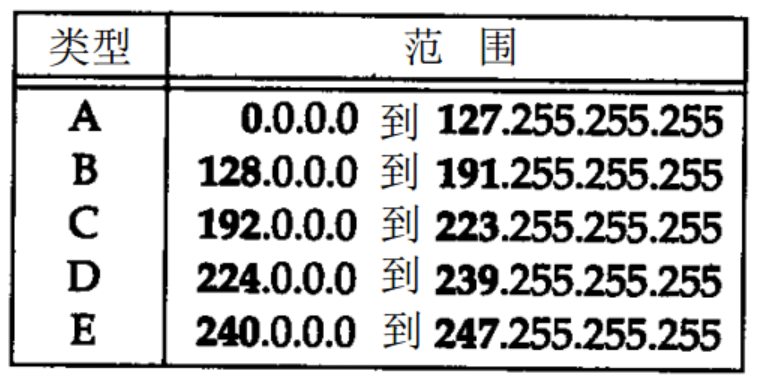
-
192.168.xx.xx,专门给组织内部使用的
-
-
-
域名
? 由于IP地址具有不方便记忆并且不能显示地址组织的名称和性质等缺点,人们设计出了域名,并通过网域名称系统(DNS,Domain Name System)来将域名和IP地址相互映射,使人更方便地访问互联网,而不用去记住能够被机器直接读取的IP地址数串。
比如百度的域名为www.baidu.com,IP地址为14.215.177.39,在浏览器中输入任意一个都能访问百度
package com.kongbai.lesson_ip;

import java.net.InetAddress;
import java.net.UnknownHostException;

/**
 * @author kongbai
 * @version 1.0.0
 * @ClassName TestInetAddress.java
 * @Description TODO
 * @createTime 2022年03月15日 17:01:00
 */
public class TestInetAddress {
    public static void main(String[] args) {
        try {
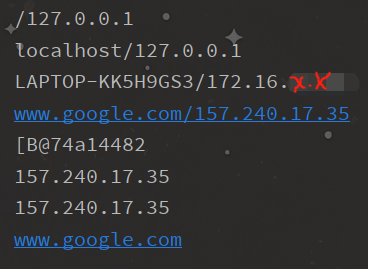
            //查询本地地址
            InetAddress inetAddress1 = InetAddress.getByName("127.0.0.1");
            System.out.println(inetAddress1);
            InetAddress inetAddress2 = InetAddress.getByName("localhost");
            System.out.println(inetAddress2);
            InetAddress inetAddress3 = InetAddress.getLocalHost();
            System.out.println(inetAddress3);

            //查询网络地址
            InetAddress inetAddress4 = InetAddress.getByName("www.google.com");
            System.out.println(inetAddress4);

            //常用方法
            System.out.println(inetAddress4.getAddress()); //字节地址
            System.out.println(inetAddress4.getCanonicalHostName()); //规范的名字
            System.out.println(inetAddress4.getHostAddress()); //IP
            System.out.println(inetAddress4.getHostName()); //域名

        } catch (UnknownHostException e) {
            e.printStackTrace();
        }
    }
}
三、端口
端口表示计算机上的一个程序的进程
-
不同的进程有不同的端口号,用来区分软件
-
端口是通过端口号来标记的,端口号只有整数,范围是从0~65535
-
TCP/UDP,每个协议范围都是0~65535;单个协议下,端口号不能冲突,就是说TCP为80,UDP也可以为80,但不能同一协议下出现两个80
-
端口分类
-
公有端口 0~1023
-
http:80
-
https:443
-
ftp:21
-
ssh:22
-
telnet:23
……
-
-
程序注册端口 1024~49151,分配用户或程序的
-
Tomcat:8080
-
MySQL:3306
-
Oracle:1521
……
-
-
动态、私有 49152~65535,尽量不使用
netstat -ano #查看所有的端口
netstat -ano|findstr "端口号" #查看指定的端口
tasklist|findstr "PID" #查看指定PID的进程
-
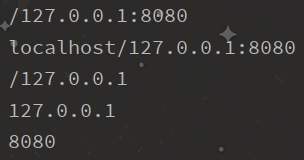
package com.kongbai.lesson_ip;

import java.net.InetSocketAddress;

/**
 * @author kongbai
 * @version 1.0.0
 * @ClassName TestInetSocketAddress.java
 * @Description TODO
 * @createTime 2022年03月15日 17:53:00
 */
public class TestInetSocketAddress {
    public static void main(String[] args) {
        InetSocketAddress inetSocketAddress = new InetSocketAddress("127.0.0.1", 8080);
        InetSocketAddress inetSocketAddress2 = new InetSocketAddress("localhost", 8080);
        System.out.println(inetSocketAddress);
        System.out.println(inetSocketAddress2);

        System.out.println(inetSocketAddress.getAddress());
        System.out.println(inetSocketAddress.getHostName()); //地址
        System.out.println(inetSocketAddress.getPort()); //端口
    }
}
四、通信协议
协议:约定,就好比我们现在说的普通话,彼此之间都能听懂
网络通信协议:速率,传输码率,代码结构,传输控……
TCP/IP协议簇
? 重要:
- TCP:用户传输协议
- UDP:用户数据报协议
TCP和UDP的区别
- 连接性
- TCP是面向连接的协议,在收发数据前必须和对方建立可靠的连接,建立连接的3次握手、断开连接的4次挥手,为数据传输打下可靠基础;UDP是一个面向无连接的协议,数据传输前,源端和终端不建立连接,发送端尽可能快的将数据扔到网络上,接收端从消息队列中读取消息段。
- 可靠性
- TCP提供可靠交付的服务,传输过程中采用许多方法保证在连接上提供可靠的传输服务,如编号与确认、流量控制、计时器等,确保数据无差错,不丢失,不重复且按序到达;UDP使用尽可能最大努力交付,但不保证可靠交付。
- 报文首部
- TCP报文首部有20个字节,额外开销大;UDP报文首部只有8个字节,标题短,开销小。
- TCP协议面向字节流,将应用层报文看成一串无结构的字节流,分解为多个TCP报文段传输后,在目的站重新装配;UDP协议面向报文,不拆分应用层报文,只保留报文边界,一次发送一个报文,接收方去除报文首部后,原封不动将报文交给上层应用。
- 吞吐量控制
- TCP拥塞控制、流量控制、重传机制、滑动窗口等机制保证传输质量;UDP没有。
- 双工性
- TCP只能点对点全双工通信;UDP支持一对一、一对多、多对一和多对多的交互通信。
4.1 TCP
如果不捕获异常,代码量很少的,无需刻意操作
客户端
- 连接服务器Socket
- 发送消息
package com.kongbai.internet.tcp;

import java.io.IOException;
import java.io.OutputStream;
import java.net.InetAddress;
import java.net.Socket;

/**
 * @author kongbai
 * @version 1.0.0
 * @ClassName TcpClient.java
 * @Description TODO
 * @createTime 2022年03月16日 10:51:00
 * 客户端
 */
public class TcpClient {
    public static void main(String[] args) {
        Socket socket = null;
        OutputStream os = null;

        try {

            //1.要知道服务器的地址
            InetAddress serverIP = InetAddress.getByName("127.0.0.1");
            int port = 9999;
            //2.创建一个socket连接
            socket = new Socket(serverIP, port);
            //3.发送消息IO流
            os = socket.getOutputStream();
            os.write("你好,世界".getBytes());

        } catch (IOException e) {
            e.printStackTrace();
        } finally {
            if (os != null) {
                try {
                    os.close();
                } catch (IOException e) {
                    e.printStackTrace();
                }
            }

            if (socket != null) {
                try {
                    socket.close();
                } catch (IOException e) {
                    e.printStackTrace();
                }
            }
        }

    }
}
服务器
- 建立服务的端口ServerSocket
- 等待用户的连接accept
- 接收用户的消息
package com.kongbai.internet.tcp;

import java.io.ByteArrayOutputStream;
import java.io.IOException;
import java.io.InputStream;
import java.net.ServerSocket;
import java.net.Socket;

/**
 * @author kongbai
 * @version 1.0.0
 * @ClassName TcpServer.java
 * @Description TODO
 * @createTime 2022年03月16日 10:52:00
 * 服务器
 */
public class TcpServer {
    public static void main(String[] args) {
        //写这里是为了提升作用域
        ServerSocket serverSocket = null;
        Socket socket = null;
        InputStream is = null;
        ByteArrayOutputStream baos = null;

        try {

            //1.得有一个地址
            serverSocket = new ServerSocket(9999);
            //2.等待客户端连接过来
            socket = serverSocket.accept(); //侦听
            //3.读取客户端得消息
            is = socket.getInputStream();

            /*
            做一点小补充,之前都喜欢这样写,其实这样写是有问题的,如果是中文,长度超过
            这个字节后,就可能会出现乱码
            byte[] buffer = new byte[1024];
            int len;
            while ((len=is.read(buffer)) != -1) {
                String string = new String(buffer, 0, len);
                System.out.println(string);
            }
             */
            //管道流(这样写就不会有这种问题)
            baos = new ByteArrayOutputStream();
            byte[] buffer = new byte[1024];
            int len;
            while ((len = is.read(buffer)) != -1) {
                baos.write(buffer, 0, len);
            }
            System.out.println(baos.toString());

        } catch (IOException e) {
            e.printStackTrace();
        } finally {
            //关闭资源,要逐步关闭,把完整的代码写出
            if (baos != null) {
                try {
                    baos.close();
                } catch (IOException e) {
                    e.printStackTrace();
                }
            }

            if (is != null) {
                try {
                    is.close();
                } catch (IOException e) {
                    e.printStackTrace();
                }
            }

            if (socket != null) {
                try {
                    socket.close();
                } catch (IOException e) {
                    e.printStackTrace();
                }
            }

            if (serverSocket != null) {
                try {
                    serverSocket.close();
                } catch (IOException e) {
                    e.printStackTrace();
                }
            }
        }

    }
}
先运行服务器,一直在等待接收消息
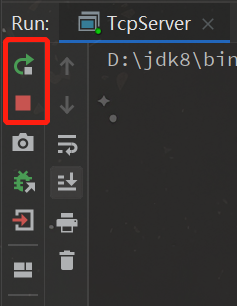
再运行客户端,接收完毕,停止运行,服务器显示消息

4.1.1 文件上传
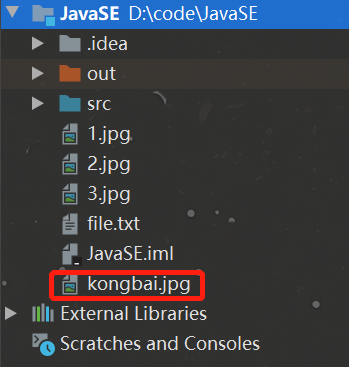
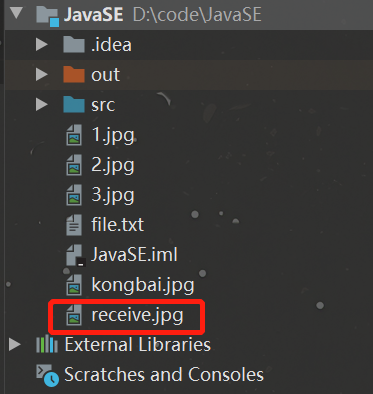
随意复制一个文件到代码根目录下,传输效果也在此目录下查看
服务器
package com.kongbai.internet.tcp;

import java.io.File;
import java.io.FileOutputStream;
import java.io.InputStream;
import java.io.OutputStream;
import java.net.ServerSocket;
import java.net.Socket;

/**
 * @author kongbai
 * @version 1.0.0
 * @ClassName TcpServer02.java
 * @Description TODO
 * @createTime 2022年03月16日 11:46:00
 */
public class TcpServer02 {
    public static void main(String[] args) throws Exception {
        //1.创建服务
        ServerSocket serverSocket = new ServerSocket(9009);
        //2.监听客户端的连接
        Socket socket = serverSocket.accept();//阻塞式监听,会一直等待客户端连接
        //3.获取输入流
        InputStream is = socket.getInputStream();

        //4.文件输出
        FileOutputStream fos = new FileOutputStream(new File("receive.jpg"));
        byte[] buffer = new byte[1024];
        int len;
        while ((len = is.read(buffer)) != -1) {
            fos.write(buffer, 0, len);
        }

        //停止客户端接收完毕了
        OutputStream os = socket.getOutputStream();
        os.write("我接收完毕,可以断开".getBytes());

        //5.关闭资源
        os.close();
        fos.close();
        is.close();
        socket.close();
        serverSocket.close();
    }
}
客户端
package com.kongbai.internet.tcp;

import java.io.*;
import java.net.InetAddress;
import java.net.Socket;

/**
 * @author kongbai
 * @version 1.0.0
 * @ClassName TcpClient02.java
 * @Description TODO
 * @createTime 2022年03月16日 11:39:00
 */
public class TcpClient02 {
    public static void main(String[] args) throws Exception {
        //1.创建一个Socket连接
        Socket socket = new Socket(InetAddress.getByName("127.0.0.1"), 9009);
        //2.创建一个输出流
        OutputStream os = socket.getOutputStream();

        //3.读取文件
        FileInputStream fis = new FileInputStream(new File("kongbai.jpg"));
        //4.写出文件
        byte[] buffer = new byte[1024];
        int len;
        while ((len = fis.read(buffer)) != -1) {
            os.write(buffer, 0, len);
        }

        //通知服务器已结束
        socket.shutdownOutput(); //我已传输完毕

        //确定服务器接收完毕,才能断开连接
        InputStream is2 = socket.getInputStream();
            //String byte[]
        ByteArrayOutputStream baos = new ByteArrayOutputStream();
        byte[] buffer2 = new byte[2048];
        int len2;
        while ((len2 = is2.read(buffer2)) != -1) {
            baos.write(buffer2, 0, len2);
        }
        System.out.println(baos.toString());

        //5.关闭资源
        baos.close();
        fis.close();
        os.close();
        socket.close();
    }
}
先运行服务器
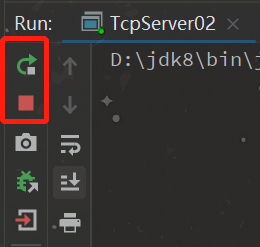
再运行客户端,客户端收到服务器的消息

文件传输完成,可以直接查看
4.1.2 初识Tomcat
Tomcat 服务器是一个免费的开放源代码的Web 应用服务器,属于轻量级应用服务器,在中小型系统和并发访问用户不是很多的场合下被普遍使用,是开发和调试JSP 程序的首选。
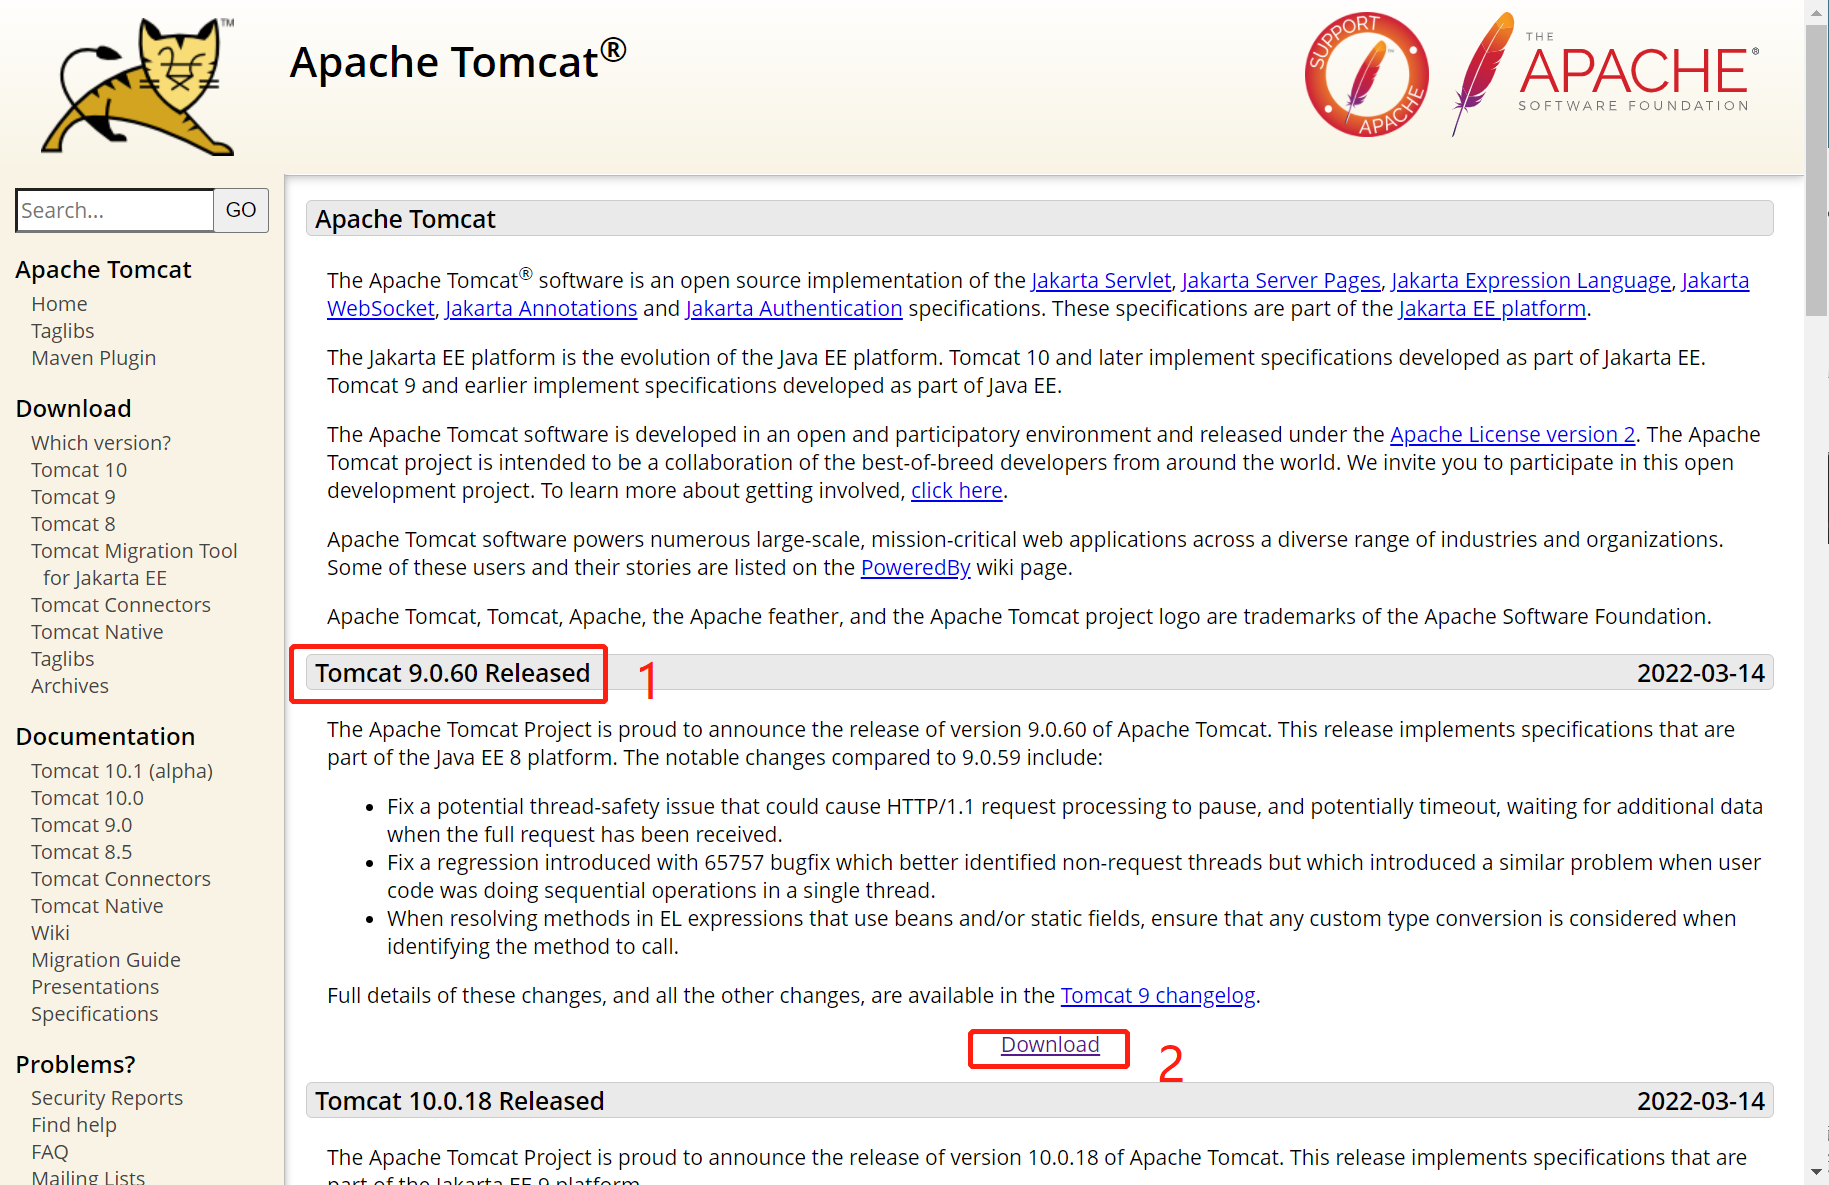
- 进入官网,找到需要的版本下载,比如我下载的是9.0.60
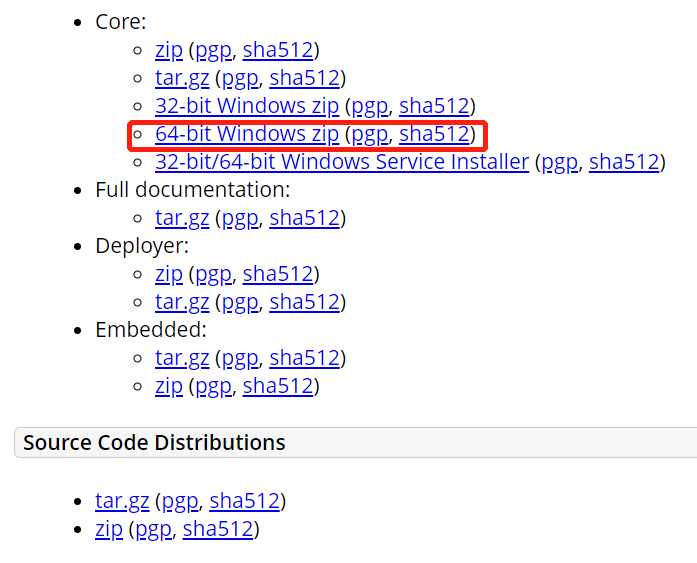
- zip文件是免安装,解压即可使用,注意下载的版本要跟自己电脑系统版本匹配
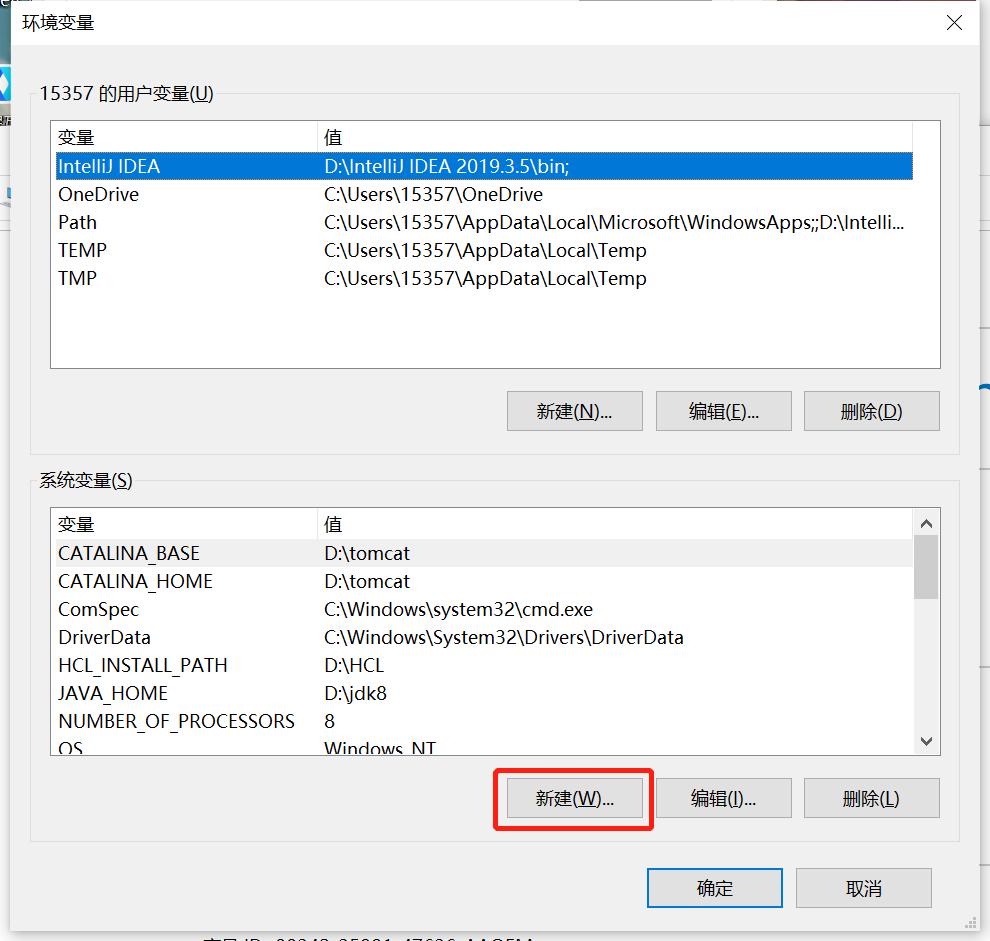
- 在运行之前,先将环境配置好
变量已经有则编辑并添加即可,没有则新建
变量名:CATALINA_BASE
变量值:tomcat解压路径,比如我的放在D:\tomcat
变量名: CATALINA_HOME
变量值:tomcat解压路径,比如我的放在D:\tomcat
变量名: path
变量值:;%CATALINA_HOME%\lib;%CATALINA_HOME%\bin (如果前面有其它变量,分号不能少)
三个添加完成后确定即可
- 测试
打开bin目录
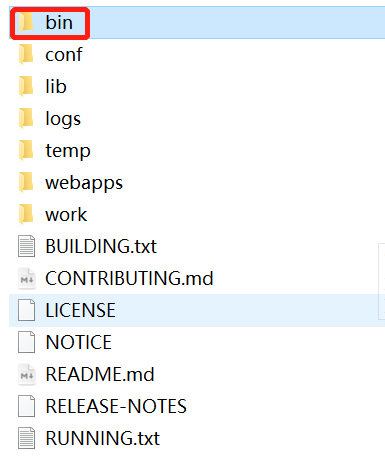
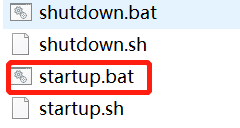
找到startup.bat,双击启动
? bat是windows文件,sh是Linux文件;如需关闭程序双击shutdown.bat,不建议直接关闭窗口
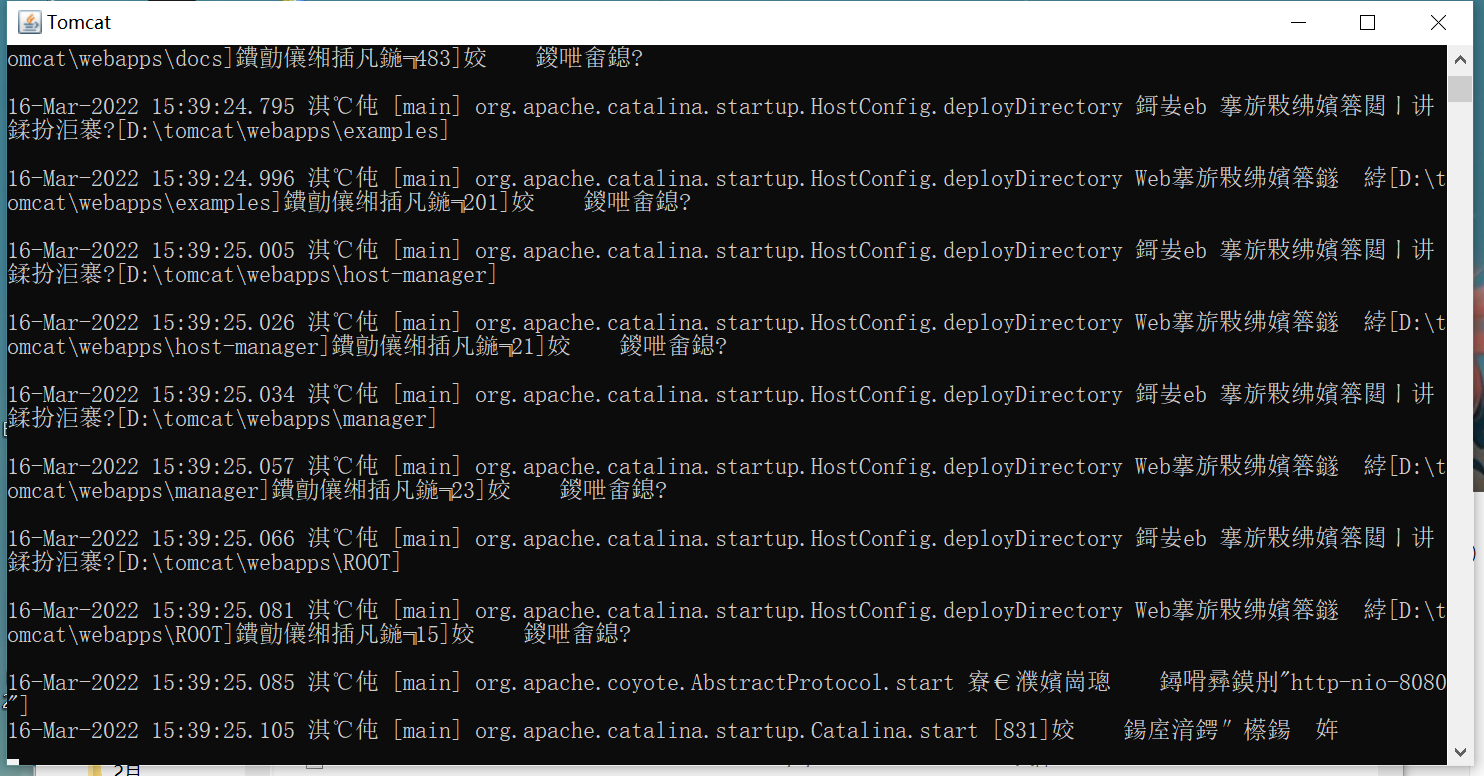
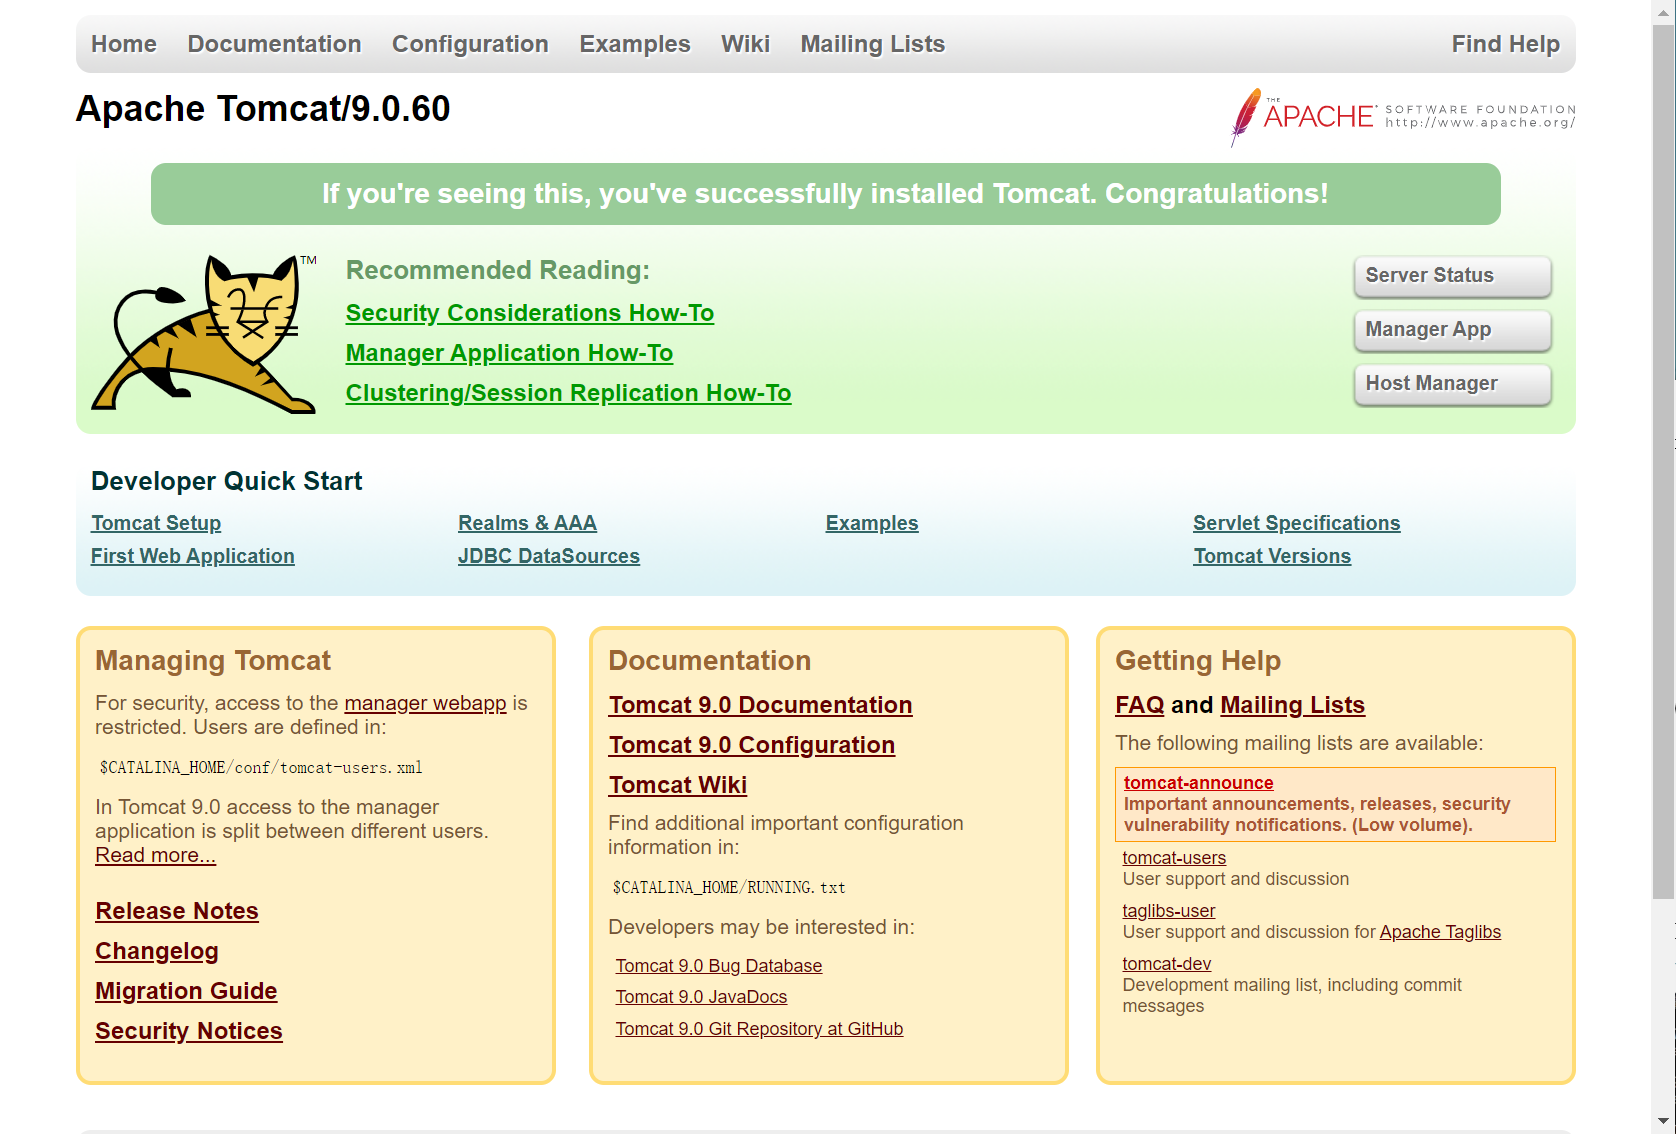
出现此窗口后,打开浏览器。输入localhost:8080
正常访问则环境配置成功
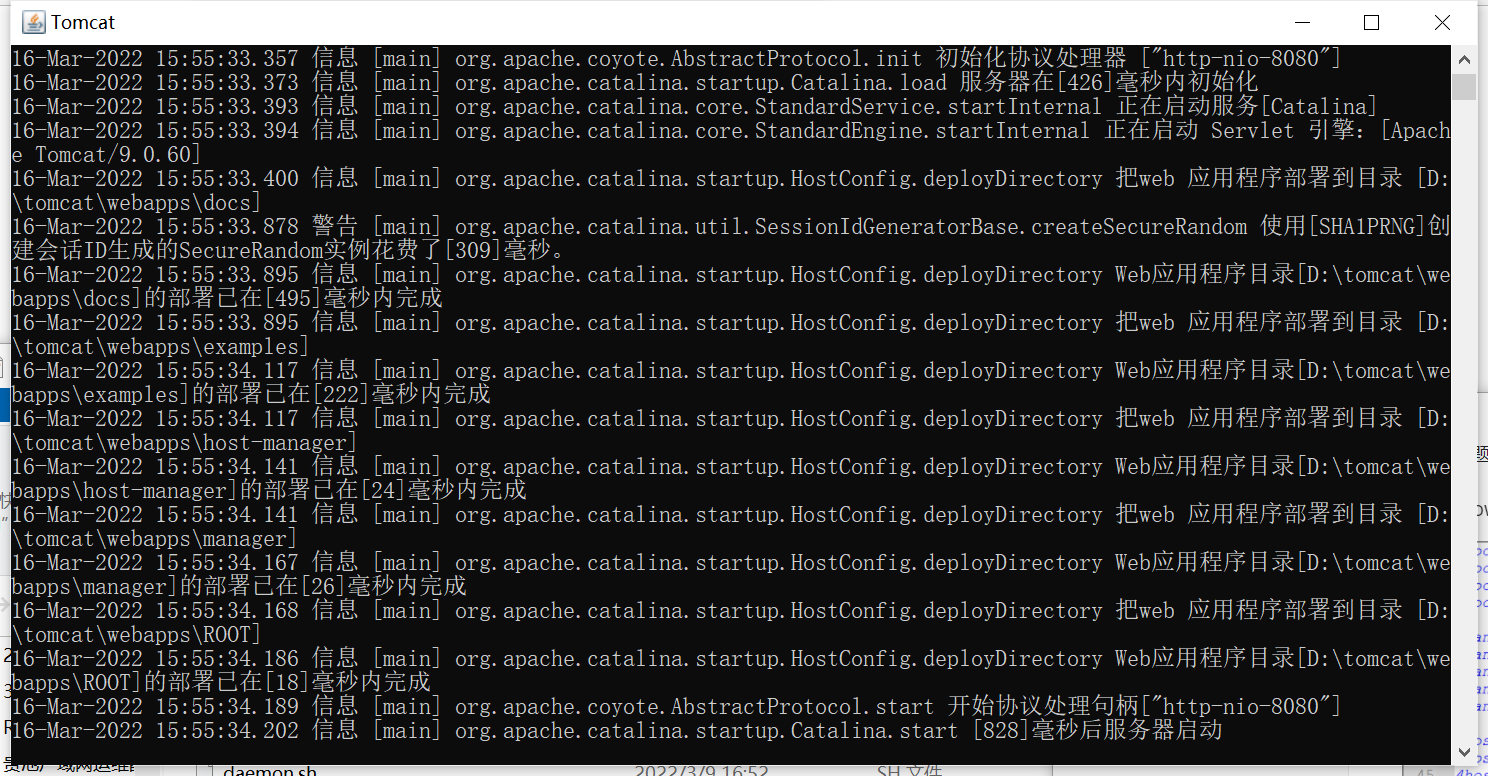
开启程序后,会出现窗口,可以发现显示有很多乱码
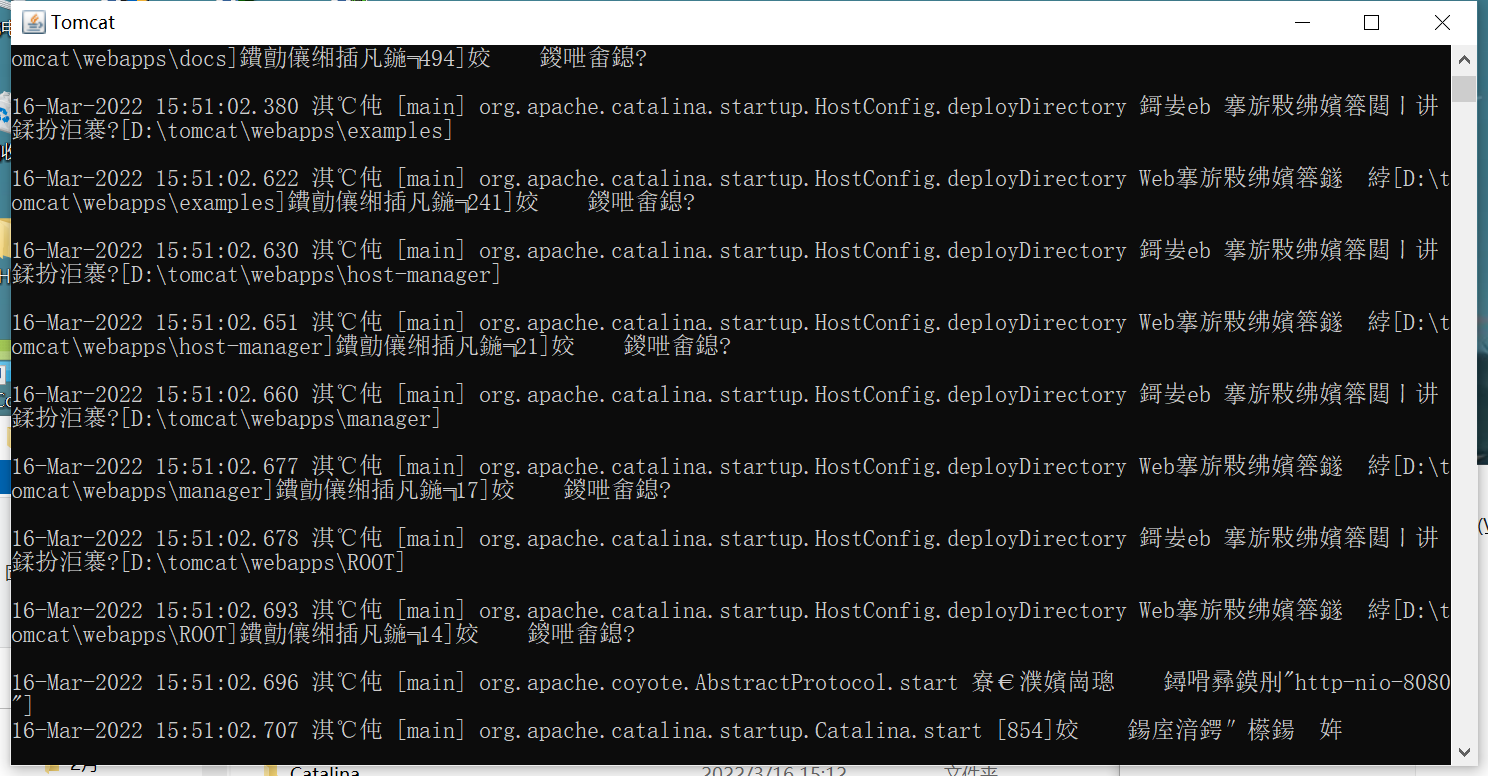
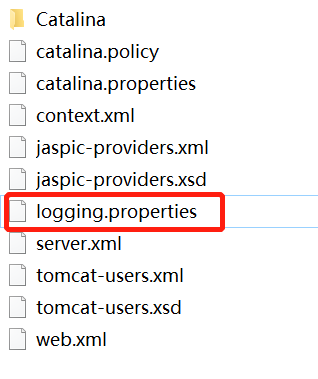
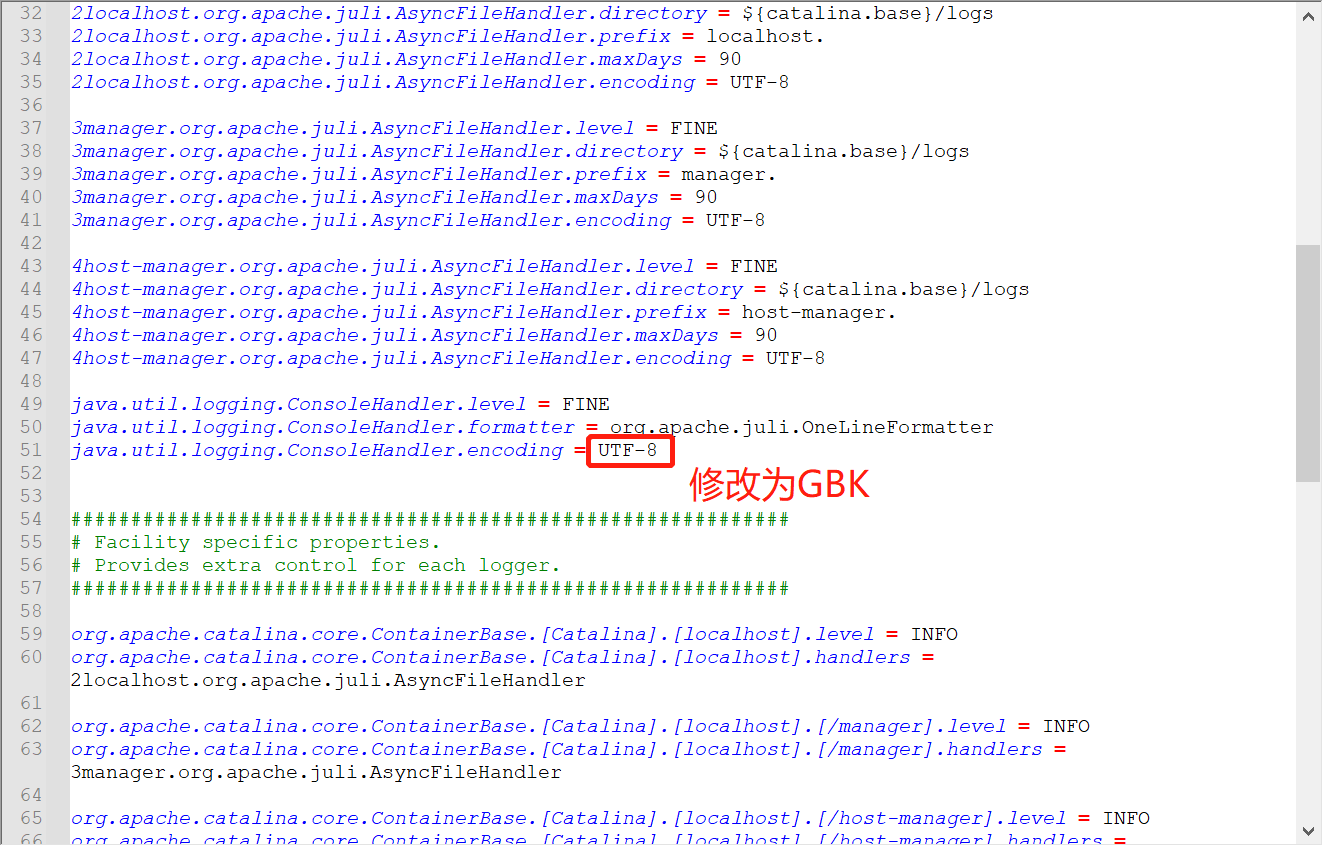
只需要在conf文件夹下找到logging.properties文件并打开编辑
windowns默认是GBK
重启一些程序,就不会乱码了
4.2 UDP
udp不需要连接,那么也就不存在什么客户端和服务端的关系,我既可以发送也可以接收,你开了9090端口,我也可以开一个8080端口
写一个发送消息的例子
发送端
package com.kongbai.internet.udp;

import java.net.DatagramPacket;
import java.net.DatagramSocket;
import java.net.InetAddress;

/**
 * @author kongbai
 * @version 1.0.0
 * @ClassName UdpClient.java
 * @Description TODO
 * @createTime 2022年03月16日 16:04:00
 */
//不需要连接服务器
public class UdpSend {
    public static void main(String[] args) throws Exception {
        //1.建立一个Socket
        DatagramSocket socket = new DatagramSocket();

        //2.建个包
        String msg = "你好,服务器";

        //3.发送给谁
        InetAddress localhost = InetAddress.getByName("localhost");
        int port = 9090;
            //数据    数据的长度起始     要发给谁
        DatagramPacket packet = new DatagramPacket(msg.getBytes(), 0, msg.getBytes().length, localhost, port);

        //4.发送包
        socket.send(packet);

        //5.关闭流
        socket.close();
    }
}
接收端
package com.kongbai.internet.udp;

import java.net.DatagramPacket;
import java.net.DatagramSocket;

/**
 * @author kongbai
 * @version 1.0.0
 * @ClassName UdpServer.java
 * @Description TODO
 * @createTime 2022年03月16日 16:15:00
 */
//还是要等待客户端的连接
public class UdpReceive {
    public static void main(String[] args) throws Exception {
        //1.开放端口
        DatagramSocket socket = new DatagramSocket(9090);

        //2.接收数据包
        byte[] buffer = new byte[1024];
        DatagramPacket packet = new DatagramPacket(buffer, 0, buffer.length); //接收

        socket.receive(packet); //阻塞接收
        System.out.println(packet.getAddress().getHostAddress()); //发送数据的地址
        System.out.println(new String(packet.getData(), 0, packet.getLength()));

        //3.关闭连接
        socket.close();
    }
}
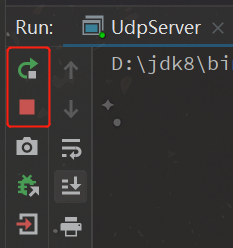
先运行接收端,持续等待
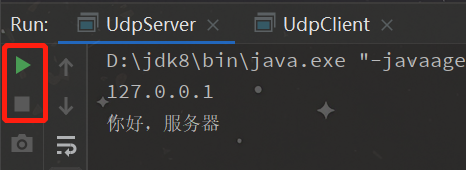
再运行发送端,收到数据并停止运行
4.2.1 UDP聊天实现
先来看看单方面的发送
接收端
package com.kongbai.internet.udp.chat;

import java.net.DatagramPacket;
import java.net.DatagramSocket;

/**
 * @author kongbai
 * @version 1.0.0
 * @ClassName UdpReceive02.java
 * @Description TODO
 * @createTime 2022年03月16日 16:32:00
 */
public class UdpReceive02 {
    public static void main(String[] args) throws Exception {
        DatagramSocket socket = new DatagramSocket(6666);
        while (true) {
            //准备接收数据
            byte[] container = new byte[1024];
            DatagramPacket packet = new DatagramPacket(container, 0, container.length);
            socket.receive(packet); //阻塞式接收

            //断开连接
            byte[] data = packet.getData();
            String receiveData = new String(data, 0, data.length);
            System.out.println(receiveData);
            if (receiveData.equals("bye")) {
                break;
            }
        }
        socket.close();
    }
}
发送端
package com.kongbai.internet.udp.chat;

import java.io.BufferedReader;
import java.io.InputStreamReader;
import java.net.DatagramPacket;
import java.net.DatagramSocket;
import java.net.InetSocketAddress;

/**
 * @author kongbai
 * @version 1.0.0
 * @ClassName UdpSend02.java
 * @Description TODO
 * @createTime 2022年03月16日 16:32:00
 */
public class UdpSend02 {
    public static void main(String[] args) throws Exception {
        DatagramSocket socket = new DatagramSocket(8888);

        //准备数据:控制台读取System.in
        BufferedReader reader = new BufferedReader(new InputStreamReader(System.in));

        while (true) {
            String data = reader.readLine();
            byte[] datas = data.getBytes();
            DatagramPacket packet = new DatagramPacket(datas, 0, datas.length,
                    new InetSocketAddress("localhost", 6666));
            socket.send(packet);

            if (data.equals("bye")) {
                break;
            }
        }
        socket.close(); //关闭流
    }
}
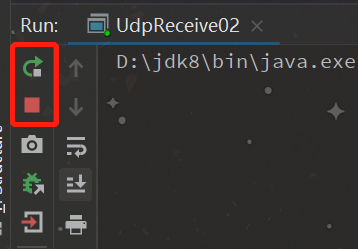
先运行接收端
再运行发送端
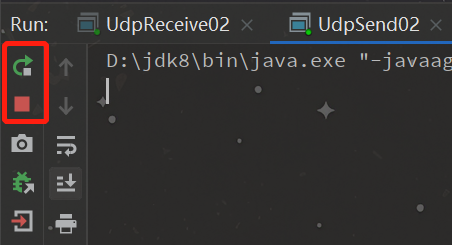
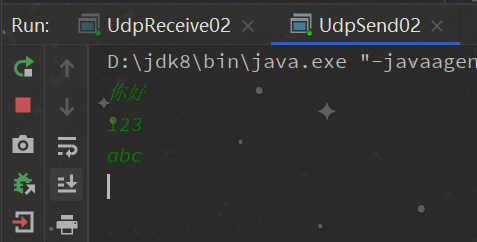
可以看到接收端和发送端都在持续运行没有停止,现在在发送端输入消息
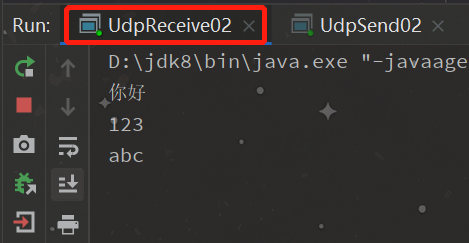
接收端便会显示,且程序不会停止,依旧在持续运行
现在,需要实现一个咨询的功能,双方均可发送和接收,这里需要用到多线程–>对上面的代码进行一点改造
TalkSend:
package com.kongbai.internet.udp.chat;

import java.io.BufferedReader;
import java.io.InputStreamReader;
import java.net.DatagramPacket;
import java.net.DatagramSocket;
import java.net.InetSocketAddress;

/**
 * @author kongbai
 * @version 1.0.0
 * @ClassName TalkSend.java
 * @Description TODO
 * @createTime 2022年03月16日 17:07:00
 */
public class TalkSend implements Runnable{
    DatagramSocket socket = null;
    BufferedReader reader = null;

    private int fromPort;
    private String toIP;
    private int toPort;

    public TalkSend(int fromPort, String toIP, int toPort) {
        this.fromPort = fromPort;
        this.toIP = toIP;
        this.toPort = toPort;

        try {
            socket = new DatagramSocket(fromPort);
            reader = new BufferedReader(new InputStreamReader(System.in));
        } catch (Exception e) {
            e.printStackTrace();
        }
    }

    @Override
    public void run() {
        while (true) {
            try {
                String data = reader.readLine();
                byte[] datas = data.getBytes();
                DatagramPacket packet = new DatagramPacket(datas, 0, datas.length,
                        new InetSocketAddress(this.toIP, this.toPort));
                socket.send(packet);

                if (data.equals("bye")) {
                    break;
                }
            } catch (Exception e) {
                e.printStackTrace();
            }
        }
        socket.close(); //关闭流
    }
}
TalkReceive:
package com.kongbai.internet.udp.chat;

import java.io.IOException;
import java.net.DatagramPacket;
import java.net.DatagramSocket;
import java.net.SocketException;

/**
 * @author kongbai
 * @version 1.0.0
 * @ClassName TalkReceive.java
 * @Description TODO
 * @createTime 2022年03月16日 17:21:00
 */
public class TalkReceive implements Runnable{
    DatagramSocket socket = null;
    private int port;
    private String msgFrom;

    public TalkReceive(int port, String msgFrom) {
        this.port = port;
        this.msgFrom = msgFrom;
        try {
            socket = new DatagramSocket(port);
        } catch (SocketException e) {
            e.printStackTrace();
        }
    }

    @Override
    public void run() {
        while (true) {
            //准备接收数据
            try {
                byte[] container = new byte[1024];
                DatagramPacket packet = new DatagramPacket(container, 0, container.length);
                socket.receive(packet); //阻塞式接收

                //断开连接
                byte[] data = packet.getData();
                String receiveData = new String(data, 0, data.length);
                System.out.println(msgFrom + receiveData);
                if (receiveData.equals("bye")) {
                    break;
                }
            } catch (IOException e) {
                e.printStackTrace();
            }
        }
        socket.close();
    }
}
TalkTeacher:
package com.kongbai.internet.udp.chat;

/**
 * @author kongbai
 * @version 1.0.0
 * @ClassName TalkTeacher.java
 * @Description TODO
 * @createTime 2022年03月16日 17:31:00
 */
public class TalkTeacher {
    public static void main(String[] args) {
        new Thread(new TalkSend(5555, "localhost", 8888)).start();
        new Thread(new TalkReceive(9999, "学生:")).start();
    }
}
TalkStudent:
package com.kongbai.internet.udp.chat;

/**
 * @author kongbai
 * @version 1.0.0
 * @ClassName TalkStudent.java
 * @Description TODO
 * @createTime 2022年03月16日 17:27:00
 */
public class TalkStudent {
    public static void main(String[] args) {
        //开启两个线程
        new Thread(new TalkSend(7777, "localhost", 9999)).start();
        new Thread(new TalkReceive(8888, "老师:")).start();
    }
}
idea中直接运行效果不容易查看,用cmd来:
- 进入out文件夹下对应的代码文件夹中,这里存储的都是class文件,在路径栏前面输入cmd即可打开

- 分别打开两次,且输入如下命令;输入回车后什么都没显示且不报错

- 输入任意字符,另一个窗口就会显示

虽然不是很好看,但效果实现了!
五、URL
URL是统一资源定位符,是互联网上标准资源的地址。而互联网上的每个文件都有唯一的一个的URL,它包含的信息指出文件的位置以及浏览器应该怎么处理它。
package com.kongbai.internet;

import java.net.MalformedURLException;
import java.net.URL;

/**
 * @author kongbai
 * @version 1.0.0
 * @ClassName TestURL.java
 * @Description TODO
 * @createTime 2022年03月17日 13:57:00
 */
public class TestURL {
    public static void main(String[] args) throws MalformedURLException {
        URL url = new URL("http://localhost:8080/helloworld/index.jsp?username=kongbai&password=123");
        System.out.println(url.getProtocol()); //协议
        System.out.println(url.getHost()); //主机
        System.out.println(url.getPort()); //端口
        System.out.println(url.getPath()); //文件
        System.out.println(url.getFile()); //全路径
        System.out.println(url.getQuery()); //参数
    }
}

写个下载网络资源的代码,随意找个文件地址
package com.kongbai.internet;

import java.io.FileOutputStream;
import java.io.InputStream;
import java.net.HttpURLConnection;
import java.net.MalformedURLException;
import java.net.URL;

/**
 * @author kongbai
 * @version 1.0.0
 * @ClassName UrlDown.java
 * @Description TODO
 * @createTime 2022年03月17日 14:21:00
 */
public class UrlDown {
    public static void main(String[] args) throws Exception {
        //1.下载地址
        URL url = new URL("https://tse1-mm.cn.bing.net/th/id/R-C.2f2858f7d8b57" +
                "a848633cc02711a4a4f?rik=LeMvCvdwReQy9g&riu=http%3a%2f%2ftupian.sioe" +
                ".cn%2fb%2fbing-home-image%2fpic%2f20140729.jpg&ehk=12NQ%2f5iVQ%2ffbeZ" +
                "WHB9ryq2tAyCh9hDZDCkHe7eAqVQw%3d&risl=&pid=ImgRaw&r=0");
        //2.连接到这个资源 HTTP
        HttpURLConnection urlConnection = (HttpURLConnection) url.openConnection();
        InputStream inputStream = urlConnection.getInputStream();
        FileOutputStream fos = new FileOutputStream("tige.jpg"); //下载文件的名称及格式

        byte[] buffer = new byte[1024];
        int len;
        while ((len = inputStream.read(buffer)) != -1) {
            fos.write(buffer, 0, len); //写出这个数据
        }

        System.out.println("下载完成");
        fos.close();
        inputStream.close();
        urlConnection.disconnect(); //断开连接
    }
}
执行完成即在侧边栏出现,可以直接双击打开查看
