Netty是一个基于协议运作的框架,那么今天先来了解一下我们使用最多的Http协议,再使用该协议使用Java手写一个Tomcat。
1.什么是HTTP
1.1 介绍
超文本传输协议(Hyper Text Transfer Protocol,HTTP)是一个简单的请求-响应协议。它运行在TCP之上,指定了客户端可能发送什么的消息以及得到什么样的响应。
工作原理:HTTP是基于客户端与服务端且面向连接的,典型的HTTP处理过程如下:
- 客户端与服务端建立连接
- 客户端向服务端提出请求
- 服务端接受请求,并返回相应的文件作为响应
- 客服端与服务端关闭连接
1.2 协议报文
使用抓包访问一个HTTP接口并返回,得到内容如下:
- request请求报文
GET http://127.0.0.1:9012/api/app/online?type=1 HTTP/1.1
Host: 127.0.0.1:9012
Connection: keep-alive
User-Agent: Mozilla/5.0 (Windows NT 10.0; Win64; x64) AppleWebKit/537.36 (KHTML, like Gecko) Chrome/96.0.4664.110 Safari/537.36
Accept: text/html,application/xhtml+xml,application/xml;q=0.9,image/avif,image/webp,image/apng,*/*;q=0.8,application/signed-exchange;v=b3;q=0.9
- 使用Postman模拟的Post的请求报文
POST http://127.0.0.1:9012/api/app/online HTTP/1.1
Content-Type: application/json
User-Agent: PostmanRuntime/7.26.8
Accept: */*
Host: 127.0.0.1:9090
Connection: keep-alive
Content-Length: 11

{"a":"bbb"}
请求报文分析:
第一行中包含请求方法 请求路径 协议版本
其他行为请求头参数
如果是POST,那就是请求结果 请求头 空行 返回的body参数
- response响应报文
HTTP/1.1 200
Content-Type: application/json
Date: Fri, 29 Apr 2022 06:56:06 GMT
Keep-Alive: timeout=60
Connection: keep-alive
Content-Length: 46

{"code":0,"message":"ok","content":{"data":1}}
可以看出和Post请求一样,只有第一行返回的是响应结果,版本号 状态码
2.什么是Tomcat
2.1 介绍
轻量级的web应用服务器,在一台服务器配置好Tomcat后,可以利用它响应HTML页面的访问请求。Java中的Servlet 和JSP 规范总是能在Tomcat 中得到体现。
2.2 工作原理
Tomcat是一个中间件,也可以被运行在JVM中。Web项目的本质是一大堆的资源文件和方法,Web项目部署在Tomcat容器中就是希望Tomcat去调用写好的方法去返回客户端所需要的数据。
接下来看这样的一个web.xml文件,来源于Tomcat/conf中的web.xml
//sevlet拦截处理类
<servlet>
    <servlet-name>default</servlet-name>
    <servlet-class>org.apache.catalina.servlets.DefaultServlet</servlet-class>
    <init-param>
        <param-name>debug</param-name>
        <param-value>0</param-value>
    </init-param>
    <load-on-startup>1</load-on-startup>
</servlet>
//监听的mapping
<servlet-mapping>
    <servlet-name>default</servlet-name>
    <url-pattern>/</url-pattern>
</servlet-mapping>
使用spring MVC开发过的人应该不在少数吧,这个配置应该很熟悉了吧。
MVC工作原理:通过拦截浏览器匹配的路径,返回Servlet中的doGet/doPost的逻辑处理结果。
如HTTP请求就是通过TCP建立连接,将请求头信息封装成HttpRequest对象调用到Servlet中的doGet/doPost,然后处理完逻辑后,再将返回结果封装成HttpResponse对象给客户端响应,接下来通过代码来深入的了解一下。
3.Java代码实现
3.1 结构
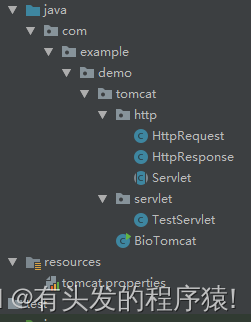
- servlet实现类
public class TestServlet extends Servlet {

    @Override
    public void doGet(HttpRequest httpRequest, HttpResponse httpResponse) throws Exception {
        doPost(httpRequest, httpResponse);
    }

    @Override
    public void doPost(HttpRequest httpRequest, HttpResponse httpResponse) throws Exception {
        System.out.println("参数:" + httpRequest.getParamMap());

        httpResponse.write("hello, my name is TestServlet,requestParam:" + httpRequest.getParamMap());
    }
}
暂时不用引入其他jar包,底层均为自己实现
3.2 Servlet顶层设计
- 在原始的servlet包中,是通过doService方法调用到doGet/doPost,这里直接抽象了
public abstract class Servlet {
    public void service(HttpRequest httpRequest, HttpResponse httpResponse) throws Exception {
        try {
            if ("GET".equals(httpRequest.getMethodType())) {
                doGet(httpRequest, httpResponse);
            } else if ("POST".equals(httpRequest.getMethodType())) {
                doPost(httpRequest, httpResponse);
            }
        } catch (Exception e) {
            httpResponse.write("500 SERVICE ERROR");
        }
    }
    public abstract void doGet(HttpRequest httpRequest, HttpResponse httpResponse) throws Exception;

    public abstract void doPost(HttpRequest httpRequest, HttpResponse httpResponse) throws Exception;
}
3.3 Http输入输出体
在MVC中获取参数都是在Request中获取,输出到浏览器是通过Response,这里简单实现一下
HttpRequest
@Data
public class HttpRequest {

    String methodType;
    String methodName;
    Map<String, Object> paramMap;

    public HttpRequest(InputStream is) throws IOException {
        String content = null;
        int len;
        byte[] bytes = new byte[1024];
        if ((len = is.read(bytes)) > 0) {
            content = new String(bytes, 0, len);
        }
        //此处日志输出为上面贴的HTTP协议内容
        System.out.println(content);
        //解析得到HttpRequest对象
        handlerRequest(content);
    }
	//解析 偷懒只解析get方法的了
    private void handlerRequest(String content) {
        //GET /test.do?type=1 HTTP/1.1
        String[] split = content.split("\n")[0].split(" ");
        this.methodType = split[0];
        //test.do?type=1
        String[] split1 = split[1].split("\\?");
        this.methodName = split1[0];
        if (split1.length > 1) {
            if(this.paramMap == null) this.paramMap = new HashMap<>();
            //type=1&status=1
            String[] split2 = split1[1].split("&");
            for (String str : split2) {
                String[] split3 = str.split("=");
                this.paramMap.put(split3[0], split3[1]);
            }
        }
    }
}
- HttpResponse
public class HttpResponse {

    OutputStream os;

    public HttpResponse(OutputStream os) {
        this.os = os;
    }

    public void write(String str) throws IOException {
        StringBuilder sb = new StringBuilder().append("HTTP/1.0 200 OK\n")
                .append("Content-Type: text/html\n")
                .append("\r\n")
                .append(str);
        os.write(sb.toString().getBytes());
    }
}
3.4 核心连接类
public class BioTomcat {

    static int port = 9090;
    static ServerSocket serverSocket;
    static Map<String, String> mapping = new ConcurrentHashMap<>();

    public static void main(String[] args) throws IOException {
        //initMapping(); 正常是扫描注解得到对应的请求地址和servlet类的,这里只为弄懂原理,简便了
        mapping.put("/test.do", "com.example.demo.tomcat.servlet.TestServlet");

        serverSocket = new ServerSocket(port);

        System.out.println("socket 已启动,端口:" + port);

        while (true) {
            Socket socket = serverSocket.accept();
            InputStream is = null;
            OutputStream os = null;
            try {
                is = socket.getInputStream();
                os = socket.getOutputStream();
                //输入流封装成httpRequest
                HttpRequest httpRequest = new HttpRequest(is);
                //输出流封装成httpResponse
                HttpResponse httpResponse = new HttpResponse(os);

                if (!mapping.containsKey(httpRequest.getMethodName())) {
                    httpResponse.write("404 NOT FOUND");
                    continue;
                }
                //如果是spring容器的正常应该是从容器中获取 这里单体的 直接new了
                String className = mapping.get(httpRequest.getMethodName());
                Servlet servlet = (Servlet) Class.forName(className).newInstance();
                servlet.service(httpRequest, httpResponse);
            } catch (Exception e) {
            } finally {
                if (is != null) is.close();
                if (os != null) {
                    os.flush();
                    os.close();
                }
                socket.close();
            }
        }
    }
}
4.tomcat测试
启动服务,调用http://127.0.0.1:9090/test.do?type=22&name=123456
网页输出:
hello, my name is TestServlet,requestParam:{name=123456, type=22}
日志输出:
GET /test.do?type=22&name=123456 HTTP/1.1
Host: 127.0.0.1:9090
Connection: keep-alive
sec-ch-ua: " Not A;Brand";v="99", "Chromium";v="96", "Google Chrome";v="96"
sec-ch-ua-mobile: ?0
sec-ch-ua-platform: "Windows"
Upgrade-Insecure-Requests: 1
User-Agent: Mozilla/5.0 (Windows NT 10.0; Win64; x64) AppleWebKit/537.36 (KHTML, like Gecko) Chrome/96.0.4664.110 Safari/537.36
Accept: text/html,application/xhtml+xml,application/xml;q=0.9,image/avif,image/webp,image/apng,*/*;q=0.8,application/signed-exchange;v=b3;q=0.9
Sec-Fetch-Site: none
Sec-Fetch-Mode: navigate
Sec-Fetch-User: ?1
Sec-Fetch-Dest: document
Accept-Encoding: gzip, deflate, br
Accept-Language: zh-HK,zh-CN;q=0.9,zh;q=0.8


参数:{name=123456, type=22}
源码全贴了,就不上云了,原理应该了解了吧,下篇文章会改造成Netty版本的。
以上就是本章的全部内容了。
上一篇:通信框架之Netty第一话 - NIO的超神发展之路
下一篇:通信框架之Netty第三话 - Netty的使用以及使用Netty改造Tomcat
不见只今汾水上,唯有年年秋雁飞

