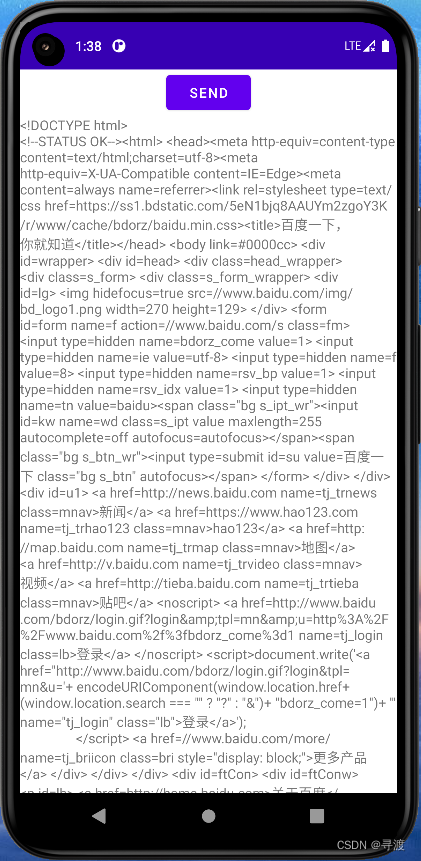
在过去,Android 上发送 HTTP 请求一般有两种方式:HttpURLConnection 和 HttpClient,不过在 Android 6.0 系统中,HttpClient 被完全移除了,因此推荐使用 HttpURLConnection。
HttpURLConnection
下面的测试代码主要实现对百度首页数据的获取。
- 首先添加网络权限
<uses-permission android:name="android.permission.INTERNET" />
- 布局文件
<LinearLayout xmlns:android="http://schemas.android.com/apk/res/android"
    android:layout_height="match_parent"
    android:layout_width="match_parent"
    android:orientation="vertical">
<Button
    android:id="@+id/button"
    android:layout_width="wrap_content"
    android:layout_height="wrap_content"
    android:text="send"
    android:layout_gravity="center"/>
    <ScrollView
        android:id="@+id/scrollView"
        android:layout_width="match_parent"
        android:layout_height="match_parent">
        <TextView
            android:id="@+id/text"
            android:layout_width="match_parent"
            android:layout_height="wrap_content"/>
    </ScrollView>
</LinearLayout>
- java文件
对部分源码的分析:
按钮点击调用sendHttpURL()方法,我们在这个方法里实现对数据的获取打印。
具体步骤:- 我们获取需要获取到HttpURLConnection实例,new一个URL对象,放入网址,调用openConnection()方法。
java Connection=new URL("http://www.baidu.com").openConnection(); - Http请求的方法有post和get两种方法,post提交数据,get获取数据。
Connection.setRequestMethod("GET"); - 设置连接超时、读取超时的毫秒数
Connection.setConnectTimeout(8000);Connection.setReadTimeout(8000); - 获取输入流

- 我们获取需要获取到HttpURLConnection实例,new一个URL对象,放入网址,调用openConnection()方法。
public class MainActivity extends AppCompatActivity {
private TextView responseText;
    @Override
    protected void onCreate(Bundle savedInstanceState) {
        super.onCreate(savedInstanceState);
        setContentView(R.layout.activity_main);
        // 隐藏标题栏
        if (getSupportActionBar() != null)
            getSupportActionBar().hide();

        Button button01=findViewById(R.id.button);
        responseText=findViewById(R.id.text);
        button01.setOnClickListener(new View.OnClickListener() {
            @Override
            public void onClick(View view) {
                sendHttpURL();
            }
        });
    }
    private void sendHttpURL()
    {
    //开启一个线程
        new Thread(new Runnable() {
            @Override
            public void run() {
            //
                HttpURLConnection Connection=null;
                BufferedReader reader=null;
                try {
                    //获取HttpURLConnection实例:这时候我们需要new出一个对象,然后传入百度的网络地址,调用openConnect()方法
                    URL url=new URL("https://www.baidu.com/");
                    Connection=(HttpURLConnection)url.openConnection();
                  //  new URL("http://www.baidu.com").openConnection();
                    //需要从服务器获取数据get,提交数据给服务器post
                    Connection.setRequestMethod("GET");
                    //设置连接超时、读取超时的毫秒数
                    Connection.setConnectTimeout(8000);
                    Connection.setReadTimeout(8000);
                    //获取服务器返回的输入流
                    InputStream inputStream=Connection.getInputStream();
                    //对获取的输入流进行读取
                    InputStreamReader inputStreamReader=new InputStreamReader(inputStream);
                    reader= new BufferedReader(inputStreamReader);

                    StringBuffer response=new StringBuffer();

                    String line;
                    while ((line=reader.readLine())!=null)
                    {
                        response.append(line);
                    }
                    //调用showResponse()方法
                    showResponse(response.toString());
                }catch (Exception e)
                {
                    e.printStackTrace();
                }finally {
                    //已经获取到了数据,我们需要关闭连接。
                    // close()是用来释放连接所占用的资源即释放BluetootheGatt的所有资源,只能使用BluetoothDevice.connectGatt()方法进行重新连接
                    if(reader!=null)
                    {
                        try {
                            reader.close();
                        }catch (IOException e) {
                            e.printStackTrace();
                        }
                    }
                    //我们就使用disconnect()断开连接的,但是用它断开连接后,连接所占用的资源并没有被释放,而只是暂时的断开连接,可以调用BluetoothGatt.connect()方法进行重连,这样还可以继续进行断开前的操作。
                    if (Connection!=null)
                        Connection.disconnect();
                }
            }
        }).start();
    }
    //Android里面不允许在子线程里面进行UI操作,所以我们需要把线程切换成主线程。
    private void showResponse(final String response){
        runOnUiThread(new Runnable() {
            @Override
            public void run() {
                responseText.setText(response);
            }
        });
    }
}
OkHttp
和上面的HttpURLConnect共用一个布局文件。
在使用 OkHttp 之前,我们需要先在项目中添加 OkHttp 库的依赖,编辑 app/build.gradle 文件,在 dependencies 闭包中添加如下内容:
 /* okhttp3.0依赖库 */
    implementation 'com.squareup.okhttp3:okhttp:3.12.13'
    implementation 'com.squareup.okio:okio:1.15.0'
OkHttp的具体用法:
private void sendOkHttpURL() {
        new Thread(new Runnable() {
            @Override
            public void run() {
                Request request;
                Response response = null;
                try {
                    //创建一个OkHttpClient实例
                    OkHttpClient client = new OkHttpClient();
                    //建立一个Request对象,利用这个对象来发起http请求
                    request = new Request.Builder().url("https://www.baidu.com").build();
                    //newCall方法来创建一个call对象,调用他的execute()方法来发送请求并且获取服务器的返回的数据
                    response = client.newCall(request).execute();
                    //得到具体的数据
                    String responseData = response.body().string();

                    showResponse(responseData);
                } catch (Exception e) {
                    e.printStackTrace();
                } finally {
                    //已经获取到了数据,我们需要关闭连接。
                    // close()是用来释放连接所占用的资源即释放BluetootheGatt的所有资源,只能使用BluetoothDevice.connectGatt()方法进行重新连接
                    if (response != null) {
                        try {
                            response.close();
                        } catch (Exception e) {
                            e.printStackTrace();
                        }
                    }
                }
            }
        }).start();
    }
下面是向服务器发送数据,示例代码中没有使用。
// 构建一个 RequestBody 对象存放待提交的参数
val requestBody = FormBody.Builder()
					.add("username", "admin")
					.add("password", "123")
					.build()
// 调用 post 方法,并将 RequestBody 对象传入
val request = Request.Builder()
					.url("https://www.baidu.com")
					.post(requestBody)
					.build()
