Docker网络
一、前言
1.docker的镜像是令人称道的地方,但网络功能还是相对薄弱的部分。
2.docker安装后会自动创建3种网络:bridge、host、none
3.yum install -y net-tools 查看网络的工具
本章节将为4个部分去介绍docker网络通信
二、docker原生网络
一、 简介
(1)docker安装后会自动创建3种网络:bridge、host、none
安装时会默认创建一个docker0 的Linux bridge,新建的容器会自动桥接到这个接口。
ip addr show docker0

(2) 查看当前网络
docker network ls

二、新建容器的网络设置
1、bridge模式
bridge模式下容器没有一个公有ip,只有宿主机可以直接访问,外部主机是不可见的。容器通过宿主机的NAT规则后可以访问外网。
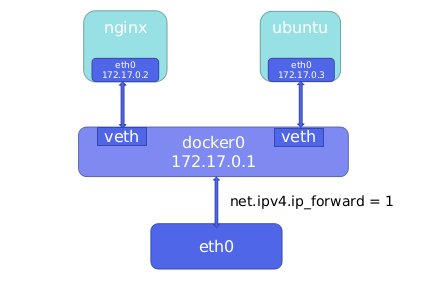
[root@server1 harbor] docker run -d nginx 后台运行nginx
9fb9e4cdfe2ab9b7ae4a86b96108239ac60eef9f60eb0274f3c7b22f4b134e4c
[root@server1 harbor] brctl show    查看网络连接
发现使用的是默认的网桥

2、host模式
host模式可以让容器共享宿主机网络栈,这样的好处是外部主机与容器直接通信,但是容器的网络缺少隔离性。
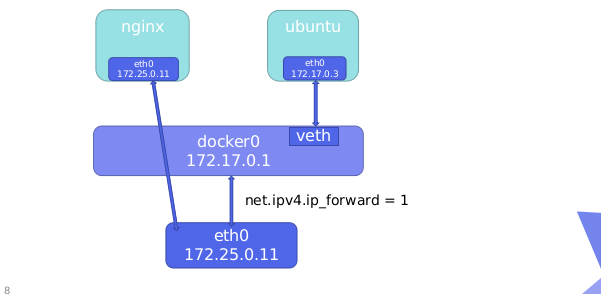
host网络模式需要在容器创建时指定 --network=host
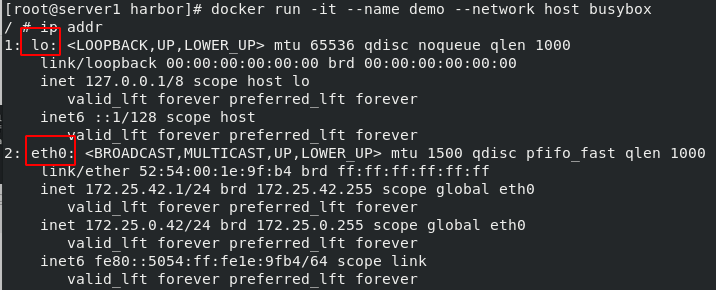
[root@server1 harbor] docker run -it --name demo --network host busybox
/ # ip addr show

3、none模式
none模式是指禁用网络功能,只有lo接口,在容器创建时使用
–network=none指定。
[root@server1 harbor]# docker run -it --name demo --network none busybox
/ # ip addr
只有lo口的

三、Docker自定义网络
自定义网络模式,docker提供了三种自定义网络驱动:
bridge、overlay、macvlan。
自定义bridge驱动类似默认的bridge网络模式,但增加了一些新的功能,overlay和macvlan是用于创建跨主机网络。
一、新建默认自定义网络
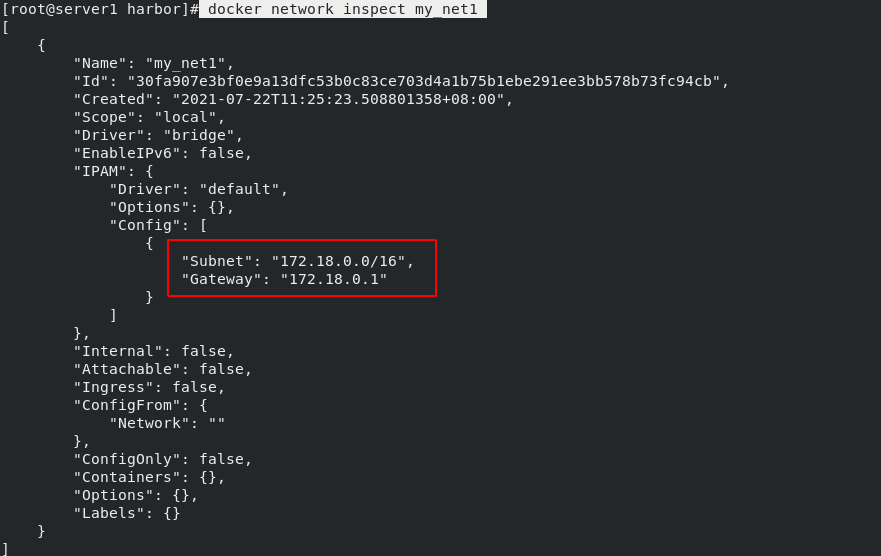
docker network create -d bridge my_net1
docker network ls                           图1
docker network inspect my_net1              图2
图1

图2
二、新建自定义–subnet 、–gateway网桥
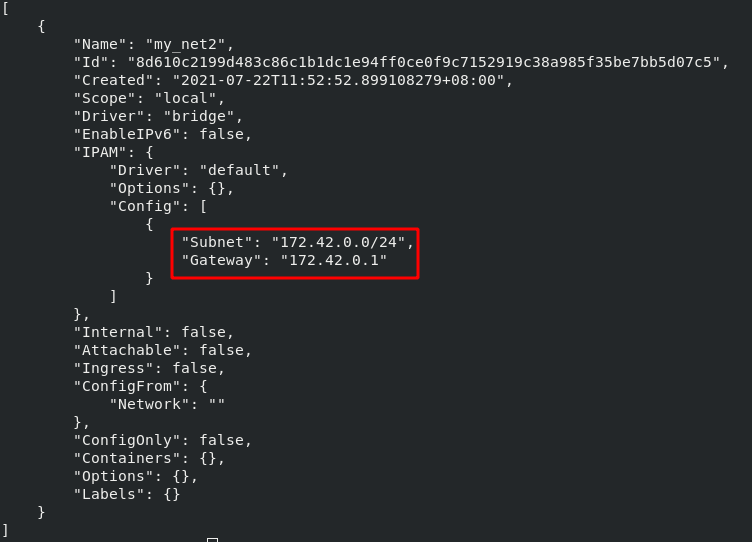
 docker network create --subnet 172.42.0.0/24 --gateway 172.42.0.1 my_net2
 docker network inspect my_net2
成功获取到设定的网络
三、实现同一网桥的容器的互通
使用–ip参数可以指定容器ip地址,但必须是在自定义网桥上,默认的bridge模式不支持,同一网桥上的容器是可以互通的。
[root@server1 harbor] docker network create --subnet 172.42.0.0/24 --gateway 172.42.0.1 my_net2              建立自定义网络
[root@server1 harbor] docker run -it --name demo1 --network my_net2 --ip 172.42.0.10 busybox             设置此容器的ip(并且ctrl+p+q打入后台运行)
[root@server1 harbor] docker run -it --name demo3 --network my_net2 --ip 172.42.0.12 busybox
/  ping 172.42.0.10              ping 之前demo1的ip

四、Docker容器通信
docker 1.10开始,内嵌了一个DNS server。
dns解析功能必须在自定义网络中使用。
启动容器时使用 --name 参数指定容器名称
五、跨主机容器网络
跨主机网络解决方案
docker原生的overlay和macvlan
一、macvlan网络方案实现
Linux kernel提供的一种网卡虚拟化技术。
无需Linux bridge,直接使用物理接口,性能极好。
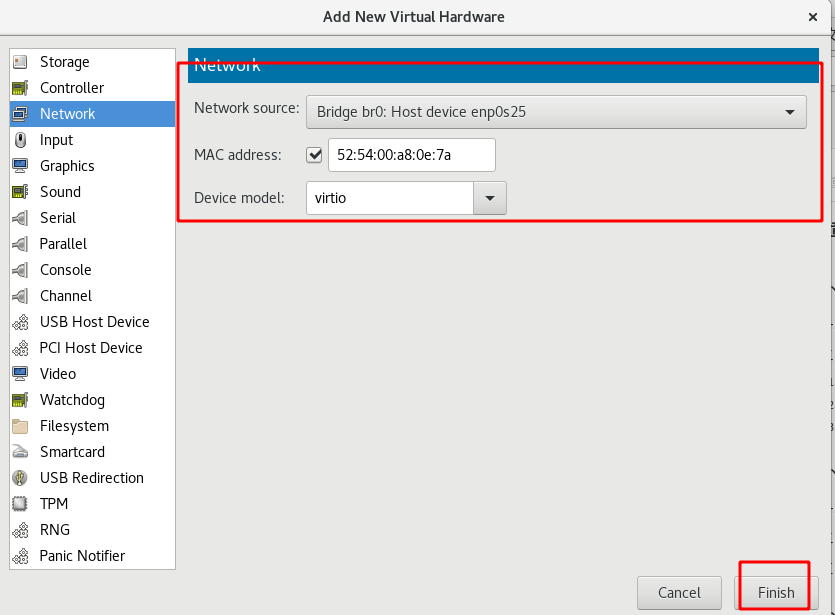
1.配置新网卡
server1
添加虚拟网卡
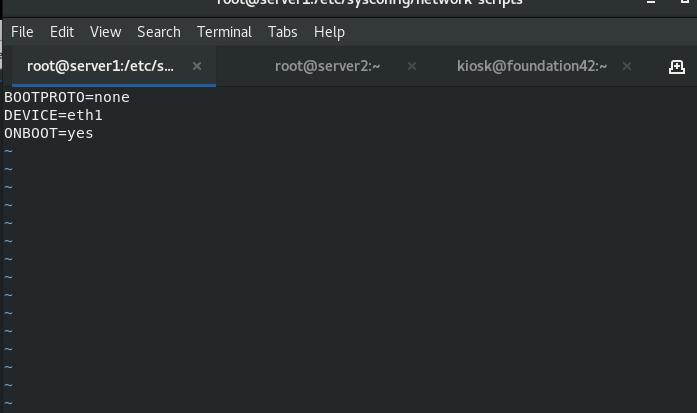
修改新网卡配置
[root@server1 network-scripts] cd /etc/sysconfig/network-scripts
[root@server1 network-scripts] cp ifcfg-eth0 ifcfg-eth1
[root@server1 network-scripts] vim ifcfg-eth1   图1
图1
2.启用网卡,设定混杂模式,
[root@server1 network-scripts] ifup eth1
[root@server1 network-scripts] ip link set eth1 promisc on
[root@server1 network-scripts] ip addr show eth1

3.docker主机上创建macvlan网络,开启容器进程
[root@server1 network-scripts] docker network create -d macvlan --subnet 172.54.0.0/24 --gateway 172.54.0.1 -o parent=eth1 macvlan1
1a4404b1fd8a1586081fa14600e1f1e843872f20609800fd6482f8a28f5c604f
[root@server1 network-scripts] docker run -it --name demo2 --network macvlan1 --ip 172.44.0.11 busybox
/
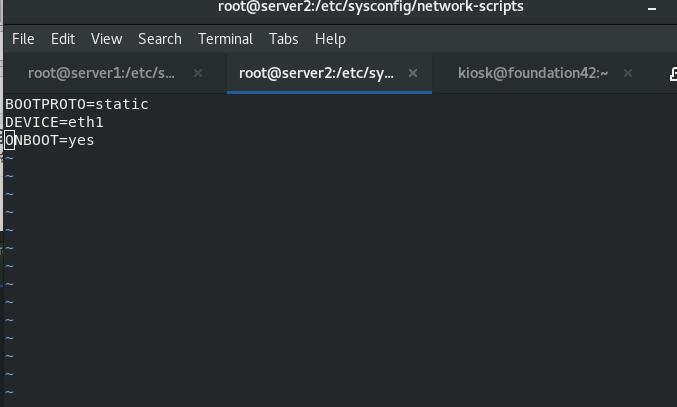
4.另外一块主机配置
server2
操作同上,添加一块相同的网卡eth1,修改其内容如下
启用网卡,设定混杂模式,
[root@server1 network-scripts] ifup eth1
[root@server1 network-scripts] ip link set eth1 promisc on
[root@server1 network-scripts] ip addr show eth1
创建相同网段的macvlan,设定ip为172.54.0.12的容器进程
[root@server2 mnt] docker network create -d macvlan --subnet 172.54.0.0/24 --gateway 172.54.0.1 -o parent=eth1 macvlan1
[root@server2 mnt] docker run -it --name demo3 --network macvlan1 --ip 172.54.0.12 busybox
5.实验结果:在sserver2的容器中,ping通server1的容器进程
