                  **基于https搭建web服务器**
 搭建一个基于https://www.zuoye.com:22222访问的web网站,网站首页在/www/https/,内容为zuoye,可以根据https://www.zuoye.com:22222/mimi访问到的信息为mimi,该网站的实际内容在/usr/local/secret,该网站的内容只有用户xiaoming能够查看。
步骤:
1.首先挂载光盘,写yum源
[root@localhost ~]# mount /dev/sr0 /mnt
mount: /mnt: /dev/sr0 already mounted on /run/media/root/RHEL-8-0-0-BaseOS-x86_64
[root@localhost ~]# cat /etc/yum.repos.d/base.repo
[BaseOS]
name=BaseOS
baseurl=file:///mnt/BaseOS
gpgcheck=0
[AppStream]
name=AppStream
baseurl=file:///mnt/AppStream
gpgcheck=0
2、安装httpd 、mod_ssl包
yum install httpd -y
yum install mod_ssl -y
3、切换到/etc/pki/tls/certs/目录下
[root@localhost ~]# cd /etc/pki/tls/certs/
 利用rz安装Makefile
先安装rz包
[root@localhost certs]# yum install lrzsz -y

使用make命令给自己颁发证书
若无make 先安装make包
[root@localhost certs]# rpm -q make
[root@localhost certs]# make zhengshu.crt
e is 65537 (0x010001)
Enter pass phrase:
Verifying - Enter pass phrase:
umask 77 ;
/usr/bin/openssl req -utf8 -new -key zhengshu.key -x509 -days 365 -out zhengshu.crt -set_serial 0
Enter pass phrase for zhengshu.key:
Country Name (2 letter code) [XX]:cn
State or Province Name (full name) []:sx
Locality Name (eg, city) [Default City]:xian
Organization Name (eg, company) [Default Company Ltd]:open
Organizational Unit Name (eg, section) []:ce
Common Name (eg, your name or your server’s hostname) []:www.zuoye.com
Email Address []:admin@open.com
 4、编辑配置文件
cd /etc/httpd/conf.d/
vim host-zhengshu.conf

5、在Linux的/etc/hosts 下写域名解析

在windows的C:\Windows\System32\drivers\etc\hosts下写域名解析

6、创建目录 ,写网页内容
[root@localhost conf.d]# mkdir /www/https
[root@localhost conf.d]# echo zuoye > /www/https/index.html
7、新建用户

8、创建目录,写网页内容

9、关闭防火墙,selinux,重启httpd服务
systemctl stop firewalld
setenforce 0


实验要求:搭建dhcp服务器使其能够给172.24.8.0网段和192.168.168.0网段的主机分配ip地址,dhcp服务器可以给该网段的主机分配固定ip地址为172.24.8.8和192.168.168.168。
1、先在vmware的编辑选项卡里面找到虚拟网络编辑器,去掉使用本地dhcp服务将IP地址分配给虚拟机的勾。

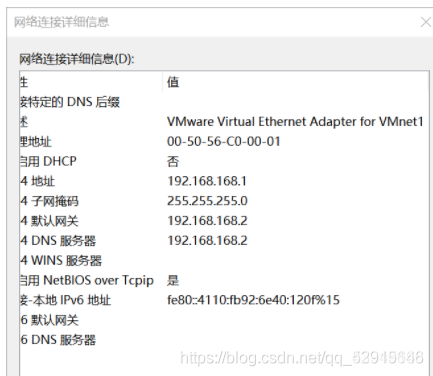
 2、去网络适配器里面查看vmnet1和vmnet8是否有相应模式段的地址,没有则手动配置


3、确保自己有两个网卡,一个处于nat和一个处于仅主机模式,并手动配置相应的ip参数
4、xshell远程连接
 5、rhel7装dhcp包,rhel8装dhcp-server
8.2


6、编辑/etc/dhcp/dhcpd.conf配置文件
 7、停止防火墙,改selinux的模式为permissive,重启dhcpd服务
[root@localhost ~]# systemctl stop firewalld
[root@localhost ~]# setenforce 0
[root@localhost ~]# getenforce
Permissive
8、给客户端的虚拟机添加两块网卡分别为仅主机和nat模式,并测试
