前言
之前章节介绍了,sc.exe、instsrv与srvany、Winsw进行在Windows系统中的应用程序服务化操作,本章讲解Windows系统中,服务化的另一个利器Nssm

工具介绍
Nssm全称为the Non-Sucking Service Manager,翻译为不是很糟糕的服务管理工具,参考链接:https://nssm.cc/
nssm is a service helper which doesn’t suck. srvany and other service helper programs suck because they don’t handle failure of the application running as a service. If you use such a program you may see a service listed as started when in fact the application has died. nssm monitors the running service and will restart it if it dies. With nssm you know that if a service says it’s running, it really is. Alternatively, if your application is well-behaved you can configure nssm to absolve all responsibility for restarting it and let Windows take care of recovery actions.
nssm logs its progress to the system Event Log so you can get some idea of why an application isn’t behaving as it should.
nssm also features a graphical service installation and removal facility. Prior to version 2.19 it did suck. Now it’s quite a bit better.
Google翻译:
nssm是一个不错的服务助手。 srvany 和其他服务帮助程序很糟糕,因为它们不处理作为服务运行的应用程序的故障。 如果您使用这样的程序,您可能会看到一个服务被列为已启动,而实际上该应用程序已经死亡。 nssm监视正在运行的服务,如果它死了,它将重新启动它。 使用 nssm,您知道如果服务说它正在运行,它确实是。 或者,如果您的应用程序表现良好,您可以配置 nssm以免除重新启动它的所有责任,并让 Windows 负责恢复操作
实际上,Nssm这些描述还停留在n年前,虽然srvany在高版本Windows系统中,已经不再升级,但并不妨碍,工具包的安装和使用,Winsw也能够输出异常日志,就目前来说,nssm从操作便捷度上看,还是优于目前笔者已知的其他工具
源码地址
git://git.nssm.cc/nssm/nssm.git or http://git.nssm.cc/nssm/nssm.git
程序下载
https://nssm.cc/release/nssm-2.24.zip
解压后,服务分为两个版本,一个是32位,一个是64位,依据需求进行选择

基础指令
常用指令
安装
服务名称(Path),启动路径(Startup directory)和服务名(Service name)属于必填项,其他配置,要么可以选择默认
nssm install <servicename>
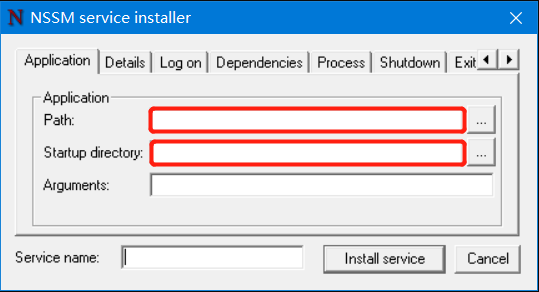
启动
根据服务名称启动服务
nssm start <servicename>
修改
用于设置对应服务的特定配置
nssm set <servicename> <parameter>
查看配置
根据服务名称获取对应的配置值
nssm set <servicename> <parameter>
查看状态
nssm status <servicename>
停止
停止服务运行
nssm stop <servicename>
卸载
卸载服务
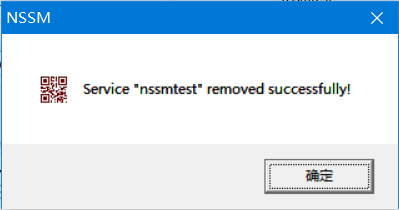
nssm remove <servicename>

卸载成功
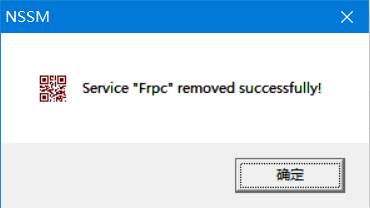
更多指令配置请查看笔者的文章太阳当空照-Windows服务化方式NSSM指令清单
案例实践
案例,为基于.Net Core的一个简单控制台程序,功能和之前笔者文章中,进行服务化的控制台程序一致,原来的配方,项目名换成nssmtest,内容如下:
static void Main(string[] args)
{
    while (true)
    {
        string datestr = DateTime.Now.ToString("HH:mm:ss");
        //休眠一秒,输出一秒日期时间字符串特定文本文件
        Thread.Sleep(1000);
        LogMsg(datestr);
    }
}

private static void LogMsg(string msg)
{
    //System.AppDomain.CurrentDomain.BaseDirectory
    //获取程序集目录:C:\Windows\Temp\.net\sctest

    //System.Environment.CurrentDirectory
    //获取该进程从中启动的目录:C:\Windows\system32

    //System.IO.Directory.GetCurrentDirectory()
    //获取当前应用工作路径:C:\Windows\system32

    //获取当前进程所属的执行exe文件名称
    string filename = System.Diagnostics.Process.GetCurrentProcess().MainModule.FileName;
    string dictoryPath = Path.GetDirectoryName(filename);
    string path = System.IO.Path.Combine(dictoryPath, $"{DateTime.Now.ToString("yyyy-MM-dd")}.log");
    using (var writer = File.AppendText(path))
    {
        writer.WriteLine($"当前时间:{msg}");
    }
}
发布后目录如下:

以管理员权限执行cmd,切换路径到nssm程序集目录下,此处为E:\DownLoads\nssm-2.24\win64
安装服务
>nssm install
Service "nssmtest" installed successfully!
选择对应exe发布路径
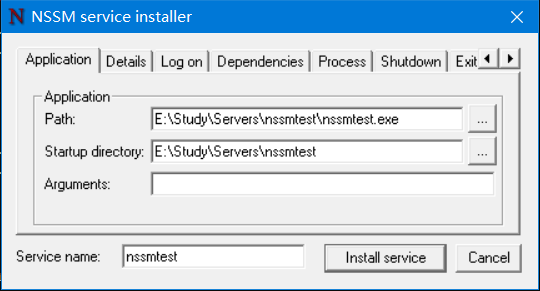
确认无误后,点击按钮[Install service],提示安装成功
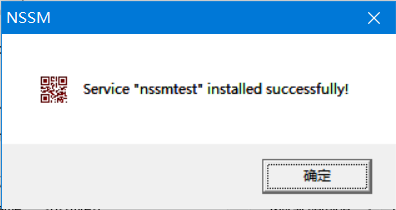
查看服务列表或者执行服务查询指令,可查看到对应服务是否存在,进行二次核查确认
服务列表

服务查询
>nssm status nssmtest
SERVICE_STOPPED
或
>sc query nssmtest
SERVICE_NAME: nssmtest
        TYPE               : 10  WIN32_OWN_PROCESS
        STATE              : 1  STOPPED
        WIN32_EXIT_CODE    : 1077  (0x435)
        SERVICE_EXIT_CODE  : 0  (0x0)
        CHECKPOINT         : 0x0
        WAIT_HINT          : 0x0
启动服务
>nssm start nssmtest
nssmtest: START: 操作成功完成。
查看状态
>nssm status nssmtest
SERVICE_RUNNING

执行程序目录下生成对应时间输出文件

停止服务
>nssm stop nssmtest
nssmtest: STOP: 操作成功完成。
>nssm status nssmtest
SERVICE_STOPPED

卸载服务
>nssm remove nssmtest
Service "nssmtest" removed successfully!

卸载成功
>nssm status nssmtest
Can't open service!
OpenService(): 指定的服务未安装。
以上即为笔者对于在Windows上实现应用程序服务化,使用nssm的基本操作,如需要上述测试程序,评论或者私信笔者