centos7 搭建lnmp环境及配置教程
安装lnmp环境是最方便,最快捷的一种方法。源码编译安装需要花费大量的人类时间,当然源码编译可以个性化配置一些其它功能。目前来说,yum安装基本满足我们搭建web服务器的需求。
nmp环境分为4部分,linux、nginx、mysql和php。
软件安装
linux系统
采用vm虚拟机最小化安装centos7.6,目前最新的centos系统。
nginx安装
配置nginx源
rpm -ivh http://nginx.org/packages/centos/7/noarch/RPMS/nginx-release-centos-7-0.el7.ngx.noarch.rpm
安装nginx-1.16版本
yum install -y nginx
确认是否安装:
yum install nginx,会默认创建nginx:nginx,组和账户。
文件默认位置:
二进制文件在/usr/sbin/nginx
配置文件夹在/etc/nginx/
log文件夹在/var/log/nginx
yum安装会自动创建/usr/lib/systemd/system/nginx.service,可以用systemctl 启动停止。
mysql安装
配置mysql源
rpm -ivh http://dev.mysql.com/get/mysql57-community-release-el7-10.noarch.rpm
安装mysql5.7
yum -y install mysql-community-server
确认是否安装:

php安装
配置php源
rpm -Uvh https://dl.fedoraproject.org/pub/epel/epel-release-latest-7.noarch.rpm
rpm -Uvh https://mirror.webtatic.com/yum/el7/webtatic-release.rpm
安装php7.0
yum install -y php70w-common php70w-fpm php70w-opcache php70w-gd php70w-mysqlnd php70w-mbstring php70w-pecl-redis php70w-pecl-memcached php70w-devel
上面该命令即可安装拓展:
php-api, php-bz2, php-calendar, php-ctype, php-curl, php-date, php-exif, php-fileinfo, php-filter, php-ftp, php-gettext, php-gmp, php-hash, php-iconv, php-json, php-libxml, php-openssl, php-pcre, php-pecl-Fileinfo, php-pecl-phar, php-pecl-zip, php-reflection, php-session, php-shmop, php-simplexml, php-sockets, php-spl, php-tokenizer, php-zend-abi, php-zip, php-zlib
如果要加装其它php拓展(如xml),直接”yum install php70w-xml”即可,非常简单
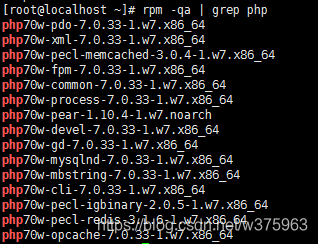
确认是否安装:

查看安装的php拓展
1 [root@localhost ~]# php -m
至此,nginx、mysql、php安装完成。下一步,配置。
软件配置及wordpress安装
nginx配置
首先看一下nginx配置文件夹。。
[root@localhost ~]# tree /etc/nginx
/etc/nginx
├── conf.d
│ └── default.conf
├── fastcgi_params
├── koi-utf
├── koi-win
├── mime.types
├── modules -> …/…/usr/lib64/nginx/modules
├── nginx.conf
├── scgi_params
├── uwsgi_params
└── win-utf
再看一下nginx配置文件nginx.conf,其包含了conf.d文件夹内所有后缀是conf的配置文件。其实conf.d文件夹中以conf结尾的文件即为网站的配置文件。

查看conf.d/default.conf默认配置文件

每一个网站目录都需要一个”server“来引导。server_name为要访问的网址(即域名,后面建立wordpress配置会详细讲解),root即为网站的默认目录,index为索引。
下面我们来重建一个客户端浏览器与web服务器交互的过程,来理解这些配置的作用。
浏览器里面输入“localhost”(即server_name,可以用ip地址代替),浏览器会默认访问其80端口,恰好web服务器nginx监听的就是80端口(配置中的listen 80),这时候nginx会找到网站的默认目录root,即/usr/share/nginx/html,然后寻找该目录下的index索引文件,即index.html、index.htm,我们来看一下/usr/share/nginx/html文件夹和index.html文件的内容:

index.html是一个html语言编写的文件,可以在网页上显示出来,启动nginx, systemctl start nginx ,访问localhost(或者ip),即可显示出来index.html文件中的内容

php配置
第一节安装过程我们单独安装了nginx与php,它们根本就不认识,怎么交互?所以需要将nginx与php程序关联起来,即改动default.conf文件中的有关fastcgi的项,把注释去掉,然后把 /script 改成 $document_root ,即

但单纯地访问静态的html网页实现的功能太少了,所以,当当当当,php出场了!用php语言来编写网页。nginx收到用户请求后,访问网站所在目录,看到其索引文件是php结尾的,index.php,然后将其转交给php处理,php处理后返回给nginx,nginx再返回给用户。
从wordpress官网上下载源码,然后解压,查看其文件:
[root@localhost ~]# wget https://cn.wordpress.org/latest-zh_CN.tar.gz
[root@localhost ~]# tar xf latest-zh_CN.tar.gz
[root@localhost ~]# ls wordpress/
index.php wp-admin wp-content wp-load.php wp-signup.php
license.txt wp-blog-header.php wp-cron.php wp-login.php wp-trackback.php
readme.html wp-comments-post.php wp-includes wp-mail.php xmlrpc.php
wp-activate.php wp-config-sample.php wp-links-opml.php wp-settings.php
接下来配置网站的nginx配置文件。假设我们注册的网站域名为domain.com,进入/etc/nginx/conf.d/文件夹,新建domain.com.conf文件(名称随意,但后缀必须为conf,为了方便区分使用“域名”+“.conf"),修改内容如下(可以直接复制default.conf,然后修改):

注意几个要修改的地方,server_name改为你注册的域名(域名要解析到服务器的ip,一台vps服务器上可以有多个网站,不同网站就是用server_name来区分的),root即网站根目录,定位到上文我们复制到的地址,index里添加index.php(wordpress目录里只有index.php,没有index.html),还有下方的nginx与fastcgi关联。
至此,网站的配置文件完成。下一步,配置mysql。
mysql配置
首先启动mysql,
systemctl start mysqld
使用yum安装完mysql之后,第一次会生成一个随机密码,在/var/log/mysqld.log中,可以用root@localhost:后面密码登入
[root@localhost ~]# grep password /var/log/mysqld.log
2019-08-02T19:27:52.679467Z 1 [Note] A temporary password is generated for root@localhost: Fu0fT!4b,4,b
然后登录mysql,输入上方的密码(密码不会显示出来),回车
复制代码 mysql -u root -p
[root@localhost ~]# mysql -u root -p
Enter password:
Welcome to the MySQL monitor. Commands end with ; or \g.
Your MySQL connection id is 2
Server version: 5.7.27
Copyright ? 2000, 2019, Oracle and/or its affiliates. All rights reserved.
Oracle is a registered trademark of Oracle Corporation and/or its
affiliates. Other names may be trademarks of their respective
owners.
Type ‘help;’ or ‘\h’ for help. Type ‘\c’ to clear the current input statement.
mysql>
修改mysql密码
ALTER USER USER() IDENTIFIED BY ‘123456’;
重新启动nginx、mysql、php-fpm
systemctl restart nginx
systemctl restart mysqld
systemctl restart php-fpm
为避免出现其它问题,先关闭防火墙和selinux,后续再进行配置:
systemctl stop firewalld
setenforce 0
浏览网页
输入自己的网络ip
http://(自己的ip)/info.php