ubuntu 20.04 windows10 双系统安装
1. win10 分配空闲磁盘
\qquad
使用
D
i
s
k
G
e
n
i
u
s
DiskGenius
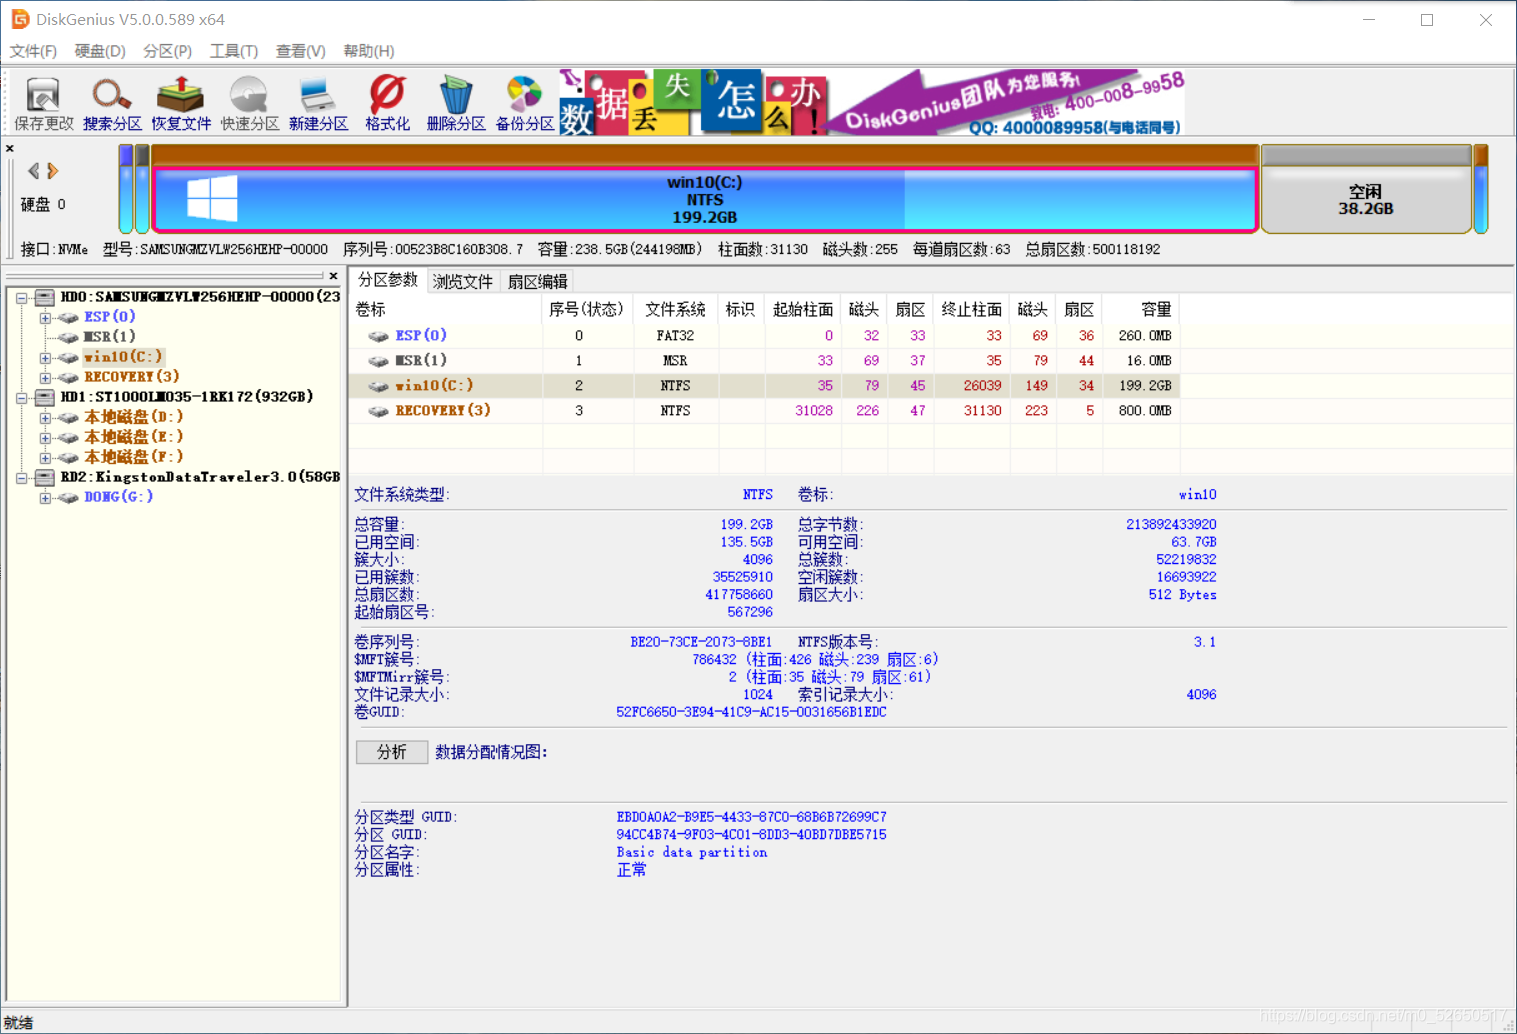
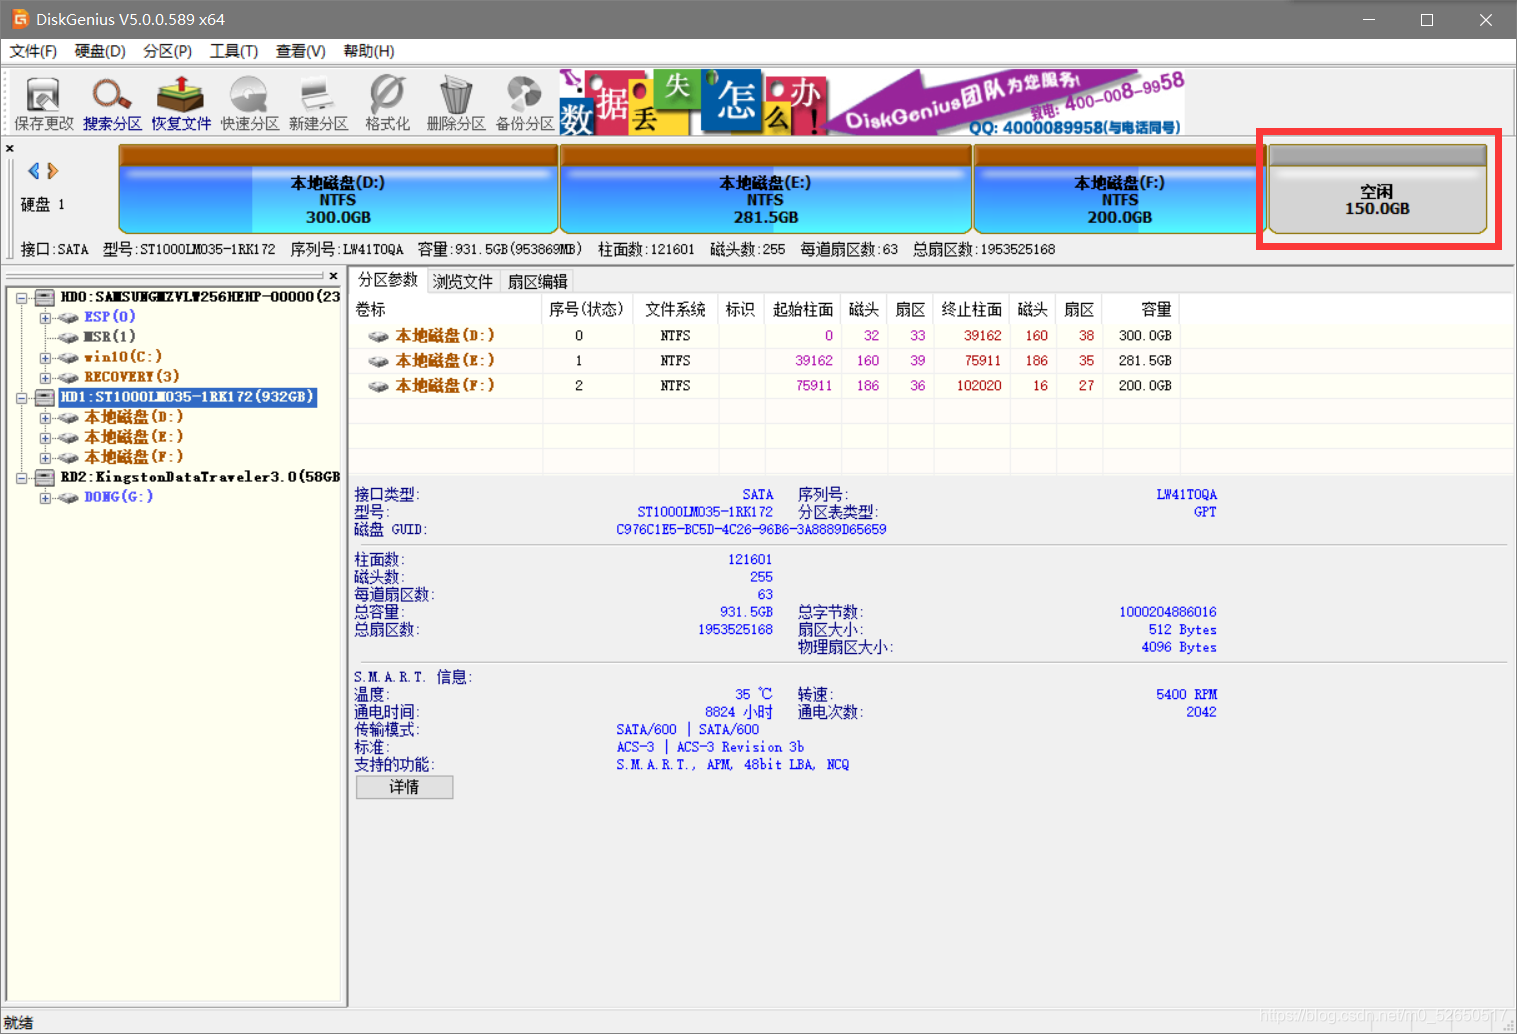
DiskGenius 数据恢复软件对磁盘空间进行拆分。也可以在
w
i
n
10
win10
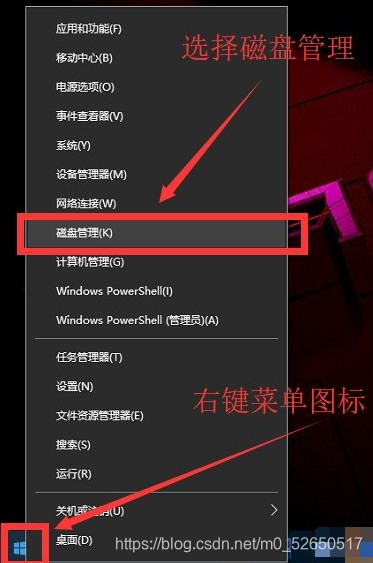
win10 左下角开始图标上鼠标右键,在右键菜单中找到磁盘管理,打开即可。作者电脑为250G固态硬盘(实际238)+1T机械硬盘(实际932),所以我将固态硬盘划分38.2G空闲,机械硬盘划分150G空闲。
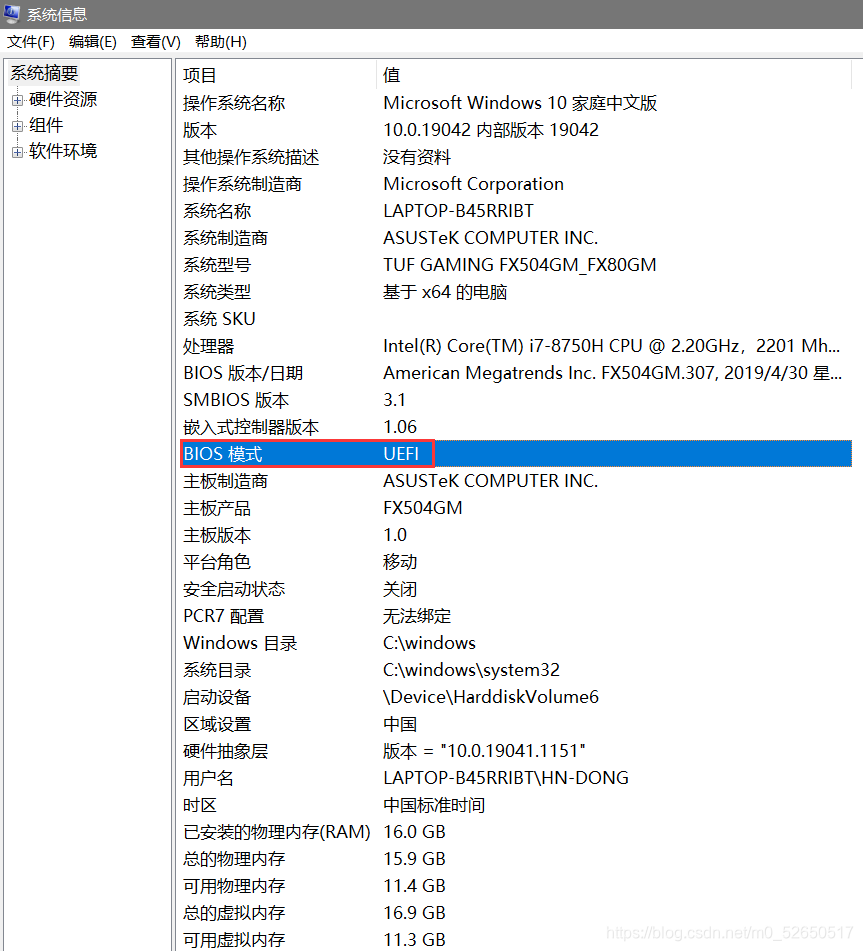
2. 检查 windows10 的引导方式
\qquad
首先win+R运行,输入msinfo32,回车弹出系统信息,查看BIOS模式,本文适用于UEFI引导。
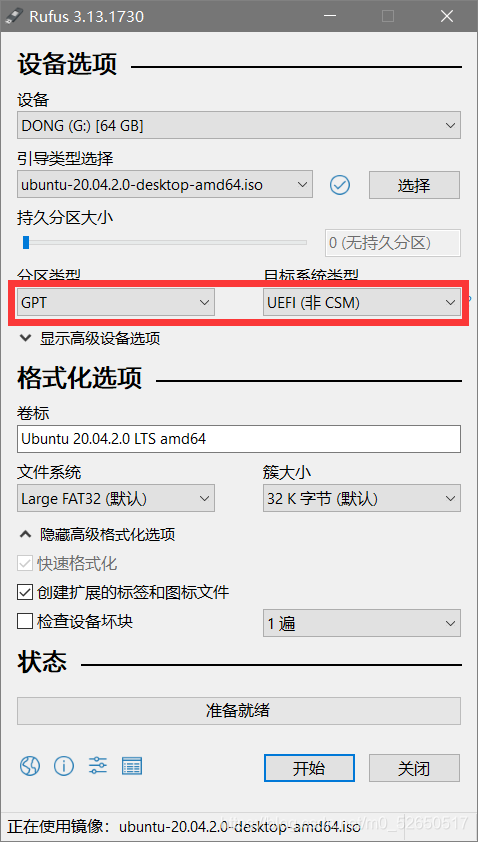
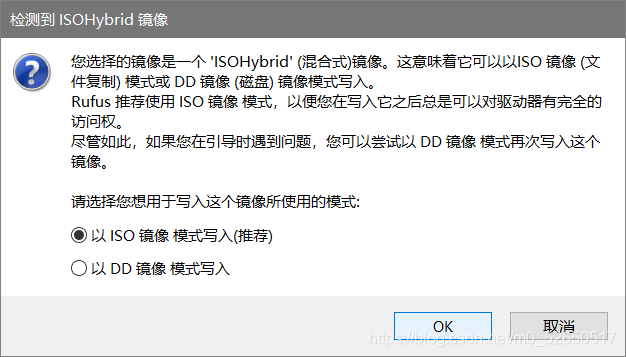
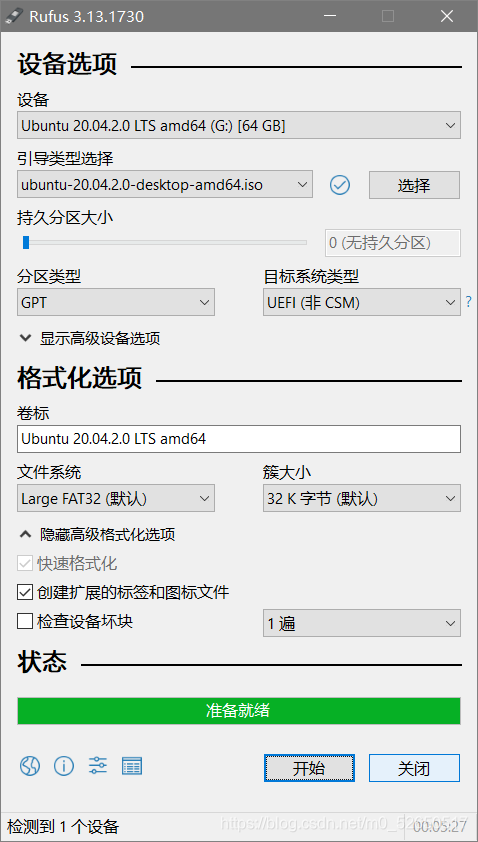
3. 制作 U 盘启动盘
\qquad
使用
R
u
f
u
s
Rufus
Rufus 工具创建可引导 USB 闪存盘。分区类型选择 GPT,引导类型选择要安装的
u
b
u
n
t
u
ubuntu
ubuntu 系统。
4. 安装 ubuntu 20.04 系统
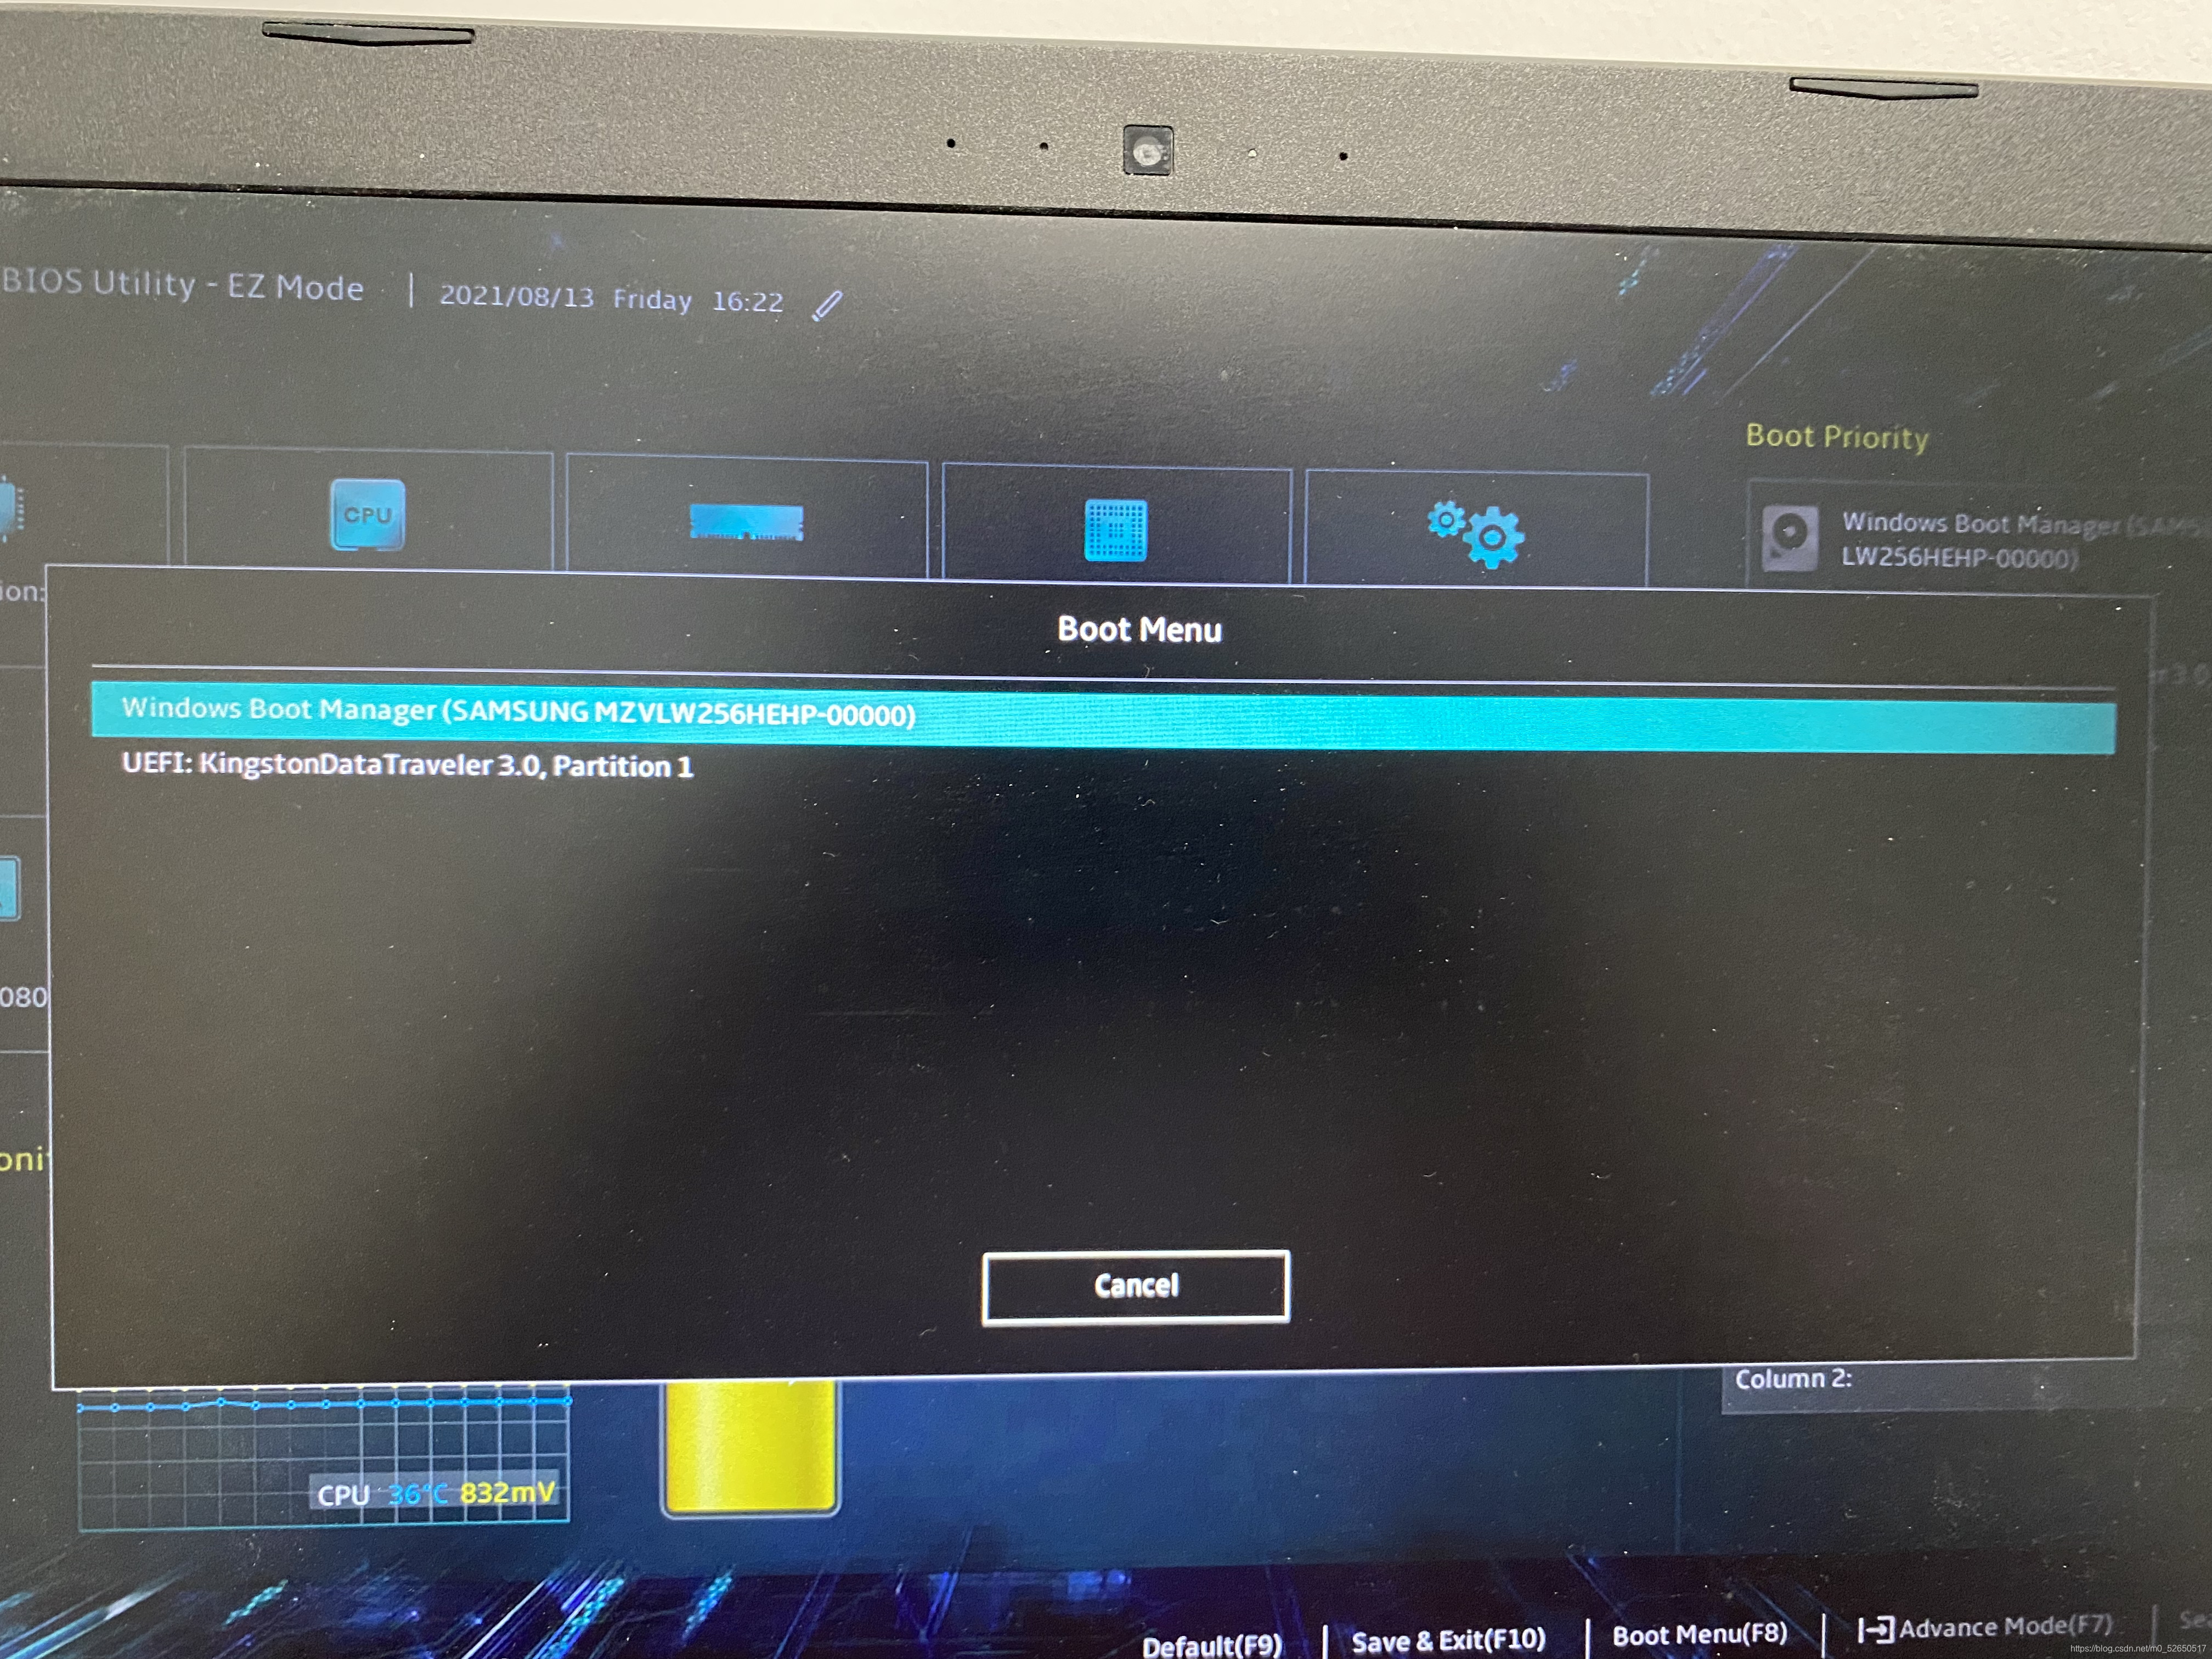
4.1 进入 bios
\qquad
重启
w
i
n
d
o
w
s
10
windows10
windows10,按
F
2
/
F
10
/
F
12
F2/F10/F12
F2/F10/F12(不同机型,进入
b
i
o
s
bios
bios 的按键不同)进入 bios,选择UEFI进入
u
b
u
n
t
u
20.04
ubuntu 20.04
ubuntu20.04 系统安装。
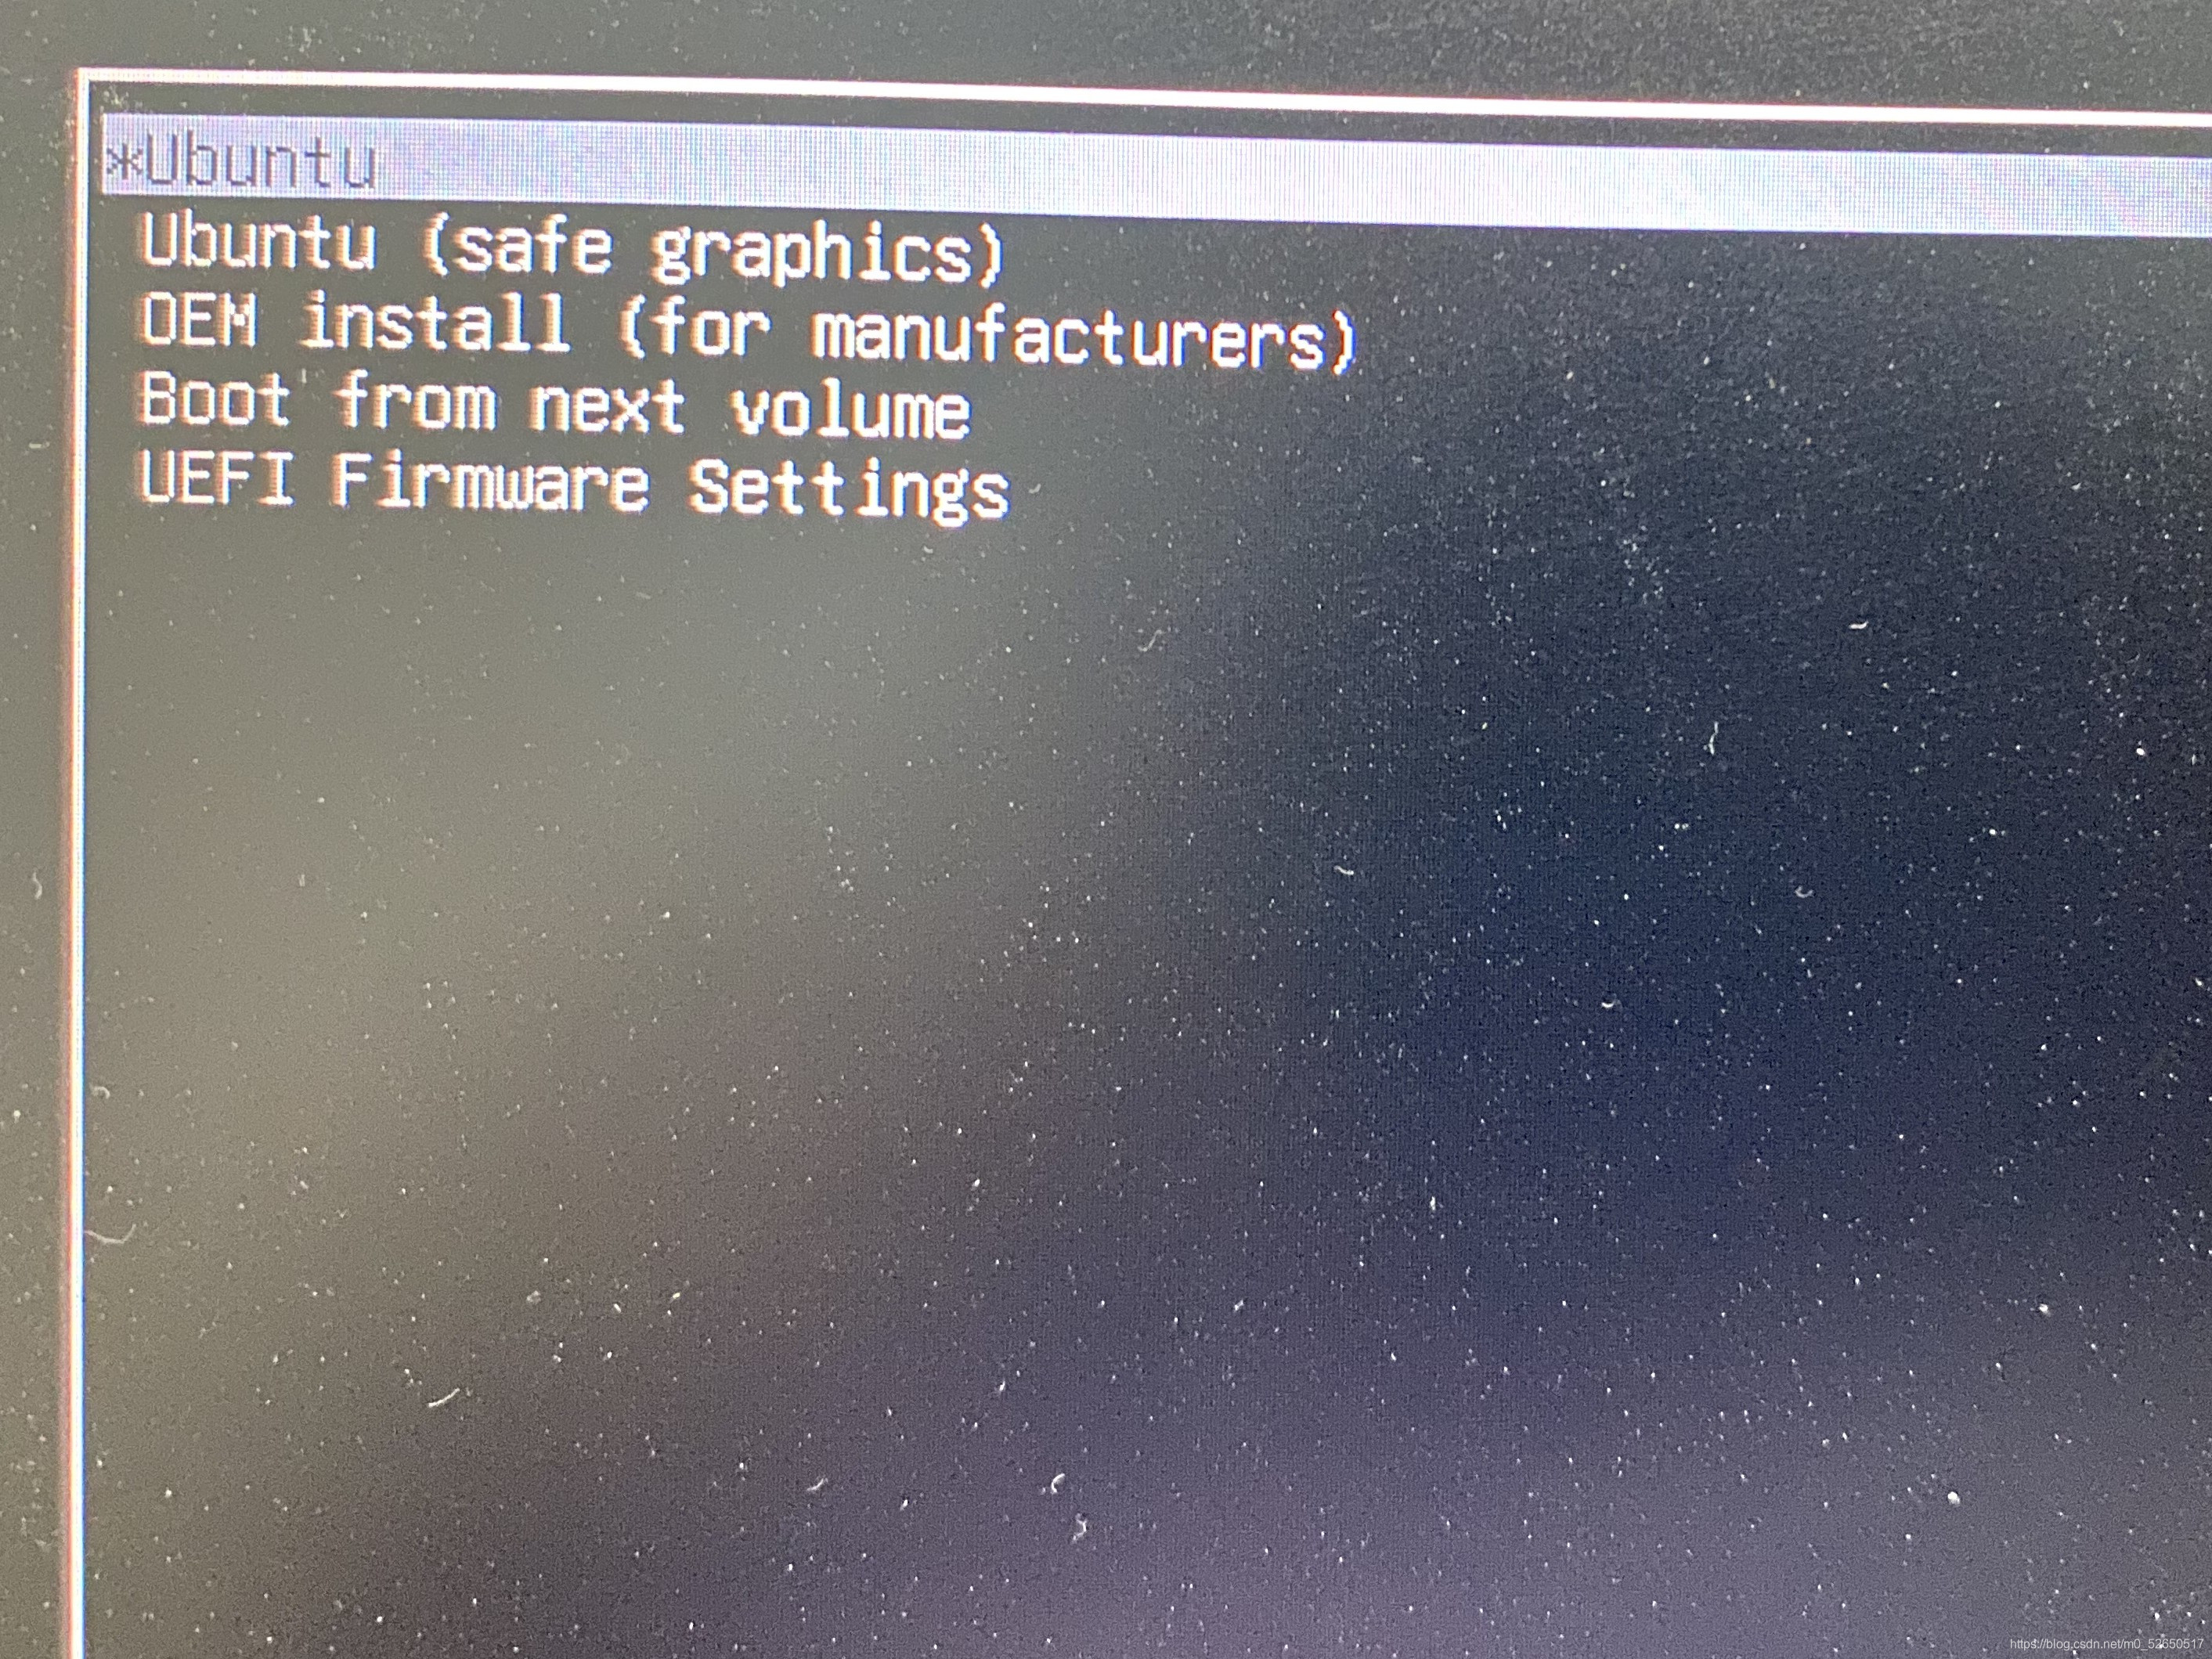
4.2 禁用驱动
\qquad
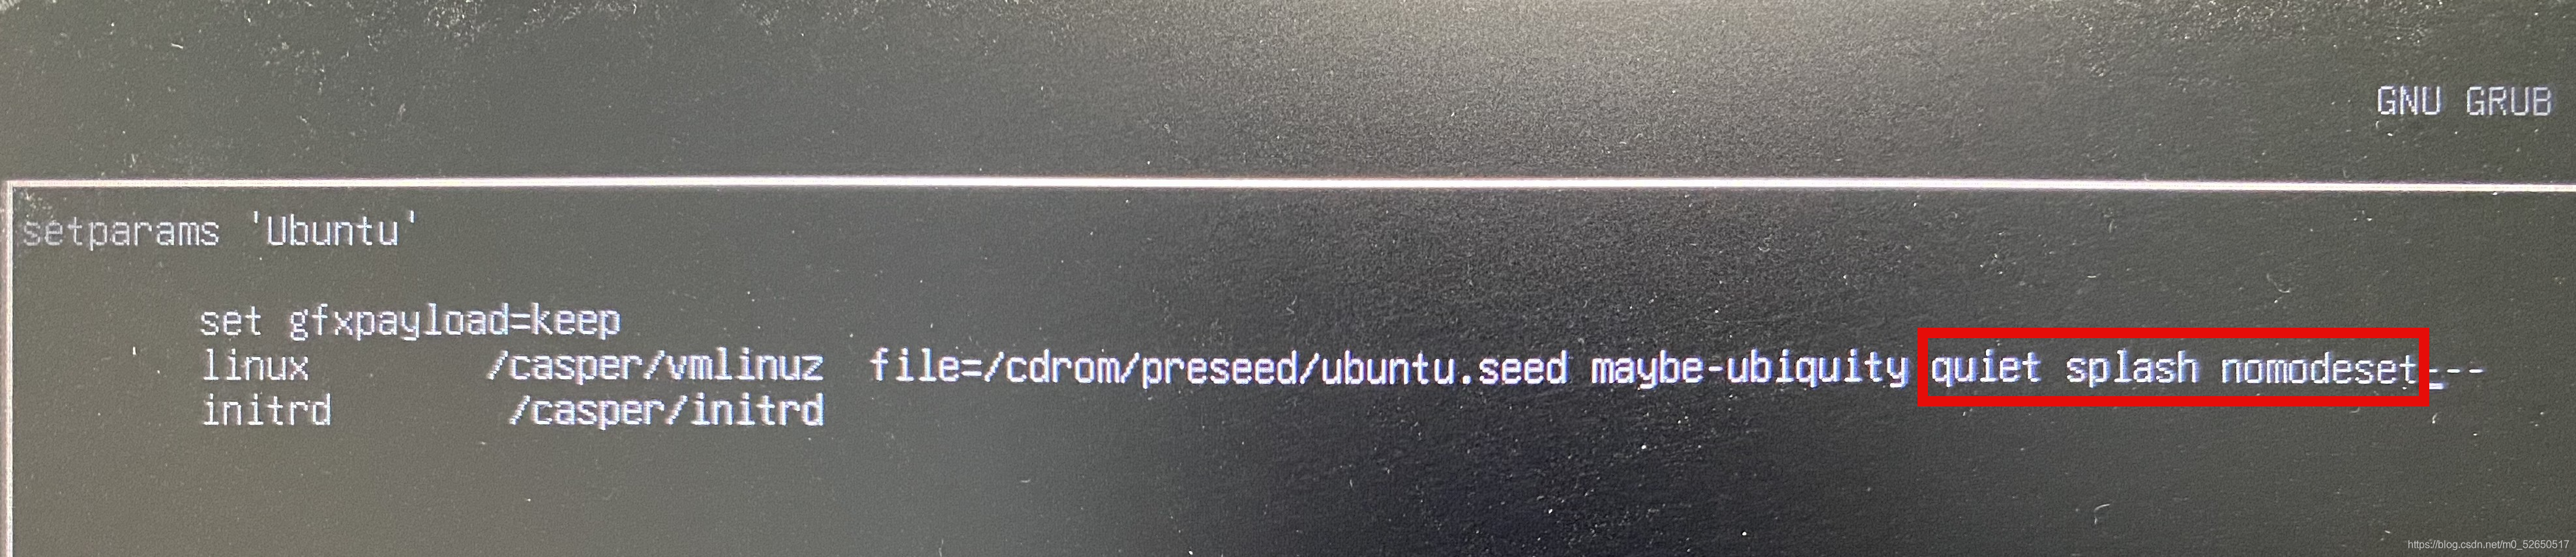
在Ubuntu选项按键盘e键进入编辑,使用
n
o
m
o
d
e
s
e
t
nomodeset
nomodeset 告诉内核在系统启动之前不启动视频驱动程序,而改用 BIOS 模式。
\qquad
在 quiet splash 后加入 nomodeset,然后按键盘
F
10
F10
F10 进入
u
b
u
n
t
u
20.04
ubuntu20.04
ubuntu20.04 安装界面。
4.3 正式安装
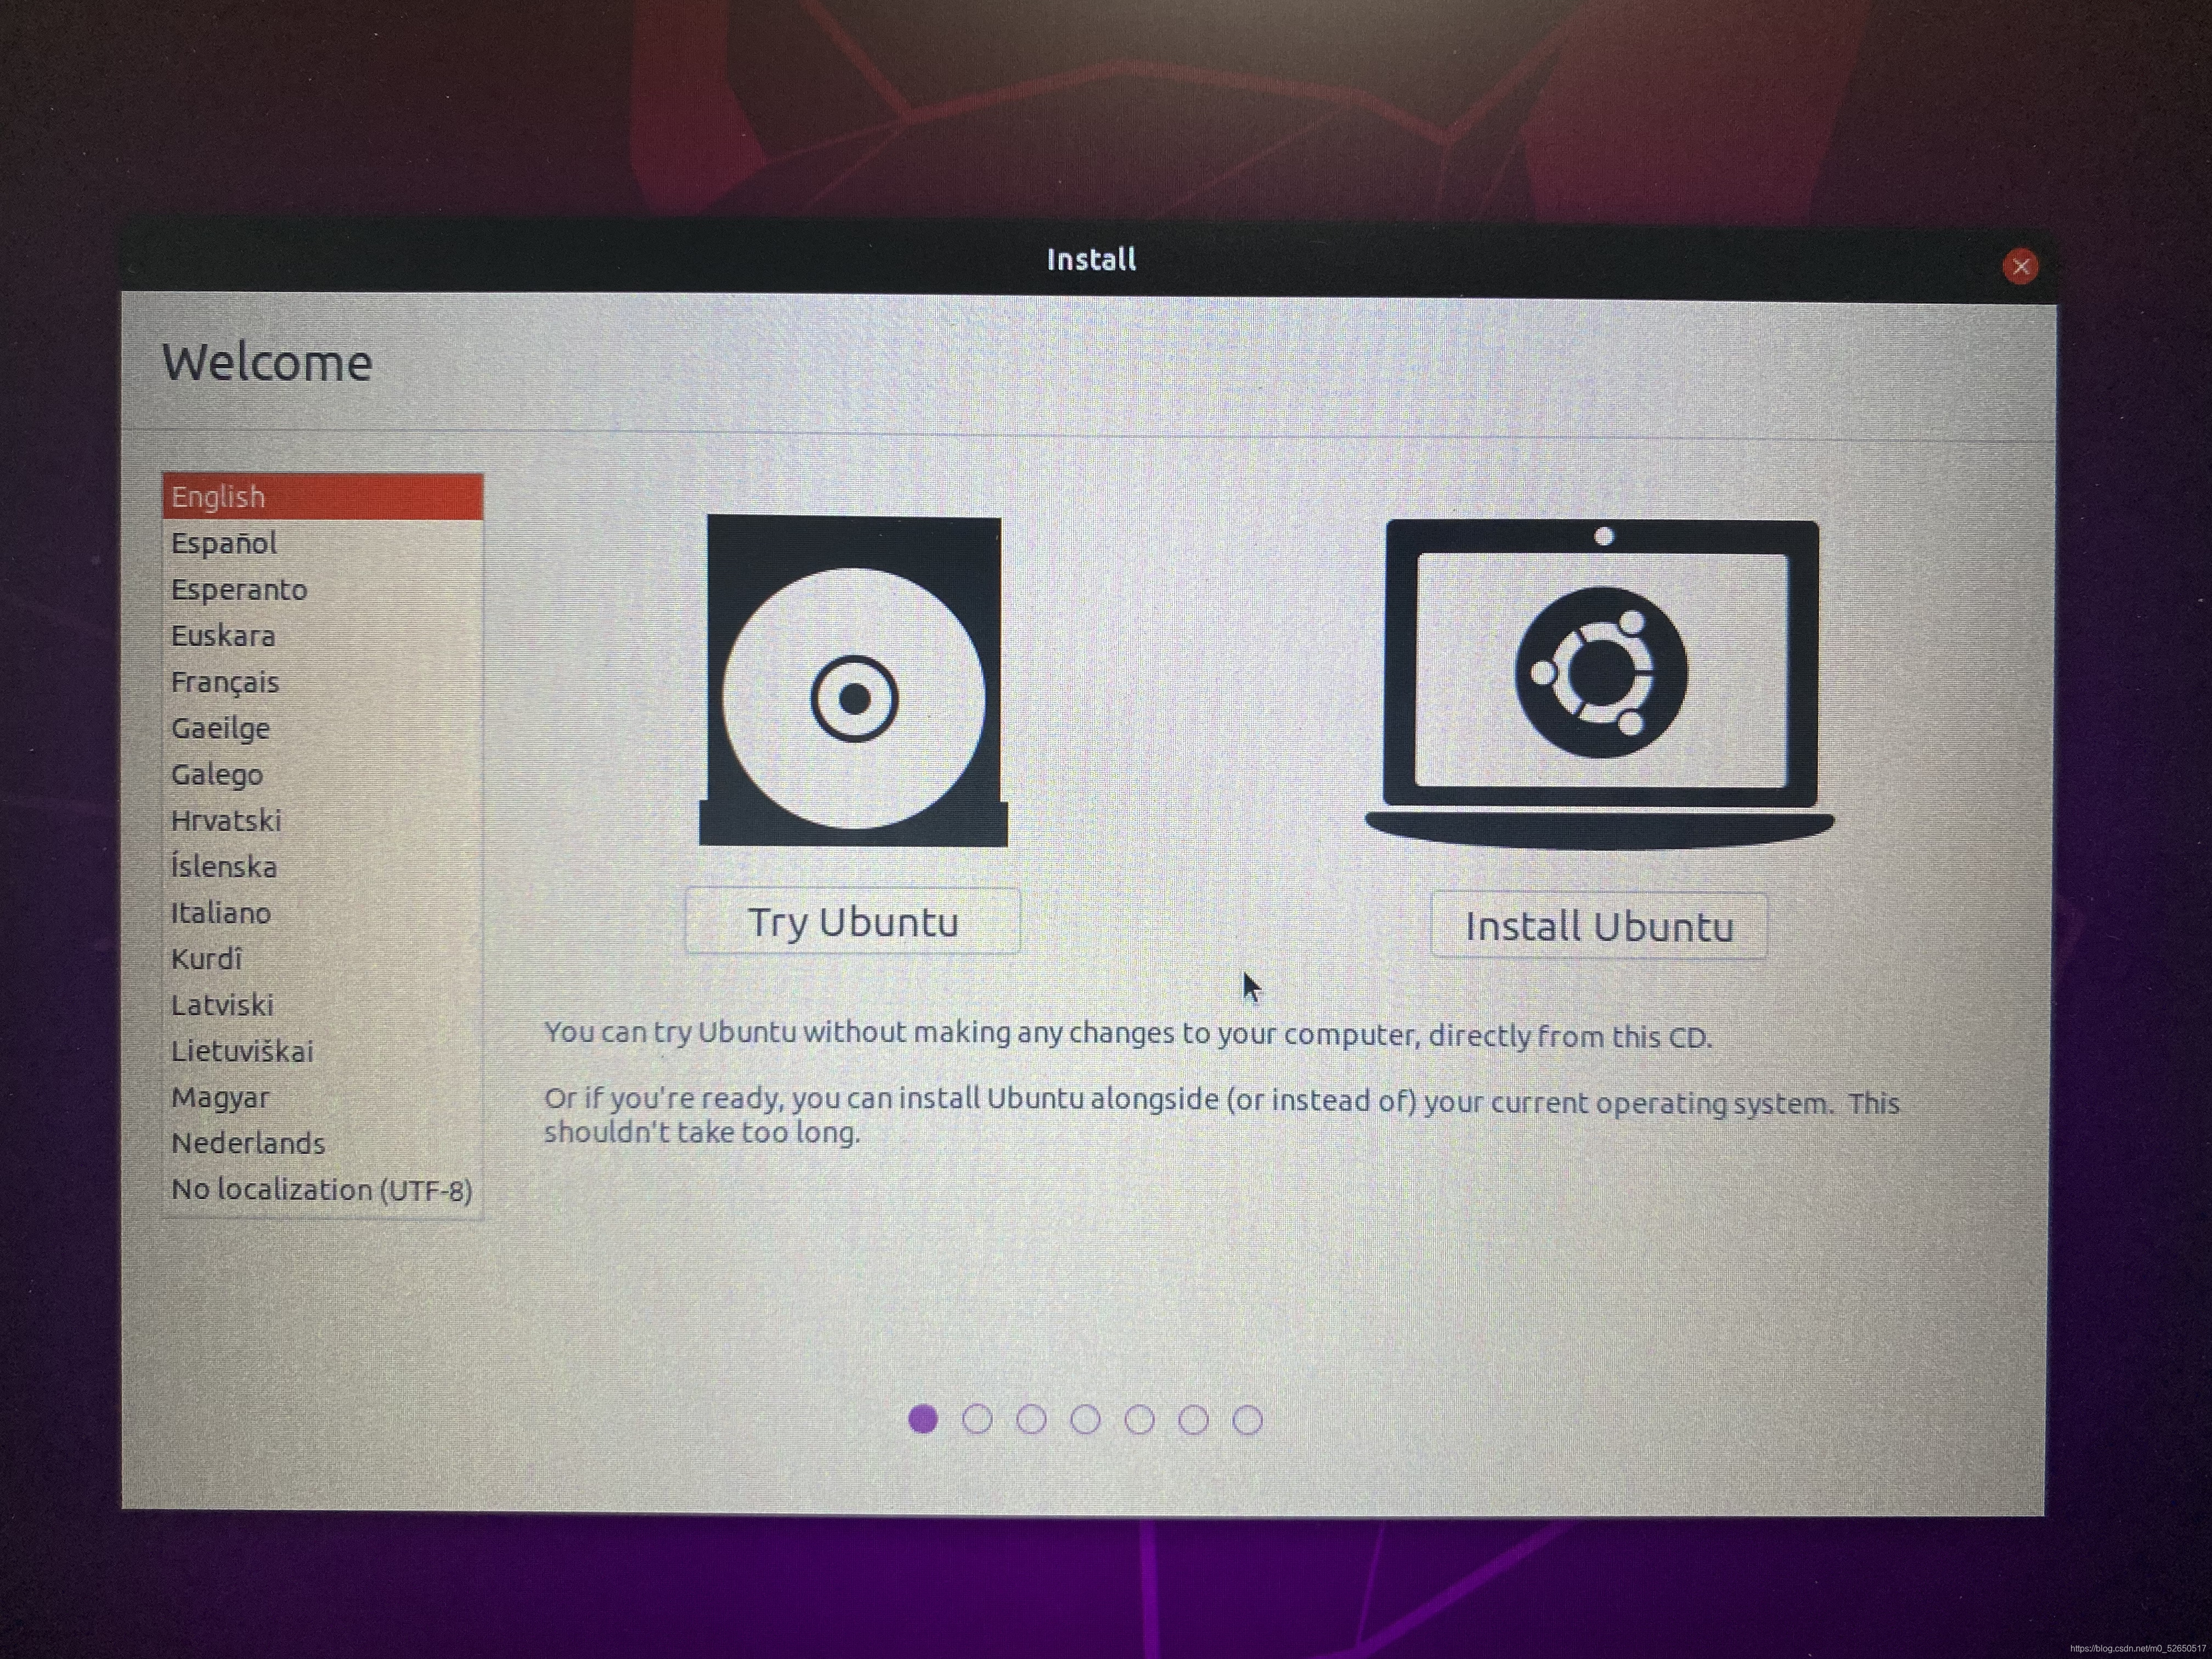
4.3.1 Install Ubuntu
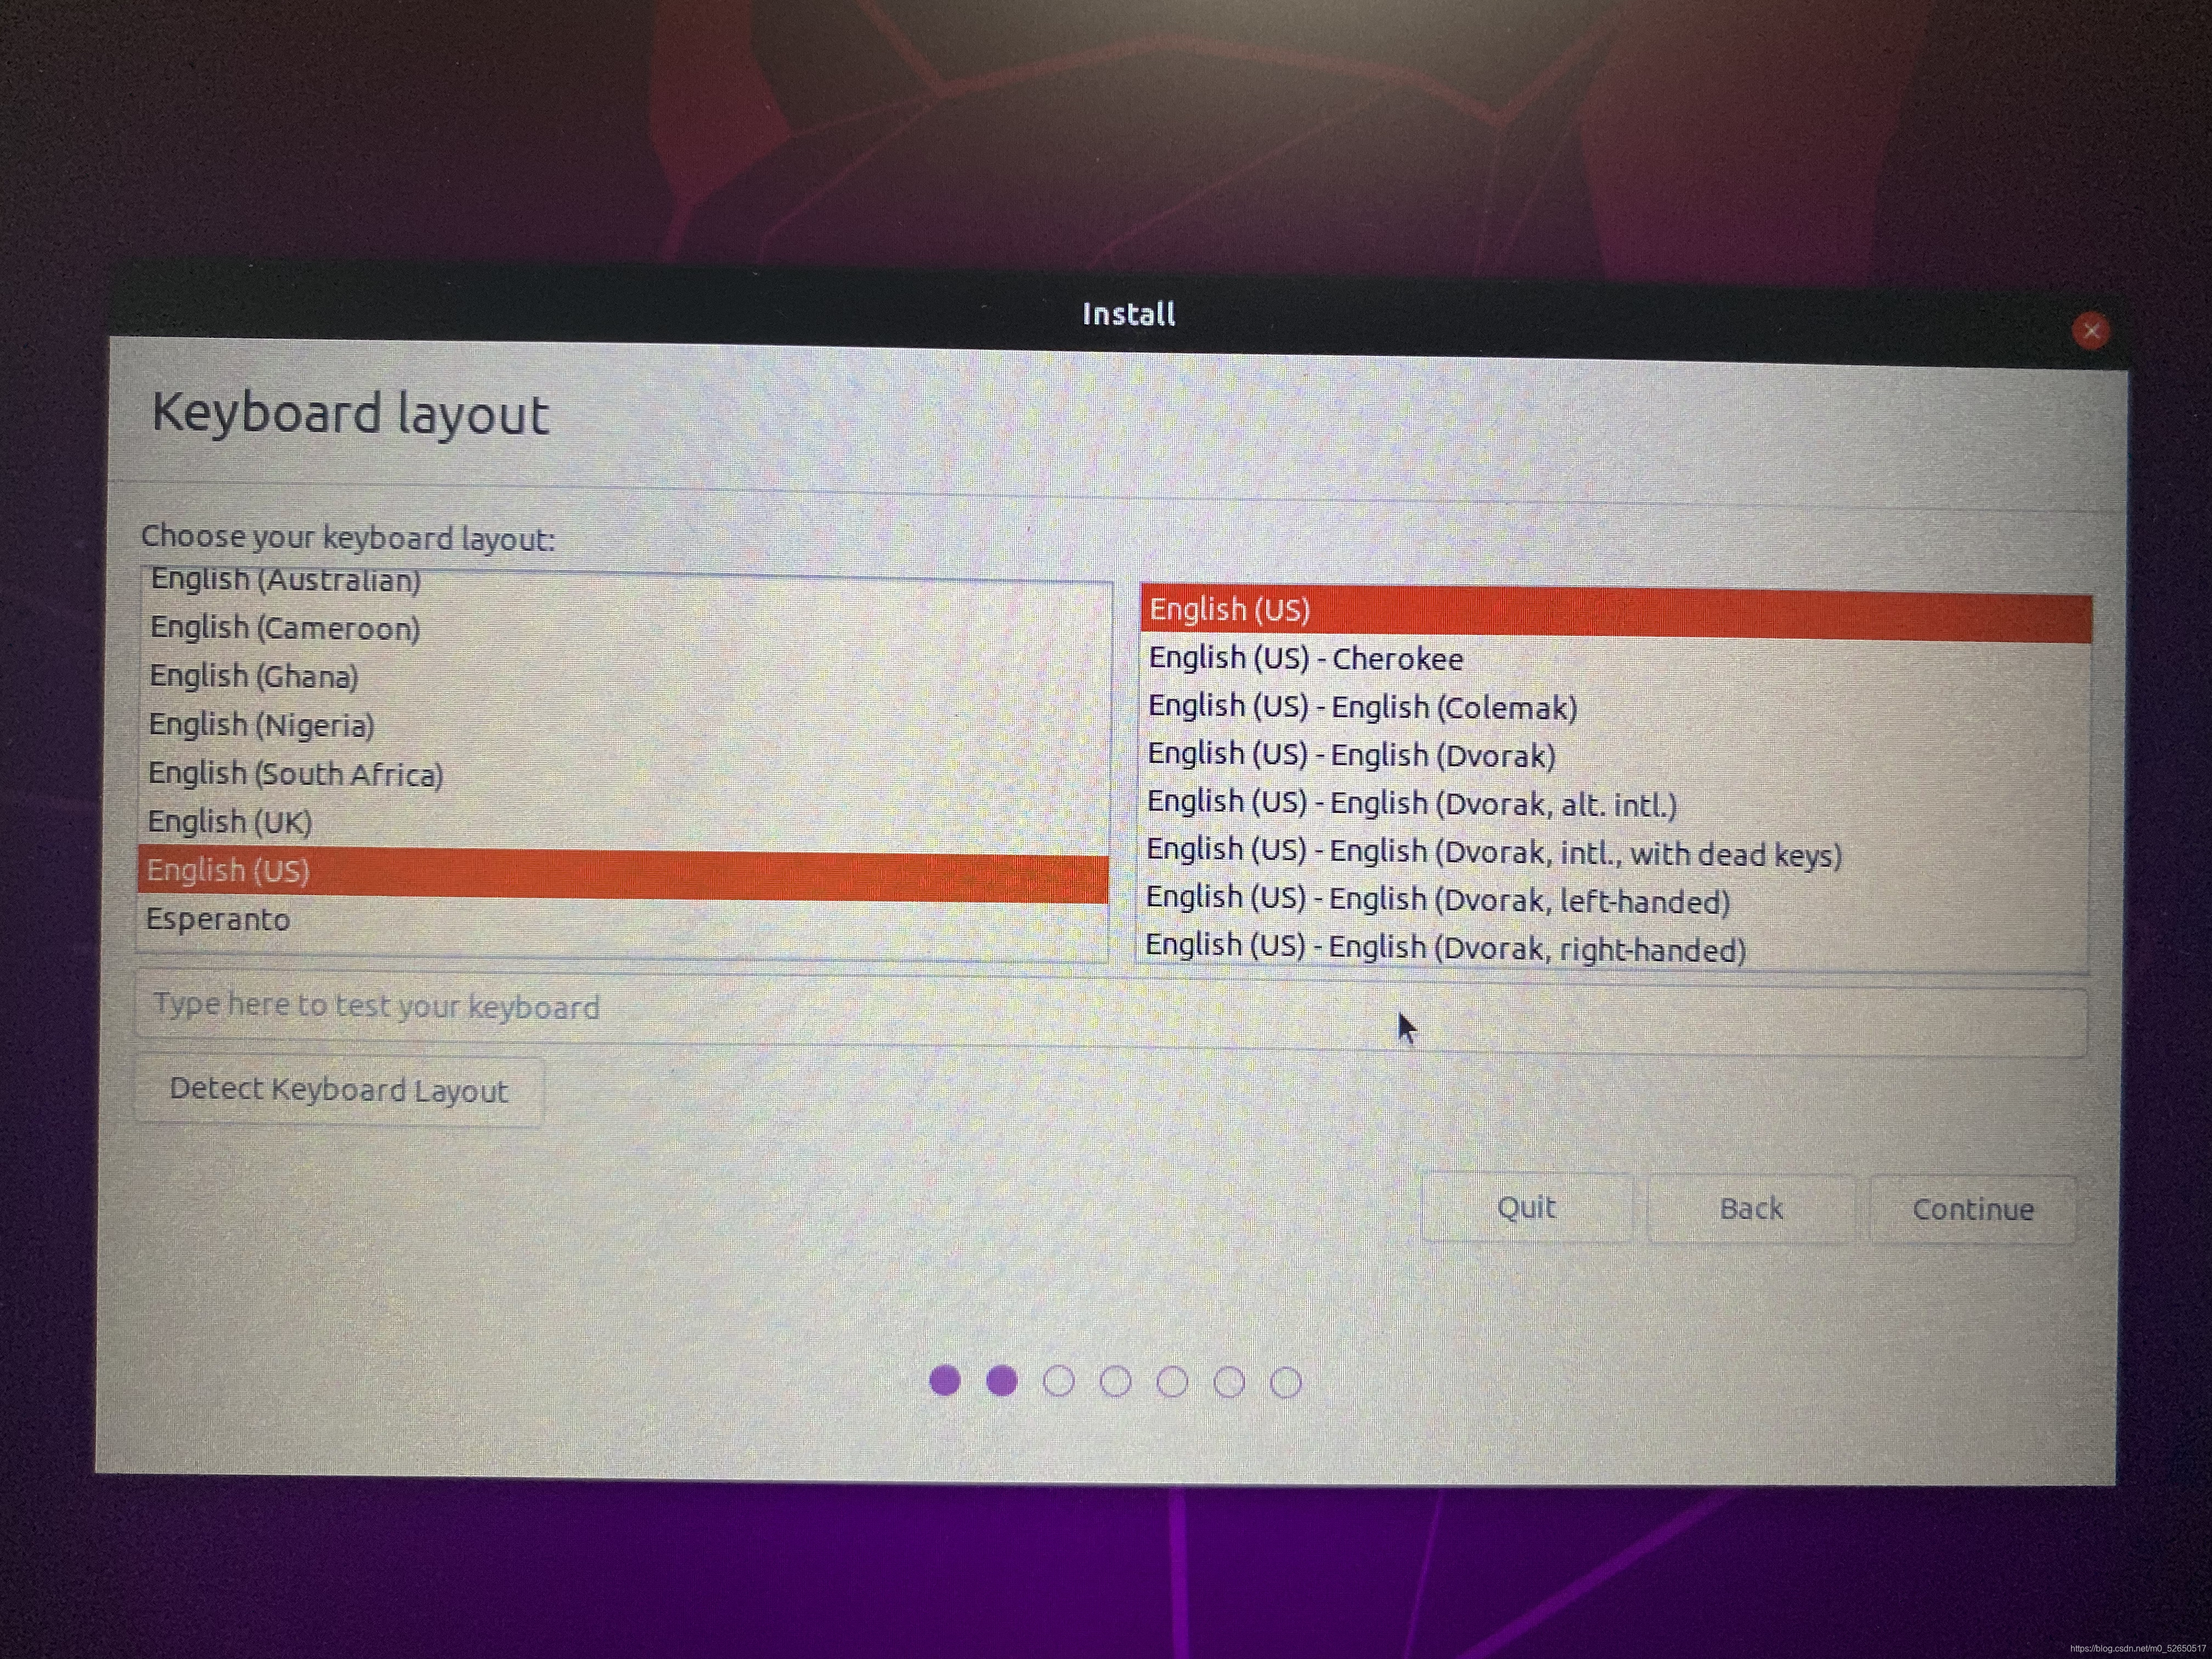
4.3.2 Keyboard layout
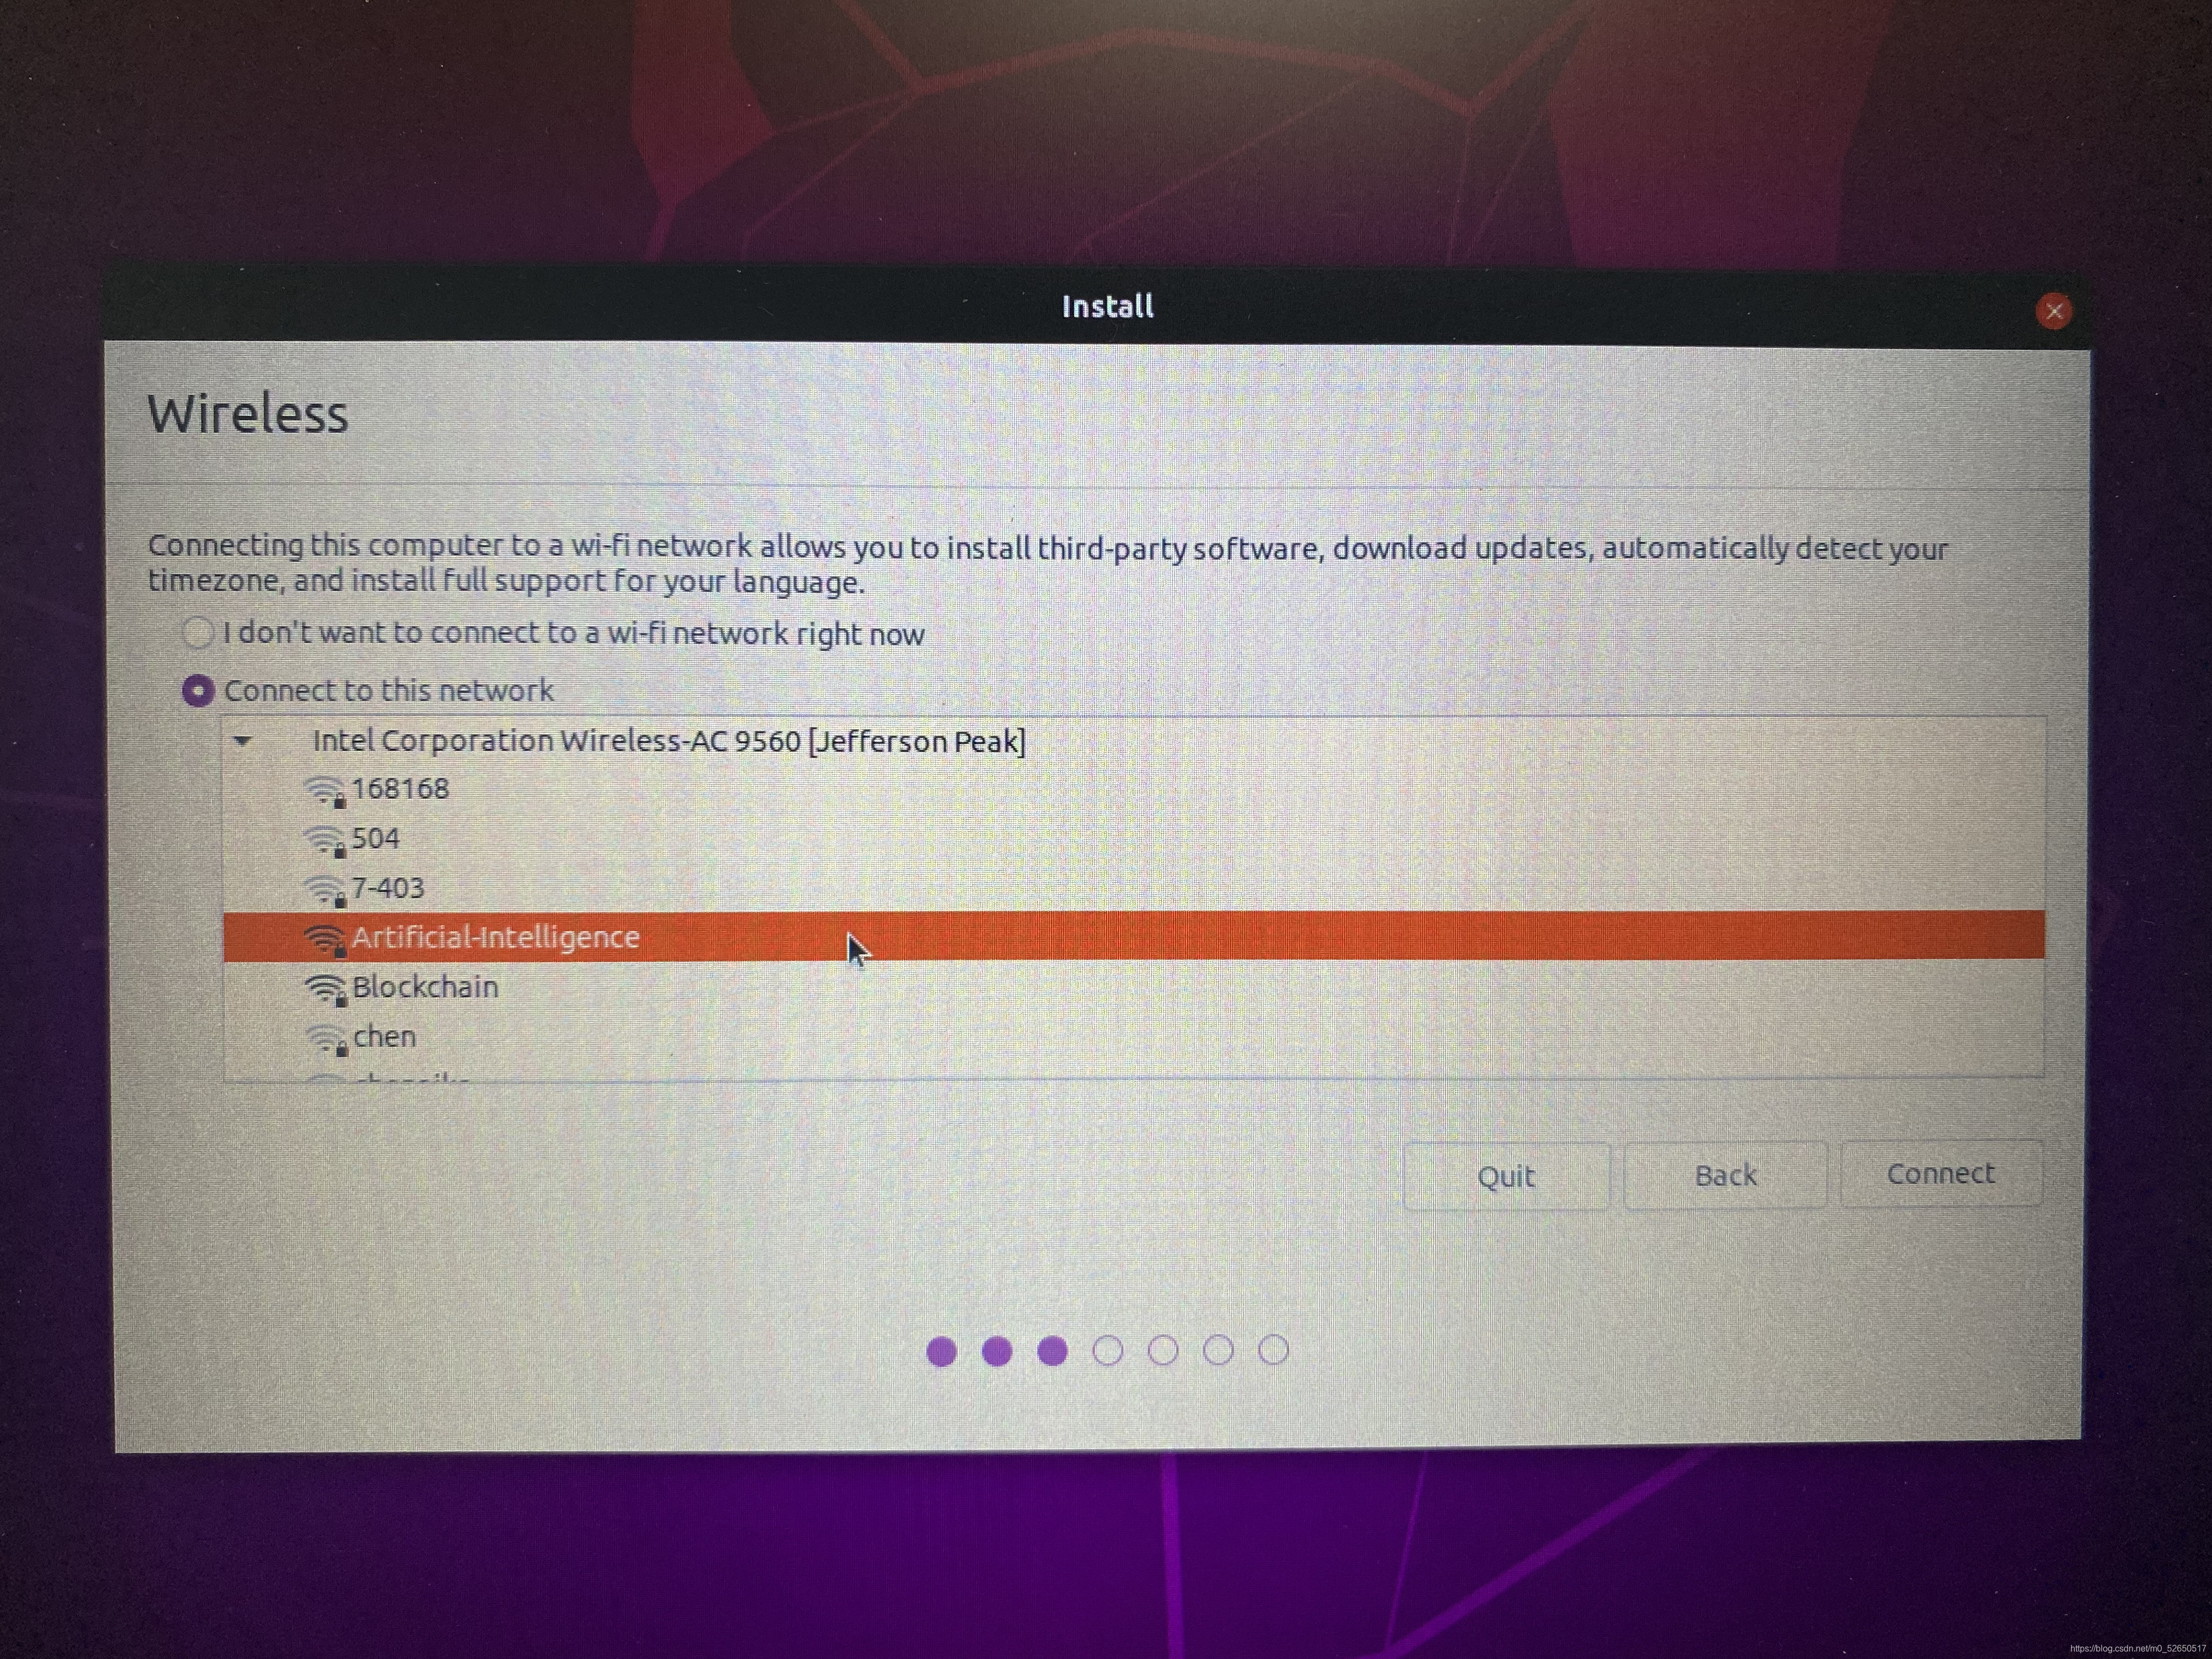
4.3.3 Wireless
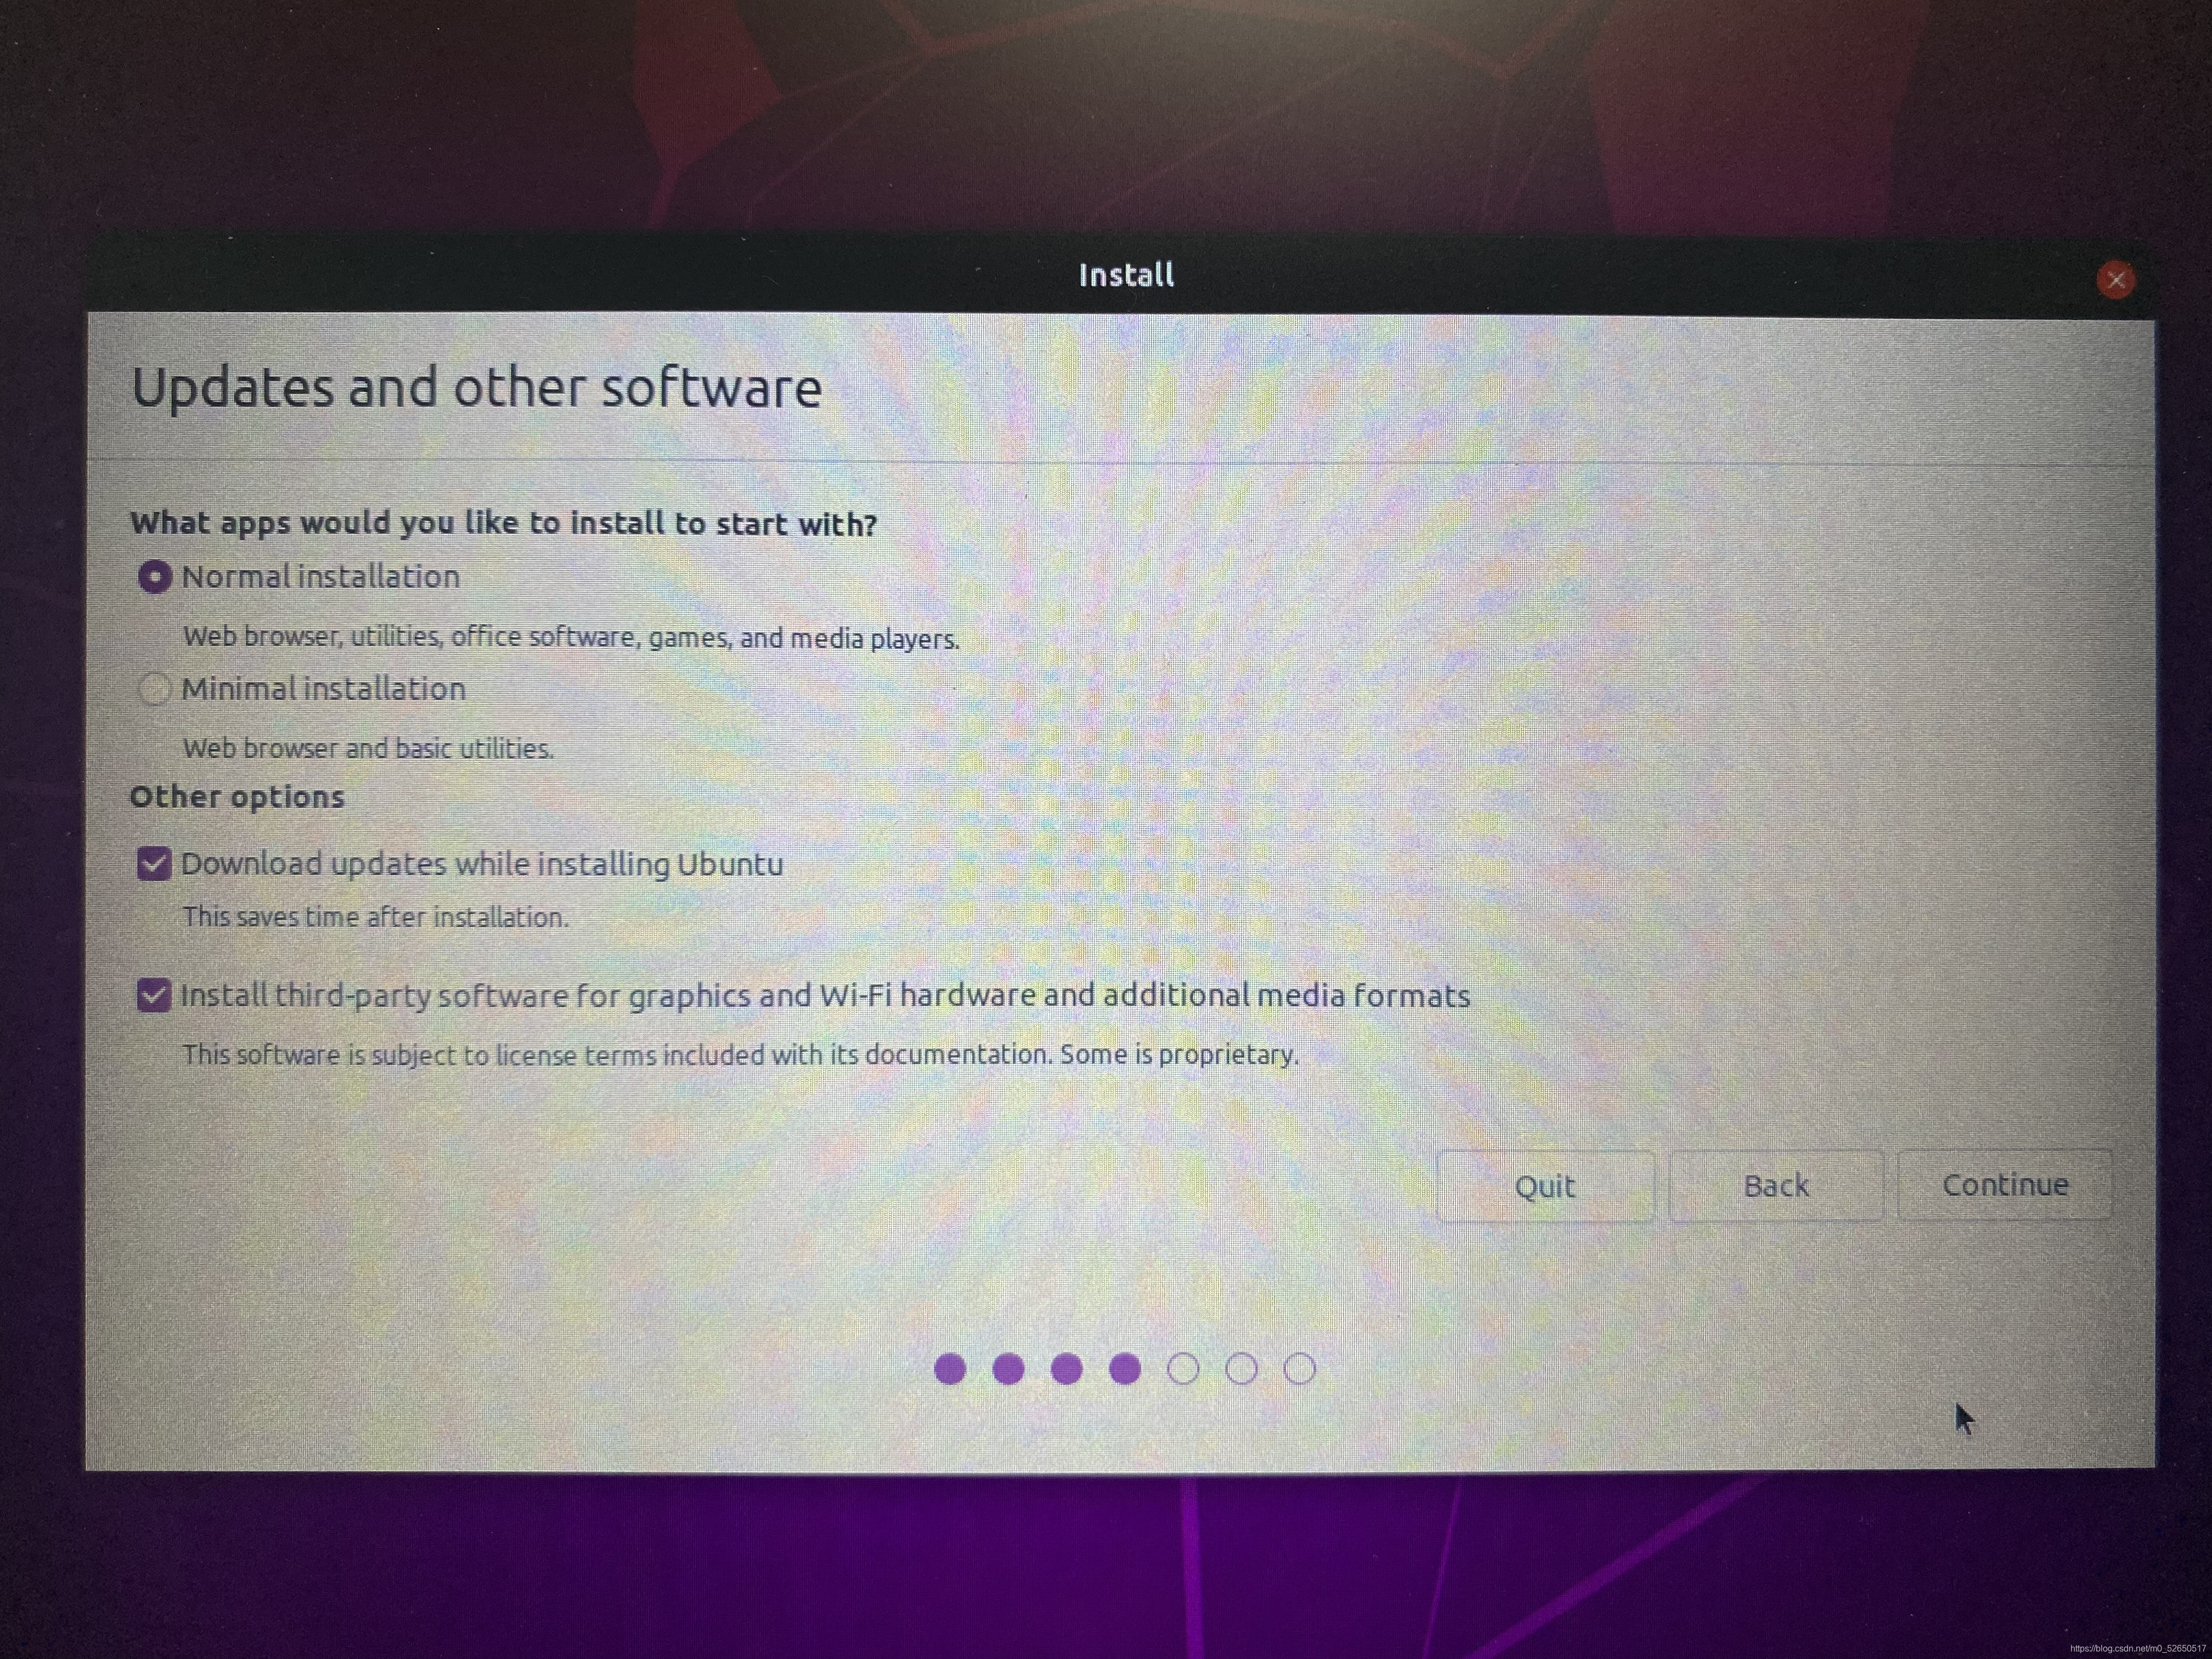
4.3.4 Updates and other software
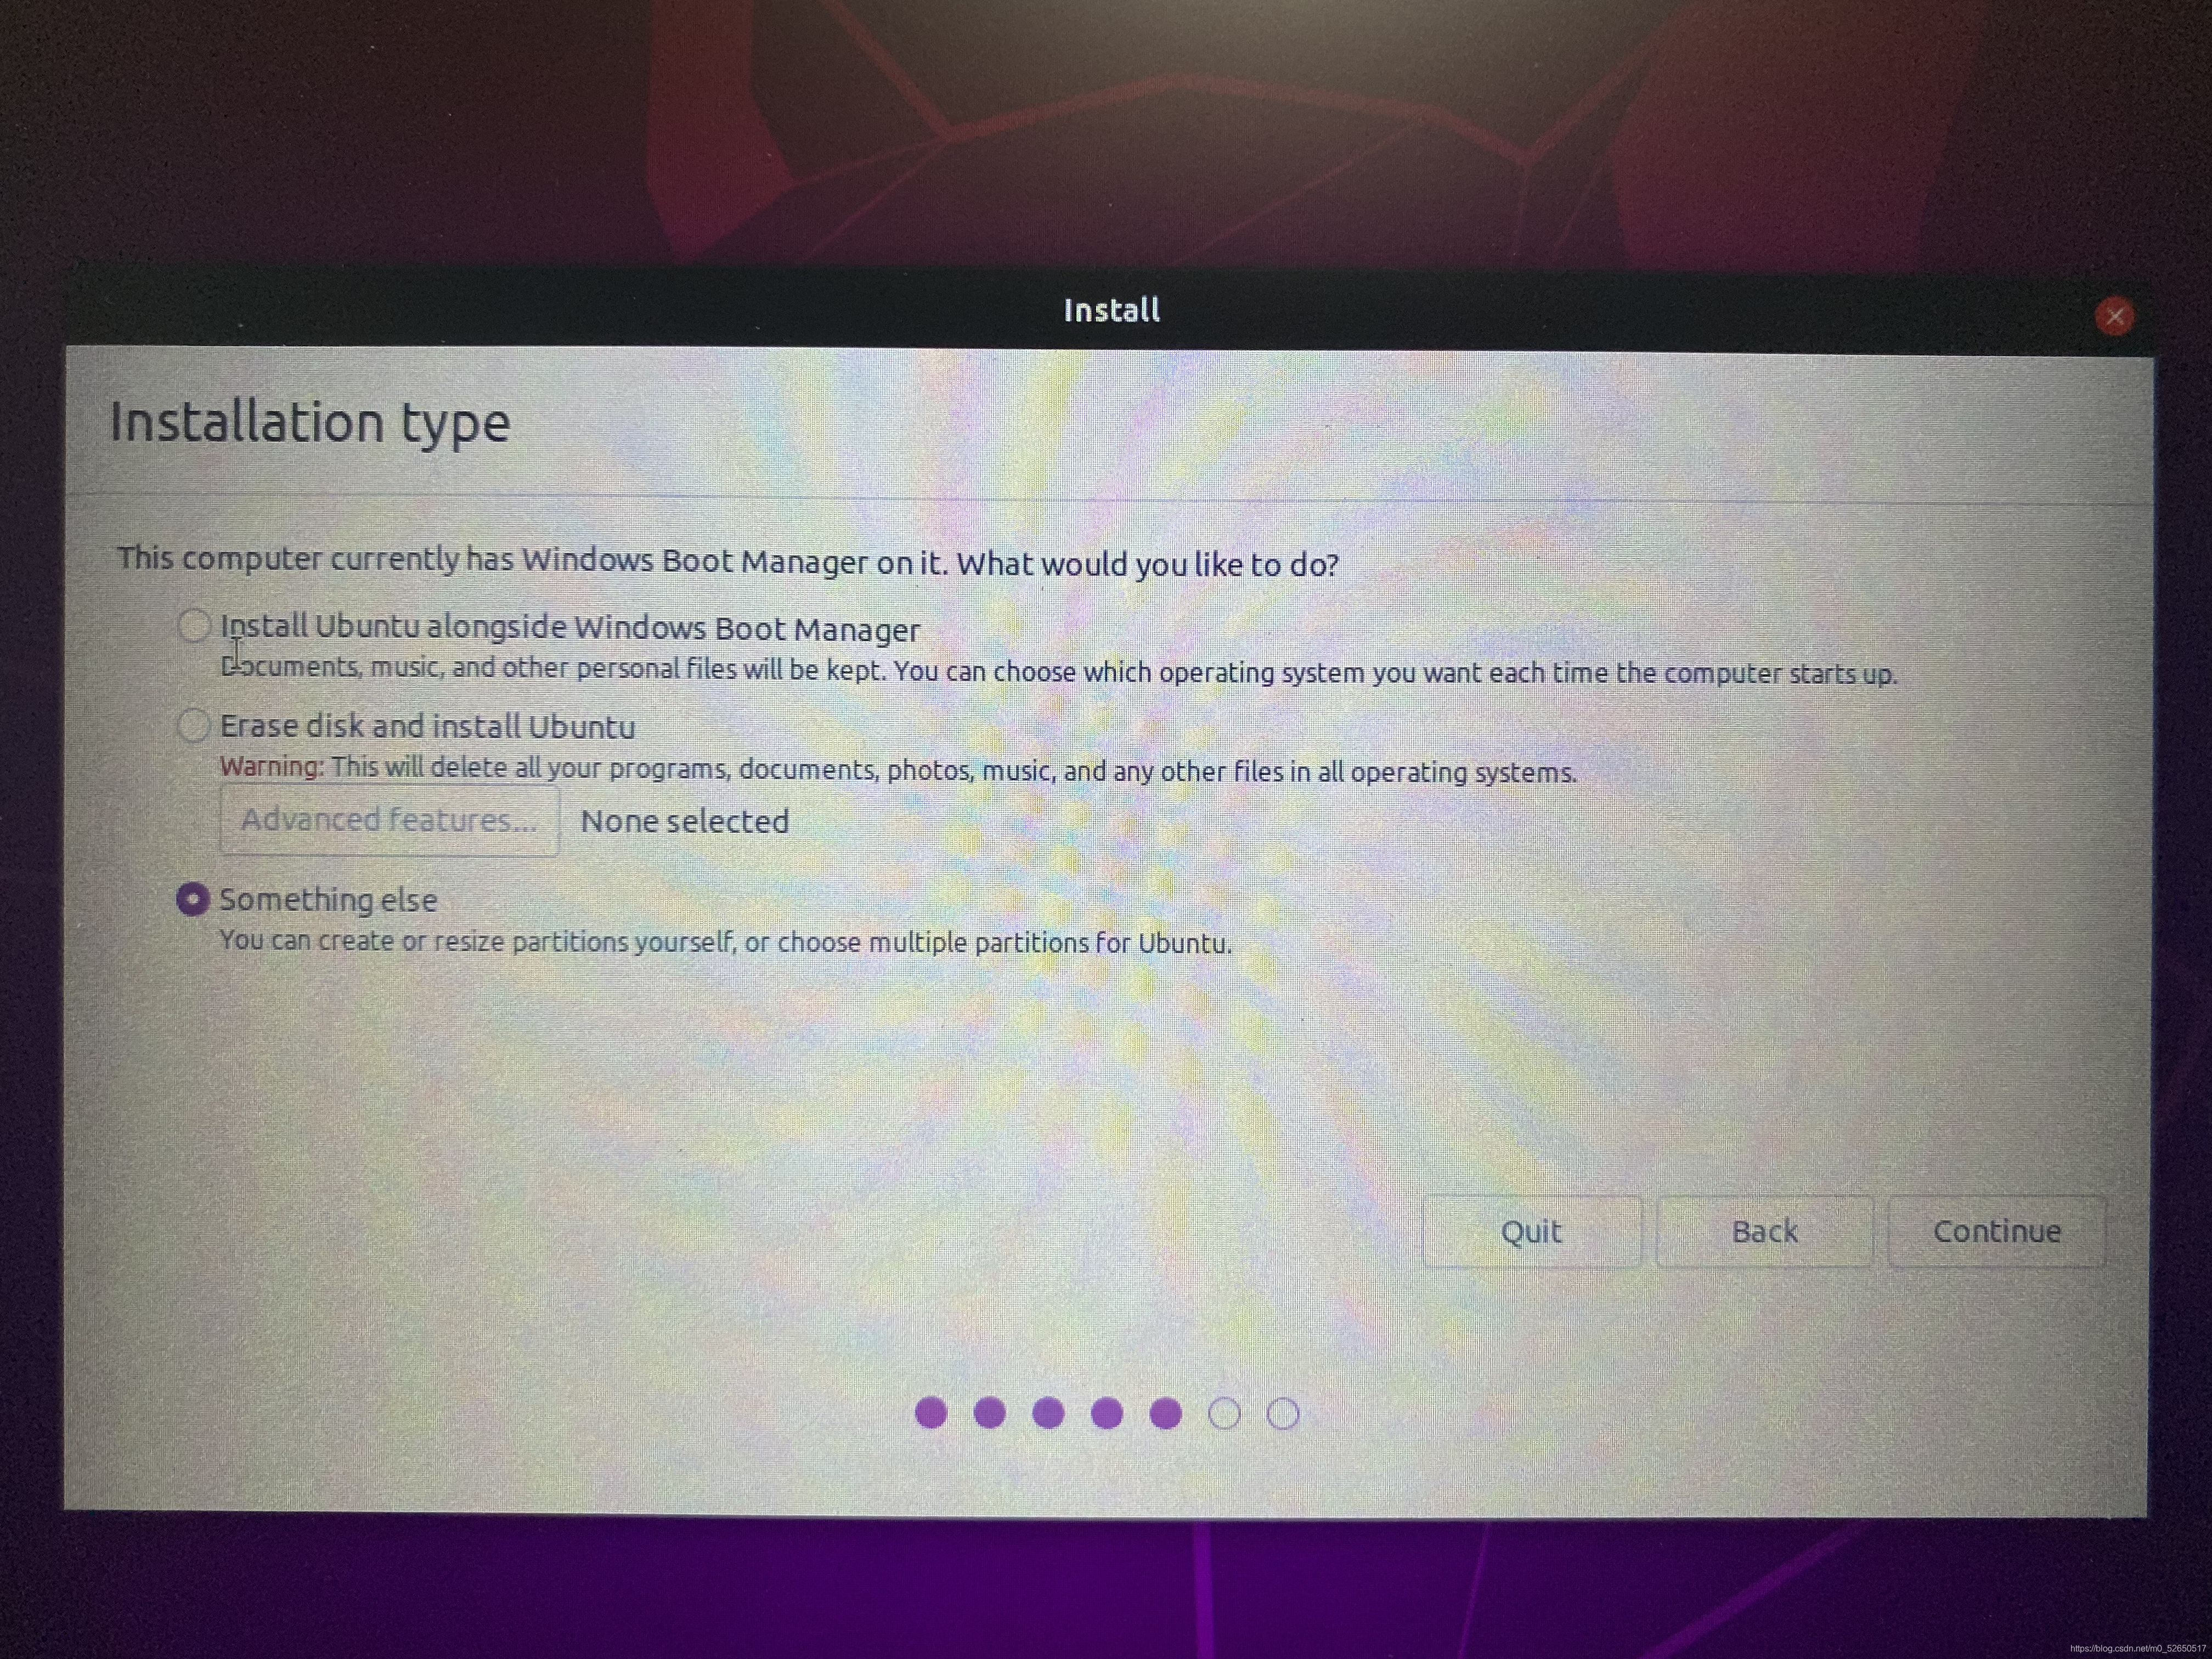
4.3.5 Installation type
\qquad
想要自己对
u
b
u
n
t
u
ubuntu
ubuntu 系统进行分区,要选择Something else选项,如果不要自行分区,选择Install Ubuntu alongside windows Boot Manager选项即可自动安装
u
b
u
n
t
u
ubuntu
ubuntu 系统。注:千万不要选择Erase disk and install Ubuntu,不然
w
i
n
d
o
w
s
10
windows10
windows10 系统会被删除。
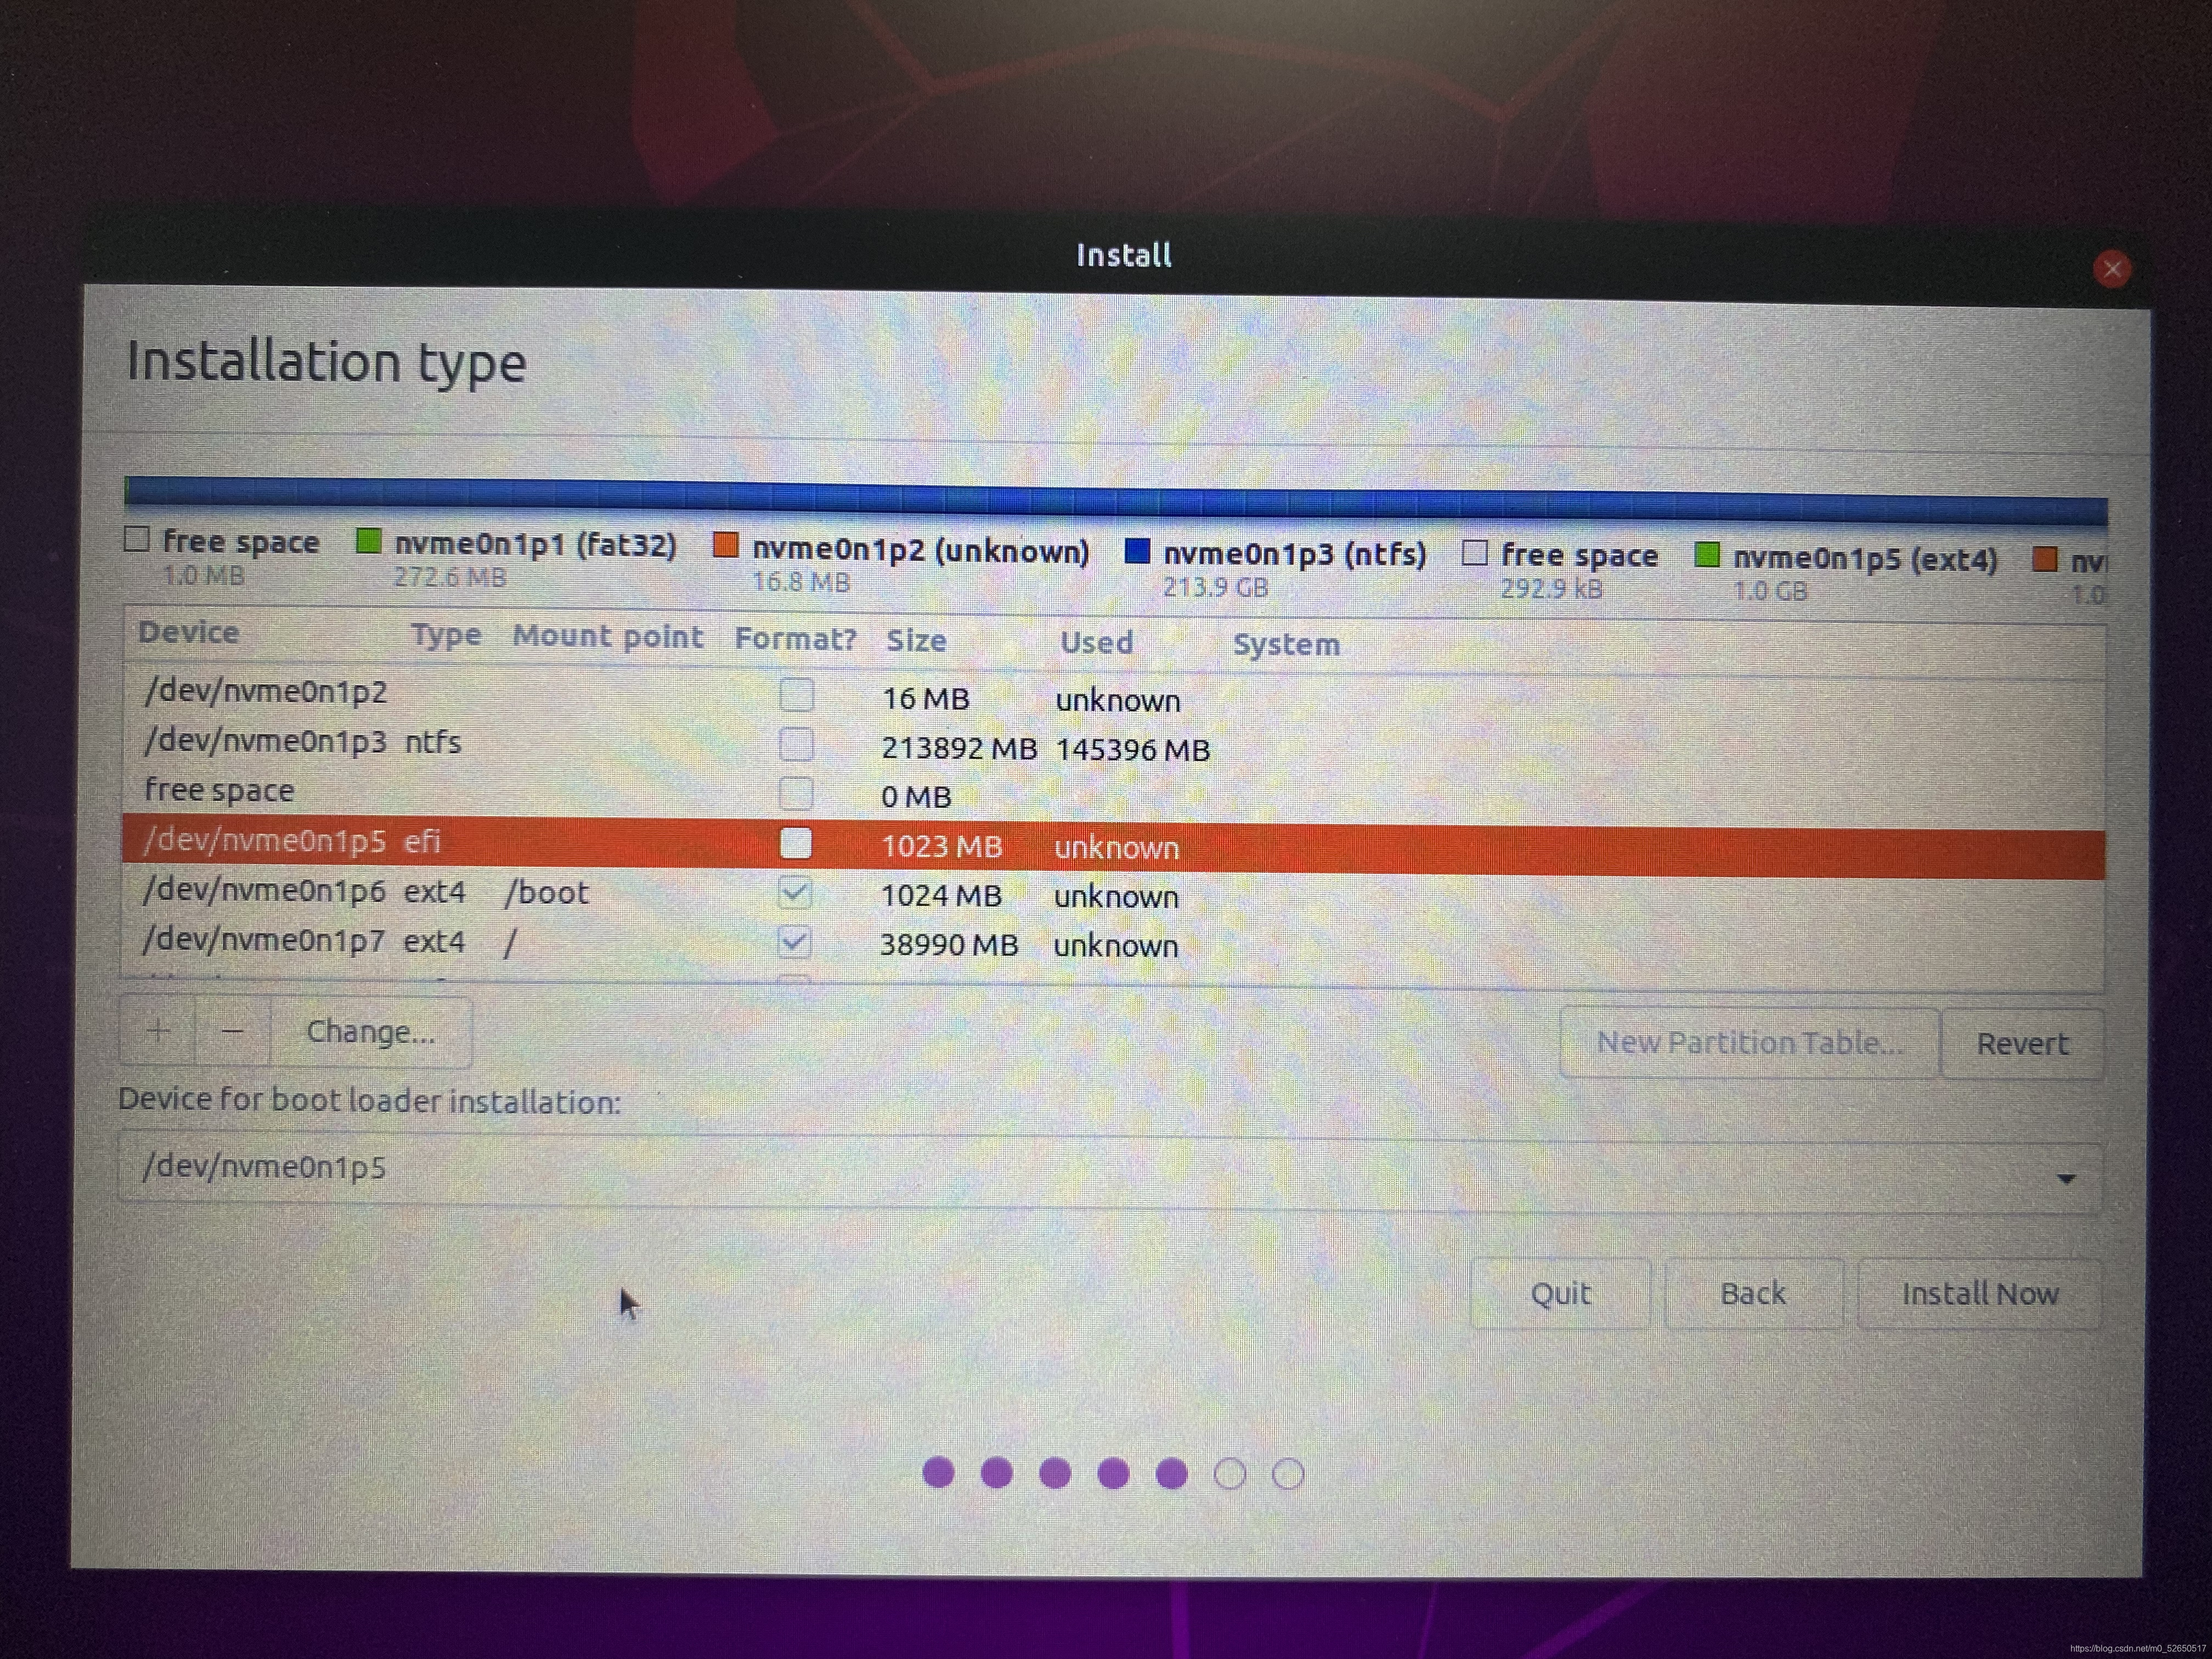
4.3.6 磁盘分区
\qquad
作者将固态硬盘划分为efi分区:
1
G
1G
1G、/boot分区:
1
G
1G
1G 和/分区:
剩
余
空
间
剩余空间
剩余空间;机械硬盘
150
G
150G
150G 都划分给/home分区。作者电脑内存为16G,所以没有划分swap交换分区,若读者需要可以划分swap交换分区,空间大小与内存大小相同即可。
\qquad
Device for boot loader installation要选择efi分区所在位置。


\qquad
时区选择
S
h
a
n
g
h
a
i
,
C
h
i
n
a
Shanghai,China
Shanghai,China

\qquad
等待安装即可,最后会弹出对话框,选择
r
e
b
o
o
t
reboot
reboot 即可。
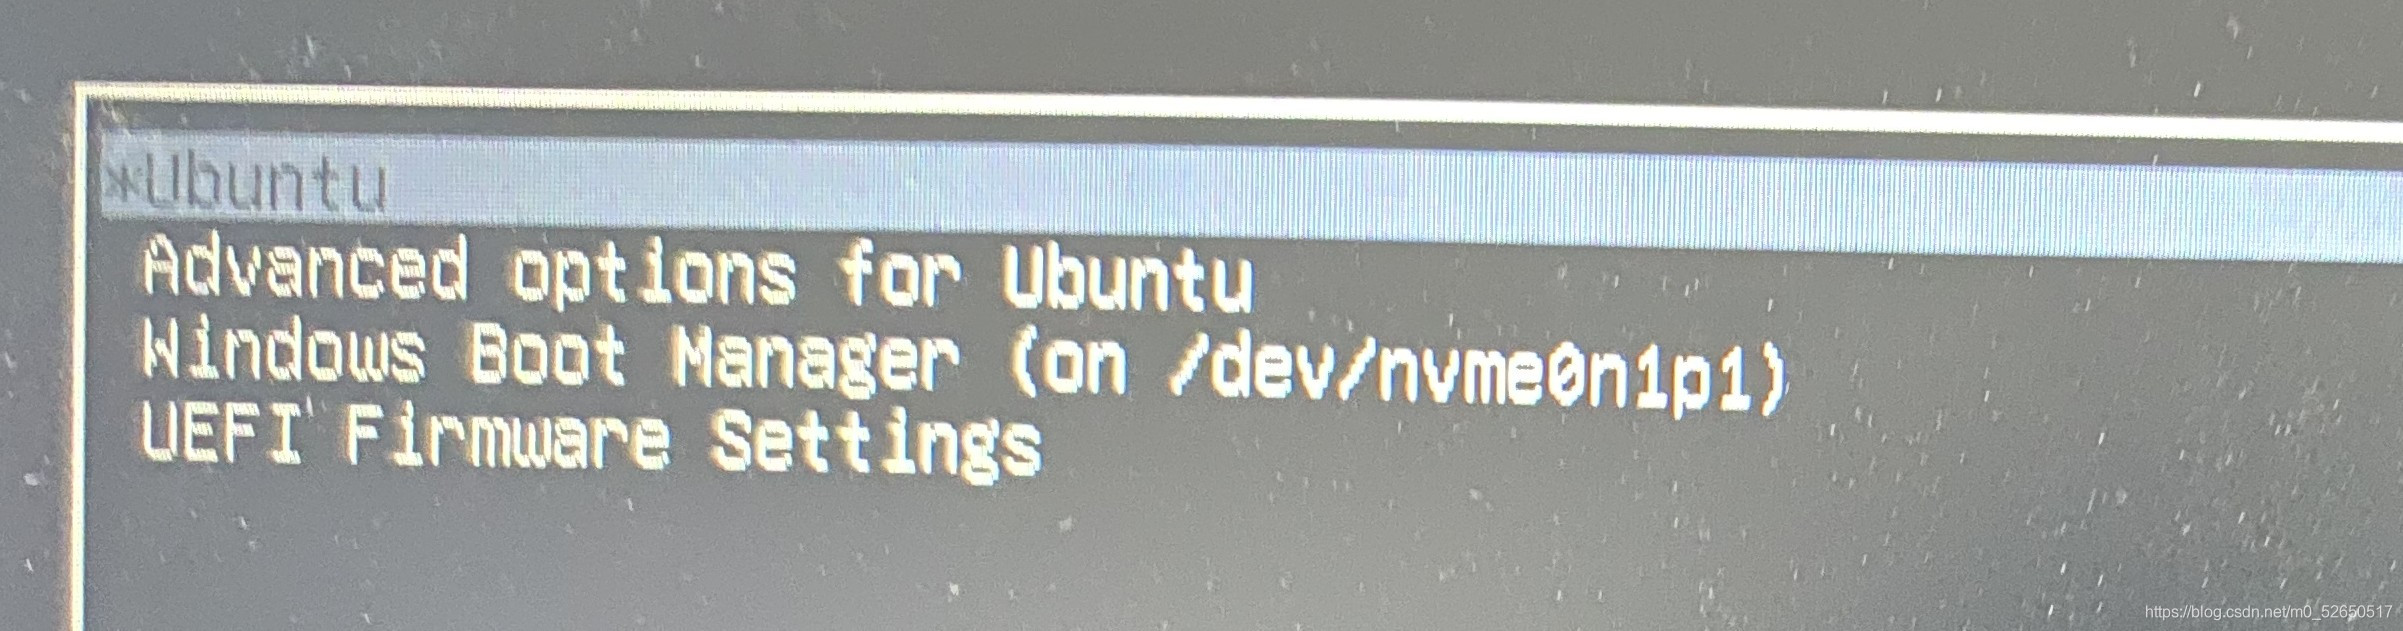
5. 重启 ubuntu 20.04 系统
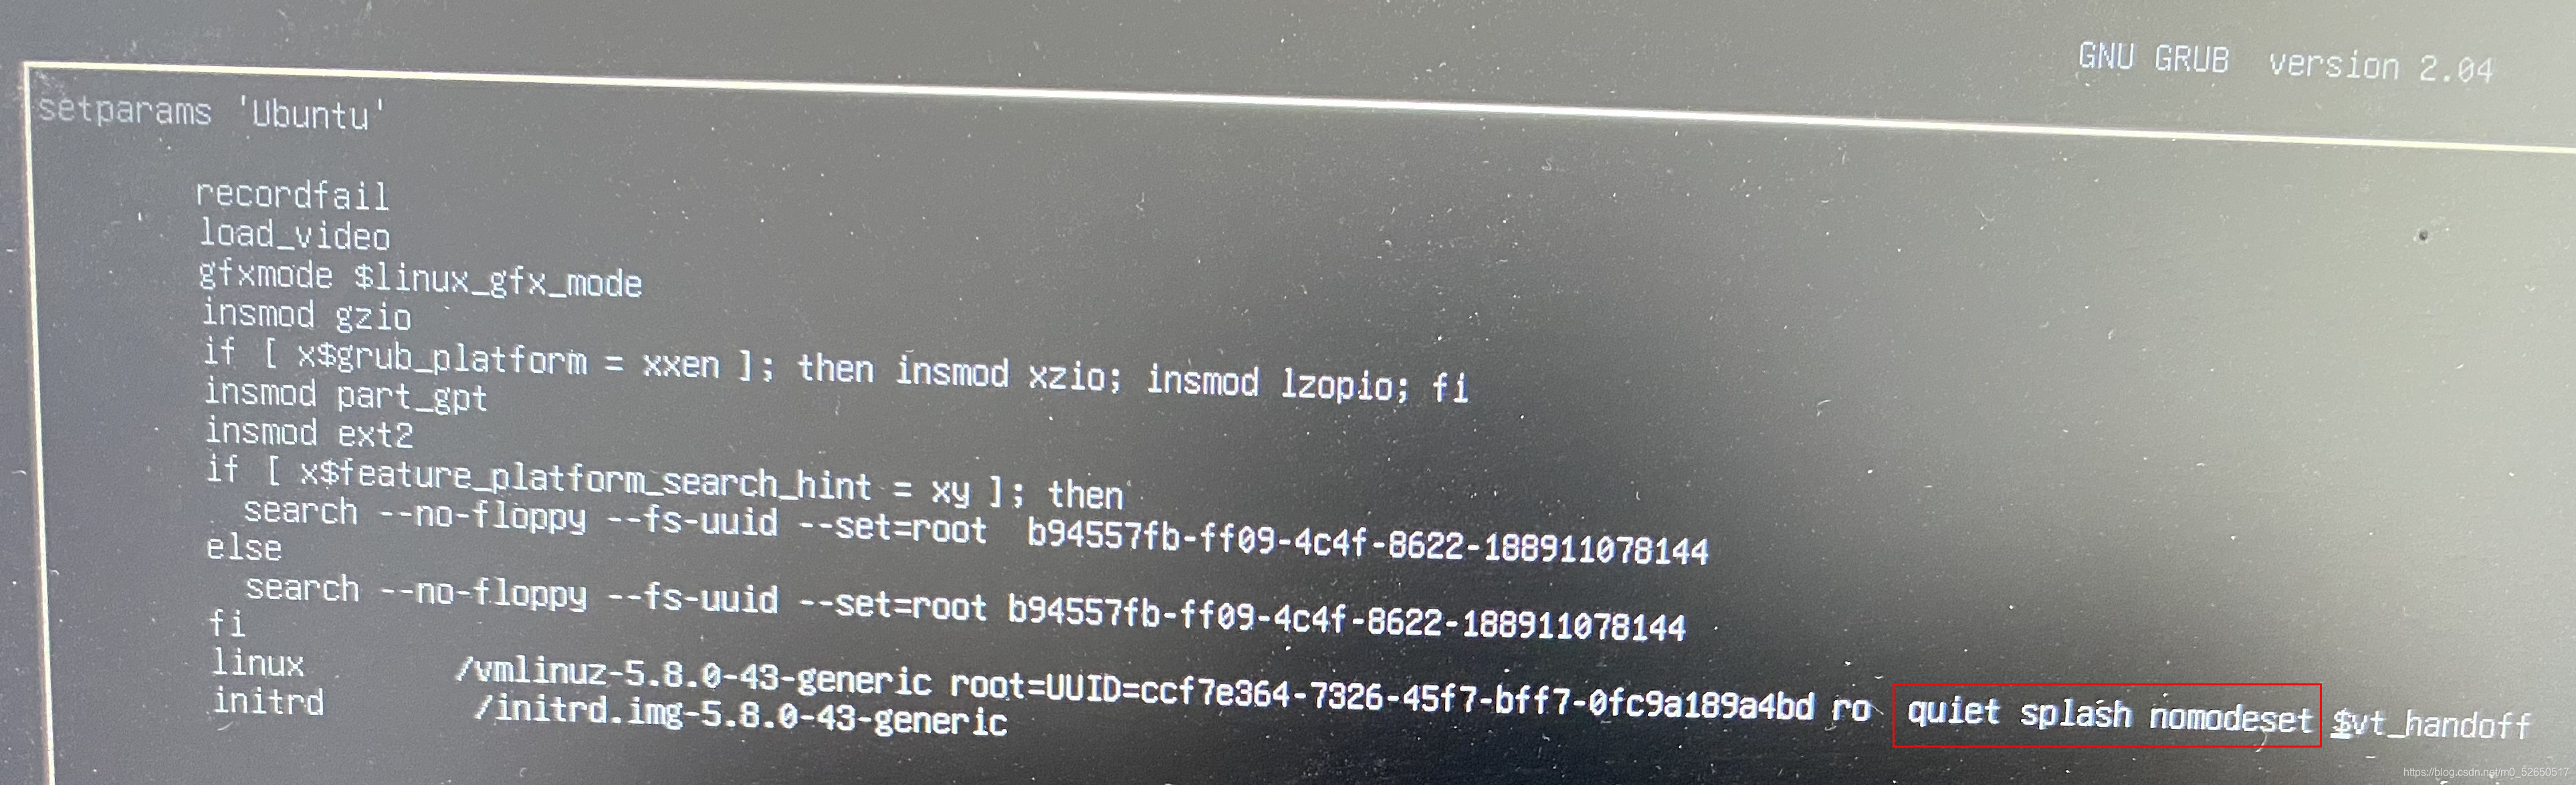
5.1 禁用视频驱动
\qquad
在Ubuntu选项按键盘e键进入编辑,使用
n
o
m
o
d
e
s
e
t
nomodeset
nomodeset 告诉内核在系统启动之前不启动视频驱动程序,而改用 BIOS 模式。
\qquad
在 quiet splash 后加入 nomodeset,然后按键盘
F
10
F10
F10 进入
u
b
u
n
t
u
20.04
ubuntu20.04
ubuntu20.04 系统。
5.2 永久禁用 nouveau 驱动
5.2.1 方法一
- 打开
b
l
a
c
k
l
i
s
t
.
c
o
n
f
blacklist.conf
blacklist.conf 文件:
sudo gedit /etc/modprobe.d/blacklist.conf - 文本最后加入:
blacklist nouveau
options nouveau modeset=0
- 更新
i
n
i
t
r
a
m
f
s
initramfs
initramfs:
s
h
e
l
l
shell
shell 输入
sudo update-initramfs -u - 重启:
s
h
e
l
l
shell
shell 输入
reboot - 验证:
s
h
e
l
l
shell
shell 输入
lsmod | grep nouveau,如果没有输出,说明禁用 n o u v e a u nouveau nouveau 成功。

5.2.1 方法二
- 打开
g
r
u
b
grub
grub 文件:
s
h
e
l
l
shell
shell 输入
sudo gedit /etc/default/grub - 修改
g
r
u
b
grub
grub 文件:
GRUB_CMDLINE_LINUX_DEFAULT="quiet splash"换成GRUB_CMDLINE_LINUX_DEFAULT="quiet splash nomodeset" - 更新
g
r
u
b
grub
grub 文件:
s
h
e
l
l
shell
shell 输入
sudo update-grub - 重启:
s
h
e
l
l
shell
shell 输入
reboot
5.3 换源
- 备份原来的源:
sudo cp /etc/apt/sources.list /etc/apt/sources_init.list - 打开
s
o
u
r
c
e
s
.
l
i
s
t
sources.list
sources.list 文件:
sudo gedit /etc/apt/sources.list - 更换 s o u r c e s . l i s t sources.list sources.list 文件内容:阿里源 https://developer.aliyun.com/mirror/
deb http://mirrors.aliyun.com/ubuntu/ focal main restricted universe multiverse
deb-src http://mirrors.aliyun.com/ubuntu/ focal main restricted universe multiverse

deb http://mirrors.aliyun.com/ubuntu/ focal-security main restricted universe multiverse
deb-src http://mirrors.aliyun.com/ubuntu/ focal-security main restricted universe multiverse

deb http://mirrors.aliyun.com/ubuntu/ focal-updates main restricted universe multiverse
deb-src http://mirrors.aliyun.com/ubuntu/ focal-updates main restricted universe multiverse

deb http://mirrors.aliyun.com/ubuntu/ focal-proposed main restricted universe multiverse
deb-src http://mirrors.aliyun.com/ubuntu/ focal-proposed main restricted universe multiverse

deb http://mirrors.aliyun.com/ubuntu/ focal-backports main restricted universe multiverse
deb-src http://mirrors.aliyun.com/ubuntu/ focal-backports main restricted universe multiverse
- 更新源:
sudo apt-get update
sudo apt-get upgrade
sudo apt-get dist-upgrade
\qquad
如果报错:使用sudo apt-get -f install修复损坏的软件包,尝试卸载出错的软件包,重新安装正确版本的软件。
- 其他源:


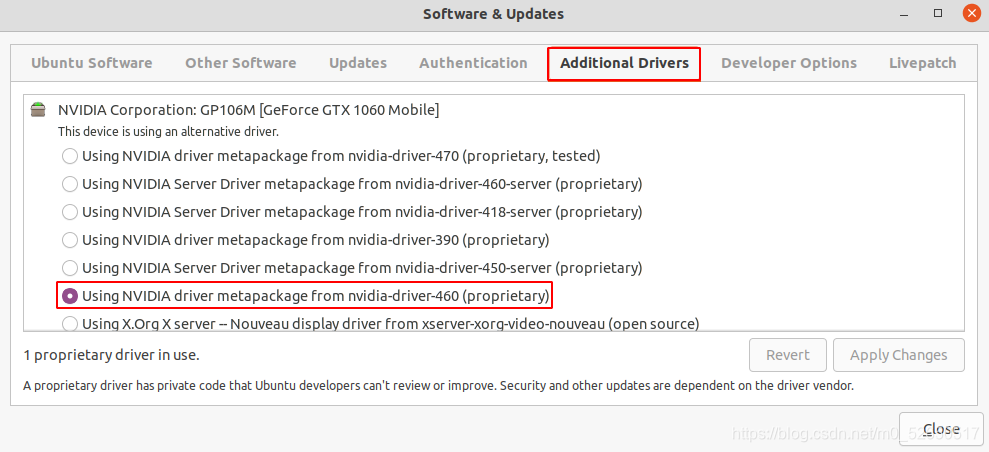
5.4 安装 NVIDIA 驱动
- 打开
Software & Updates

- 在
Additional Drivers中选择要安装的NVIDIA驱动即可。