前端自动化
介绍



git push origin master -f
强制覆盖先前提交
CI/CD工具介绍

Jenkins搭建
搭建要点

dockerhub
https://hub.docker.com/


课程架构


docker run --name jenkins_zero -itd -p 11005:8080 -p 50000:50000 jenkins/jenkins:lts

docker logs -f jenkins_zero

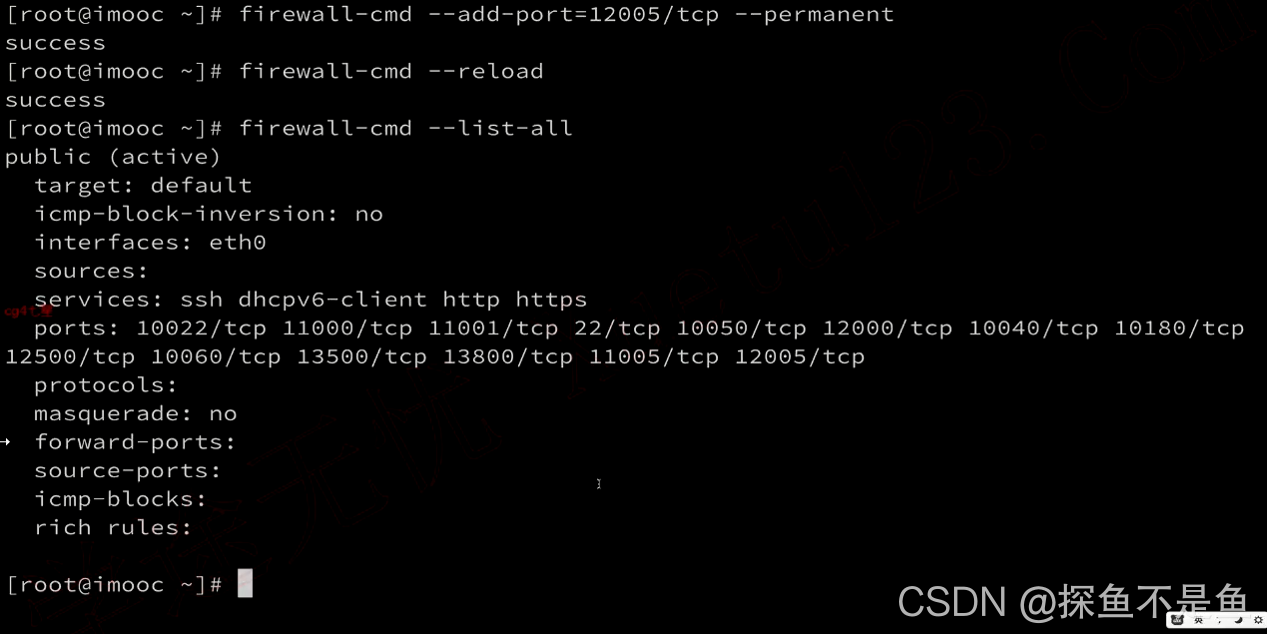
firewall-cmd --add-port=11005/tcp --permanent
永久放行端口号
firewall-cmd --reload
重新加载防火墙规则
本地打开jenkins


出现错误重新来几次即可


jekins全局地址 后面与gihub连接


离线安装插件方法(没有选择默认插件)


局域网安装插件


安装常用插件


备份镜像


tmp目录linux重启后数据会重置


备份容器方式2


备份完成

解压


备份容器方式3(最终方案)


搭建小结

Jenkins权限管理
全局安全配置


Role-Based Strategy


安全矩阵


一定要添加否则很麻烦


gilab(gitlab登录jenkins,用户记得密码更少)


部分用户无法登陆


退出jenkins登录


权限管理总结
Role-based Aurthorization Strategy


Jenkins与gitlab对接
创建gitlab项目(私有)

配置jenkins凭据


jenkins设置私钥


gilab设置公钥

配置


集成gitlab


jenkins


模拟


总结

DockerFile
方式一

前端项目配置Dockerfile
# build stage
FROM node:14 as build-stage

LABEL maintainer=rollsroycewkk@qq.com

# 创建一个工作目录
WORKDIR /app
COPY . .
RUN yarn install --registry=https://registry.npm.taobao.org

RUN npm run build

# production stage
FROM nginx:stable-alpine as production-stage
COPY --from=build-stage /app/dist /usr/share/nginx/html
EXPOSE 80
CMD ["nginx", "-g", "daemon off;"]


前端项目配置.dockerignore
# Dependency directory
# https://www.npmjs.org/doc/misc/npm-faq.html#should-i-check-my-node_modules-folder-into-git
node_modules
.DS_Store
dist

# node-waf configuration
.lock-wscript

# Compiled binary addons (http://nodejs.org/api/addons.html)
build/Release
.dockerignore
Dockerfile
*docker-compose*

# Logs
logs
*.log

# Runtime data
.idea
.vscode
*.suo
*.ntvs*
*.njsproj
*.sln
*.sw*
pids
*.pid
*.seed
.git
.hg
.svn
后端项目配置Dockerfile
FROM node:14

LABEL maintainer=rollsroycewkk@qq.com

# 创建一个工作目录
WORKDIR /app
COPY . .
RUN yarn install --registry=https://registry.npm.taobao.org

# 这里产生了dist目录,及server.bundle.js
RUN npm run build

EXPOSE 12005

# 上传配置一些静态图片资源
VOLUME ["/app/public"]

# 运行node
CMD ["node","dist/server.bundle.js"]
后端项目配置.dockerignore
# Dependency directory
# https://www.npmjs.org/doc/misc/npm-faq.html#should-i-check-my-node_modules-folder-into-git
node_modules
.DS_Store
dist

# node-waf configuration
.lock-wscript

# Compiled binary addons (http://nodejs.org/api/addons.html)
build/Release
.dockerignore
Dockerfile
*docker-compose*

# Logs
logs
*.log

# Runtime data
.idea
.vscode
*.suo
*.ntvs*
*.njsproj
*.sln
*.sw*
pids
*.pid
*.seed
.git
.hg
.svn

端口号更改/与dockerfile暴露端口一直

前端项目生产地址配置

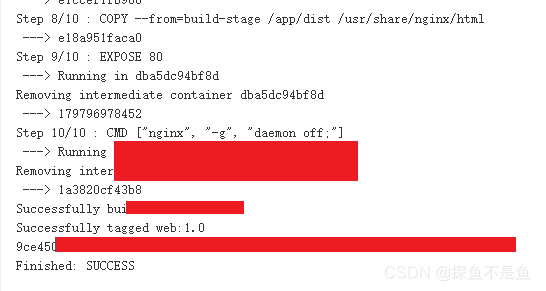
docker build -t web:1.0 .
打包前端镜像 -t就是 -tag .就是根目录下的dockerfile

Docker Desktop


镜像构建过程


docker images

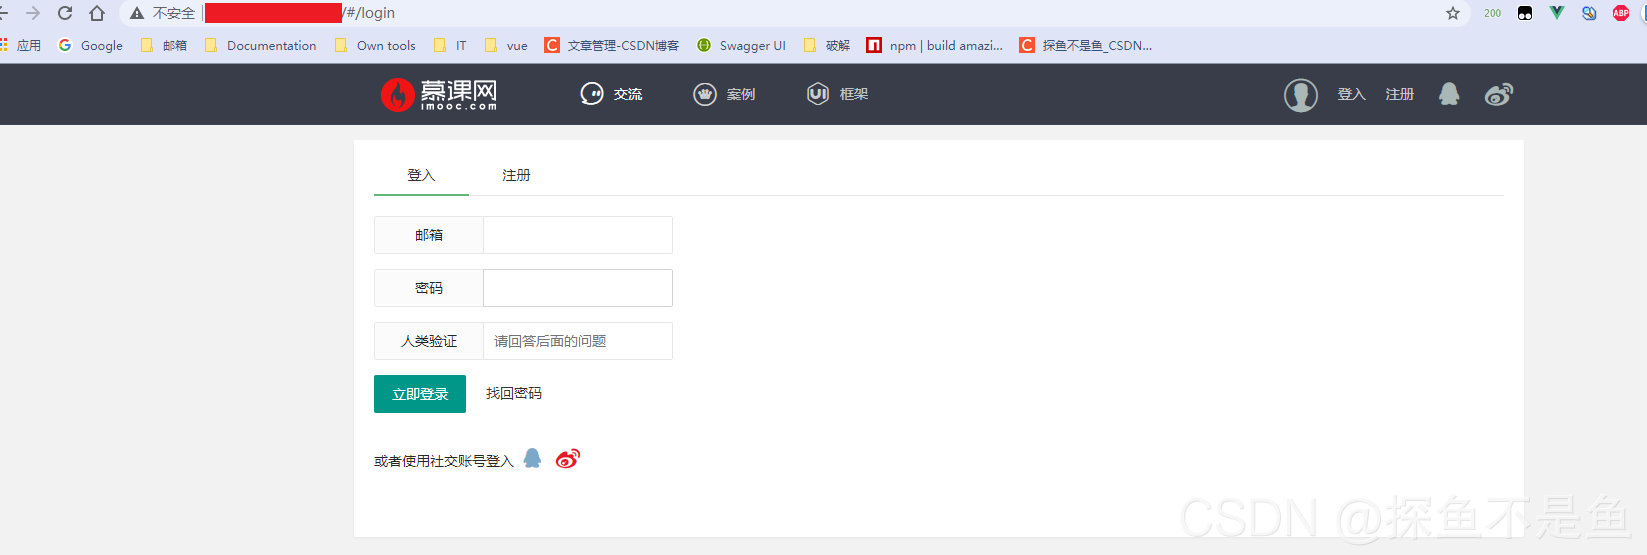
docker run -itd --name web -p 11000:80 web:1.0

浏览器输入localhost:11000


Jenkins任务配置
前端项目配Deploy keys/Jenkins


gitlab项目配置webhooks


jenkins配置


模拟

后端项目配置jenkins


测试


注意(私钥)

gitlab是管理员配置shh 公钥 启用即可

Shell脚本
简单添加变量
#!/bin/bash

CONTAINER=${container_name}
PORT=${port}

echo $CONTAINER
echo $PORT
echo "hello imooc-front"


docker build --no-cache -t i m a g e n a m e : {image_name}: imagen?ame:{tag}


docker run -itd --name $CONTAINER -p $PORT:80 i m a g e n a m e : {image_name}: imagen?ame:{tag}
docker run --name jenkins_one -itd -p 11006:8080 -p 50001:50000 -v /var/run/docker.sock:/var/run/docker.sock -v /usr/bin/docker:/usr/bin/docker jenkins/jenkins:lts
jenkins挂载docker
chmod 777 /var/run/docker.sock
授权

docker inspect 容器名称
所有镜像运行状态
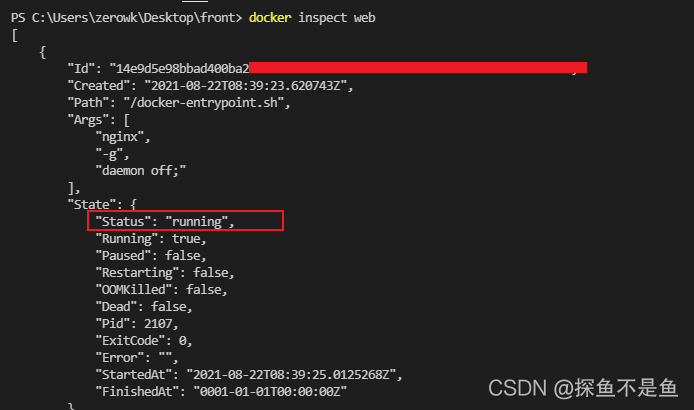
正在运行就停止
#!/bin/bash

CONTAINER=${container_name}
PORT=${port}

# echo $CONTAINER
# echo $PORT

# 完成了镜像的构建
# docker build -t web:1.0 .
docker build --no-cache -t ${image_name}:${tag} .


# 跑起来我们的服务 -itd 在后台执行
docker run -itd --name $CONTAINER -p $PORT:80 ${image_name}:${tag}


# echo "hello imooc-front"


RUNNING=${docker inspect --format="{{ .State.Running}}" $CONTAINER 2 > /dev/null}

# 条件判断
if[ ! -n $RUNNING ]; then
  echo "$CONTTINER does not exit"
  return 1
fi


最终判断
#!/bin/bash

CONTAINER=${container_name}
PORT=${port}

# echo $CONTAINER
# echo $PORT

# 完成了镜像的构建
# docker build -t web:1.0 .
docker build --no-cache -t ${image_name}:${tag} .


# echo "hello imooc-front"


RUNNING=`docker inspect --format="{{ .State.Running}}" $CONTAINER `
echo $RUNNING

# 条件判断
if [ ! -n $RUNNING ]; then
  echo "$CONTAINER does not exit"
  return 1
fi

if [ "$RUNNING" == "false" ]; then
  echo "$CONTAINER is not running"
  return 2
else
  echo "$RUNNING is running"
  # delete same name container
  matchingStarted=$(docker ps --filter="name=$CONTAINER" -q | xargs)
  if [ -n $matchingStarted ]; then
    docker stop $matchingStarted
  fi

  matching=$(docker ps -a --filter="name=$CONTAINER" -q | xargs )
  if [ -n $matching ]; then
    docker rm $matching
  fi
fi

echo "RUNNING is ${RUNNING}"

# 跑起来我们的服务 -itd 在后台执行
docker run -itd --name $CONTAINER -p $PORT:80 ${image_name}:${tag}
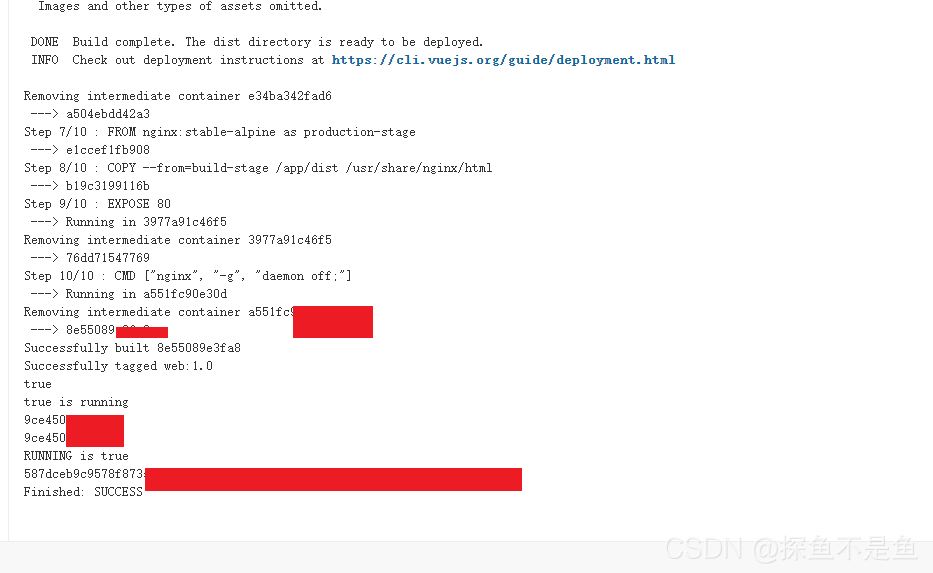
放行
Travis CI
github登录travis并且创建github仓库

创建vue项目关联仓库


根目录配置travis.yml文件
language: node_js
node_js:
  - "14.15.1"

cache:
  yarn: true

install:
  - yarn intall

script:
  - npm run build

第一次提交代码

同步travis

手动构建一次


发布到github pages

deploy:
  provider: pages
  skip_cleanup: true
  local_dir: dist/
  github_token: $GITHUB_TOKEN  # Set in the settings page of your repository, as a secure variable
  keep_history: true
  name: "zeroWk"
  email: xxxxxxxx@163.com
  on:
    branch: master
根目录vue.config.js
module.exports = {
  publicPath: process.env.NODE_ENV === "production" ? "/travisci-demo" : "/"
}

github申请token


设置travis变量


提交代码


githubPages


总结

Ciecle CI
github登录

github创建仓库
要是公共项目才可以

本地拉取仓库

创建.circleci文件夹/config.yml

version: 2.1
jobs:
  build:
    docker:
      - image: circleci/node:14-browsers
    steps:
      - run: echo 'A first hello'
      - run: npm -v
上传代码
git add .
git commit -m “add”
git remote add origin https://github.com/xxxxx
git branch -M main
git push -u origin main

刷新circleci

set Up Project

vue create circle-demo1
创建一个项目,将demo1中的文件复制到demo中

设置远程拉取代码分支branchs


配置config.yml
version: 2.1
jobs:
  build:
    docker:
      - image: circleci/node:14-browsers
    only:
      - main
    steps:
      - add_ssh_keys:
          fingerprintts:
            - "13:12:94:88:0c:94:ec:70:f0:5e:3a:15:71:e9:d4:a0"
      - checkout
      - run:
        name: Install
        command: yarn install
      - run
        name: Build
        command: yarn build

提交代码


缩进

保存/复用缓存

script文件件/deploy.sh 脚本
sh脚本就相当于一个函数 return不同值
#!/bin/sh
# 构想 https://gist.github.com/motemen/8595451

# 基于 https://github.com/eldarlabs/ghpages-deploy-script/blob/master/scripts/deploy-ghpages.sh
# MIT许可 https://github.com/eldarlabs/ghpages-deploy-script/blob/master/LICENSE

# abort the script if there is a non-zero error
set -e   // 相当与函数回调,如果没有xxx就退出

# 打印当前的工作路径
pwd
remote=$(git config remote.origin.url)   // 设置远程仓库地址

echo 'remote is: '$remote

# 新建一个发布的目录
mkdir gh-pages-branch
cd gh-pages-branch
# 创建的一个新的仓库
# 设置发布的用户名与邮箱
git config --global user.email "$GH_EMAIL" >/dev/null 2>&1
git config --global user.name "$GH_NAME" >/dev/null 2>&1
git init
git remote add --fetch origin "$remote"

echo 'email is: '$GH_EMAIL
echo 'name is: '$GH_NAME
echo 'sitesource is: '$siteSource

# 切换gh-pages分支
if git rev-parse --verify origin/gh-pages >/dev/null 2>&1; then
  git checkout gh-pages
  # 删除掉旧的文件内容
  git rm -rf .
else
  git checkout --orphan gh-pages
fi

# 把构建好的文件目录给拷贝进来
cp -a "../${siteSource}/." .

ls -la

# 把所有的文件添加到git
git add -A
# 添加一条提交内容
git commit --allow-empty -m "Deploy to GitHub pages [ci skip]"
# 推送文件
git push --force --quiet origin gh-pages
# 资源回收,删除临时分支与目录
cd ..
rm -rf gh-pages-branch

echo "Finished Deployment!"

配置脚本


circleci配置环境变量


重新构建

课程完整版config.yml
version: 2
jobs:
  build:
    docker:
      - image: circleci/node:10
    branches:
      only:
        - master
    steps:
      - add_ssh_keys:
          fingerprints:
            - "94:e5:20:73:dd:b1:6a:51:e1:b5:fb:5f:24:82:0d:15"
      - checkout
      - restore_cache:
          keys:
            - dependencies_imooc
      - run:
          name: Install
          command: yarn install
      - save_cache:
          paths:
            - node_modules
          key: dependencies_imooc
      - run:
          name: Build
          command: yarn build
      - run:
          name: Prepare shell commands
          # shell chmod +x 赋予执行权限
          # 执行shell脚本
          command: chmod +x scripts/deploy.sh
      - run:
          name: Run Deploy to Github pages
          command: ./scripts/deploy.sh
github pages
项目 —> setting -->


上面的ciecle-demo找不到因为webpack配置原因


总结
