参考文档:https://about.gitlab.com/install/#centos-8
1、安装和配置必要的依赖项
sudo dnf install -y curl policycoreutils openssh-server perl
sudo systemctl enable sshd
sudo systemctl start sshd
检查是否需要在防火墙开启例外
sudo firewall-cmd --permanent --add-service=http
sudo firewall-cmd --permanent --add-service=https
sudo systemctl reload firewalld
安装Postfix以发送通知电子邮件,如果要使用其他解决方案发送电子邮件,请跳过此步骤,并在安装gitlab之后配置外部的SMTP服务器
sudo dnf install postfix
sudo systemctl enable postfix
sudo systemctl start postfix
2、添加GitLab软件包存储库并安装软件包
添加GitLab软件包存储库
curl https://packages.gitlab.com/install/repositories/gitlab/gitlab-ce/script.rpm.sh | sudo bash

接下来,安装GitLab软件包。确保已正确设置DNS,然后更改https://URL为要访问GitLab实例的URL,安装将自动配置并在该URL上启动GitLab
sudo EXTERNAL_URL="https://192.168.48.129" dnf install -y gitlab-ce
3、编辑GitLab配置文件
vim /etc/gitlab/gitlab.rb

4、配置启动GitLab
gitlab-ctl reconfigure 初始化GitLab
gitlab-ctl stop 关闭服务
gitlab-ctl start 启动服务
gitlab-ctl restar 重启服务
5、登录
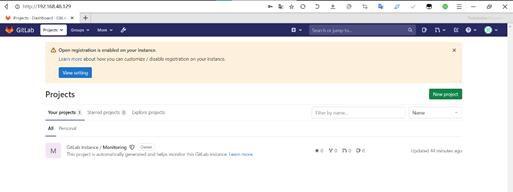
第一次登录默认为root用户,提示需要设置密码,密码不能过于简单(长度不低于8位)

6、设置中文
点击右上角头像—Setting—Preferences—Language—Save changes

7、创建新用户
第一种:由外部人员主动创建
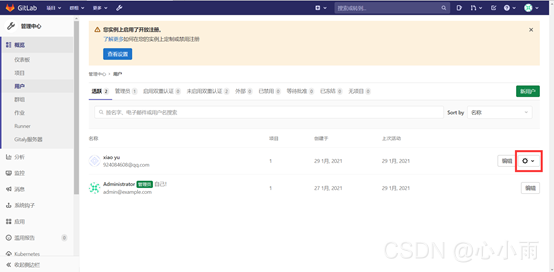
注:此方法创建的用户需要管理员进行审批,该功能可以在管理中心--设置—通用—注册限制进行开启和关闭

外部人员可以通过GitLab的登录界面进行注册

注册完成后等待管理员审批
之后登录可以创建群组和项目等操作
第二种:使用管理员进行注册


8、创建群组


向群组中添加用户

创建一个新项目


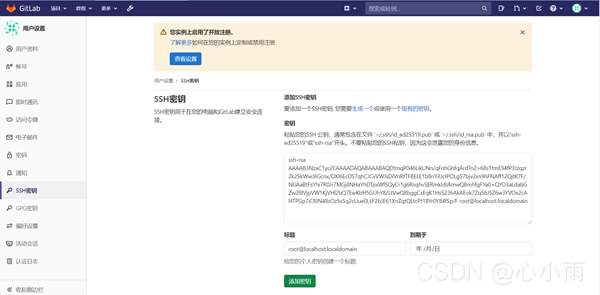
项目创建完成后提示ssh没有设置


将公钥复制至GitLab用户设置—ssh密钥
创建新文件
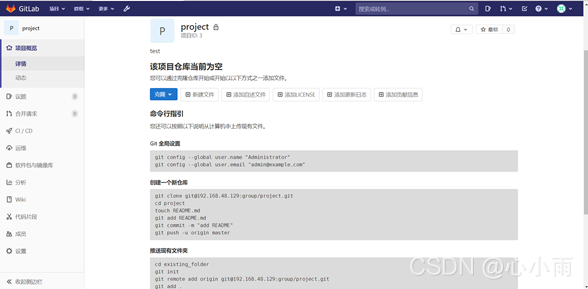


将该项目下载至本地


测试文件是否能正常上传
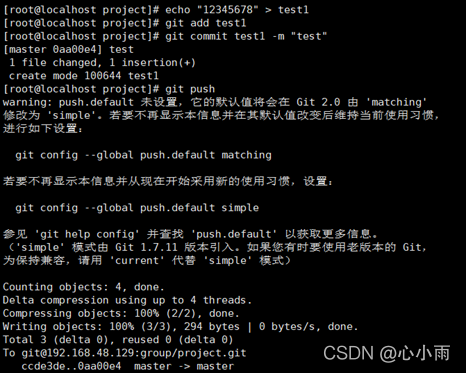
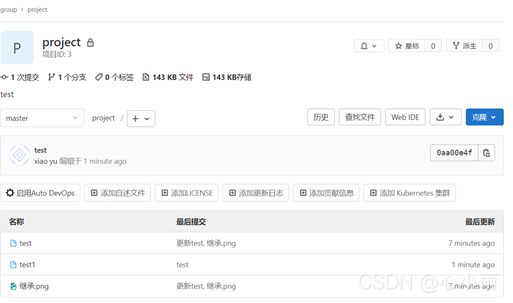

9、将本地git推送至GitLab
创建一个空仓库

根据提示,将本地仓库上传至远程库


