目录
一、反向解析
第一步:安装bind服务
[root@localhost ~]# yum install bind -y
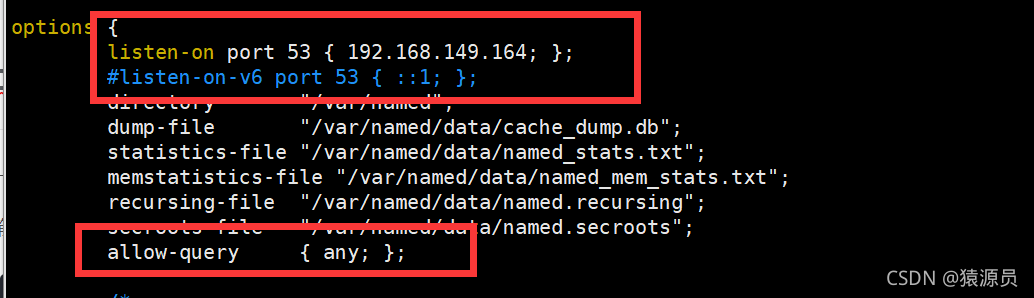
第二步:配置主区域文件(IP是本地的监听IP)
[root@localhost named]# vim /etc/named.conf
第三步:配置区域文件
[root@localhost named]# vim /etc/named.rfc1912.zones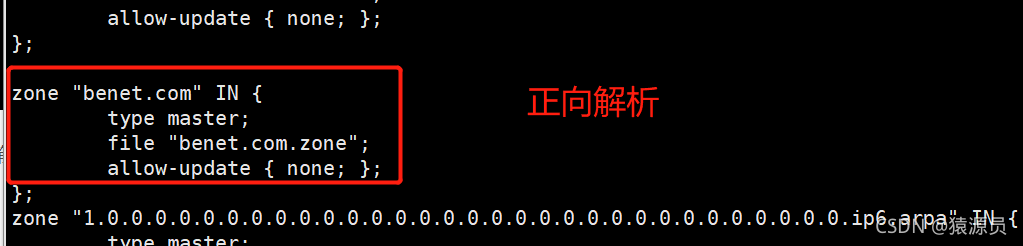

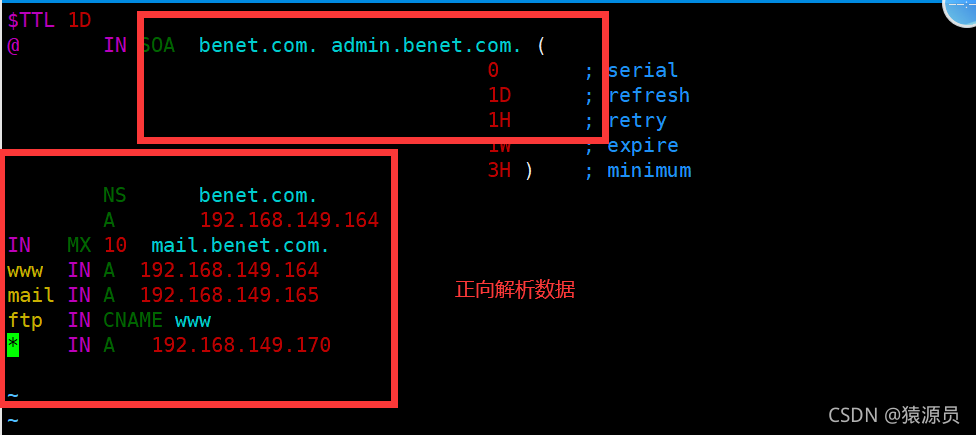
第四步:配置数据文件
[root@localhost ~]# cd /var/named

[root@localhost named]# cp -p named.localhost benet.com.zone

[root@localhost named]# vim benet.com.zone
?
[root@localhost named]# cp -p benet.com.zone benet.com.zone.local

[root@localhost named]# vim benet.com.zone.local 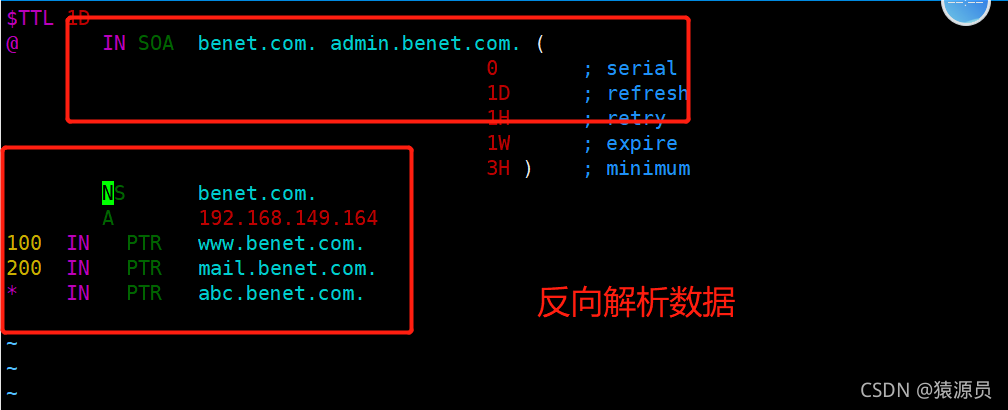
?第五步:启动bind和配置DNS
[root@localhost named]# systemctl start named

[root@localhost named]# vim /etc/resolv.conf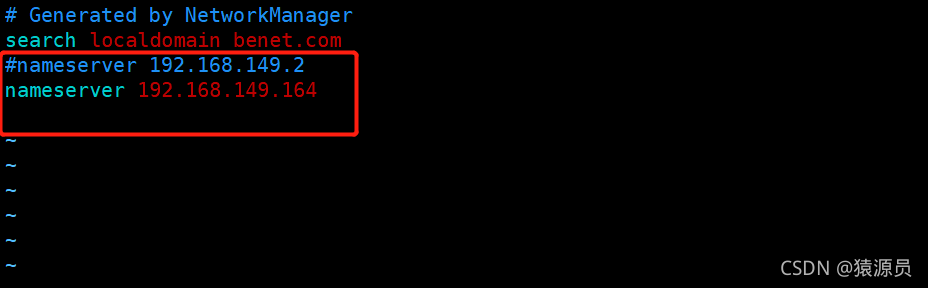
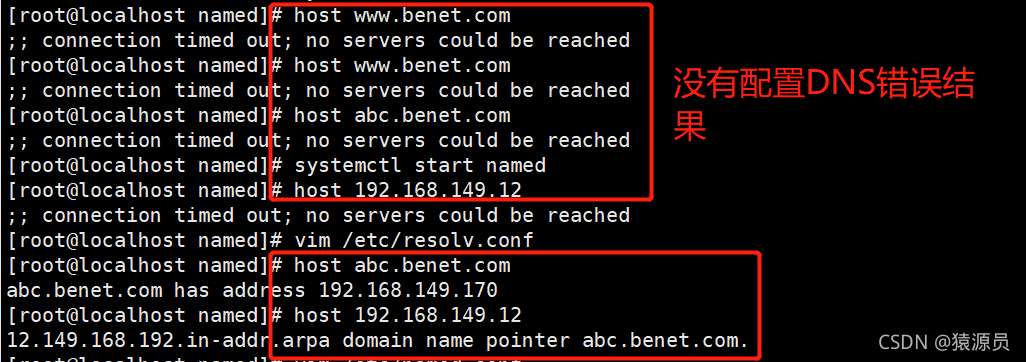
第六步:测试解析成果
?
二、主从解析
第一步:两台服务器都安装bind服务
主服务器:192.168.149.164
从服务器:192.168.149.168

[root@localhost ~]# yum install bind -y
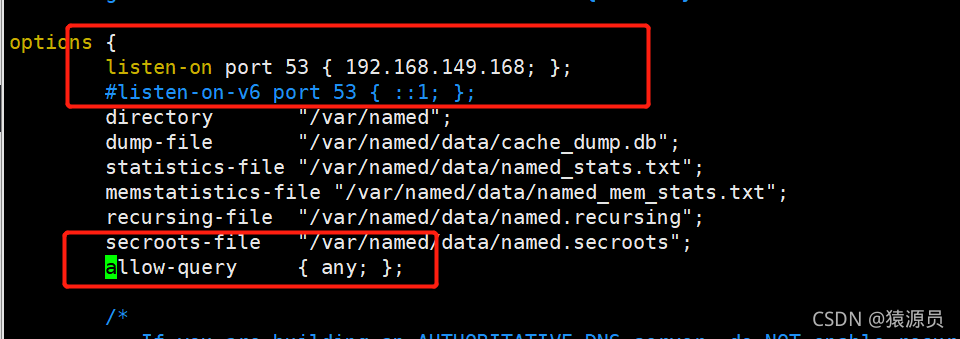
第二步:配置主服务器主区域文件
[root@localhost named]# vim /etc/named.conf 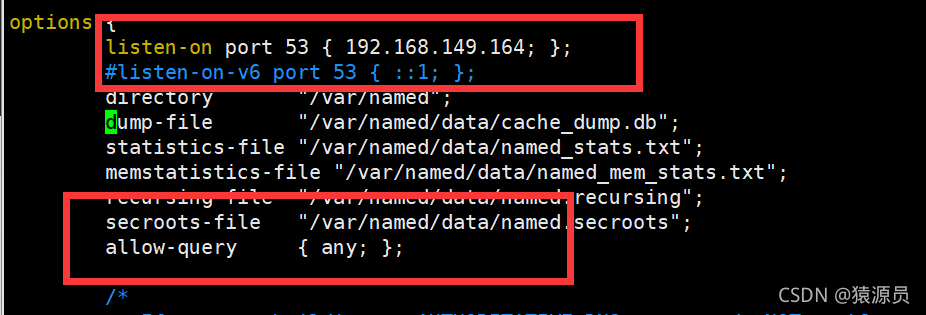
第三步:设置主服务器的区域文件
[root@localhost named]# vim /etc/named.rfc1912.zones 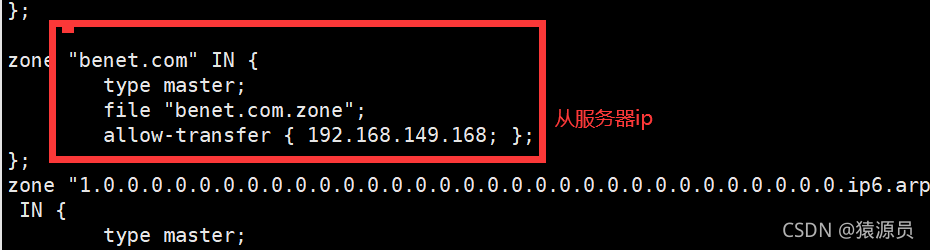
?
?第四步:主服务器配置数据文件
[root@localhost ~]# cd /var/named

[root@localhost named]# cp -p named.localhost benet.com.zone

[root@localhost named]# vim benet.com.zone
[root@localhost named]# cp -p benet.com.zone benet.com.zone.local

[root@localhost named]# vim benet.com.zone.local
第五步:?配置从服务器主区域文件
[root@localhost ~]# vim /etc/named.conf
?第六步:配置从服务器区域文件
[root@localhost named]# vim /etc/named.rfc1912.zones 
?
?第七步:开启主从两台服务器并配置DNS
[root@localhost named]# systemctl start named
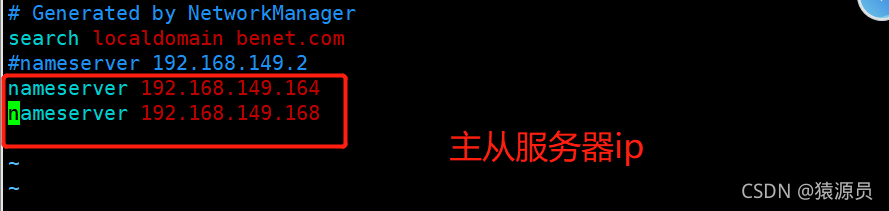
[root@localhost named]# vim /etc/resolv.conf
?第八步:测试域名解析结果


?第九步:关闭主服务器测试结果
[root@localhost named]# systemctl stop named #关闭主服务器服务

?
三、分离解析
第一步:安装bind服务
主服务器:192.168.28.12
web服务器:10.0.0.2

[root@localhost ~]# yum install bind -y
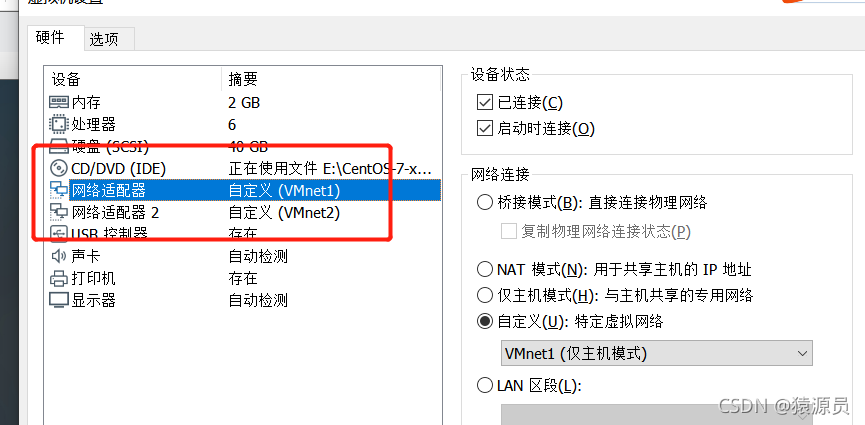
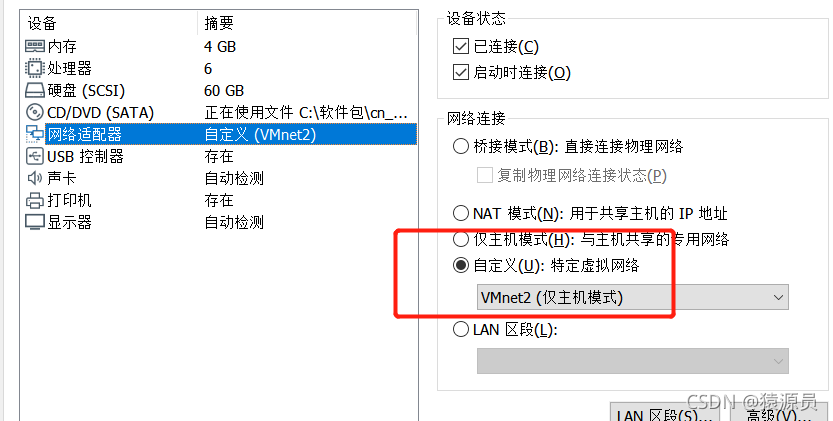
第二步:服务器设置双网卡
?
?
?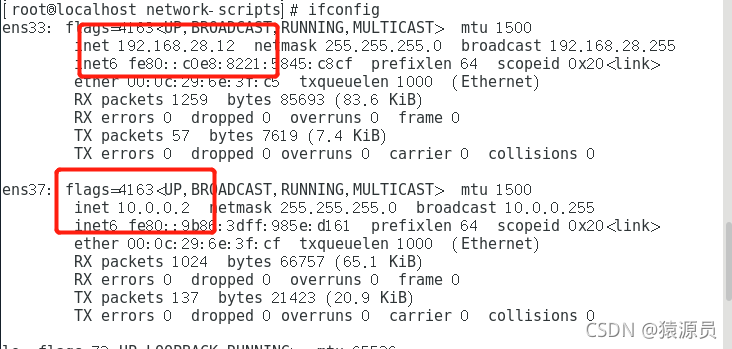
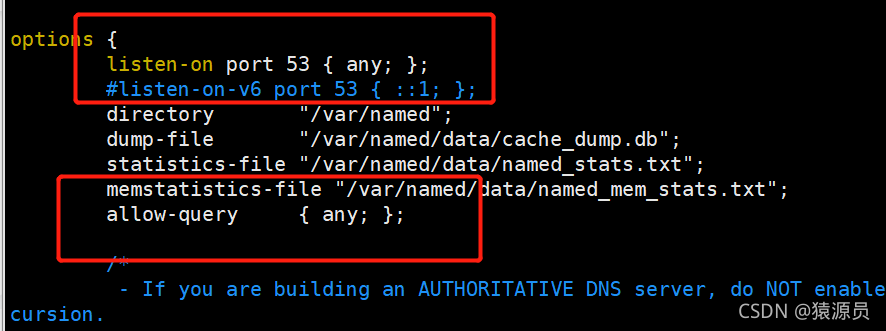
?第三步:修改服务器主配置文件?
[root@localhost named]# vim /etc/named.conf

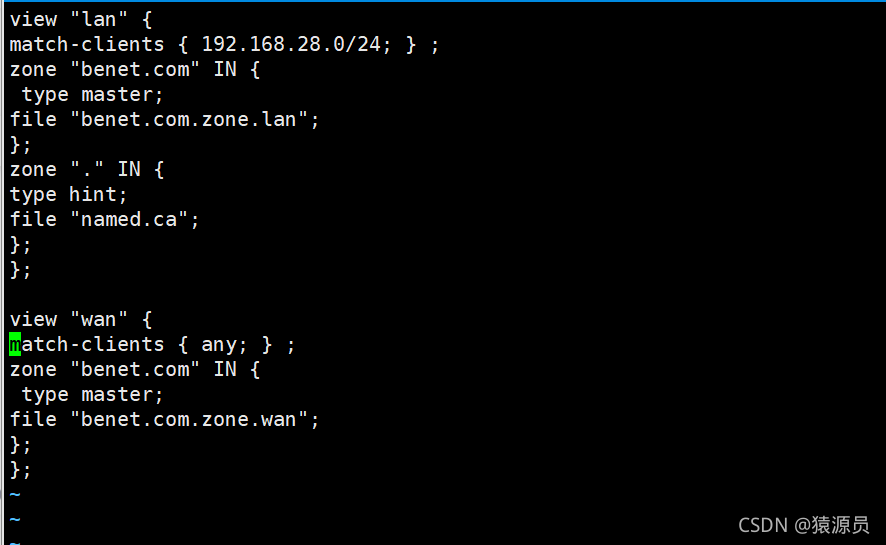
?第四步:修改区域配置文件
[root@localhost named]# vim /etc/named.rfc1912.zones


view "lan" {
match-clients { 192.168.28.0/24; } ;
zone "benet.com" IN {
 type master;
file "benet.com.zone.lan";
};
zone "." IN {
type hint;
file "named.ca";
};
};

view "wan" {
match-clients { any; } ;
zone "benet.com" IN {
 type master;
file "benet.com.zone.wan";
};
};
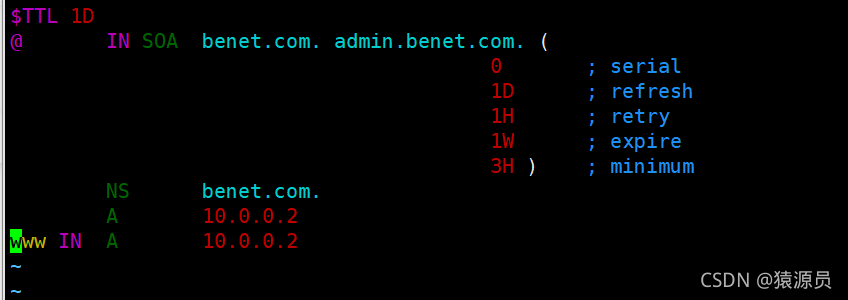
?第五步:修改数据文件
[root@localhost ~]# cd /var/named/
[root@localhost named]# cp -p named.localhost benet.com.zone.lan
[root@localhost named]# cp -p named.localhost benet.com.zone.wan
[root@localhost named]# vim benet.com.zone.lan
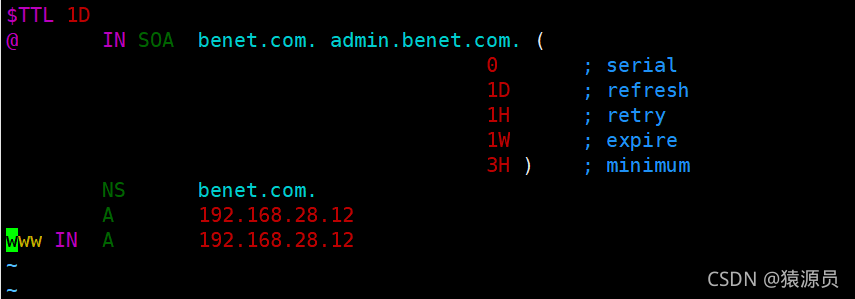
[root@localhost named]# vim benet.com.zone.wan
?第六步:启动服务和设置DNS
[root@localhost named]# systemctl start named
[root@localhost named]# vim /etc/resolv.conf 
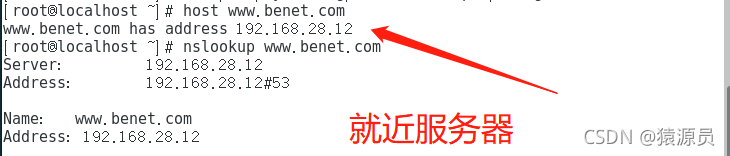
?第七步:本机测试解析结果

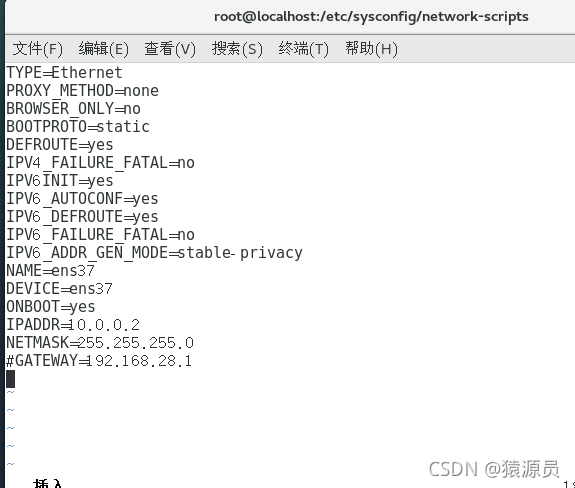
?第八步:192.168.28.0网段测试解析

[root@localhost ~]# vim /etc/sysconfig/network-scripts/ifcfg-ens33 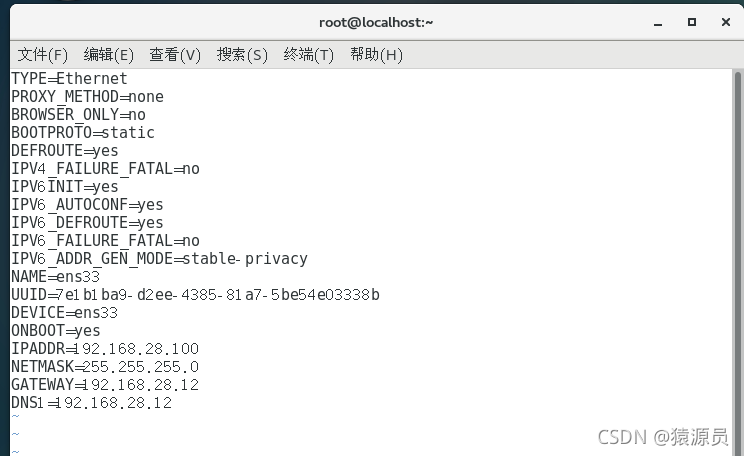
[root@localhost ~]# systemctl restart network
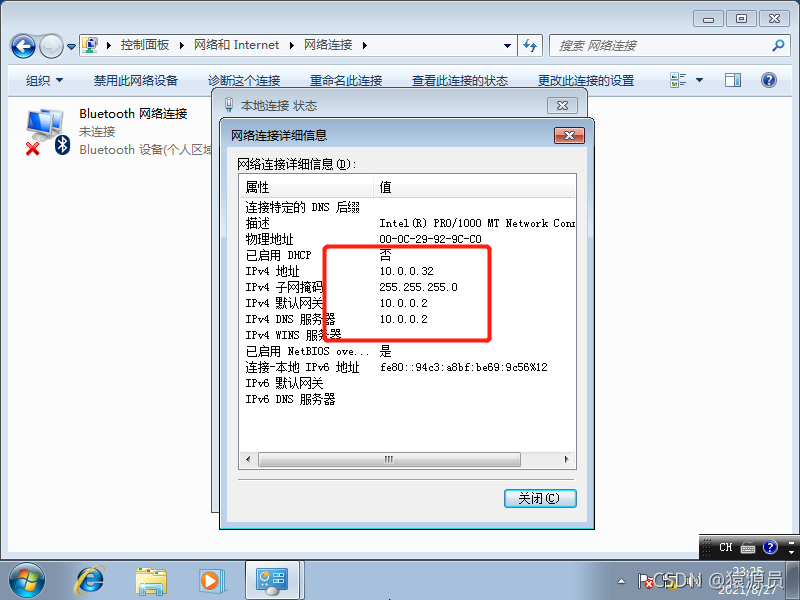
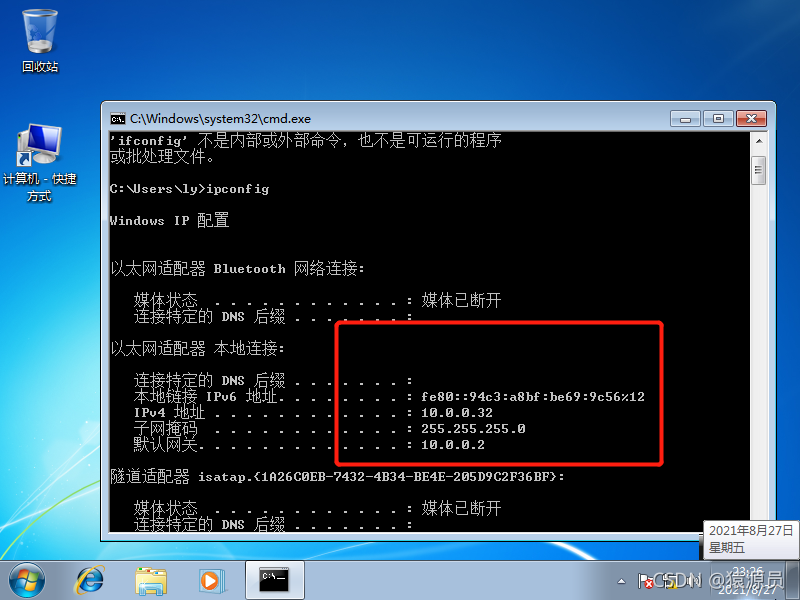
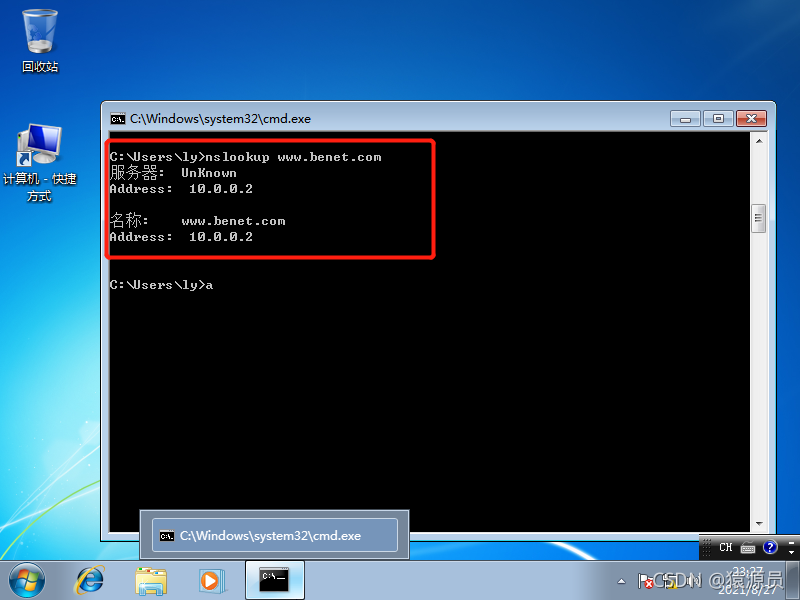
?第九步:10.0.0.0网段测试解析结果
?
?
总结
正向解析是从网址到ip的解析过程,反向即是通过ip查找网址的过程
主从是通过两台服务器做主备,在各服务器相互指向,当主服务器出现故障的时候,备用服务器可以立即顶替其工作
分离解析是我们在一个服务器上,可以有不同的网段口,但是当客户访问时候,会根据客户远近来分配比较快和近的端口