nginx.conf文件介绍
使vim打开nginx配置文件有颜色
cp -a /home/iflytek/nginx-1.16.0/contrib/vim/* /usr/share/vim/vimfiles/
user  nobody;   #指定nginx的工作进程的用户及用户组,默认为nobody

worker_processes  1;#指定工作进程的个数具体可以根据服务器cpu数量进行设置,比如cpu有4个,可以设置为4。如果不知道cpu的数量,可以设置为auto。 nginx会自动判断服务器的cpu个数,并设置相应的进程数。


#error_log  logs/error.log;      #错误日志路径
#error_log  logs/error.log  notice;
#error_log  logs/error.log  info;    #info时详细输出模式,如果编译了debug模块,那么debug为最详细的输出模式。

pid        logs/nginx.pid;     #指定nginx进程pid的文件路径


events {     #这个指令块用来设置工作进程的工作模式以及每个进程的连接上限
    worker_connections  1024;    #定义每个工作进程的最大连接数,默认是1024。ulimit -n查看设置的连接数
}


http {
    include       mime.types;  #定义数据类型
    default_type  application/octet-stream;  #设定默认类型为二进制流,也就是当文件类型未定义时使用这种方式, 例如在没有配置PHP环境时,Nginx是不予解析的,此时,用浏览器访问PHP文件就会出现下载窗口。

    log_format  jfedu  '$remote_addr - $remote_user [$time_local] "$request" '
                      '$status $body_bytes_sent "$http_referer" '
                      '"$http_user_agent" "$http_x_forwarded_for"';
  #定义日志文件格式,并默认取名为main,可以自定义该名字,这里定义jfedu。 也可以通过添加,删除变量来自定义日志文件的格式。

    access_log  logs/access.log  main;   #定义访问日志的存放路径,并且通过引用log_format所定义的main名称设置其输出 格式。

    sendfile        on;
    tcp_nopush     on;
#用于开启高效文件传输模式。直接将数据包封装在内核缓冲区,然后返给客户,将 tcp_nopush和tcp_nodelay两个指令设置为on用于防止网络阻塞;
    #keepalive_timeout  0;
    keepalive_timeout  65; #设置客户端连接保持活动的超时时间。在超过这个时间之后,服务器会关 闭该连接
    keepalive_requests 100   :设置nginx在保持连接状态最多能处理的请求数,到达请求数,即使还在 保持连接状态时间内,也需要重新连接。
提示:可以用netstat -ntlpa |grep 80  查看链接状态

    gzip  on;  #开启压缩功能,减少文件传输大小,节省带宽。
    gzip_min_length 1k; #最小文件压缩,1k起压。
    gzip_types      text/plain text/xml;    #压缩文件类型
    gzip_comp_level   3;   #压缩级别,默认是1。
server {            #用来定义虚拟主机。
        listen       8080;   #设置监听端口,默认为80端口
        server_name  v1.jfedu.net;  #域名,多个域名通过逗号隔开

        charset utf-8;   #设置网页的默认编码格式

        access_log  logs/host.access.log  jfedu; #指定该虚拟主机的独立访问日志,会覆盖前面的全局配置

        location / {    #定义请求匹配规则。
            root   /home/nginx/v1;
            index  index.html index.htm;
        }
        error_page  404              /404.html;

       error_page   500 502 503 504  /50x.html;
        location = /50x.html {
            root   html;          #定义访问错误返回的页面,凡是状态码是500 502 503 504 都会返回这个页面。
        }

}
配置测试
编译安装nginx
#如果linux服务器可以连接外网,可以通过这种方式下载nginx包。
#若不可以连接外网,通过网页下载然后上传到服务器上

wget  http://nginx.org/download/nginx-1.16.0.tar.gz

#解压到home目录下,自定义
tar -zxvf nginx-1.16.0.tar.gz

#预编译
cd  /home/nginx-1.16.0  --进入解压后的目录

./configure --prefix=/home/hadoop/nginx  --with-http_stub_status_module
或者
./configure  --prefix=/home/hadoop/nginx

#编译安装
make && make install

#启动
cd  /home/hadoop/nginx/sbin/
./nginx

#查看版本
nginx -v
文件配置
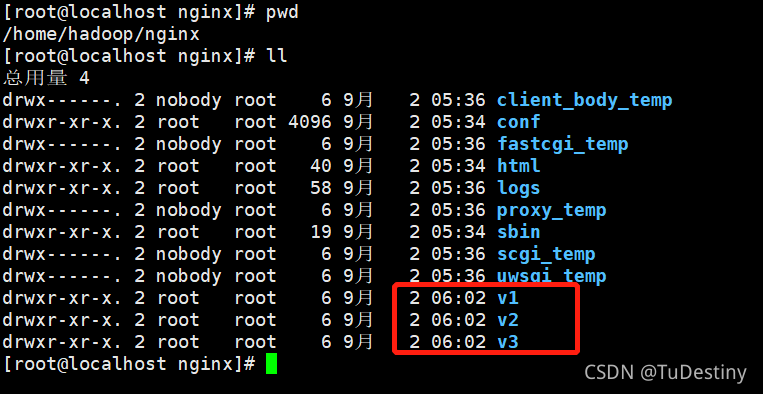
1.创建目录
mkdir -p /home/hadoop/nginx/{v1,v2,v3}

2. 将html文件夹中的文件分别复制到v1/v2/v3三个目录下
注:可以自行创建,并添加内容
cp  html/*  v1
cp  html/*  v2
cp  html/*  v3

3.修改index.html
将v1/v2/v3目录下的index.html文件进行修改,v1.jfedu.net为域名,用于后续进行区分,index.html可以进行自定义,能区分就行

4.hosts中添加域名
linux中
vim /etc/hosts
#添加如下内容
192.168.31.8 v1.jfedu.net v2.jfedu.net  v3.jfedu.net

window 中
如果本地windows系统也需要访问,在C:\Windows\System32\drivers\etc目录下修改hosts文件,将上面域名添加到hosts文件中

5. nginx.conf配置
按照章节前的文件介绍进行配置,此时我们多加两个server,具体内容如下:
server {
         listen       8081;
        server_name  v2.jfedu.net;

        charset utf-8;

        access_log  logs/v2.access.log  jfedu;

        location / {
            root   /home/nginx/v2;
            index  index.html index.htm;
        }
           }


    server {
         listen       8081;
        server_name  v3.jfedu.net;

        charset utf-8;

        access_log  logs/v3.access.log  jfedu;

        location / {
            root   /home/nginx/v3;
            index  index.html index.htm;
        }
6.重启服务
cd sbin
./nginx -s reload   如果重启报错,可根据报错信息查看配置文件
通过linux服务器进行访问

通过windows进行访问


== 注意 ==
1.注意配置文件中符号不要有遗漏
2.端口不可以被其他服务占用
3.user  nobody;   如果配置文件中配置的是普通用户,注意文件目录的权限,特别是创建的v1/v2/v3目录是否和启动nginx用户是同一个用户。否则访问会报错权限问题