Ubuntu 安装 Visual Studio Code 搭建 C++ 开发环境教程
一、Ubuntu 安装 Visual Studio Code
1、下载
(1) 在 Ubuntu Software 中下载安装
打开 Ubuntu 自带的如下软件,在搜索栏直接搜索下载 Visual Studio Code

(2) Visual Studio 官网下载安装 Visual Studio Code
下载网址:点击此处跳转下载界面
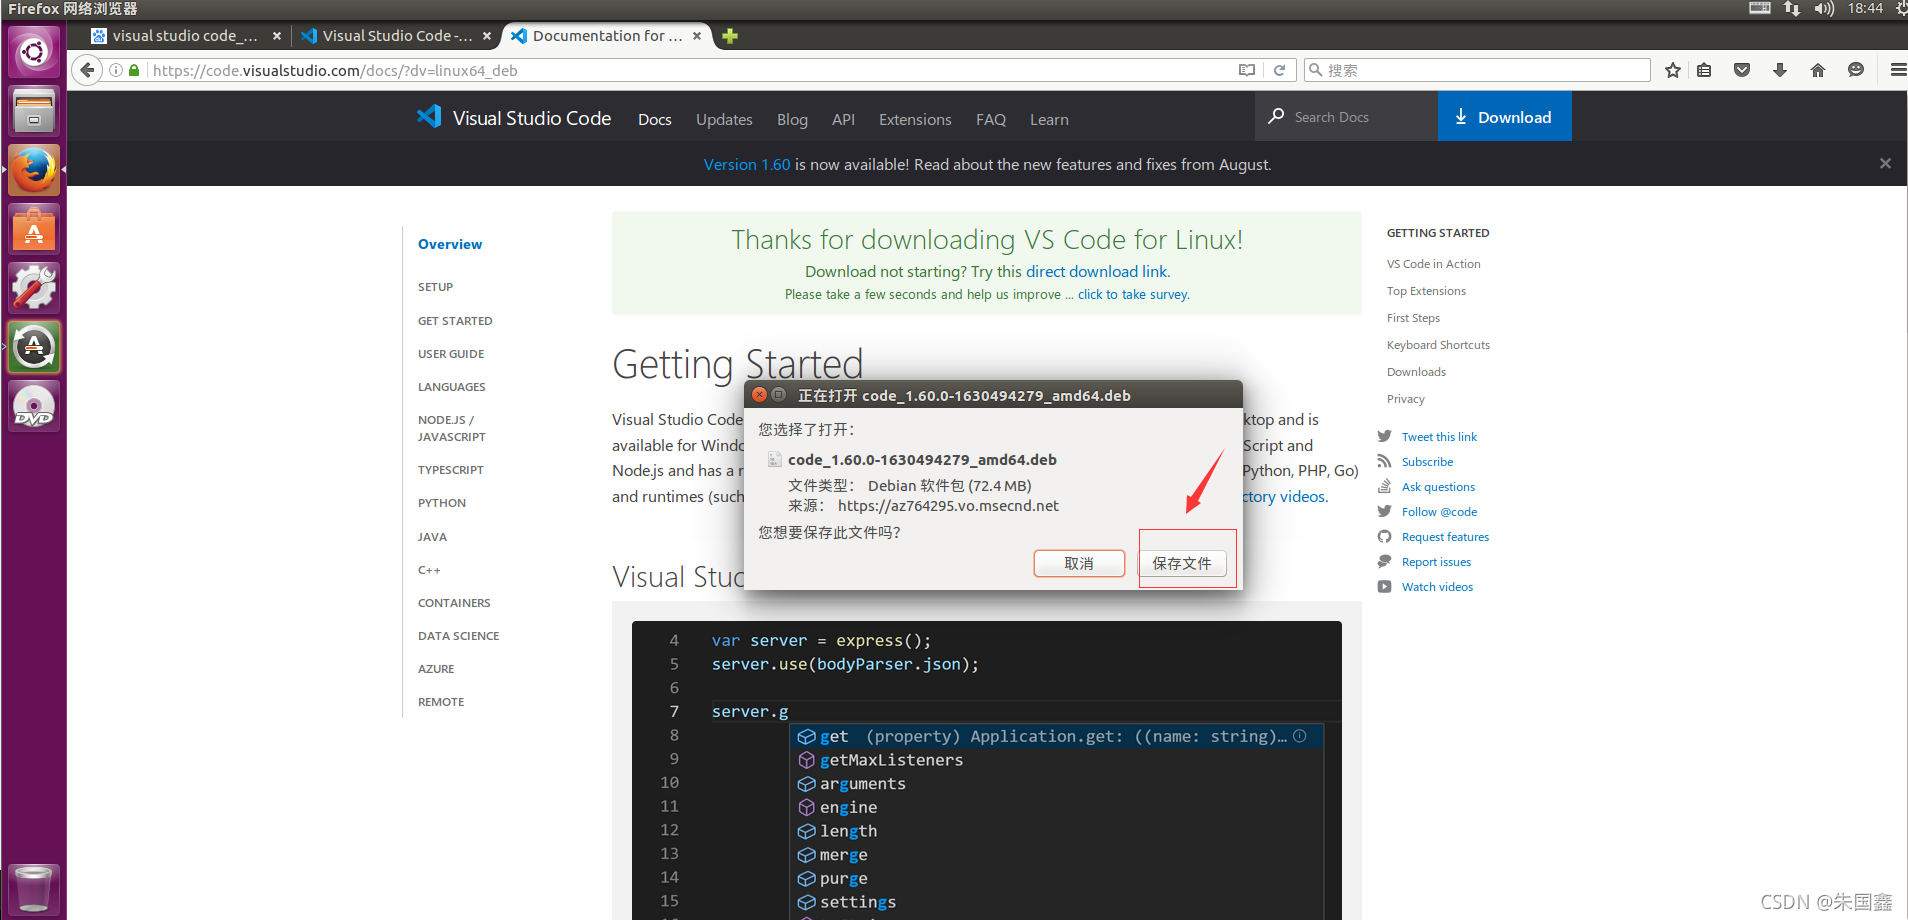
选择如图红框中的版本进行下载

选择保存文件

正在下载中

2、安装
点击下载完成的压缩包,右侧的小图标

在文件夹中对其进行解压

在终端输入如下指令
sudo dpkg -i code_1.60.0-1630494279_amd64.deb
如果此处报如下错误,点击此处跳转进行解决

解压完成

可以找到已经安装完成的 VS Code

运行如下指令可得到版本号,意味着安装成功
code --version
二、Visual Studio Code 搭建 C++ 开发环境
1、安装中文语言包
- 单击鼠标右键,打开终端运行指令,打开 VS Code,或者也可以找到软件图标双击打开
code

- 按下键盘按键【Ctrl+Shift+X】,在输入框输入【chinese】,点击【install】

- 安装完成后,按下键盘按键【Ctrl+Shift+P】,,在输入框输入【configure】,点击【Configure
Display Language】

- 点击【zh-cn】

- 点击【Restart】

- 就变成了中文的了!!!

2、创建C++项目
- 点击鼠标右键打开终端,创建项目目录cpp_test,用于学习创建第一个C++项目,并进入cpp_test目录中
mkdir ~/Projects	//home目录下创建Projects文件夹

mkdir ~/Projects/cpp_test && cd ~/Projects/cpp_test		//Projects文件夹下创建cpp_test文件夹,并到此文件夹下
- 创建配置目录
mkdir ./.vscode
- 添加编译配置文件(终端下输入以下内容然后按回车)
cat > .vscode/tasks.json << EOF
{
    "version": "2.0.0",
    "tasks": [
        {
            "label": "build",
            "type": "shell",
            "command": "g++",
            "args": [
                "-std=c++17",
                "-Wall",
                "-Wextra",
                "-g",
                "-ggdb",
                "main.cpp",
                "-o",
                "demoapp.out"
            ],
            "group": "build",
            "presentation": {
                "reveal": "always",
            },
            "problemMatcher": "\$gcc"
        }
    ]
}
EOF
- 添加运行配置文件(终端下输入以下内容然后按回车)
cat > .vscode/launch.json << EOF
{
    "version": "0.2.0",
    "configurations": [
        {
            "name": "(gdb) Launch",
            "type": "cppdbg",
            "request": "launch",
            "program": "\${workspaceFolder}/demoapp.out",
            "args": [],
            "stopAtEntry": false,
            "cwd": "\${workspaceFolder}",
            "environment": [],
            "externalConsole": true,
            "MIMode": "gdb",
            "setupCommands": [
                {
                    "description": "Enable pretty-printing for gdb",
                    "text": "-enable-pretty-printing",
                    "ignoreFailures": true
                }
            ],
            "preLaunchTask": "build"
        }
    ]
}
EOF
- 添加智能提示配置文件(终端下输入以下内容然后按回车
if [ `getconf LONG_BIT` -eq "64" ]; then
cat > .vscode/c_cpp_properties.json << EOF
{
    "configurations": [
        {
            "name": "Linux",
            "includePath": [
                "/usr/include/c++/8",
                "/usr/include/x86_64-linux-gnu/c++/8",
                "/usr/include/c++/8/backward",
                "/usr/lib/gcc/x86_64-linux-gnu/8/include",
                "/usr/local/include",
                "/usr/lib/gcc/x86_64-linux-gnu/8/include-fixed",
                "/usr/include/x86_64-linux-gnu",
                "/usr/include",
                "${workspaceRoot}"
            ],
            "defines": [],
            "intelliSenseMode": "clang-x64",
            "browse": {
                "path": [
                    "/usr/include/c++/8",
                    "/usr/include/x86_64-linux-gnu/c++/8",
                    "/usr/include/c++/8/backward",
                    "/usr/lib/gcc/x86_64-linux-gnu/8/include",
                    "/usr/local/include",
                    "/usr/lib/gcc/x86_64-linux-gnu/8/include-fixed",
                    "/usr/include/x86_64-linux-gnu",
                    "/usr/include",
                    "${workspaceRoot}"
                ],
                "limitSymbolsToIncludedHeaders": true,
                "databaseFilename": ""
            }
        }
    ],
    "version": 3
}
EOF
else
cat > .vscode/c_cpp_properties.json << EOF
{
    "configurations": [
        {
            "name": "Linux",
            "includePath": [
                "/usr/include/c++/8",
                "/usr/include/i386-linux-gnu/c++/8",
                "/usr/include/c++/8/backward",
                "/usr/lib/gcc/i686-linux-gnu/8/include",
                "/usr/local/include",
                "/usr/lib/gcc/i686-linux-gnu/8/include-fixed",
                "/usr/include/i386-linux-gnu",
                "/usr/include",
                "${workspaceRoot}"
            ],
            "defines": [],
            "intelliSenseMode": "clang-x64",
            "browse": {
                "path": [
                    "/usr/include/c++/8",
                    "/usr/include/i386-linux-gnu/c++/8",
                    "/usr/include/c++/8/backward",
                    "/usr/lib/gcc/i686-linux-gnu/8/include",
                    "/usr/local/include",
                    "/usr/lib/gcc/i686-linux-gnu/8/include-fixed",
                    "/usr/include/i386-linux-gnu",
                    "/usr/include",
                    "${workspaceRoot}"
                ],
                "limitSymbolsToIncludedHeaders": true,
                "databaseFilename": ""
            }
        }
    ],
    "version": 3
}
EOF
fi
- 创建C++源文件main.cpp(代码就是写在这个文件)
touch main.cpp

- 用Visual Studio Code打开当前工作环境(不要忽略最后的点哟)
code .

-
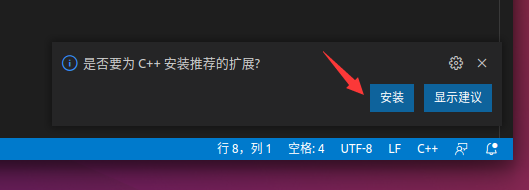
双击main.cpp打开文件,第一次会提示安装C++插件,点击安装,然后等待右下角消息安装完成(只需执行一次,以后都不需要再执行)

-
双击打开main.cpp,然后输入以下代码
#include <iostream>

int main(void)
{
    std::cout << "Hello World!" << std::endl;
    return 0;
}

-
按下Ctrl+Shift+B,然后选择build,就会开始编译

-
编译完后,点击红色框内终端窗口,然后按【回车键】关闭终端

-
点击菜单栏中的【终端】,然后点击【新建终端】,就会打开终端窗口

-
在终端输入以下内容,运行程序
./demoapp.out

- 成功显示结果

