stellar-core的编译和安装可以参考这篇文章
1、首先安装go环境
sudo apt install go
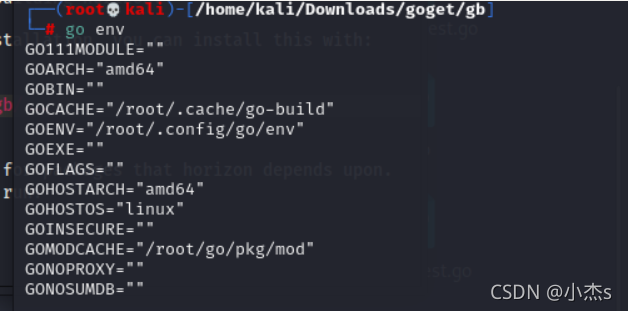
装完后输入
go env
应弹出如下关于go环境的界面

2、下载horizon的文件
git clone https://github.com/stellar/go monorepo && cd monorepo
3、编译horizon
go env -w GOPROXY=https://goproxy.cn
go install -v ./services/horizon

执行完成后,在go的bin目录下生成horizon可执行文件

将可执行文件放到目录下/usr/local/bin/stellar-horizon,可执行文件变成stellar-horizon
sudo cp $(go env GOPATH)/bin/horizon /usr/local/bin/stellar-horizon
sudo cp $(go env GOPATH)/bin/horizon /usr/bin/stellar-horizon
运行stellar-horizon --help成功说明horizon安装成功

4、配置horizon数据库
创建数据库并测试登陆
sudo -u postgres createdb -O stellar horizondb

sudo -u postgres psql -U stellar -h 127.0.0.1 -d horizondb

5、配置horizon
安装direnv工具(防止多次修改环境变量文件,导致环境变量混乱,所以安装这个工具)
sudo apt install direnv

设置环境变量,根据你的系统决定你修改的是bash还是zsh
sudo vi ~/.bashrc(根据你的系统决定你修改的是bash还是zsh,这里以bash为例)

#bash内加上
eval "$(direnv hook bash)"

#zsh内加上
eval "$(direnv hook zsh)"

source ~/.bashrc
编写horizon的配置文件.envrc
#! /bin/bash

export DATABASE_URL="postgres://stellar:stellar@localhost/horizondb"
export STELLAR_CORE_DATABASE_URL="postgres://stellar:stellar@localhost/stellar"
export STELLAR_CORE_URL="http://127.0.0.1:11626"


export STELLAR_CORE_BINARY_PATH=$(which stellar-core)
export PER_HOUR_RATE_LIMIT=72000
export LOG_LEVEL="info"
export INGEST="true"
export ENABLE_CAPTIVE_CORE_INGESTION=false
export HISTORY_ARCHIVE_URLS="https://history.stellar.org/prd/core-testnet/core_testnet_001"
export NETWORK_PASSPHRASE="Test SDF Network ; September 2015"

我们把这个.envrc文件放在一个目录下(我放在了~/horizonconfig文件夹下)

进入该目录,输入
direnv allow .
此时会弹出如下提示,表示配置生效(因为我之前已经执行过 direnv allow .,所以一进文件夹就会报提示)

此时输入horizon,启动horizon服务

此时输入
curl localhost:8000
应能查看到如下信息
