一、前言
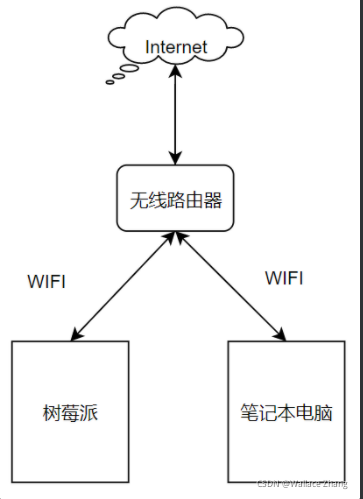
这种情况最常见与使用:树莓派经过自身的无线WIFI连接到无线路由器,笔记本也通过WIFI连接到同一个无线路由器。在这种情况下,只需要知道树莓派分配的IP地址,笔记本电脑就能通过SSH或者VNC方式访问树莓派。(在家里,我可以通过手机APP连接到无线路由器,找到树莓派电脑被分配的IP地址。)

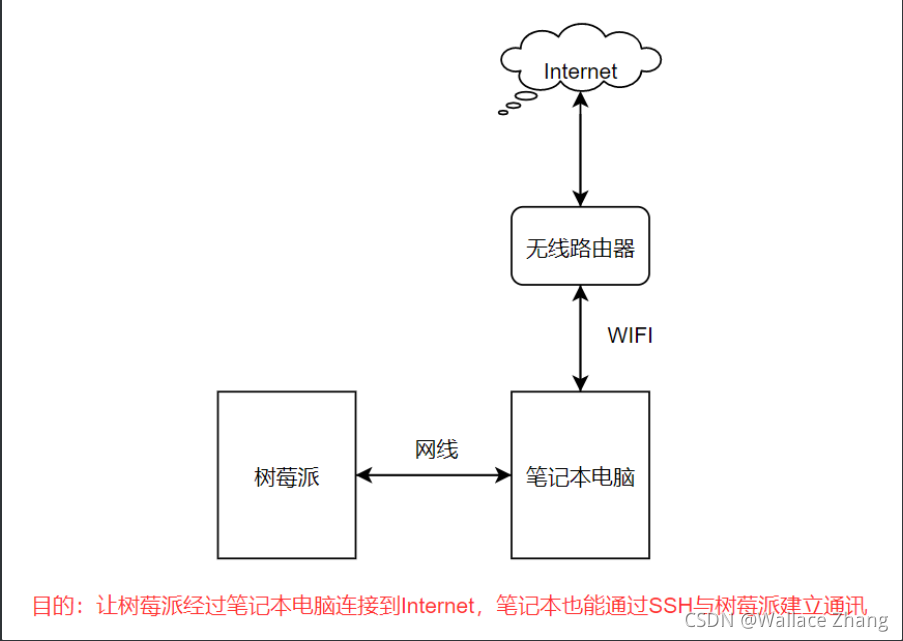
在实际使用上,有可能出现如下这种情况。笔记本电脑通过WIFI已经连接到Internet,但是树莓派无法连接到路由器。原因可能是树莓派没有无线WIFI的硬件(某些树莓派型号没有无线WIFI芯片)。或者不知道无线路由器的WIFI密码。或者在某些办公场合上,申请不到无线路由器的IP使用权限。
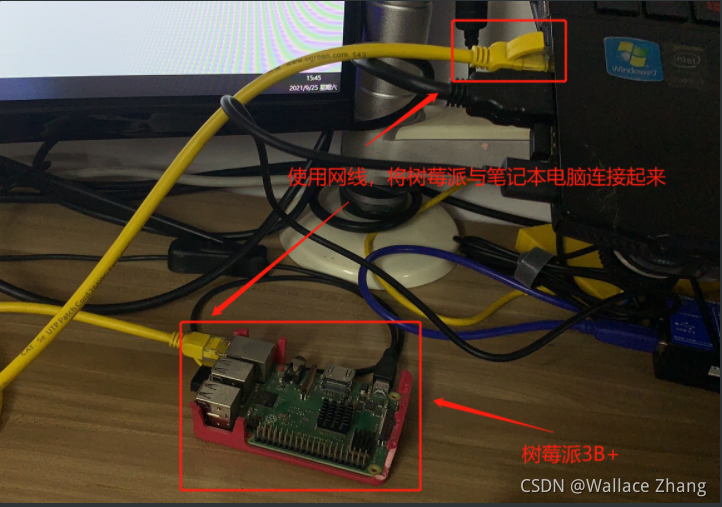
此时,利用笔记本电脑已经使用WIFI上网的前提条件,可以用网线将树莓派与笔记本电脑连接。在笔记本上做一些设置,就能让树莓配访问Internet,笔记本也能通过SSH方式访问树莓派的终端。

二、实验开始
2.1、硬件
树莓派3B+有无线WIFI模块,但是我事先关闭了。

2.2、Windows的网络
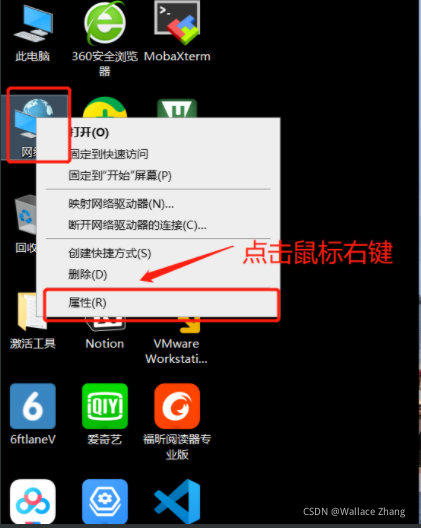
在Windows的桌面,找到“网络”后点击鼠标右键选择“属性”。

接着,弹出如下界面。在这个界面可以了解到笔记本电脑已经连接上WIFI热点“zhang_5G"。


2.3、树莓派
确保网线已经将树莓配与笔记本电脑连接。然后,树莓派上电!!

2.4、回到Windows的网络和共享中心
树莓派上电后,在Windows的”网络和共享中心“多了一个”未识别的网络“,其实它就是树莓派。其实这时的笔记本就变成一个”路由器”,通过网线与树莓派连接。

既然笔记本是一个路由器,那么树莓派的IP地址就是笔记本分配的。
沿着这个思路,去找树莓派的IP地址。找到一个IP地址192.168.137.1,实际上它并不是树莓派的IP地址。但是,它很重要。

接着,打开Windows的CMD命令行。输入" arp -a "。

输入”arp - a"后点击键盘的”回车键“,弹出一堆信息。

记得上一次找到一个IP地址:192.168.137.1。从CMD弹出来的信息看到,192.168.137.1是一个接口,并不是树莓派的IP地址。这个接口下面有两个类似的IP地址。分别是192.168.137.140与192.168.137.255。最后有255的一般都是广播地址,所以192.168.137.140是树莓派的IP地址。

2.5、MobaXterm
找到树莓派的IP地址:192.168.137.140后,就可以用SSH软件登陆树莓派的终端。我喜欢使用MobaXterm这一款免费SSH软件。
另一篇博文:树莓派 | 在Windows使用MobaXterm,通过SSH远程控制树莓派


第一次连接的话,输入”pi“之后,会要求输入密码。因为我已经不是第一次连接,所以树莓派没有要求我再一次输入密码。

验证一下树莓派是否已经连接上Internet,输入sudo apt update 与 sudo apt upgrade。从下图看到,树莓派可以通过Internet更新。证明树莓派已经连接上internet。完成!!!!!!!!!
