需要用到的服务:dhcp服务,tftp服务,ftp服务器或http服务器
?1.dhcp服务器
装包,写配置,启服务
dnf install dhcp-server
[root@localhost ~]# vim /etc/dhcp/dhcpd.conf
ddns-update-style interim;
ignore client-updates;
filename "pxelinux.0";
next-server 192.168.147.128;
subnet 192.168.147.0 netmask 255.255.255.0 {
        option routers 192.168.147.1;
        option subnet-mask 255.255.255.0;
        option domain-name-servers 114.114.114.114;
        range dynamic-bootp 192.168.147.200 192.168.147.254;
        default-lease-time 60;
        max-lease-time 60;
}
查看端口
netstat -lntup | grep dhcp
可以看到67号端口启用
2.ftp服务
dnf install tftp-server
[root@localhost ~]# systemctl status tftp.socket   #查看状态
装包

可以看见服务正在运行
[root@localhost ~]# mkdir /var/lib/tftpboot/pxelinux.cfg
[root@localhost ~]# cd /var/lib/tftpboot/pxelinux.cfg
[root@localhost pxelinux.cfg]# dnf install syslinux -y

[root@localhost tftpboot]# cp /mnt/images/pxeboot/initrd.img /var/lib/tftpboot/
[root@localhost tftpboot]# cp /mnt/images/pxeboot/vmlinuz /var/lib/tftpboot/
[root@localhost tftpboot]# cp /mnt/isolinux/isolinux.cfg /var/lib/tftpboot/pxelinux.cfg/default

[root@localhost pxelinux.cfg]# chmod 777 default
创建一个目录,pxe为网络引导,然后进入该目录,装包,然后将三个文件分别复制到以下路径中,再给default.cfg更改权限
[root@localhost tftpboot]# vim /var/lib/tftpboot/pxelinux.cfg/default
编辑该文件? ? ?:set nu 显示行号
1 default linux
?61 label linux
?62 ? menu label ^Install Red Hat Enterprise Linux 8.3
?63 ? kernel vmlinuz
?64 ? append initrd=initrd.img ks=http://192.168.147.128/ks.cfg? ? ? 提供响应文件加载位置
3.http服务
[root@localhost ~]# cp /root/anaconda-ks.cfg  /var/www/html/ks.cfg
[root@localhost ~]# vim /var/www/html/ks.cfg
如上复制该文件,ks.cfg为响应文件 ,随后进去编辑
#repo --name="AppStream" --baseurl=file:///run/install/sources/mount-0000-cdrom/AppStream? #cdrom                                                   将该端注释
url --url="http://192.168.147.128/pub"?                  添加到配置文件中
timezone Asia/Shanghai --isUtc --nontp? ? ? ? ? ? ? ? ? ?设置时区

reboot? ? ? ? ? ? ? ? ? ? ? ? ? ? ? ? ? ? ? ? ? ? ?  ?  ?重启(一般设置在后面)

---------------------------------------------------------------------------------
ps:
rootpw --iscrypted $6$F9KNKprSdlDNSsr9$VVKIwRhGlGC6uvSApsMKfjS6a94QiEn5wKNs2A76MGPM6yBGgZoPCNPHMCjWoPasrVjU.zkuAhYfWIduqMGEq1   root用户及其密码
user --name=wangruizhe --  password=$6$WEEucvNdwX7lwRFX$mvWM043Ui1NIXyxzDIxI8DdU3NfCU8RRTB9awXQsEX1.6AuOeN/77FWXYsSdFYqlNgSHLXU37rE0uEptnPkAX1 --iscrypted --gecos="Wangruizhe"  wangruizhe用户以及密码 (这个自己就有,但是可以到/etc/shadowd中复制别的用户和密码)
内容如上
[root@localhost html]# chmod 777 ks.cfg   更改权限
[root@localhost html]# pwd                查看路径
/var/www/html
[root@localhost html]# mkdir pub          创建文件
[root@localhost html]# mount /dev/sr0 /var/www/html/pub/     进行挂载
[root@localhost html]# cp /mnt/isolinux/ldlinux.c32 /var/lib/tftpboot/
[root@localhost html]# cp /usr/share/syslinux/pxelinux.0 /var/lib/tftpboot
 复制文件
所需要复制的文件及其路径如图
注意如果自己在/etc/httpd/conf.d/host.conf 添加了文件请将内容删除或移动
4.ftp服务(与http服务二选一)
dnf install vsftpd -y装包
[root@server ftp]# vim /etc/vsftpd/vsftpd.conf

anonymous_enable=YES

anon_umask=022
anon_upload_enable=YES
anon_mkdir_write_enable=YES   自己添加
编辑主配置文件使匿名用户可以登录
[root@server ~]# cd /var/ftp/
[root@server ftp]# chmod 777 pub/    给该目录下的pub目录给权限
[root@localhost ~]# mount /dev/sr0 /var/ftp/pub/   挂载文件到pub
[root@localhost ~]# ll /var/ftp/pub/           查看是否挂载成功
[root@localhost ~]# cp /root/anaconda-ks.cfg  /var/ftp/ks.cfg   复制文件到该目录
[root@localhost ~]# vim /var/ftp/ks.cfg

#repo --name="AppStream" --baseurl=file:///run/install/sources/mount-0000-cdrom/AppStream? #cdrom                                                   将该端注释
url --url="ftp://192.168.147.128/pub"?                   添加到配置文件中
timezone Asia/Shanghai --isUtc --nontp? ? ? ? ? ? ? ? ? ?设置时区

reboot? ? ? ? ? ? ? ? ? ? ? ? ? ? ? ? ? ? ? ? ? ? ?  ?  ?重启(一般设置在后面)
编辑ks.cfg文件时,其他与http服务无异但是注意协议改成ftp
编辑 /var/lib/tftpboot/pxelinux.cfg/default下的文件也一样,只有?64行 append initrd=initrd.img ks=ftp://192.168.147.128/ks.cfg? 不同
5.开始安装
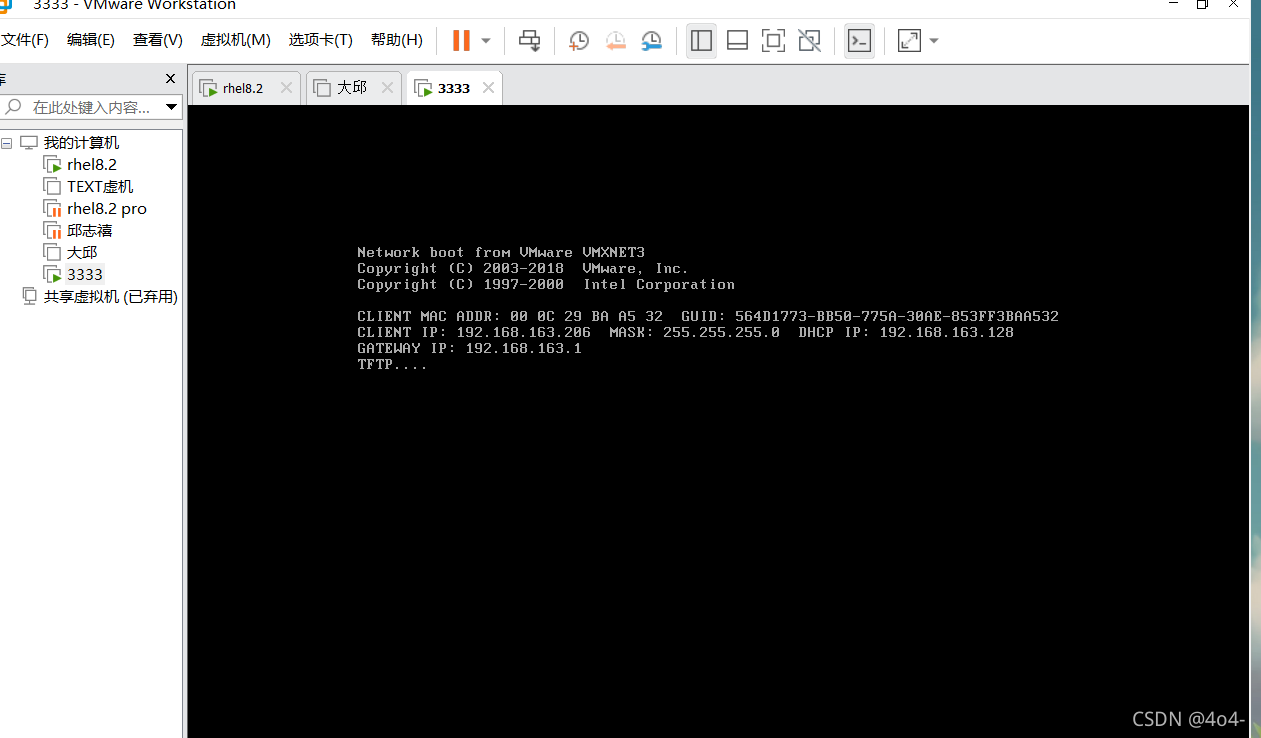
首先创建一个虚拟机,然后直接打开,可以看见它一步步完成DHCP,http://192.168.163.128等。

?
?
?
?
?安装成功。