Linux设置同局域网下的Xshell方法/Linux同局域网下访问
今天在网上找了许多关于Linux同局域网下访问的博客,都是说设置桥接设置网卡然后就Ok了,但是我怎么试都不行,之后在运维同学的帮助下,终于搭建出来了。废话不多说,直接开搞
操作步骤
- 关闭本机电脑防火墙以及虚拟机防火墙


1:查看防火状态

systemctl status firewalld

service  iptables status

2:暂时关闭防火墙

systemctl stop firewalld

service  iptables stop

3:永久关闭防火墙

systemctl disable firewalld

chkconfig iptables off

4:重启防火墙

systemctl enable firewalld

service iptables restart
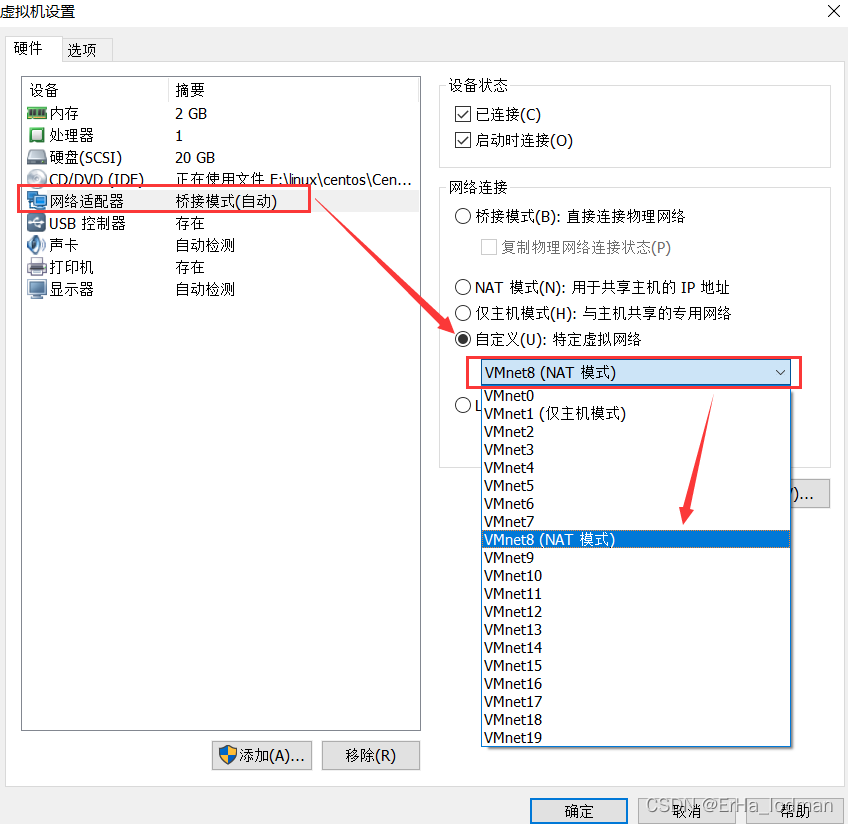
2. 设置网络设配器

网络适配器选择自定义特定虚拟网络,将其设置为VMnet8(NAT模式)

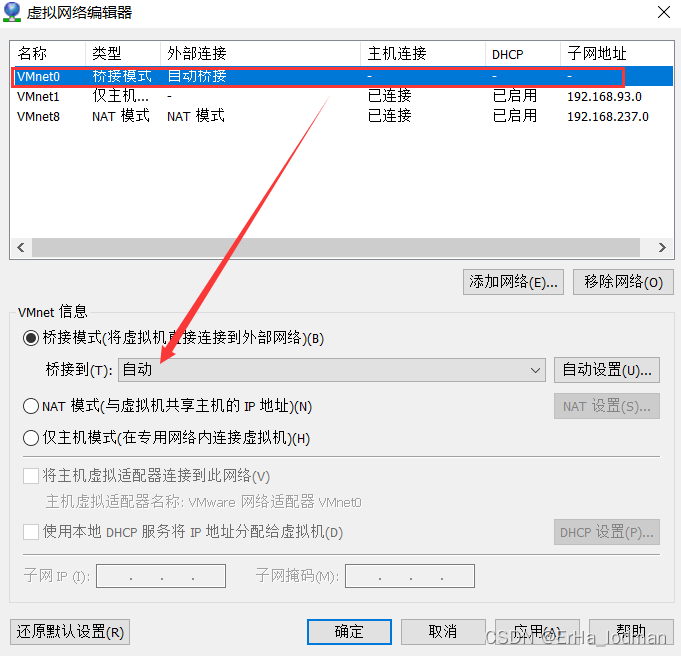
3.设置虚拟网络编辑器

3.1将VMnet0桥接模式改为自动

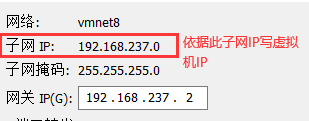
3.2设置VMnet8的NAT设置

注意这里的子网后面要对照


设置好后点击应用确定关闭即可👍👍👍👍
4.在虚拟机上查询ip地址,就能够看到你设置网络ip了

5.在本机Xshell上创建连接测试
这里的端口号使用的是上面虚拟机端口

创建时出现验证用户名密码就表明正确建立连接了,验证后就可登录

6.远程调用
>>注意!!本机的防火墙与虚拟机的防火墙一定要关掉
这里主机使用的是你位于局域网中的ip地址
端口号是上面3.2步设置的主机端口号
点击连接在确保 防火墙 关闭的情况下,就能成功创建连接了😉
🧐希望可以帮助到你