文章目录
1.网络环境的搭建
(1)本地主机网络搭建
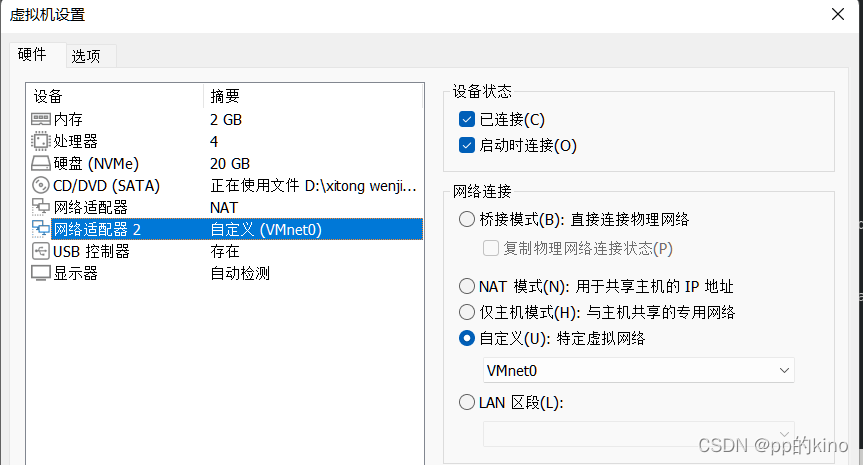
新建网卡

修改网卡ip
[root@localhost Desktop]# nm-connection-editor

[root@localhost Desktop]# nmcli connection reload
[root@localhost Desktop]# nmcli connection up ens224

[root@localhost Desktop]# ip a
 ip及网关已经设置

(2)远程主机网络搭建
[root@localhost Desktop]# nm-connection-editor

 # 自动ip获取(DHCP)

远程主机网络设置
#!/bin/bash
cd /run/media/root/RHEL-8-2-0-BaseOS-x86_64/BaseOS/Packages/

# 安装dhcp-server
rpm -ivh dhcp-server-4.3.6-40.el8.x86_64.rpm
# cp /usr/share/doc/dhcp-server/dhcpd.conf.example /etc/dhcp/dhcpd.conf

# 将配置文件覆盖写入dhcp.conf

# 将配置文件覆盖写入dhcp.conf
# 文件写入开始

cat >/etc/dhcp/dhcpd.conf  << EOF

# dhcpd.conf
#
# Sample configuration file for ISC dhcpd
#

# option definitions common to all supported networks...
option domain-name "westos.westos.org";
option domain-name-servers 114.114.114.114;

default-lease-time 600;
max-lease-time 7200;

# Use this to enble / disable dynamic dns updates globally.
#ddns-update-style none;

# If this DHCP server is the official DHCP server for the local
# network, the authoritative directive should be uncommented.
#authoritative;

# Use this to send dhcp log messages to a different log file (you also
# have to hack syslog.conf to complete the redirection).
log-facility local7;

# No service will be given on this subnet, but declaring it helps the
# DHCP server to understand the network topology.

# This is a very basic subnet declaration.

subnet 172.25.254.0 netmask 255.255.255.0 {     # 子网设定
  range 172.25.254.50 172.25.254.70;    # 分配ip地址范围
  option routers 172.25.254.250;        # 网关
}

EOF

# 重启DHCP
systemctl restart dhcpd
#重启网络
[root@localhost Desktop]# nmcli connection reload
[root@localhost Desktop]# nmcli connection up ens160
获取到的ip属于分配的地址池
[root@localhost Desktop]# ip a


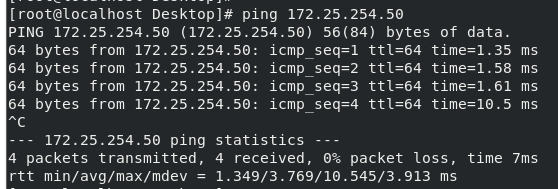
测试连接外网主机

2.本地软件仓库的搭建
创建挂载目录并挂载
mkdir /rhel8.2
mount /dev/cdrom /rhel8.2
编写软件仓库文件
cd /etc/yum.repos.d/ # 软件源指向文件配置目录
[root@localhost rhel8.2]# vim /etc/yum.repos.d/westos.repo #软件仓库指向文件
westos.repo文件内容
[AppStream]
name = Appstream
baseurl = file:///rhel8.2/AppStream
gpgcheck = 0
enabled = 1
gpgkey = file:///etc/pki/rpm-gpg/PRM-GPG-KEY-redhat-release

[BaseOS]
name = BaseOS
baseurl = file://rhel8.2/BaseOS
gpgcheck = 0
enabled = 1
gpgkey = file:///etc/pki/rpm-gpg/PRM-GPG-KEY-redhat-release
3.网络软件仓库的搭建
安装软件
dnf install httpd -y

打开防火墙
[root@localhost rhel8.2]# systemctl enable --now httpd
[root@localhost rhel8.2]# firewall-cmd --permanent --add-service=http
success
[root@localhost rhel8.2]# firewall-cmd --reload
success
建立共享目录&重新挂载
mkdir /var/www/html/rhel8.2
umount /rhel8.2
mount /dev/cdrom  /var/www/html/rhel8.2
更改westos.repo内容
[root@localhost Desktop]# vim /etc/yum.repos.d/westos.repo
[root@localhost Desktop]# cat /etc/yum.repos.d/westos.repo
[AppStream]
name = Appstream
baseurl = file:///var/www/html/rhel8.2/AppStream
gpgcheck = 0
enabled = 1
gpgkey = file:///etc/pki/rpm-gpg/PRM-GPG-KEY-redhat-release

[BaseOS]
name = BaseOS
baseurl = file:///var/www/html/rhel8.2/BaseOS
gpgcheck = 0
enabled = 1
gpgkey = file:///etc/pki/rpm-gpg/PRM-GPG-KEY-redhat-release

设置开机自动挂载
[root@localhost Desktop]# vim /etc/rc.d/rc.local
## 添加内容
mount /dev/cdrom /var/www/html/rhel8.2
## 打开文件权限
[root@localhost Desktop]# chmod +x /etc/rc.d/rc.local

4.第三方软件仓库搭建
# 建立目录
mkdir /var/www/html/software
把所有的第三方软件存放到/software中
/software中只能存在rpm类型的文件,压缩包是不能使用dnf管理的
采集第三方软件数据生成repodate目录
dnf install createrepo -y安装采集工具
cd /software进入到目录
createrepo . 对目录中进行扫描生成repodate数据目录
cretaerepo -v 指定目录
westos.repo添加文件内容
vim /etc/yum.repos.d/westos.repo
[software]
name=software
baseurl=http://172.25.254.50/software
gpgcheck=0

5.在远程主机中访问资源并书写repo文件
写入repo文件
[root@localhost Desktop]# vim /etc/yum.repos.d/westos.repo
[root@localhost Desktop]# cat /etc/yum.repos.d/westos.repo
[AppStream]
name=AppStream
baseurl=http://172.25.254.50/rhel8.2/AppStream/
gpgcheck=0

[BaseOS]
name=BaseOS
baseurl=http://172.25.254.50/rhel8.2/BaseOS/
gpgcheck=0

[software]
name=software
baseurl=http://172.25.254.50/software
gpgcheck=0
连接本地主机,访问软件资源


安装epel扩展源
rpm -ivh https://dl.fedoraproject.org/pub/epel/epel-release-latest-8.noarch.rpm

在本地主机下载ansible
[root@localhost Desktop]# yumdownloader ansible
下载并挂载到sofrware


安装所需依赖
dnf install python3-jinjia2
dnf install python3-jmespath

在远程主机下载并忽略依赖性安装ansible
[root@localhost Desktop]# rpm -ivh http://172.25.254.50/software/ansible-2.9.27-1.el8.noarch.rpm --nodeps

查看ansible安装版本
[root@localhost Desktop]# ansible --version
