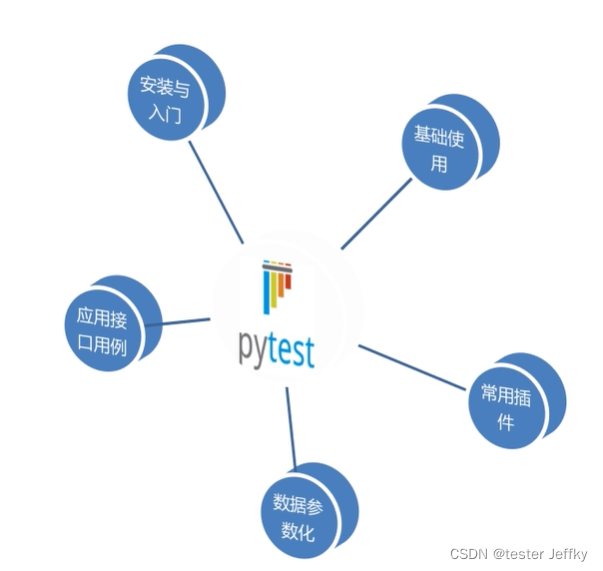
?1、安装与入门
-
介绍
- 简单灵活
- 容易上手
- 文档丰富
- 支持参数化,能够支持简单的单元测试和复杂的功能测试
- 具有很多第三方插件,并且可以自定义扩展
- 可以很好的和Jenkins工具结合
- 安装>pip install pytest
- 入门案例
-
# -*- coding: utf-8 -*-
# @Time : 2021/12/9 15:38
# @Author : jeffky
# @File : T_pytest.py


# 1、创建简单测试方法
'''
1、创建普通方法
2、使用pytest断言方法
'''

#普通方法
import pytest


def func(x):
    return x+1

#断言方法
def test_a():
    print('---test_a---')
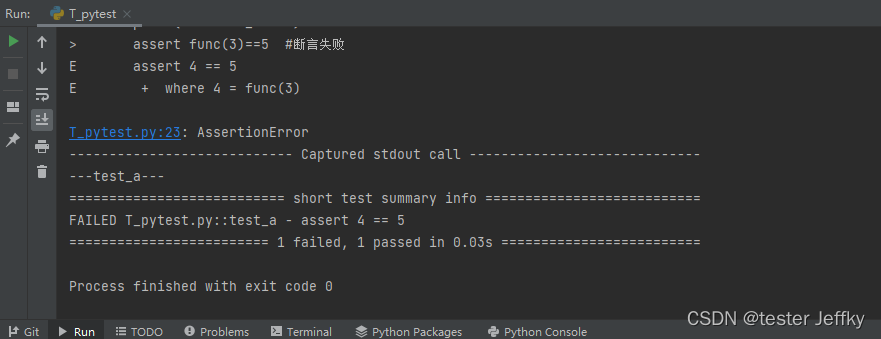
    assert func(3)==5  #断言失败
def test_b():
    print('---test_b---')
    assert func(3)==4  #断言成功

# 2、pytest运行
'''
1、Pycharm代码直接执行
2、命令行执行
'''
# 1、Pycharm代码直接执行
if __name__ == '__main__':
    pytest.main(['-s','T_pytest.py'])
?pytest T_pytest.py
-
? ? ? ? ? ? ? ?
?2、基础使用

函数级别
'''
1、定义类
2、创建测试方法test开头
3、创建setup,teardown
4、运行查看结果
'''

# 1、定义类
import pytest


class TestFunc:
    # 创建setup,teardown
    def setup(self):
        print("---setup---")
    def teardown(self):
        print("---teardown---")
    #创建测试方法test开头
    def test_a(self):
        print("test_a")
    def test_b(self):
        print("test_b")

if __name__ == '__main__':
    pytest.main(['-s','pytest_func.py'])


============================= test session starts =============================
platform win32 -- Python 3.7.1, pytest-6.2.5, py-1.11.0, pluggy-1.0.0
rootdir: E:\2021code\Jeffky_InterAutoTest, configfile: pytest.ini
collected 2 items

pytest_func.py ---setup---
test_a
.---teardown---
---setup---
test_b
.---teardown---


============================== 2 passed in 0.06s ==============================

Process finished with exit code 0
类级别
'''
1、定义类
2、创建测试方法test开头
3、创建setup_class,teardown_class
4、运行查看结果
'''

# 1、定义类
import pytest


class TestFunc:
    # 创建setup_class,teardown_class
    def setup_class(self):
        print("---setup_class---")
    def teardown_class(self):
        print("---teardown_class---")
    #创建测试方法test开头
    def test_a(self):
        print("test_a")
    def test_b(self):
        print("test_b")

if __name__ == '__main__':
    pytest.main(['-s','pytest_class.py'])


collected 2 items

pytest_class.py ---setup_class---
test_a
.test_b
.---teardown_class---


============================== 2 passed in 0.01s ==============================
3、Pytest常用插件

?测试报告
应用场景
- 自动化测试脚本最终执行是通过还是不通过,需要通过测试报告进行体现。
安装
- pip install pytest-html
使用
- 在配置文件中的命令行参数中增加 --html=用户路径/report.html


?失败重试
应用场景
- 当失败后尝试再次运行
安装
- pip install pytest-rerunfailures
使用
- 在配置文件中的命令行参数中增加 --reruns n
- 如果你期望加上出错重试等待时间,则命令行参数中增加 --reruns-delay 后面跟着时间


?

?针对单独方法通过注解的方式进行失败重试

4、参数化
- 传入单个参数,pytest.mark.parametrize(argnames,argvalues)
- argnames:参数名
-
argvalues:参数对应值,类型必须为可迭代类型,一般使用list# -*- coding: utf-8 -*- # @Time : 2021/12/9 16:45 # @Author : jeffky # @File : pytest_one.py ''' 1、定义类及创建测试方法test开头 2、创建数据 4、创建参数化 4、运行查看结果 ''' # 1、定义类及创建测试方法test开头 import pytest class TestDemo: #创建测试数据 data_list = ['zhangsan','lisi','wangwu'] #参数化 @pytest.mark.parametrize("name",data_list) def test_a(self,name): print("test_a") print(name) assert 1 if __name__ == '__main__': pytest.main(['pytest_one.py']) ============================= test session starts ============================= platform win32 -- Python 3.7.1, pytest-6.2.5, py-1.11.0, pluggy-1.0.0 rootdir: E:\2021code\Jeffky_InterAutoTest, configfile: pytest.ini plugins: html-3.1.1, metadata-1.11.0, rerunfailures-10.2 collected 3 items pytest_one.py ... [100%] - generated html file: file://E:\2021code\Jeffky_InterAutoTest\testcase\t_pytest\report\report.html - ============================== 3 passed in 0.03s ============================== Process finished with exit code 0
- 传多个参数,pytest.mark.parametrize(('参数名1','参数名2'),[(参数1_data[0],参数1_data[1]),(参数2_data[0],参数2_data[1])])
- list的每一个元素都是一个元组,元组里的每个元素和按参数顺序一一对应
'''
1、定义类及创建测试方法test开头
2、创建数据
4、创建参数化
4、运行查看结果
'''

# 1、定义类及创建测试方法test开头
import pytest


class TestDemo:
    #创建测试数据
    data_list = [('zhangsan','123456'),('lisi','123456'),('wangwu','123456')]
    #参数化
    @pytest.mark.parametrize(("name","password"),data_list)
    def test_a(self,name,password):
        print("name:",name)
        print("password:",password)
        assert 1

if __name__ == '__main__':
    pytest.main(['pytest_two.py'])


============================= test session starts =============================
platform win32 -- Python 3.7.1, pytest-6.2.5, py-1.11.0, pluggy-1.0.0
rootdir: E:\2021code\Jeffky_InterAutoTest, configfile: pytest.ini
plugins: html-3.1.1, metadata-1.11.0, rerunfailures-10.2
collected 3 items

pytest_two.py name: zhangsan
password: 123456
.name: lisi
password: 123456
.name: wangwu
password: 123456
.

- generated html file: file://E:\2021code\Jeffky_InterAutoTest\testcase\t_pytest\report\report.html -
============================== 3 passed in 0.05s ==============================

Process finished with exit code 0
5、应用接口用例

?运行原则
- 在不指定运行目录,运行文件,运行函数等参数的默认情况下,pytest会执行当前目录下的所有以test为前缀(test*.py)h或以_test为后缀(_test.py)的文件中以test为前缀的函数。

?
[pytest]

;addopts = --html=./report/report.html  --reruns 3 --reruns-delay=2
addopts = --html=./report/report.html -s


testpaths = testcase

python_files = test_*.py

python_classes = Test_*

python_functions = test_*
注意:
ini文件中尽量不要存在中文
如必须使用,有两种解决方案:
1、点击倒数第二行的报错,进入?iniconfig?模块,找到其前面一行代码的?open()?函数,在?open?函数中中增加? encoding='utf-8'?参数。

?
?2、
- 1.选择pytest.ini文件
- 2.点击 file选项
- 3.选择 File Encoding后
- 4.选择 GBK

?
