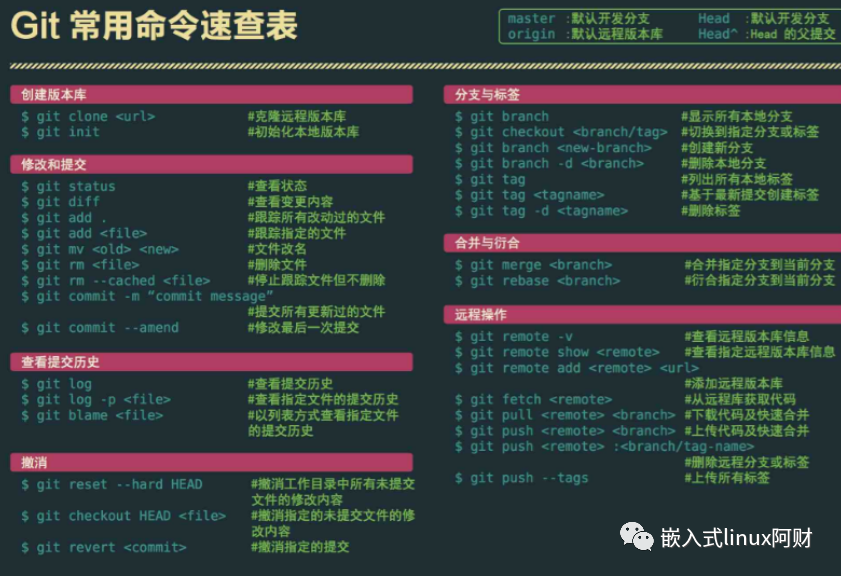
你可能遇到过这样的问题,不知道如何管理自己的代码。自己开发的代码,过了几天,忘记修改了什么,忘了上次改到哪了,代码突然找不到了等等,甚至容易消磨自己的耐心,成就感不高。今天就教你用git+gerrit管理自己的代码,这也是大公司的开发模式。
先来看效果吧~
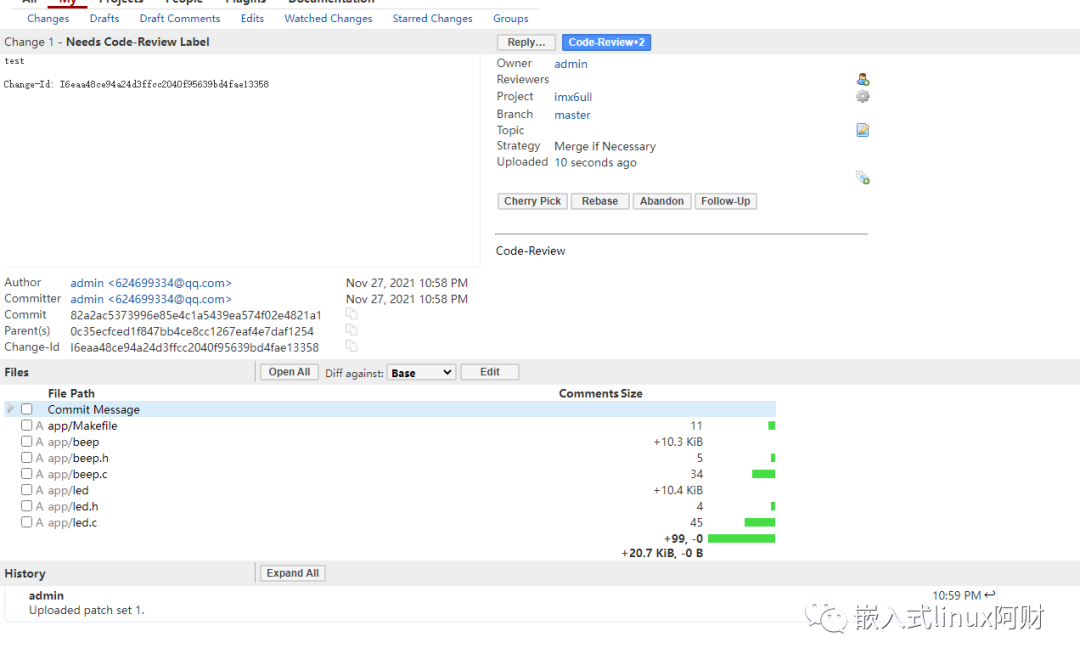
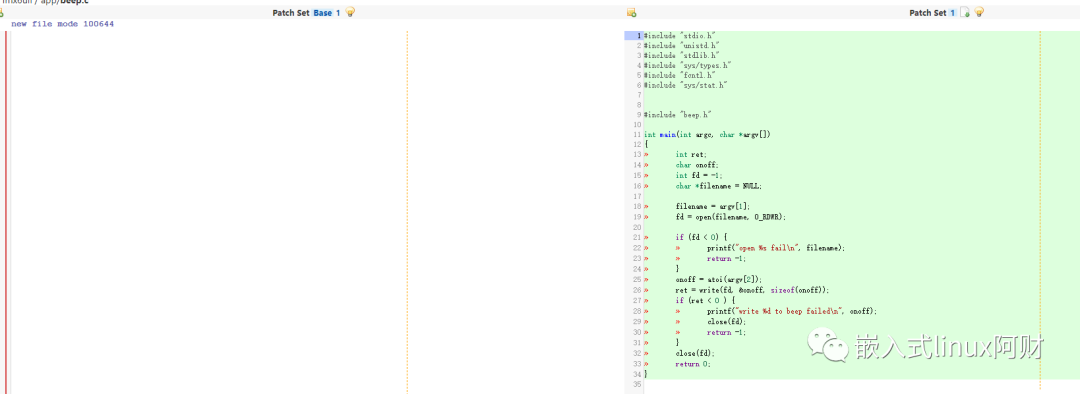
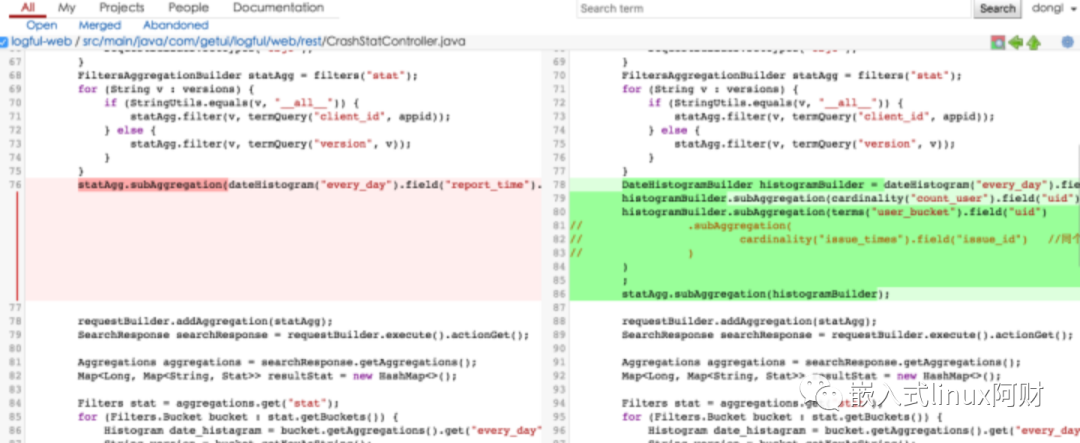
下面正式开始手把手搭建教学,教程及其简单,1小时内能搭建完成,墙裂推荐搭一个!!!
我的环境:
-
服务器:阿里云(自己的虚拟机也是可以的)
-
Ubuntu 16.04 TLS (64bit)
-
代码版本管理工具:Git
-
web服务器:Apache
-
gerrit版本:2.13.4
安装JAVA环境
https://www.oracle.com/java/technologies/downloads/#java8
我使用的JDK为jdk-8u311-linux-x64.tar.gz,可以从获取。
安装过程:
通过xftp或者filezilla等传输工具将安装包传到虚拟机上

输入以下命令解压缩到/usr/local
tar -zxvf jdk-8u311-linux-x64.tar.gz -C /usr/local/
接着设置JAVA环境变量,输入vi ~/.profile打开文件,跳到文件末尾输入一下三行(vim编辑器可以通过shift + g直接跳转到行末尾)
export?JAVA_HOME=/usr/local/jdk1.8.0_311
export?JRE_HOME=$JAVA_HOME/jre
export CLASSPATH=$JAVA_HOME/lib:$JRE_HOME/lib:$CLASSPATH
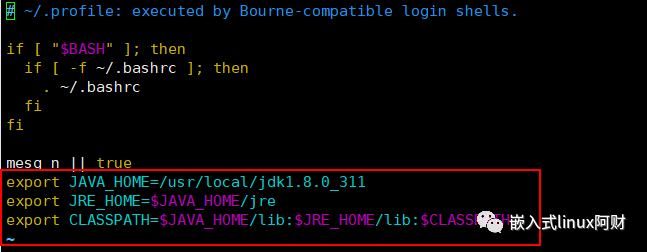
到此JAVA环境就设置好了,输入java -version检验一下是否配置成功。
出现以下内容,说明成功了~

安装git
sudo?apt-get?install?git
git?--version

安装成功~如果遇到问题的话自行百度吧,多半是需要更新软件源, 软件包之类的。
Apache web服务器安装
sudo apt-get install apache2
sudo /etc/init.d/apache2 start

安装完成~
安装gerrit & 配置
https://www.gerritcodereview.com/
从gerrit官网下载安装包,需要翻墙才能访问,也可以到网上自己找安装包下载,或者直接加我发你安装包都可以。我用的是gerrit-2.13.4.war

紧接着安装
/*
?*?创建gerrit服务器根目录,用于存放gerrit相关数据
?*?如数据库文件,日志文件等等
?*/
mkdir ~/review_site

// 安装
java -jar gerrit-2.13.4.war init --batch -d ~/review_site
配置gerrit
vi ~/review_site/etc/gerrit.config
没有注释部分保持默认即可。
[gerrit]
        basePath = git
        serverId = f9036676-7b5a-4366-b616-24423e2d6226
        canonicalWebUrl = http://172.17.34.15:28888/ #gerrit服务器的管理页面,监听8081端口
[database]
        type = h2
        database = /root/review_site/db/ReviewDB
[noteDb "changes"]
        disableReviewDb = true
        primaryStorage = note db
        read = true
        sequence = true
        write = true
[index]
        type = LUCENE
[auth]
        type = HTTP #使用HTTP Auth方式,需要使用Apache做反向代理
[receive]
        enableSignedPush = false
[sendemail]
        smtpServer = smtp.163.com #用于推送通知邮件的smtp服务器
        smtpServerPort = 465
        smtpEncryption = ssl
        smtpUser = xxx@qq.com #邮箱用户名
        smtpPass = 123456  #邮箱密码
        sslVerify = false
        from = CodeReview<xxx@qq.com> #用于显示推送邮件的发件人地址
[sendemail]
        smtpServer = localhost
[container]
        user = root
        javaHome = /usr/local/jdk1.8.0_311/jre
[sshd]
        listenAddress = *:29418
[httpd]
        listenUrl = proxy-http://172.17.34.15:28888/ #Gerrit服务器监听该url
[cache]
        directory = cache
配置apache2反向代理
开启 Apache的SSL、Proxy、Rewrite等模块
cd /etc/apache2/mods-enabled
ln -s ../mods-available/proxy.load
ln -s ../mods-available/proxy.conf
ln -s ../mods-available/proxy_http.load
ln -s ../mods-available/proxy_balancer.conf
ln -s ../mods-available/proxy_balancer.load
ln -s ../mods-available/rewrite.load
ln -s ../mods-available/ssl.conf
ln -s ../mods-available/ssl.load
ln -s ../mods-available/socache_shmcb.load
ln?-s?../mods-available/slotmem_shm.load
输入cd /etc/apache2/sites-enabled/,再ls -al看一下,可以看到这里有个链接文件000-default.conf,可以像我这样先将其备份,然后修改它。

ServerName 172.17.34.15
<VirtualHost *:8080>
    ProxyRequests Off
    ProxyVia Off
    ProxyPreserveHost On
    AllowEncodedSlashes On
    RewriteEngine On
    RewriteRule ^/(.*) http://172.17.34.15:28888/$1 [NE,P]

    <Proxy *>
          Order deny,allow
          Allow from all
    </Proxy>

    <Location /login/>
        AuthType Basic
        AuthName "Gerrit Code Review"
        Require valid-user
        AuthBasicProvider file
        AuthUserFile /etc/apache2/passwords
    </Location>

    ProxyPass / http://172.17.34.15:28888/
        # The ServerName directive sets the request scheme, hostname and port that
  # the server uses to identify itself. This is used when creating
  # redirection URLs. In the context of virtual hosts, the ServerName
  # specifies what hostname must appear in the request's Host: header to
  # match this virtual host. For the default virtual host (this file) this
  # value is not decisive as it is used as a last resort host regardless.
  # However, you must set it for any further virtual host explicitly.
  #ServerName www.example.com

  ServerAdmin webmaster@localhost
  DocumentRoot /var/www/html

  # Available loglevels: trace8, ..., trace1, debug, info, notice, warn,
  # error, crit, alert, emerg.
  # It is also possible to configure the loglevel for particular
  # modules, e.g.
  #LogLevel info ssl:warn

  ErrorLog ${APACHE_LOG_DIR}/error.log
  CustomLog ${APACHE_LOG_DIR}/access.log combined

  # For most configuration files from conf-available/, which are
  # enabled or disabled at a global level, it is possible to
  # include a line for only one particular virtual host. For example the
  # following line enables the CGI configuration for this host only
  # after it has been globally disabled with "a2disconf".
  #Include conf-available/serve-cgi-bin.conf
</VirtualHost>

# vim: syntax=apache ts=4 sw=4 sts=4 sr noet
像我这样修改即可,只需把那些ip地址改成自己对应的就行,如果是云主机要用内网的ip地址,虚拟机的话用ifconfig查看IP地址就行。
配置Apache监听端口
直接vi /etc/apache2/prots.conf
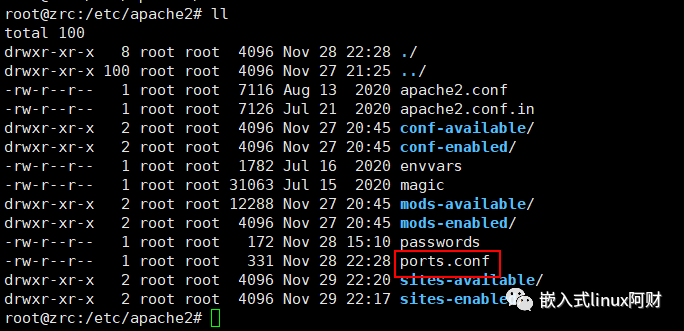
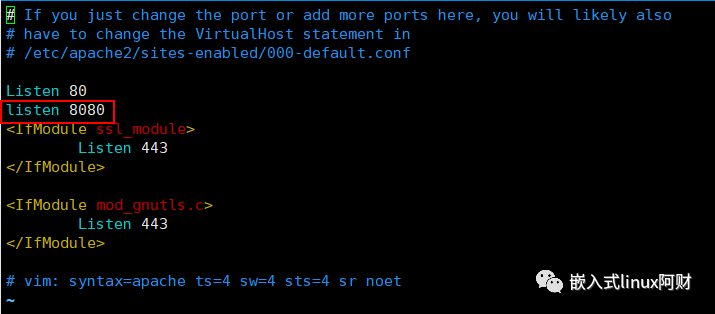
在这里添加监听8080端口**。**
添加Gerrit登录账号
touch?/etc/apache2/passwords
htpasswd -b /etc/apache2/passwords zrc 123456
注意:gerrit以第一次登陆的用户作为管理员,管理员才有资格创建project,也可以再设置其他管理员。
启动Gerrit服务
sudo ~/review_site/bin/gerrit.sh start
成功回显如下:
Starting Gerrit Code Review: OK
sudo /etc/init.d/apache2 start
成功回显如下:
[ ok ] Starting apache2 (via systemctl): apache2.service
登陆gerrit
在浏览器中输入http://192.168.x.x:8080,进入Login页面,输入账号密码登录Gerrit系统。注意:第一次登陆账号为管理员

管理员才有这个Create New Project
配置公钥
cd ~
#生成rsa公钥对
ssh-keygen -t rsa

#查看rsa公钥
cat ~/.ssh/id_rsa.pub


创建project
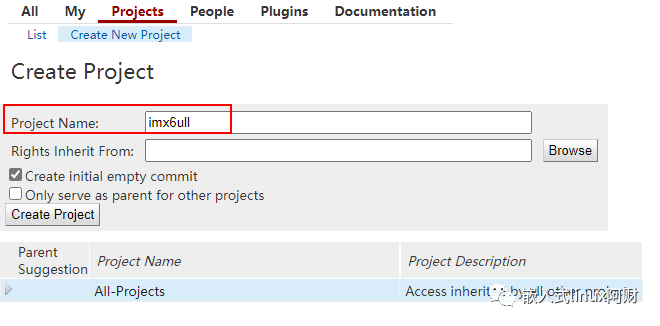
点击crete project完成创建。
#配置git用户名和email,注意此处email必须和gerrit上注册的email一致,否则无法上传代码.
git config --global user.name "zrc"
git?config?--global?user.email?xxx@qq.com

#拉项目代码到本地
git?clone?ssh://zrc@192.168.xxx.xxx:29418/imx6ull

#以下命令用来在commit-msg中加入change-id,gerrit流程必备
gitdir=$(git rev-parse --git-dir); scp -p -P 29418 admin@192.168.1.168:hooks/commit-msg ${gitdir}/hooks/
使用Gerrit评审代码
git push origin HEAD:refs/for/master
通常到这一步,大公司的步骤是需要门禁+1,也就是label,然后是评审人+1,评审人+2, 然后合入。所以,你也可以找小伙伴帮你看代码规范,你也可以自己merge。
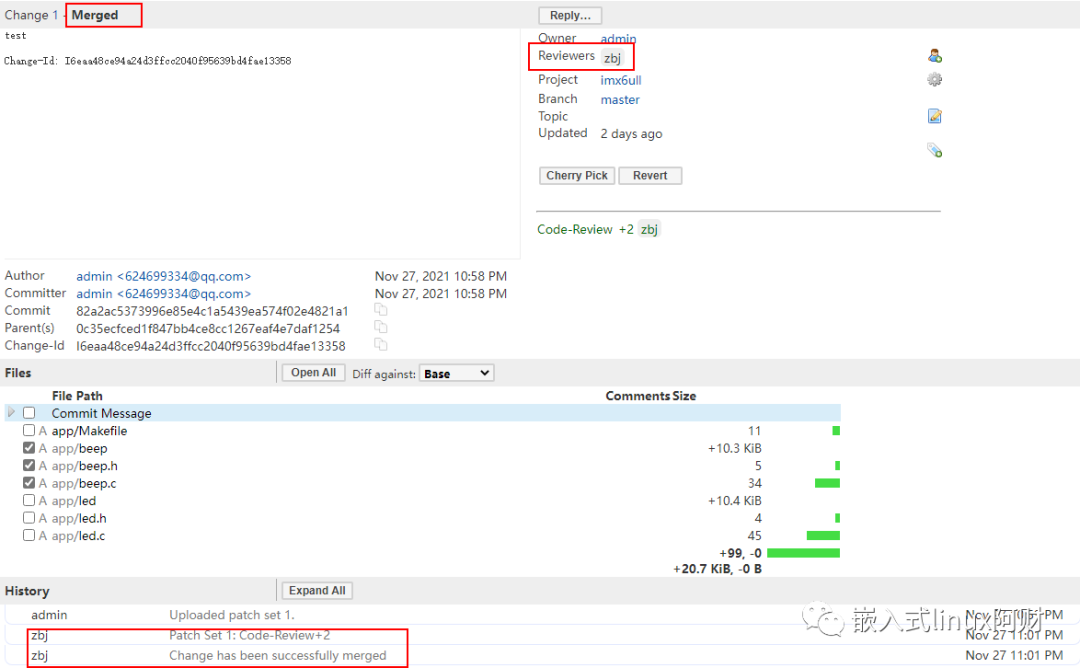
搭建教程完毕,更多的git命令用到自行网上搜索吧~
