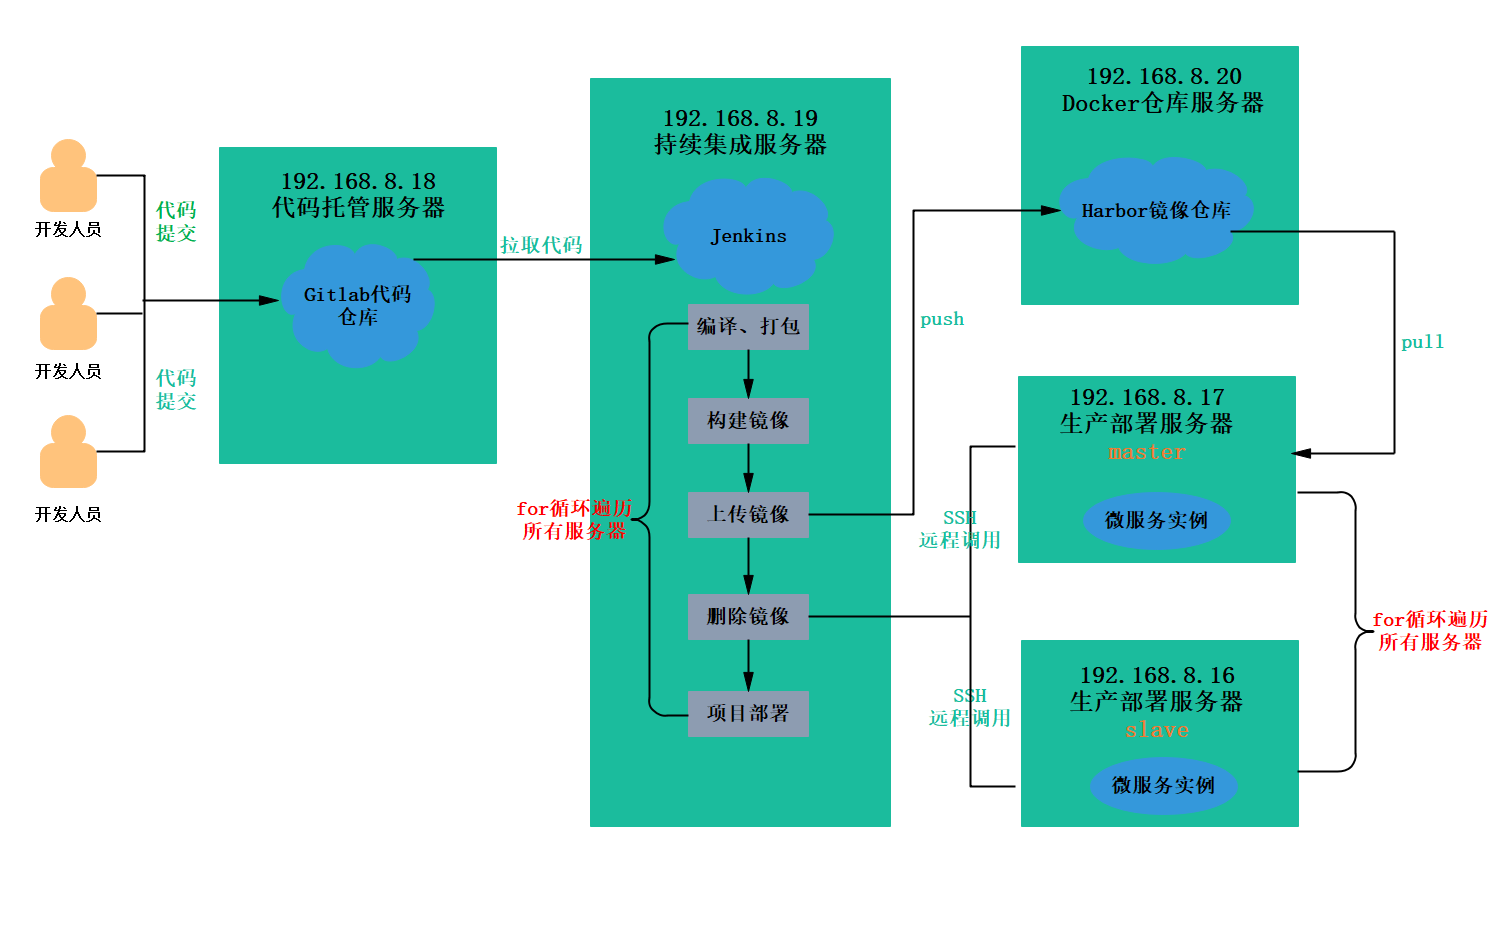
引言
前面的部署方案中因为是单节点,所以存在着以下的问题:
- 首先的话我们一次只能选择一个微服务进行部署
- 再者方案中只有一台生产者部署服务器
- 最后就是每一个微服务只有一个实例,容错率比较低
一、部署方案优化
1. 优化方案
- 在一个 Jenkins 工程中可以选择多个微服务同时发布
- 在一个 Jenkins 工程中可以选择多台生产服务器同时进行部署
- 每一个微服务都是以集群高可用形式部署
2. 集群部署流程说明
需要再加一台docker服务器
192.168.8.16
#环境配置
hostnamectl set-hostname web2-server && su
systemctl stop firewalld
systemctl disable firewalld

vim /etc/selinux/config
SELINUX=disabled

vim /etc/resolv.conf
nameserver 114.114.114.114

#安装依赖包
yum install -y yum-utils device-mapper-persistent-data lvm2

#设置阿里云镜像源
cd /etc/yum.repos.d/
yum-config-manager --add-repo https://mirrors.aliyun.com/docker-ce/linux/centos/docker-ce.repo

#安装 docker-ce 社区版
yum install -y docker-ce
systemctl start docker
systemctl enable docker

#配置镜像加速,官方网址可参考:https://help.aliyun.com/document_detail/60750.html
mkdir -p /etc/docker
#直接命令行输入以下内容:

tee /etc/docker/daemon.json <<-'EOF'
{
  "registry-mirrors": ["https://t466r8qg.mirror.aliyuncs.com"]
}
EOF

#把Harbor地址加入到Docker信任列表(harbor仓库的docker中不需要配)
vim /etc/docker/daemon.json

{
  "registry-mirrors": ["https://t466r8qg.mirror.aliyuncs.com"],
"insecure-registries": ["192.168.8.20:85"]
}

systemctl daemon-reload
systemctl restart docker

#网络优化
vim /etc/sysctl.conf
net.ipv4.ip_forward=1

sysctl -p
systemctl restart network
systemctl restart docker
docker version
二、修改idea中微服务配置
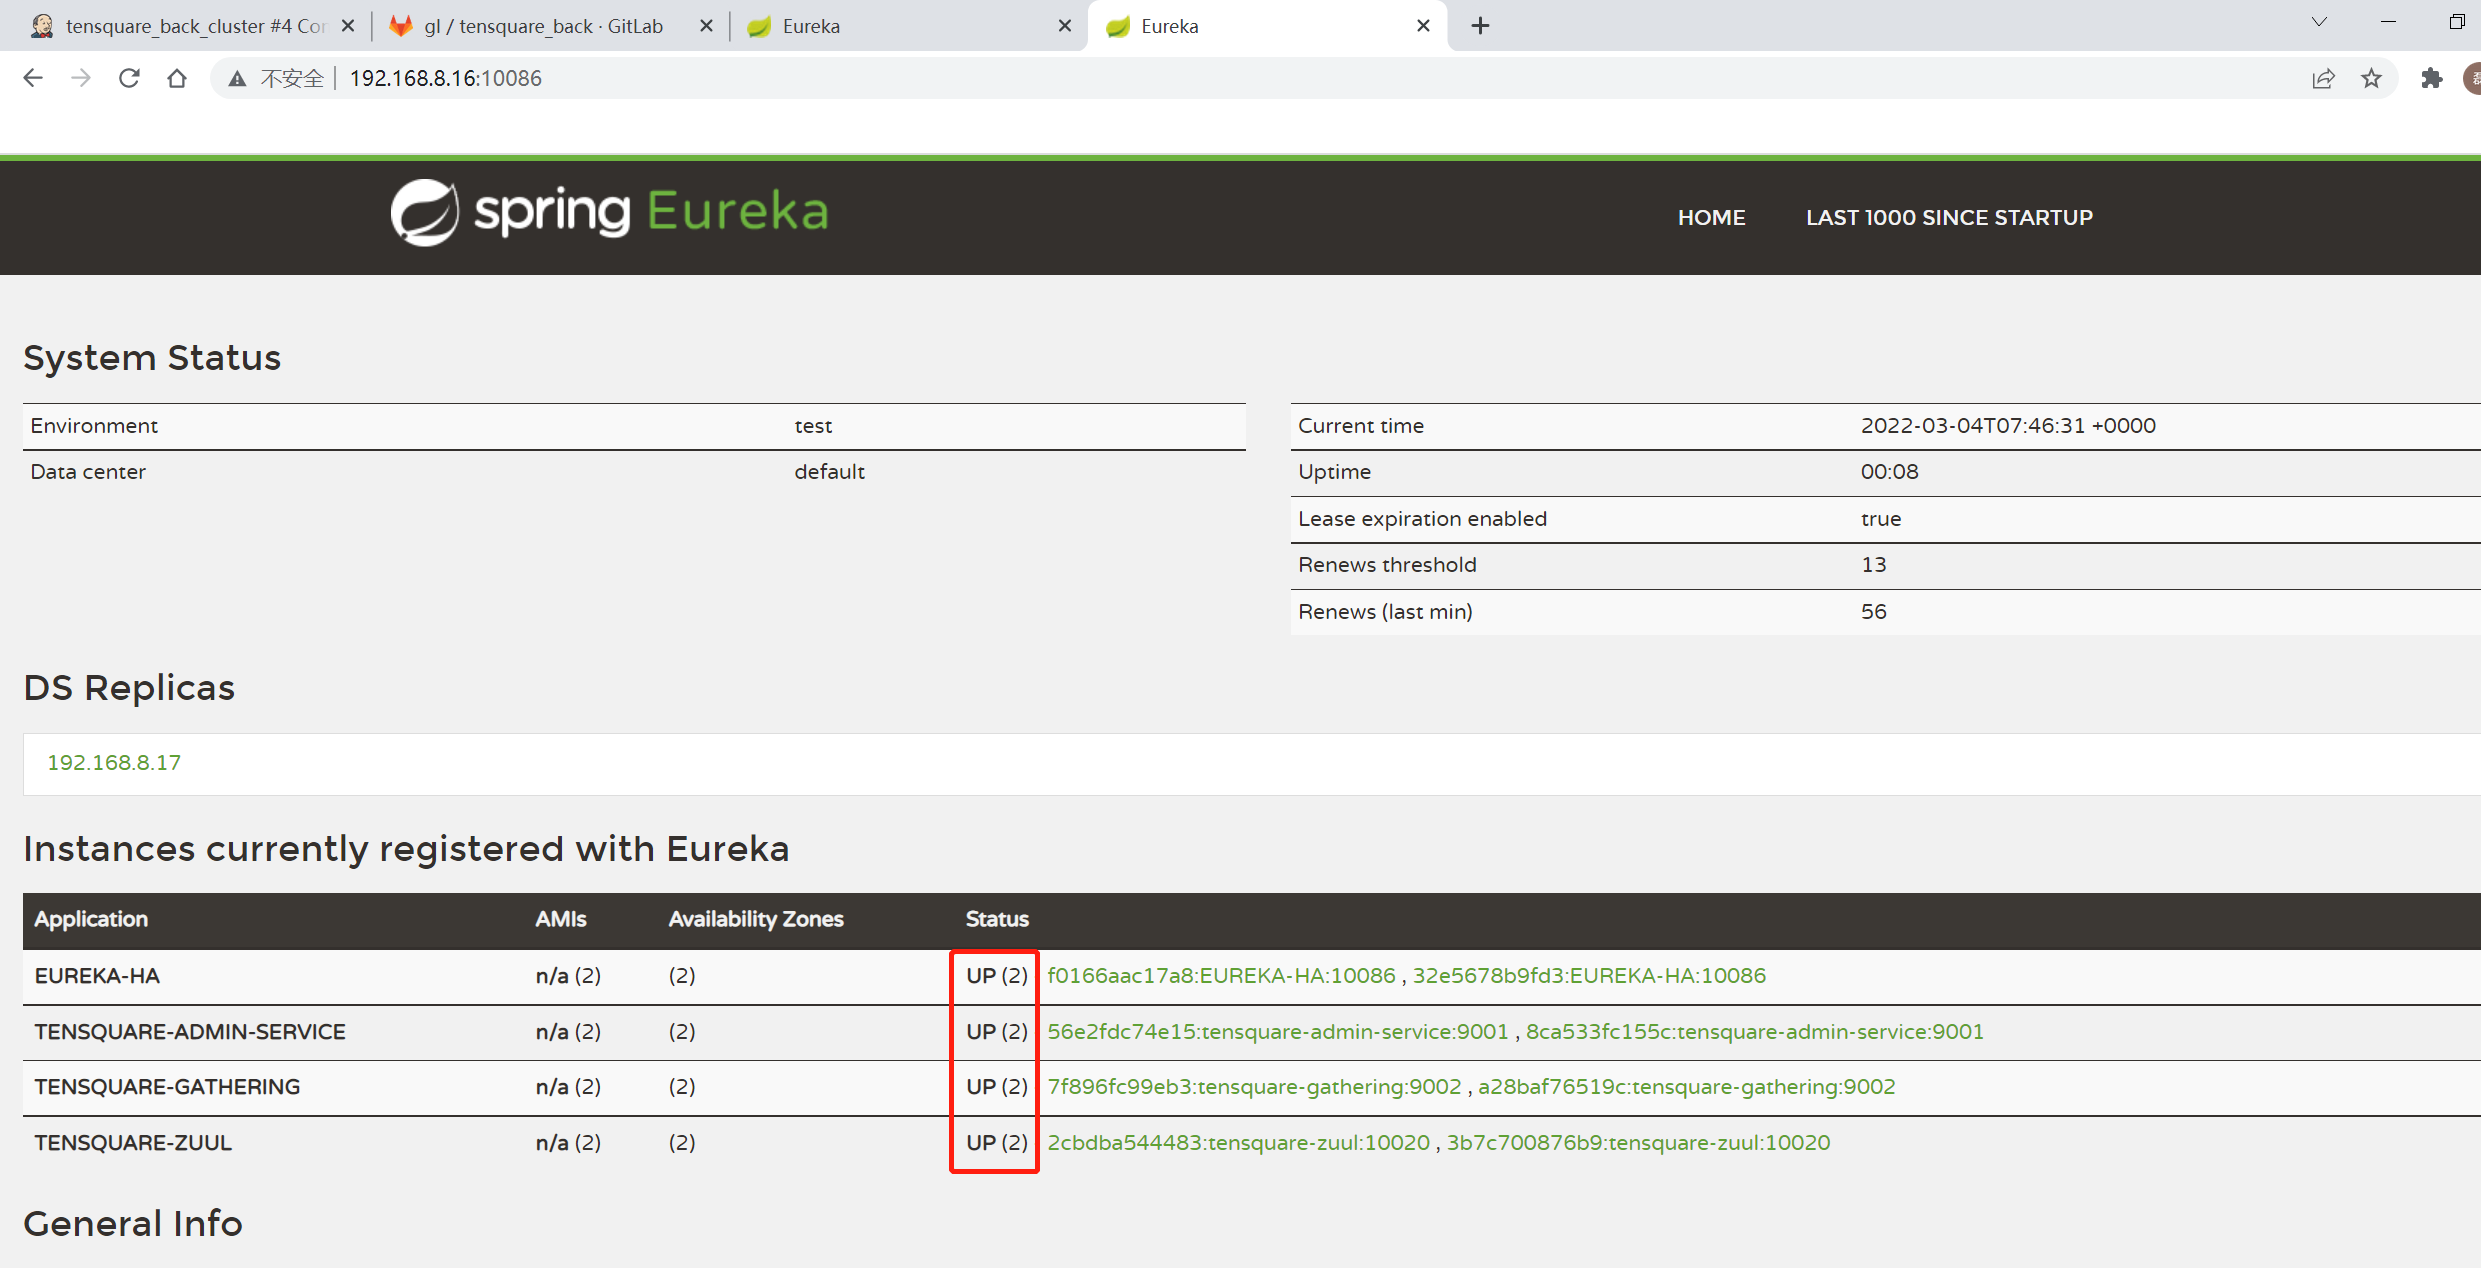
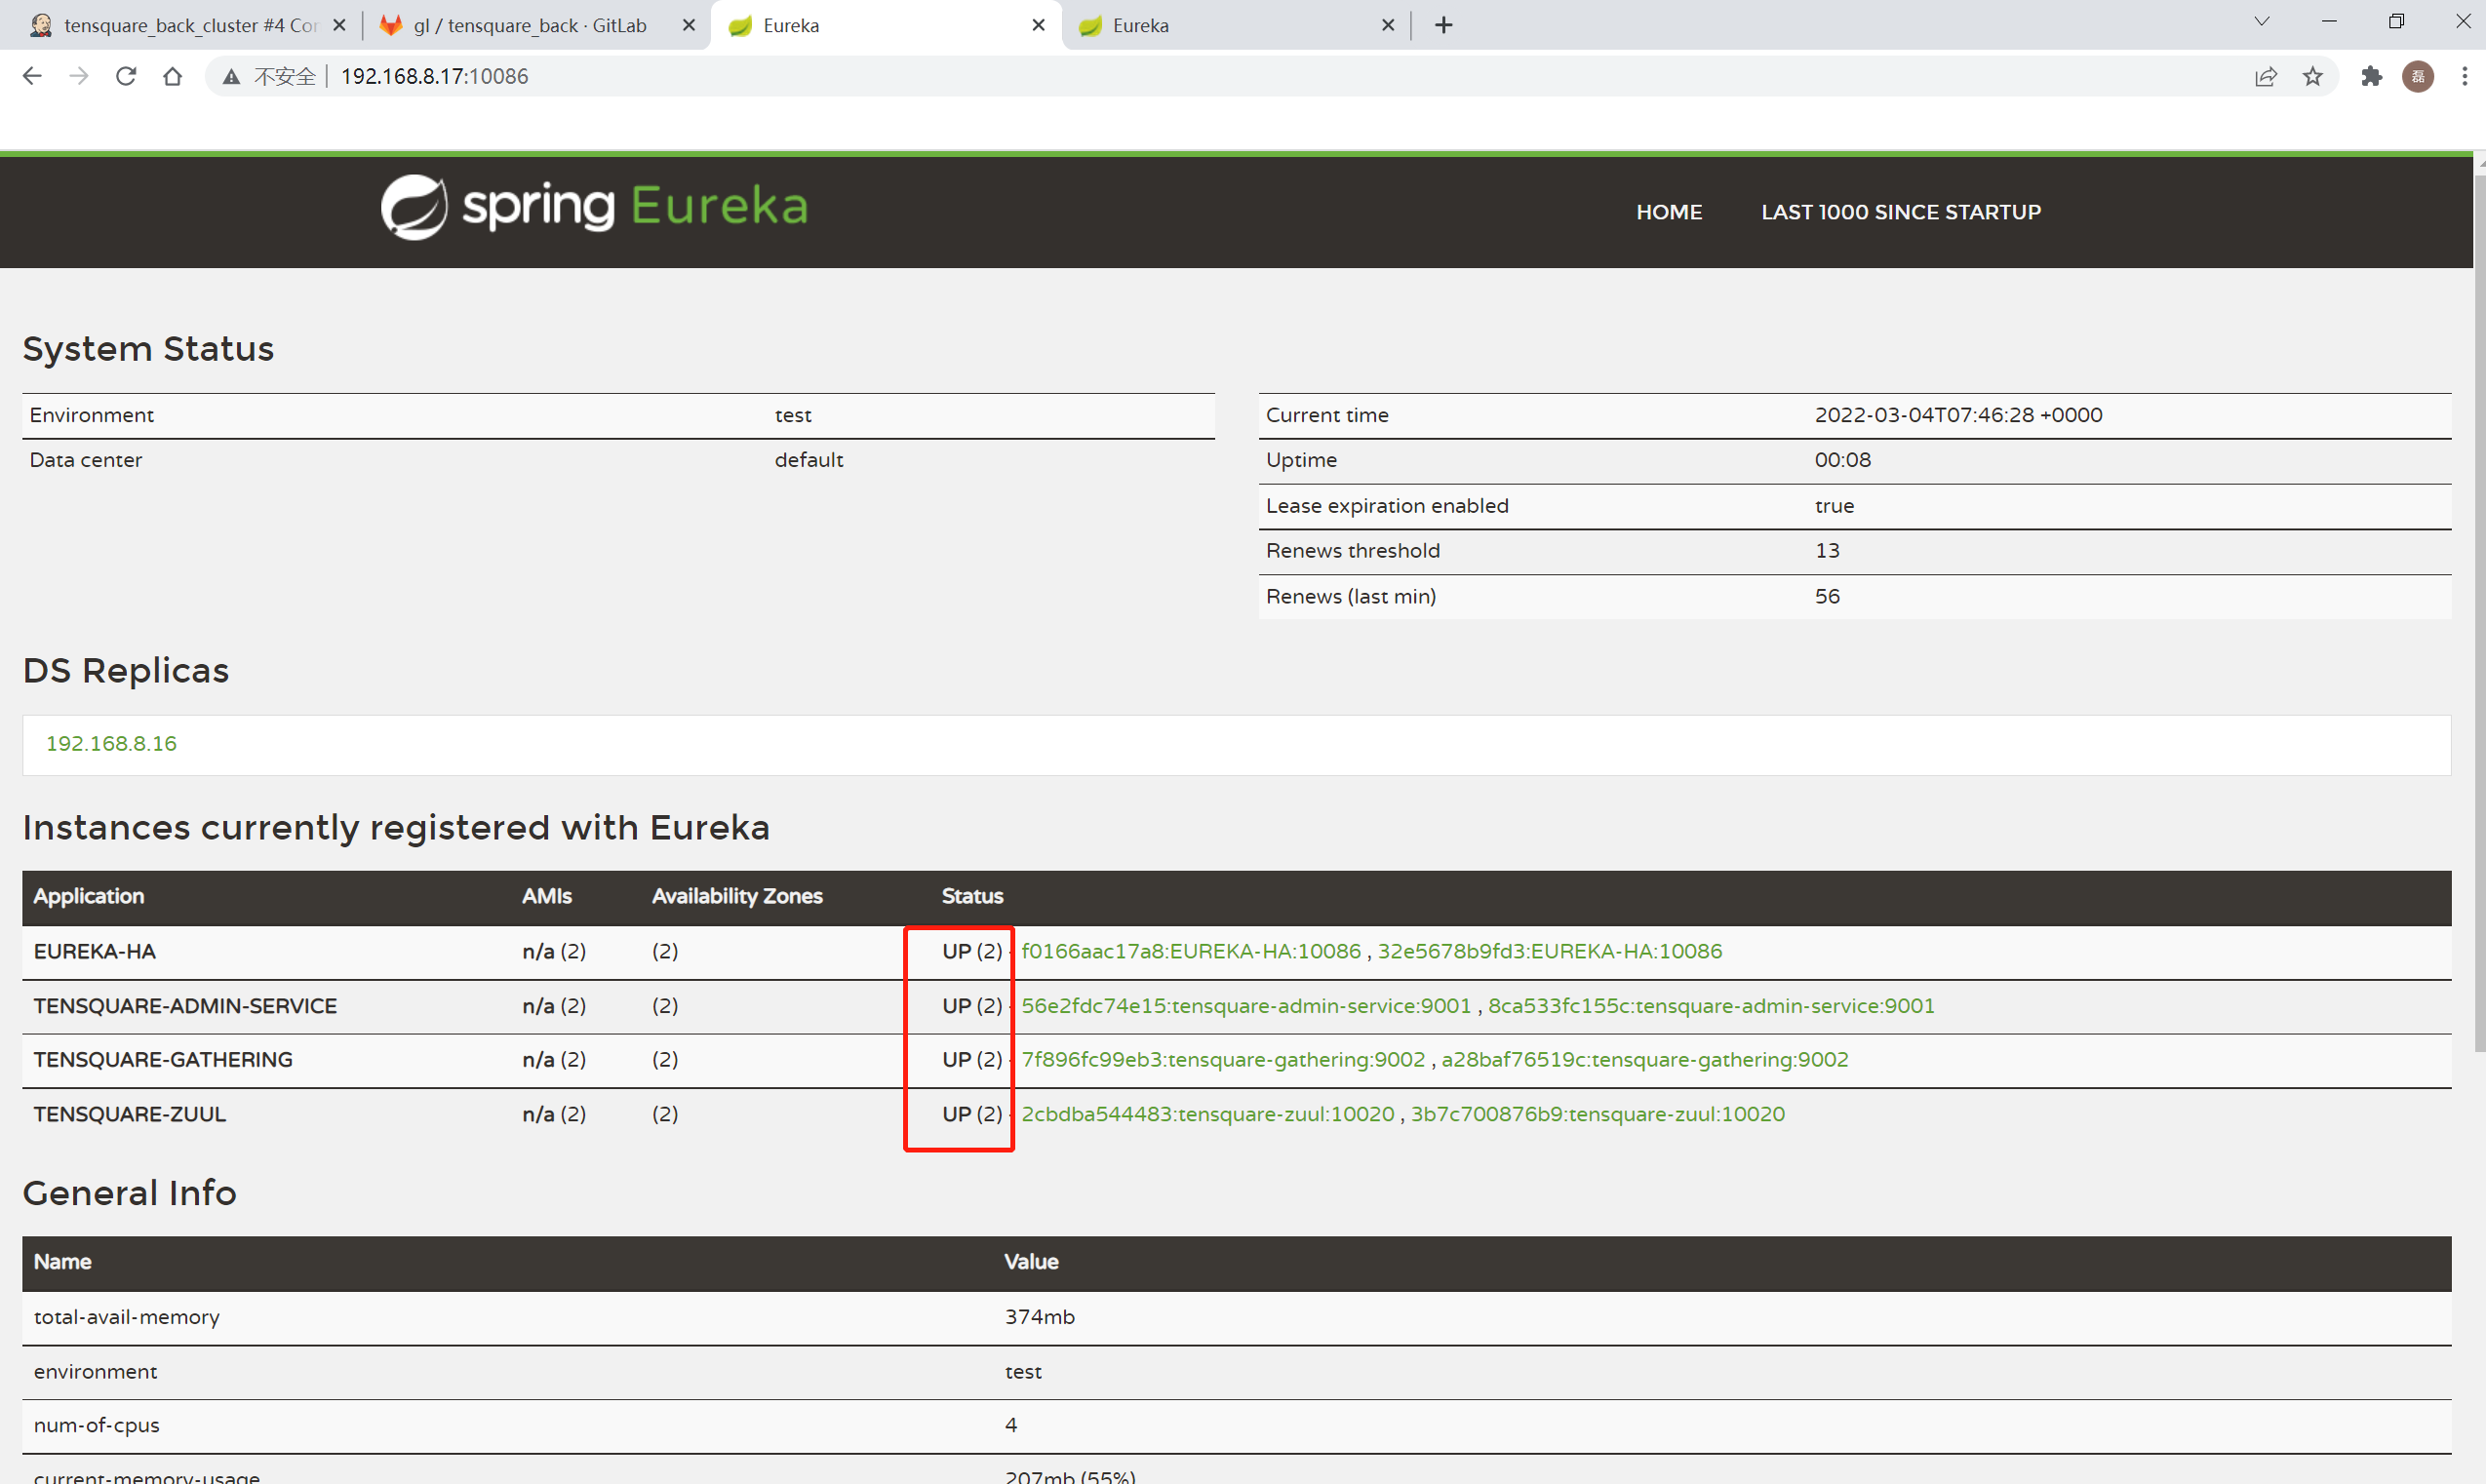
1. 注册中心配置
idea中修改注册中心eureka的配置,单节点换成集群
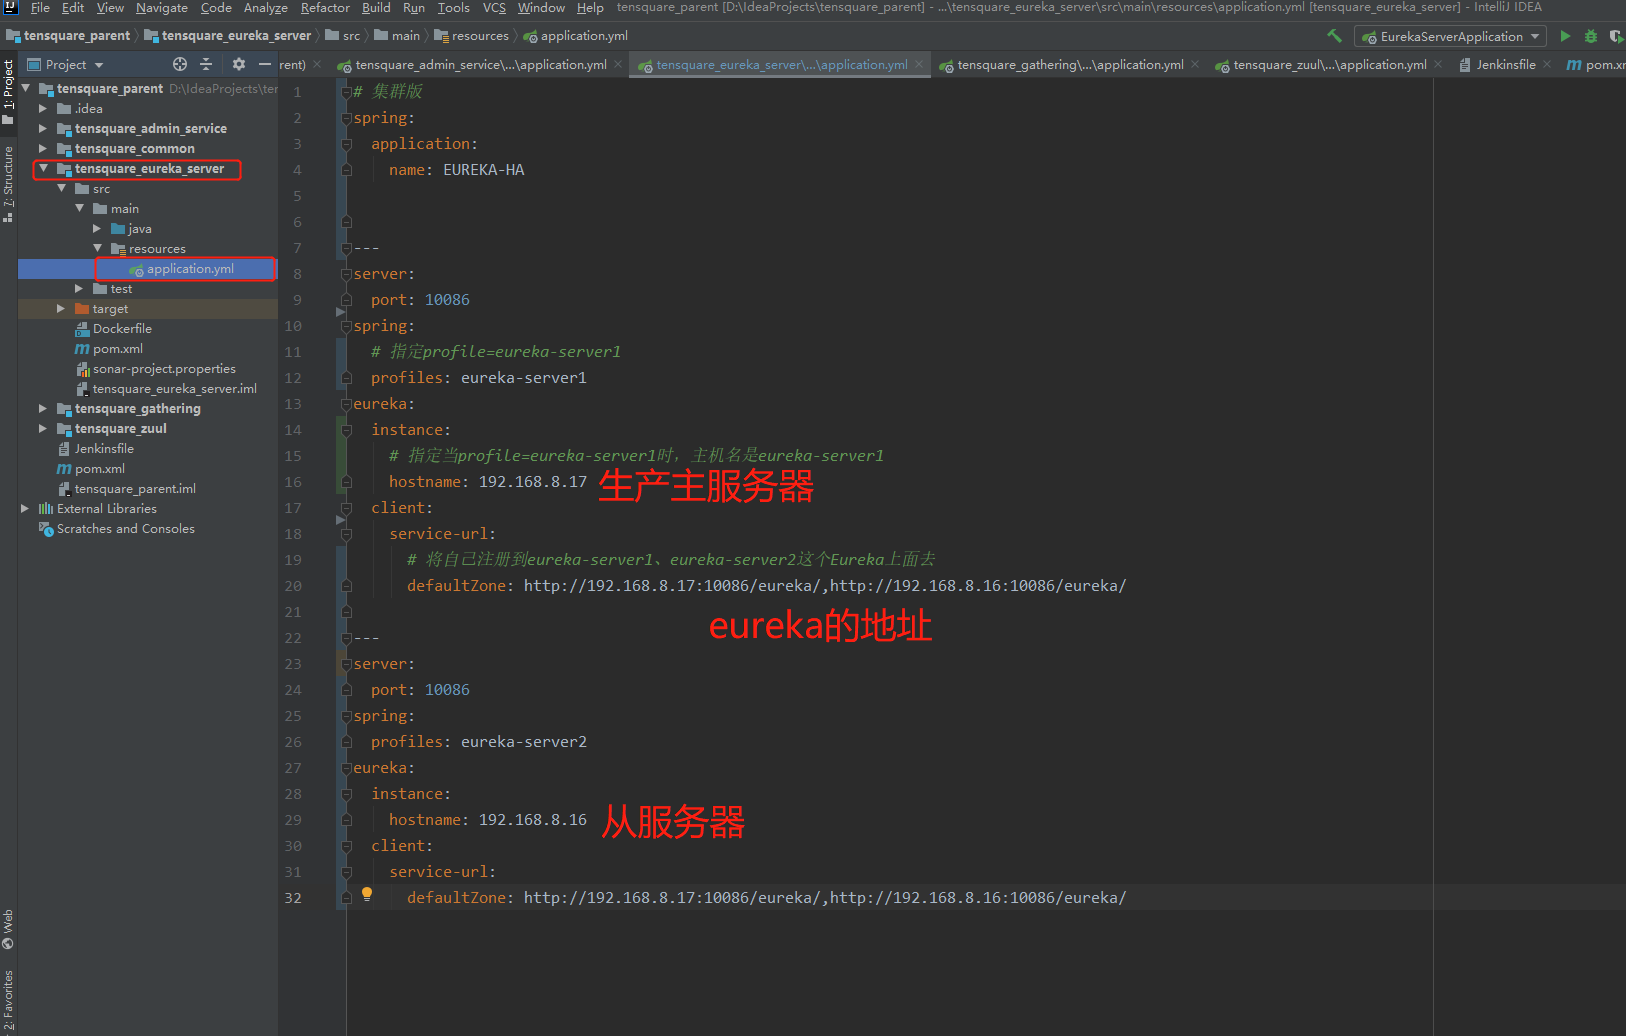
# 集群版
spring:
  application:
    name: EUREKA-HA


---
server:
  port: 10086
spring:
  # 指定profile=eureka-server1
  profiles: eureka-server1
eureka:
  instance:
    # 指定当profile=eureka-server1时,主机名是eureka-server1
    hostname: 192.168.8.17
  client:
    service-url:
      # 将自己注册到eureka-server1、eureka-server2这个Eureka上面去
      defaultZone: http://192.168.8.17:10086/eureka/,http://192.168.8.16:10086/eureka/

---
server:
  port: 10086
spring:
  profiles: eureka-server2
eureka:
  instance:
    hostname: 192.168.8.16
  client:
    service-url:
      defaultZone: http://192.168.8.17:10086/eureka/,http://192.168.8.16:10086/eureka/
在启动微服务的时候,加入参数: spring.pro?les.active 来读取对应的配置
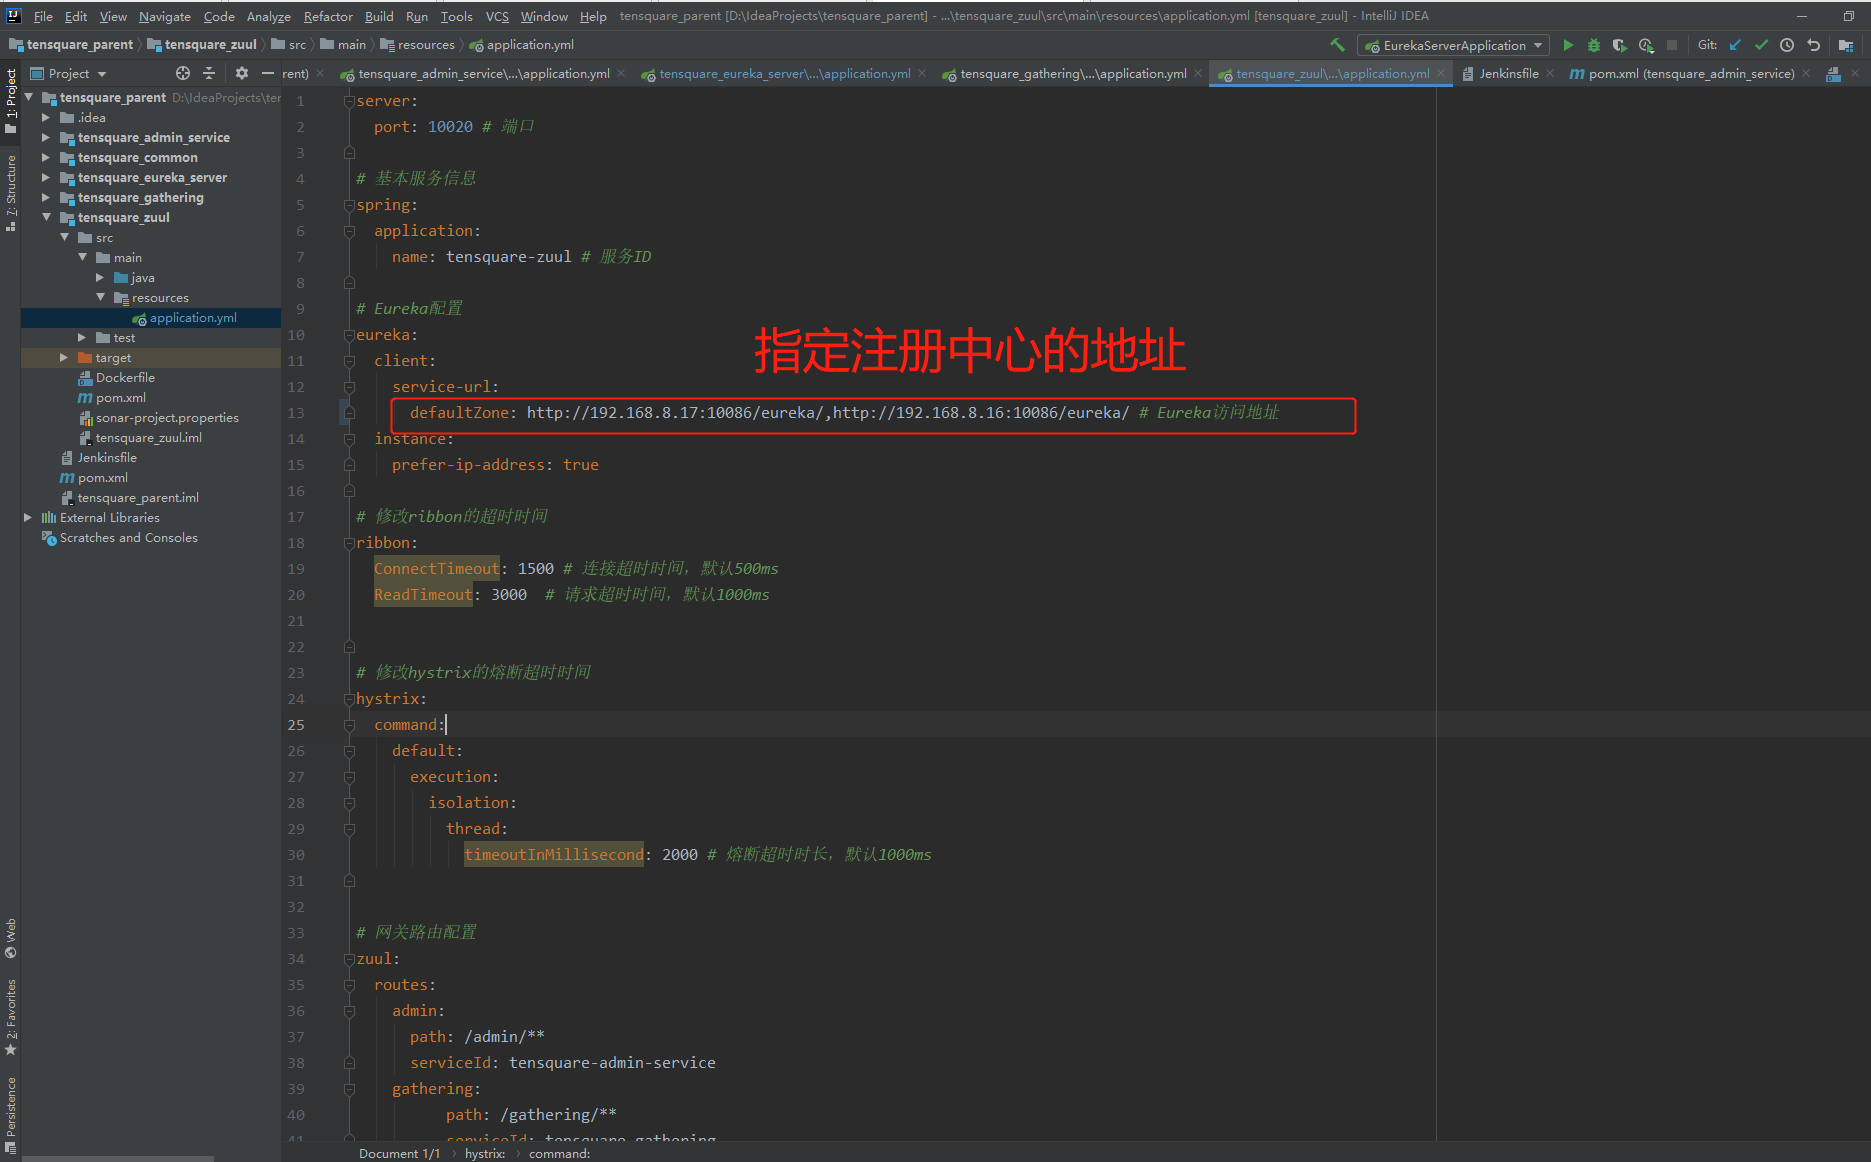
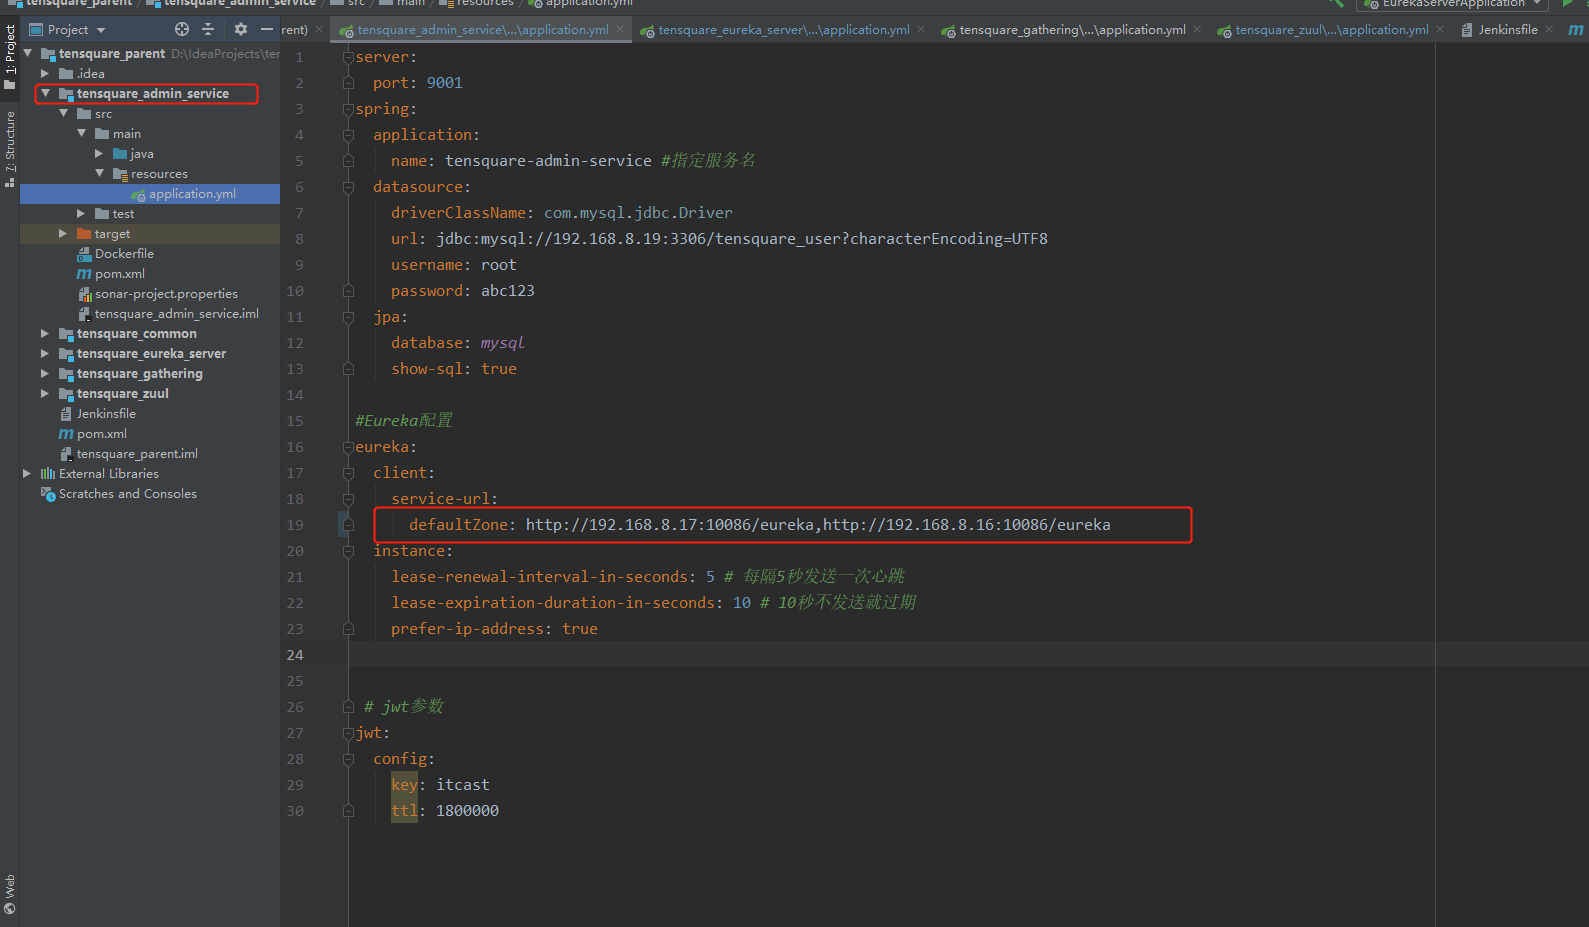
2. 其他微服务配置
网关服务配置
defaultZone: http://192.168.8.17:10086/eureka/,http://192.168.8.16:10086/eureka/ # Eureka访问地址
权限管理配置
defaultZone: http://192.168.8.17:10086/eureka,http://192.168.8.16:10086/eureka
业务模块配置
defaultZone: http://192.168.8.17:10086/eureka,http://192.168.8.16:10086/eureka
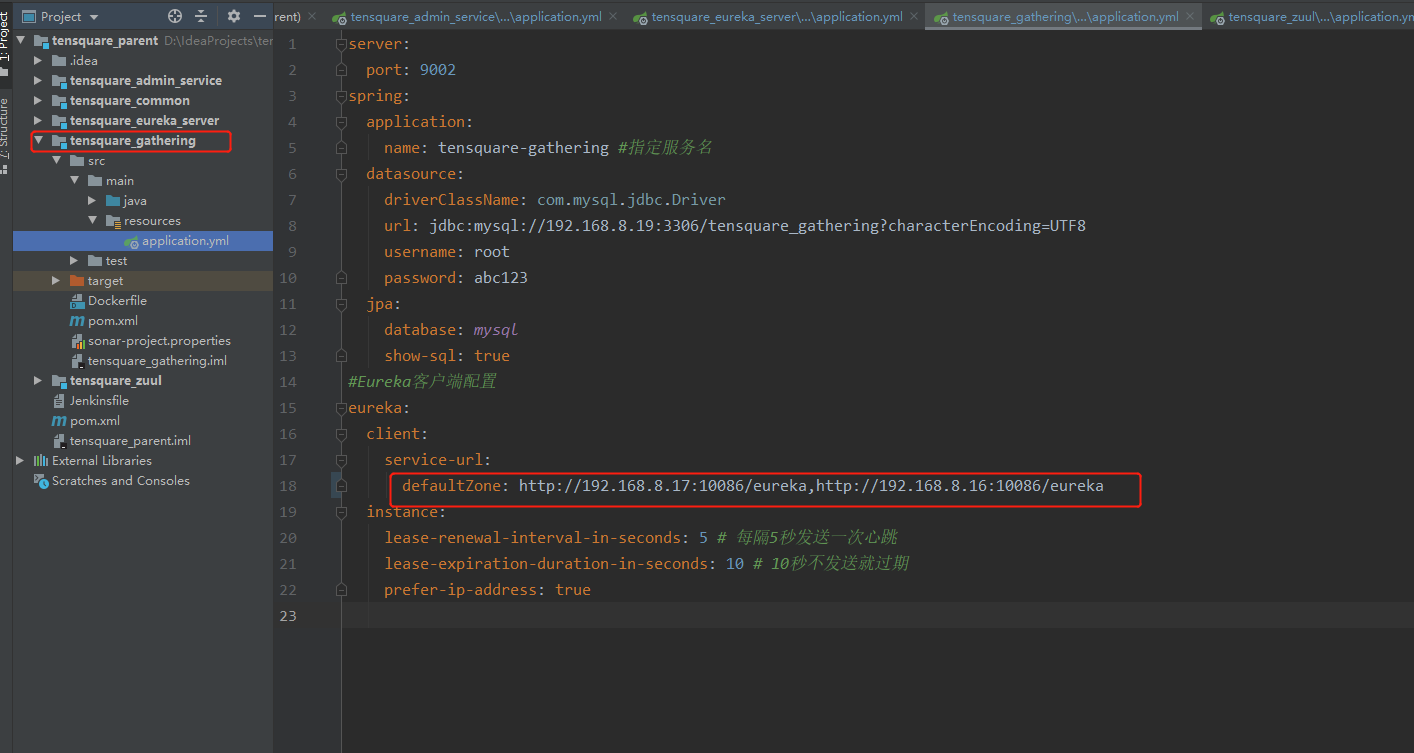
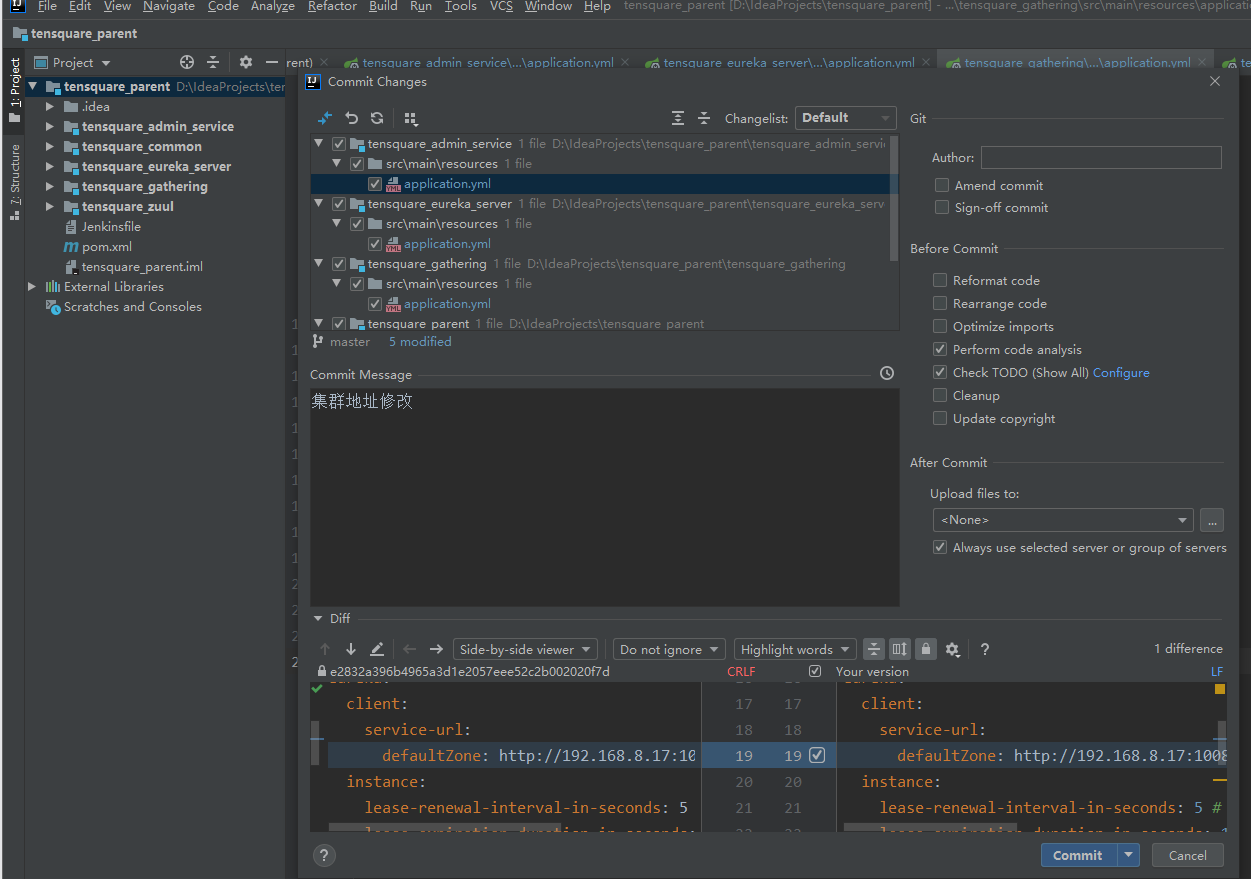
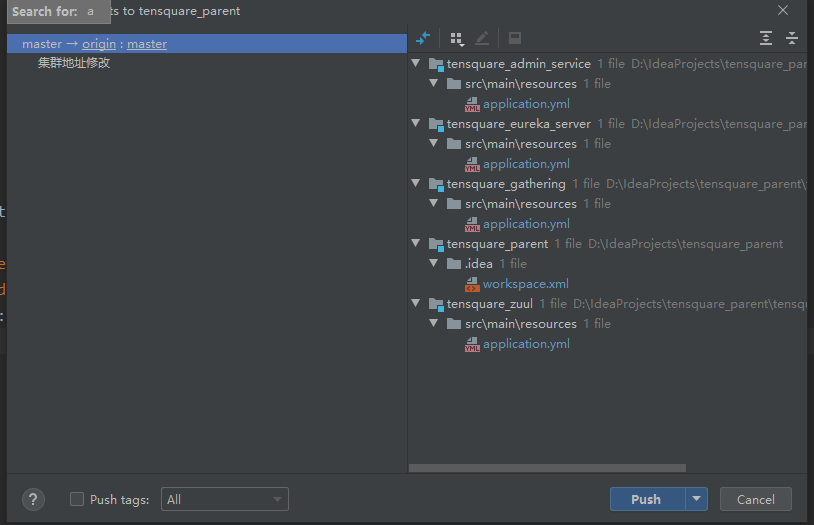
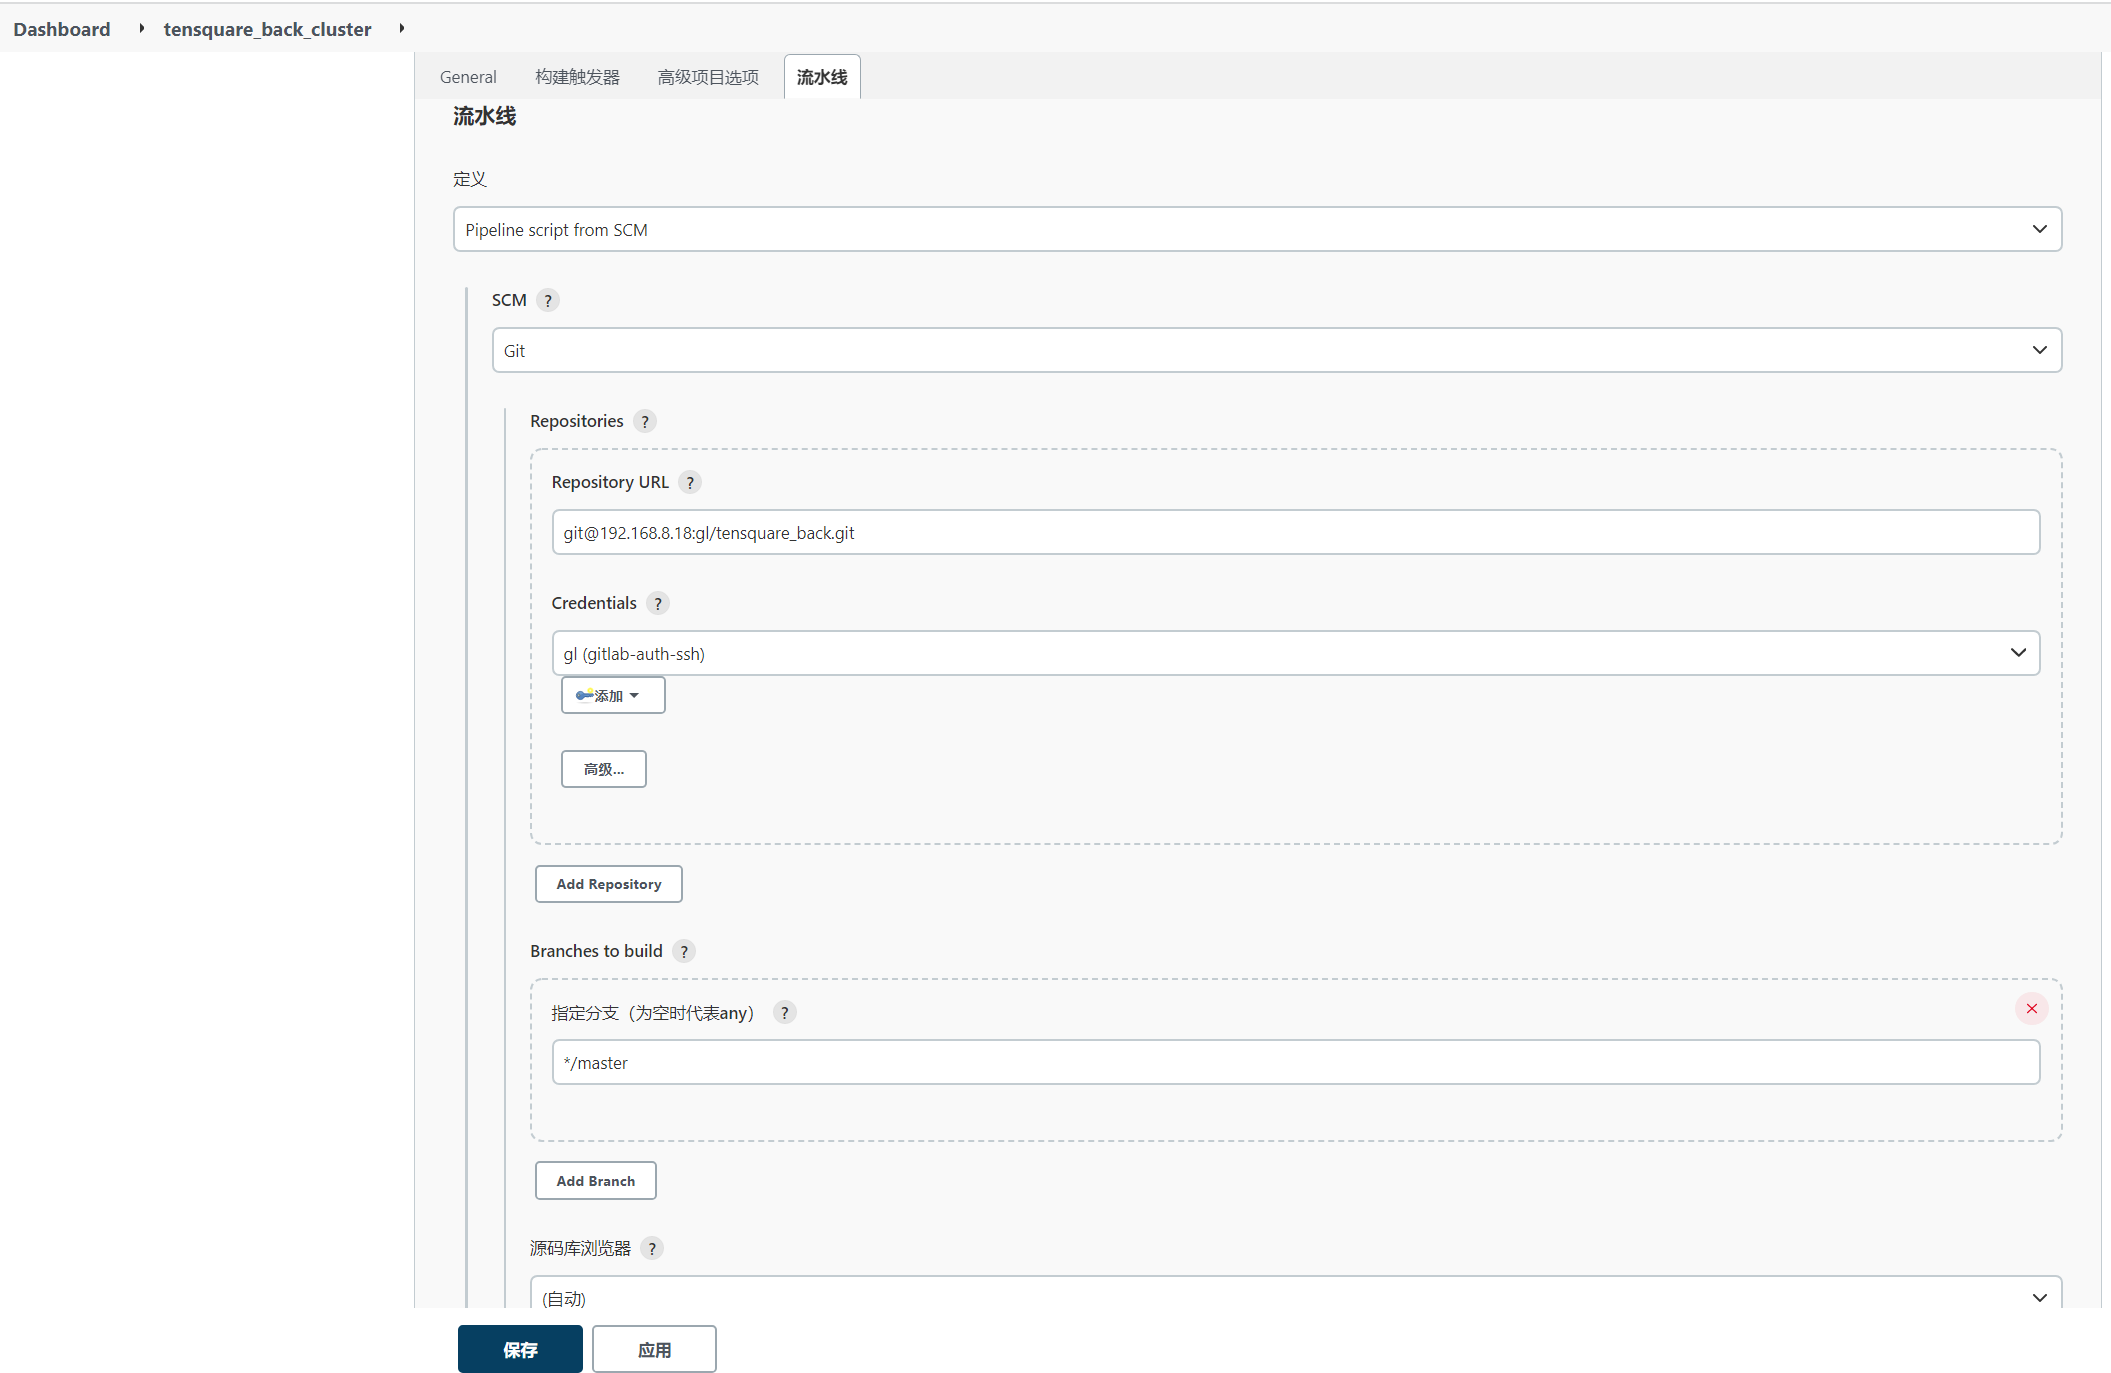
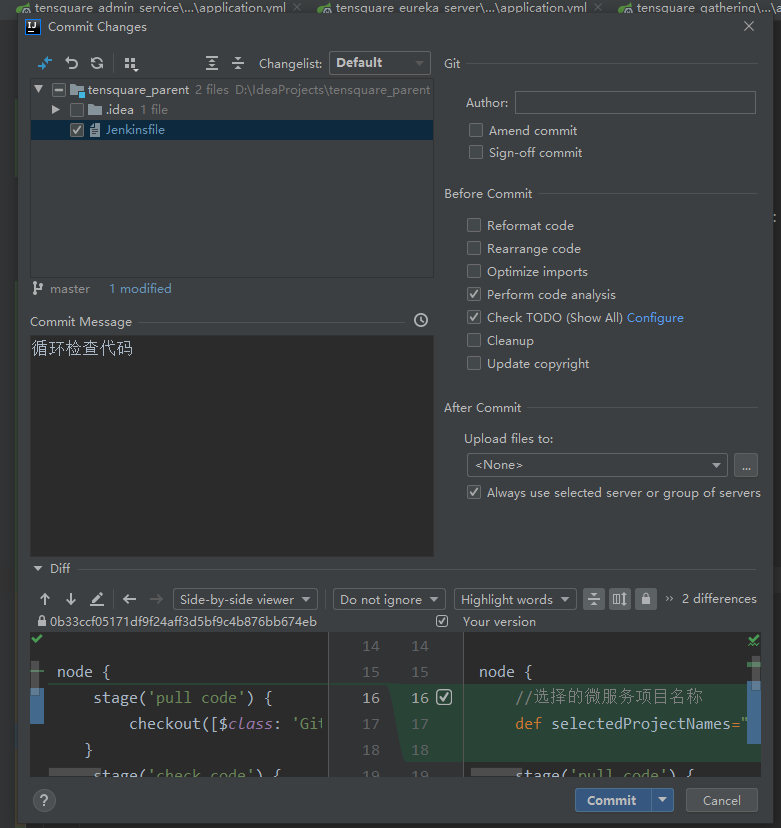
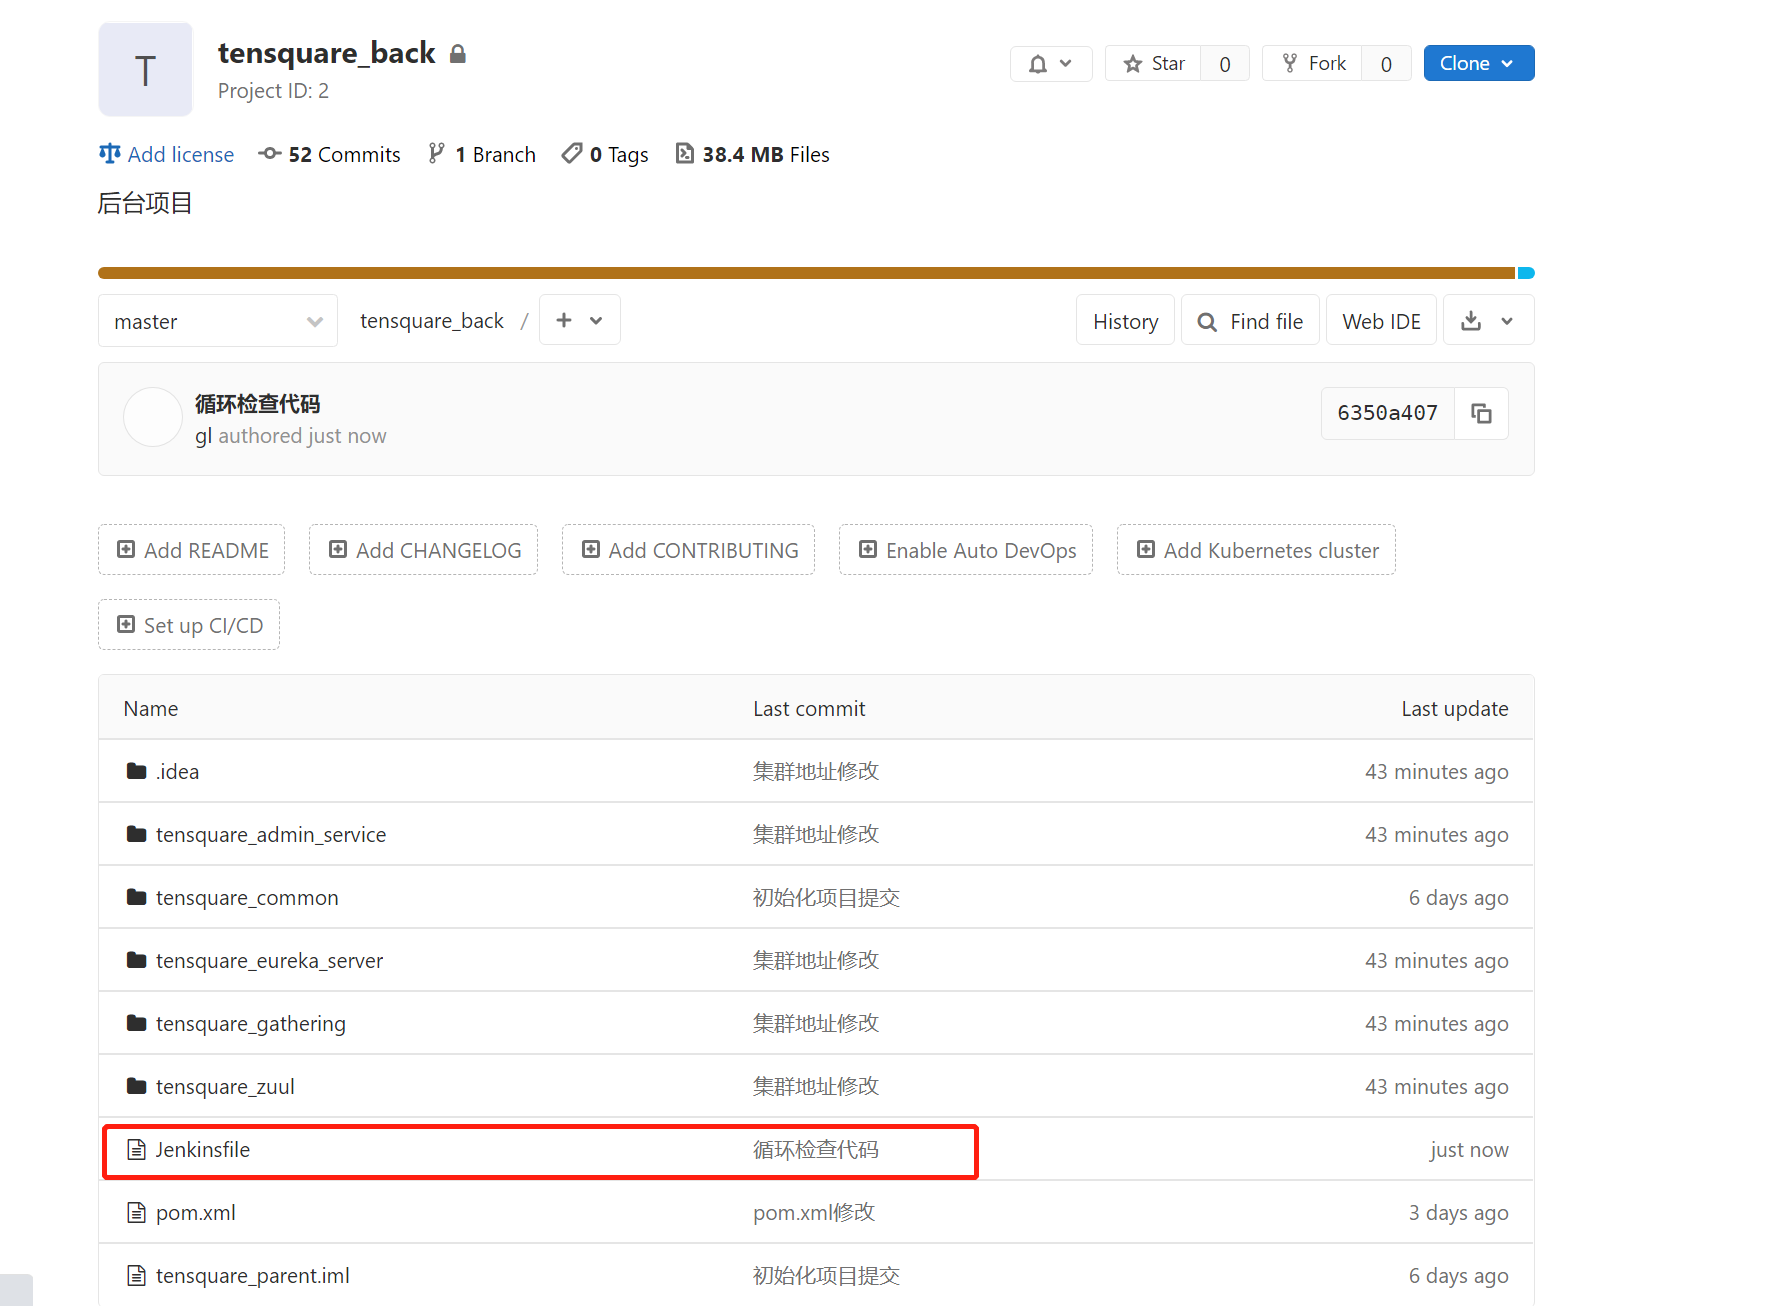
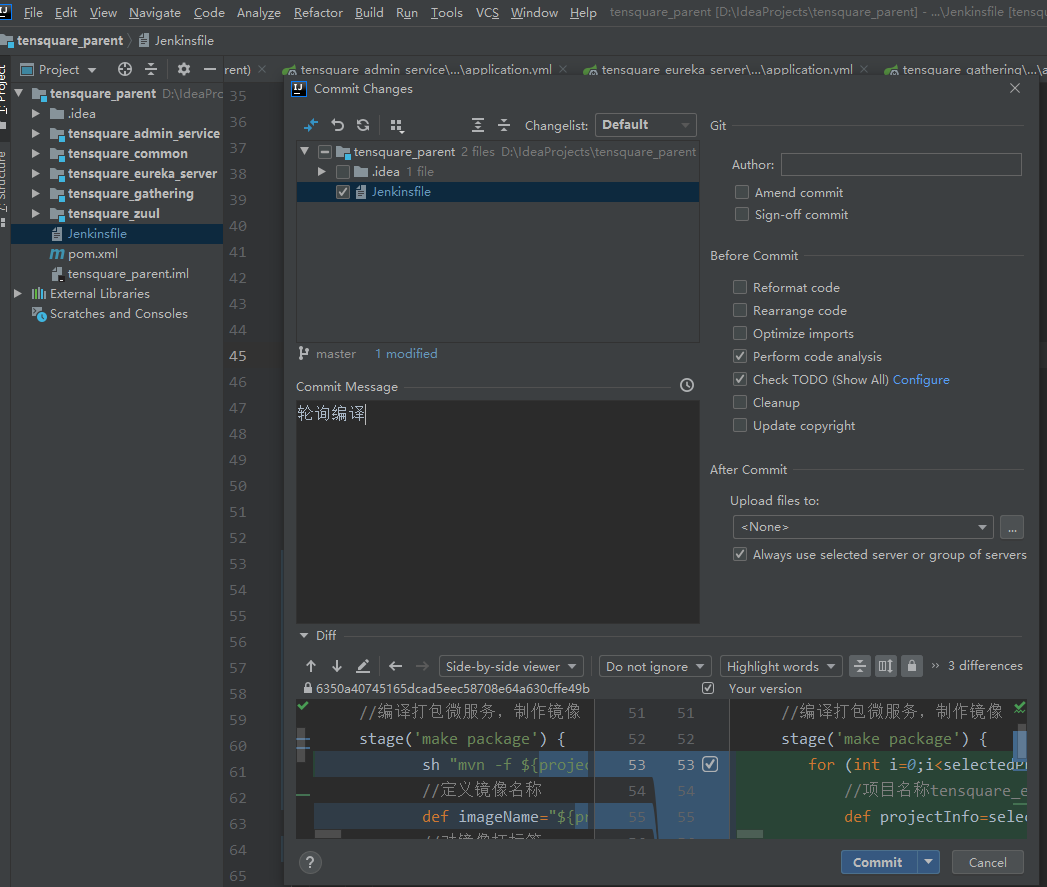
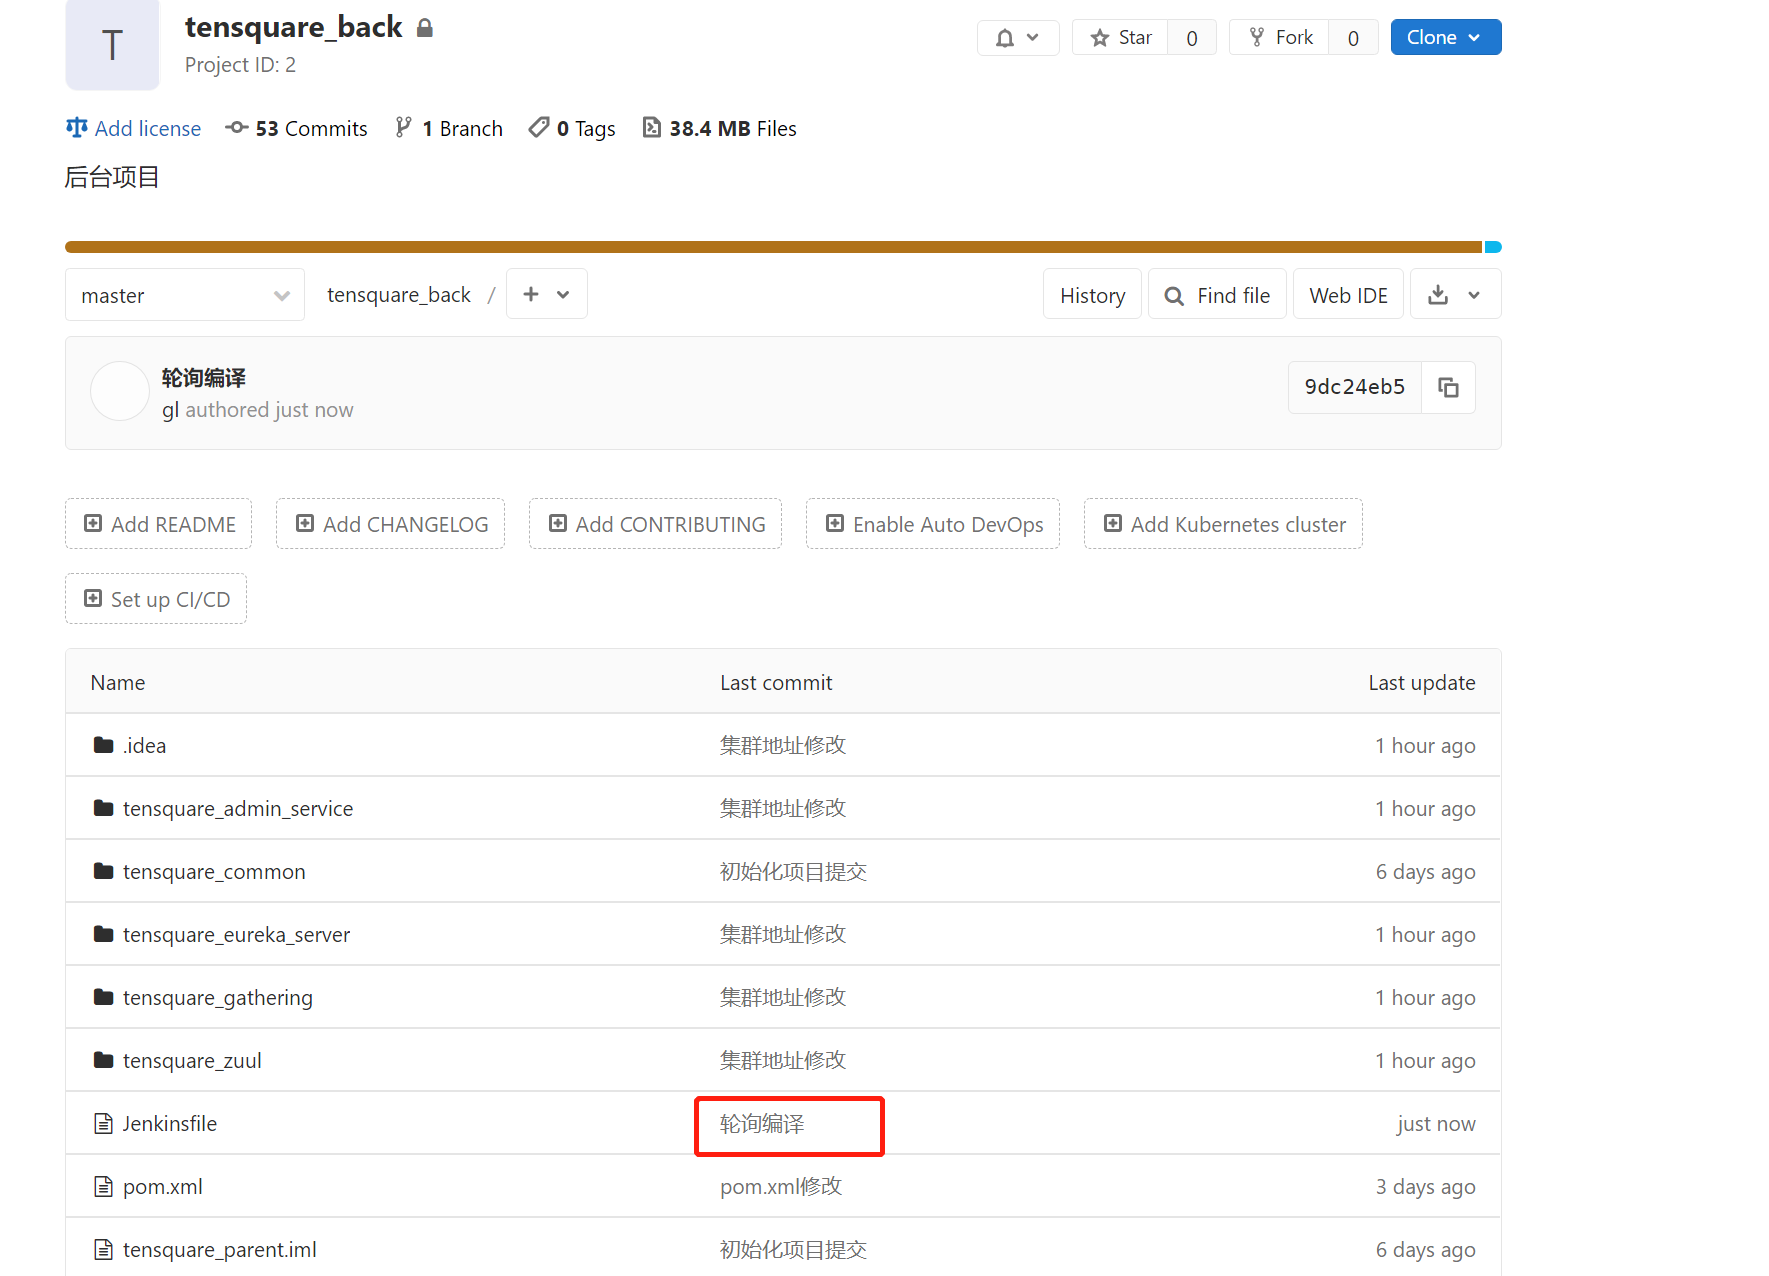
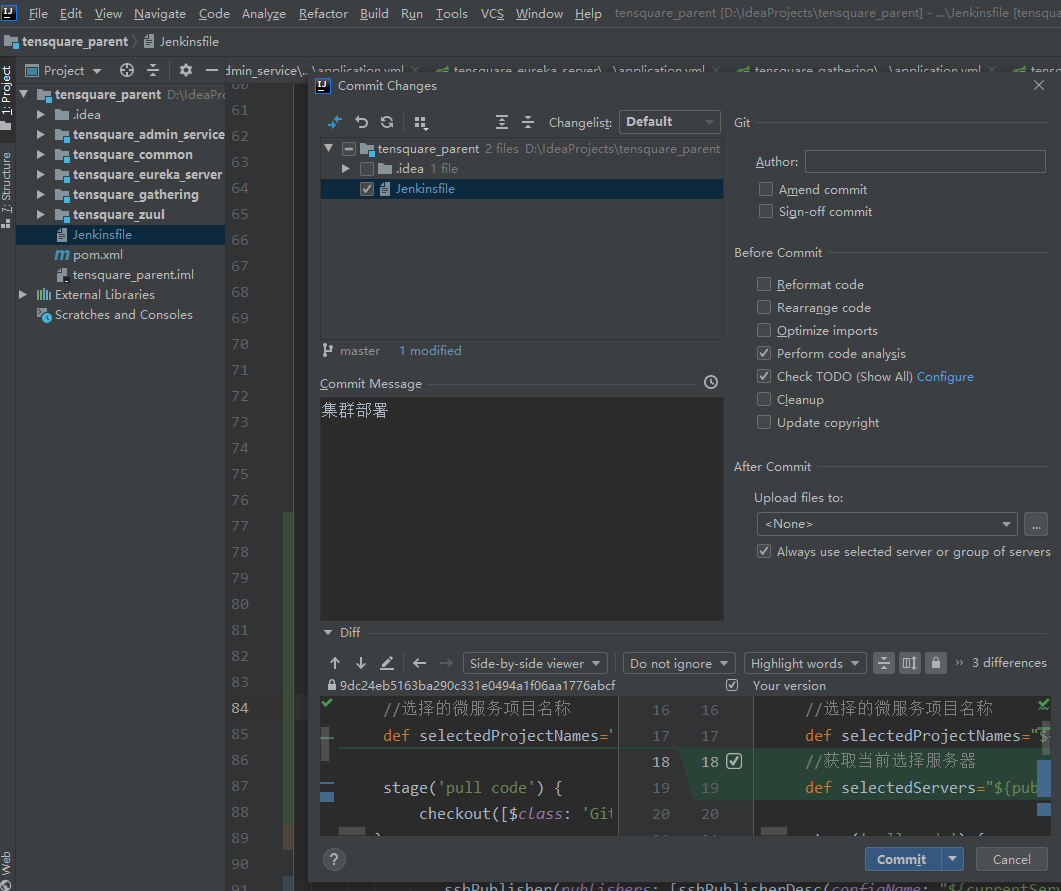
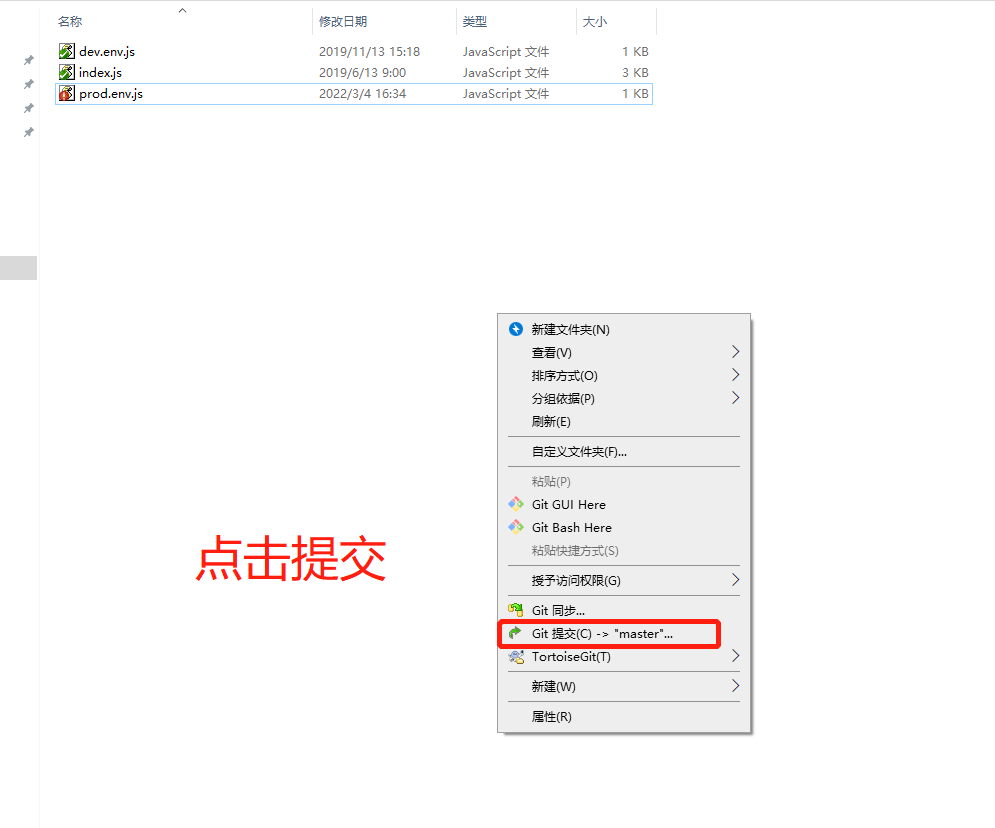
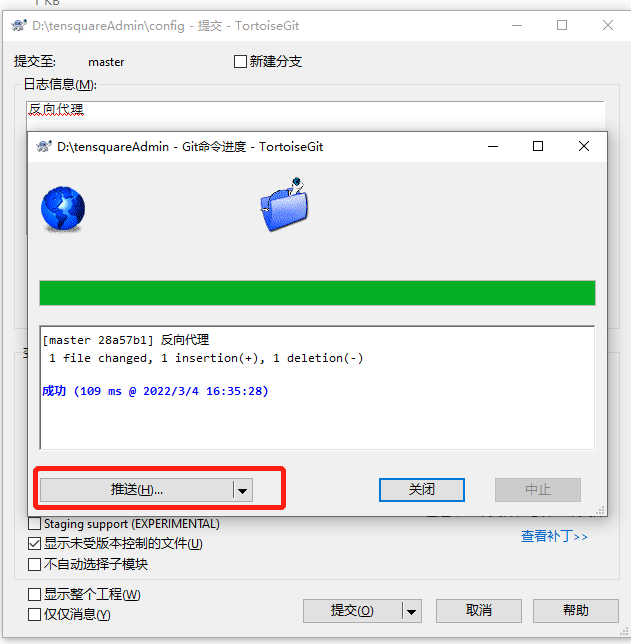
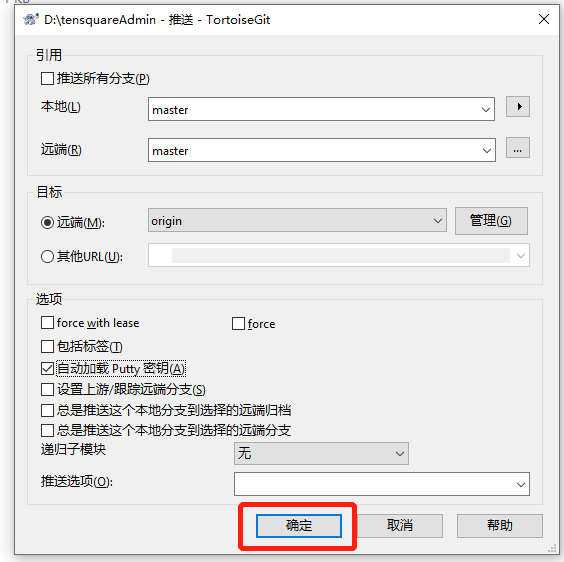
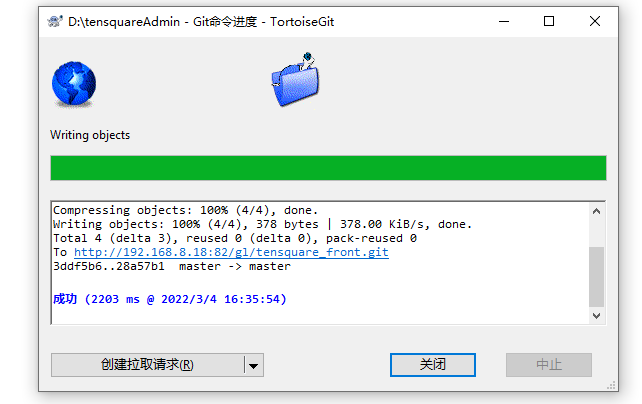
3. 提交已修改的配置
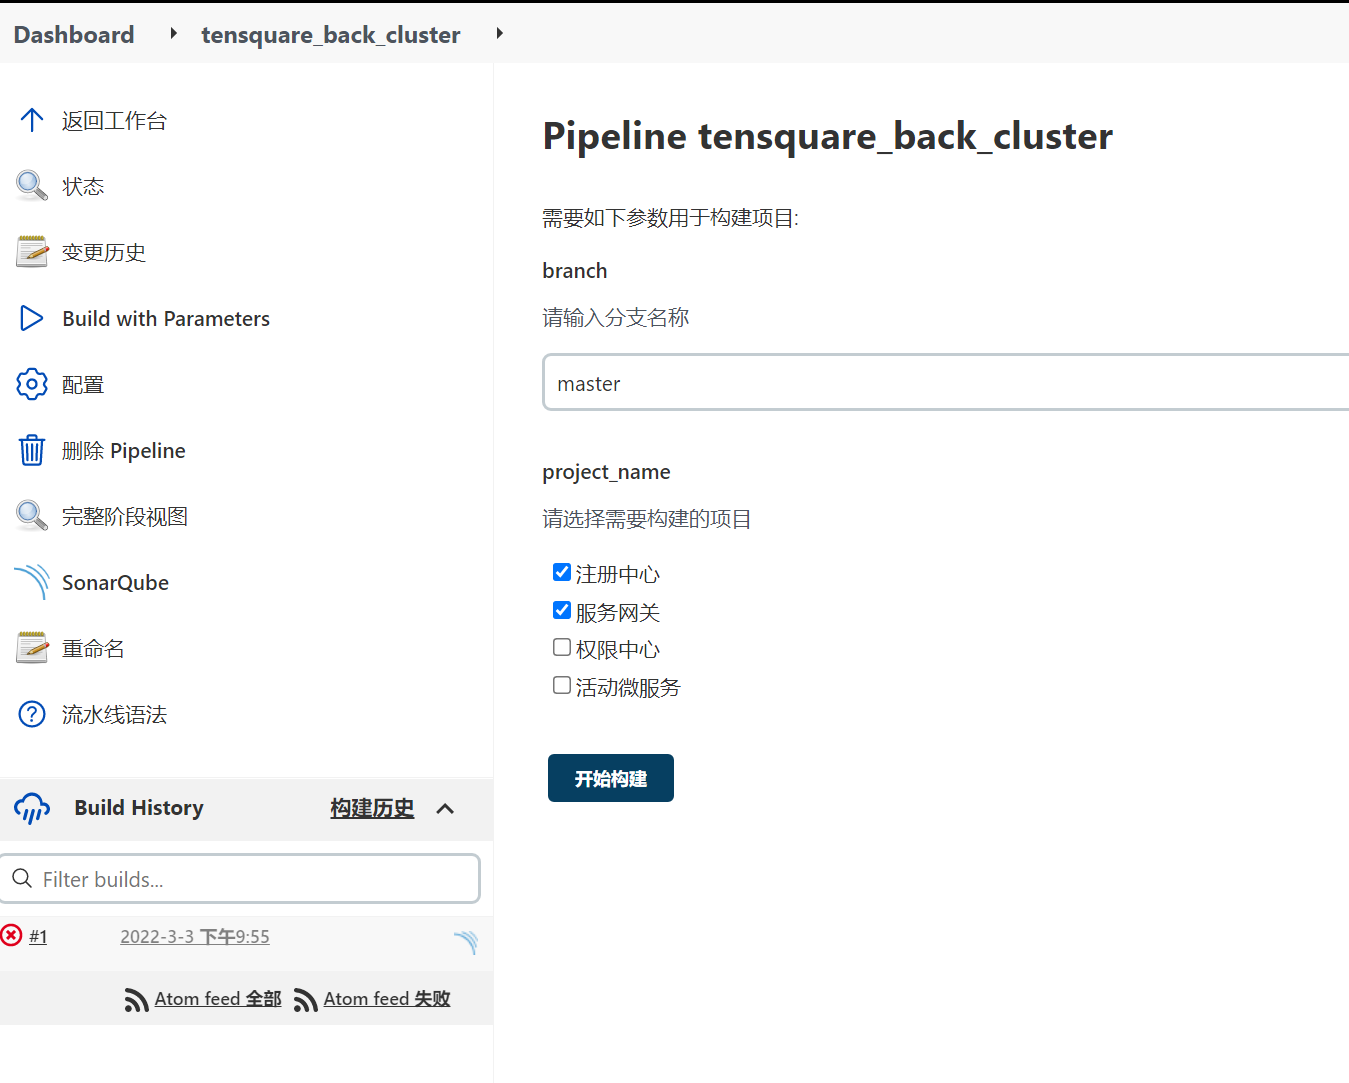
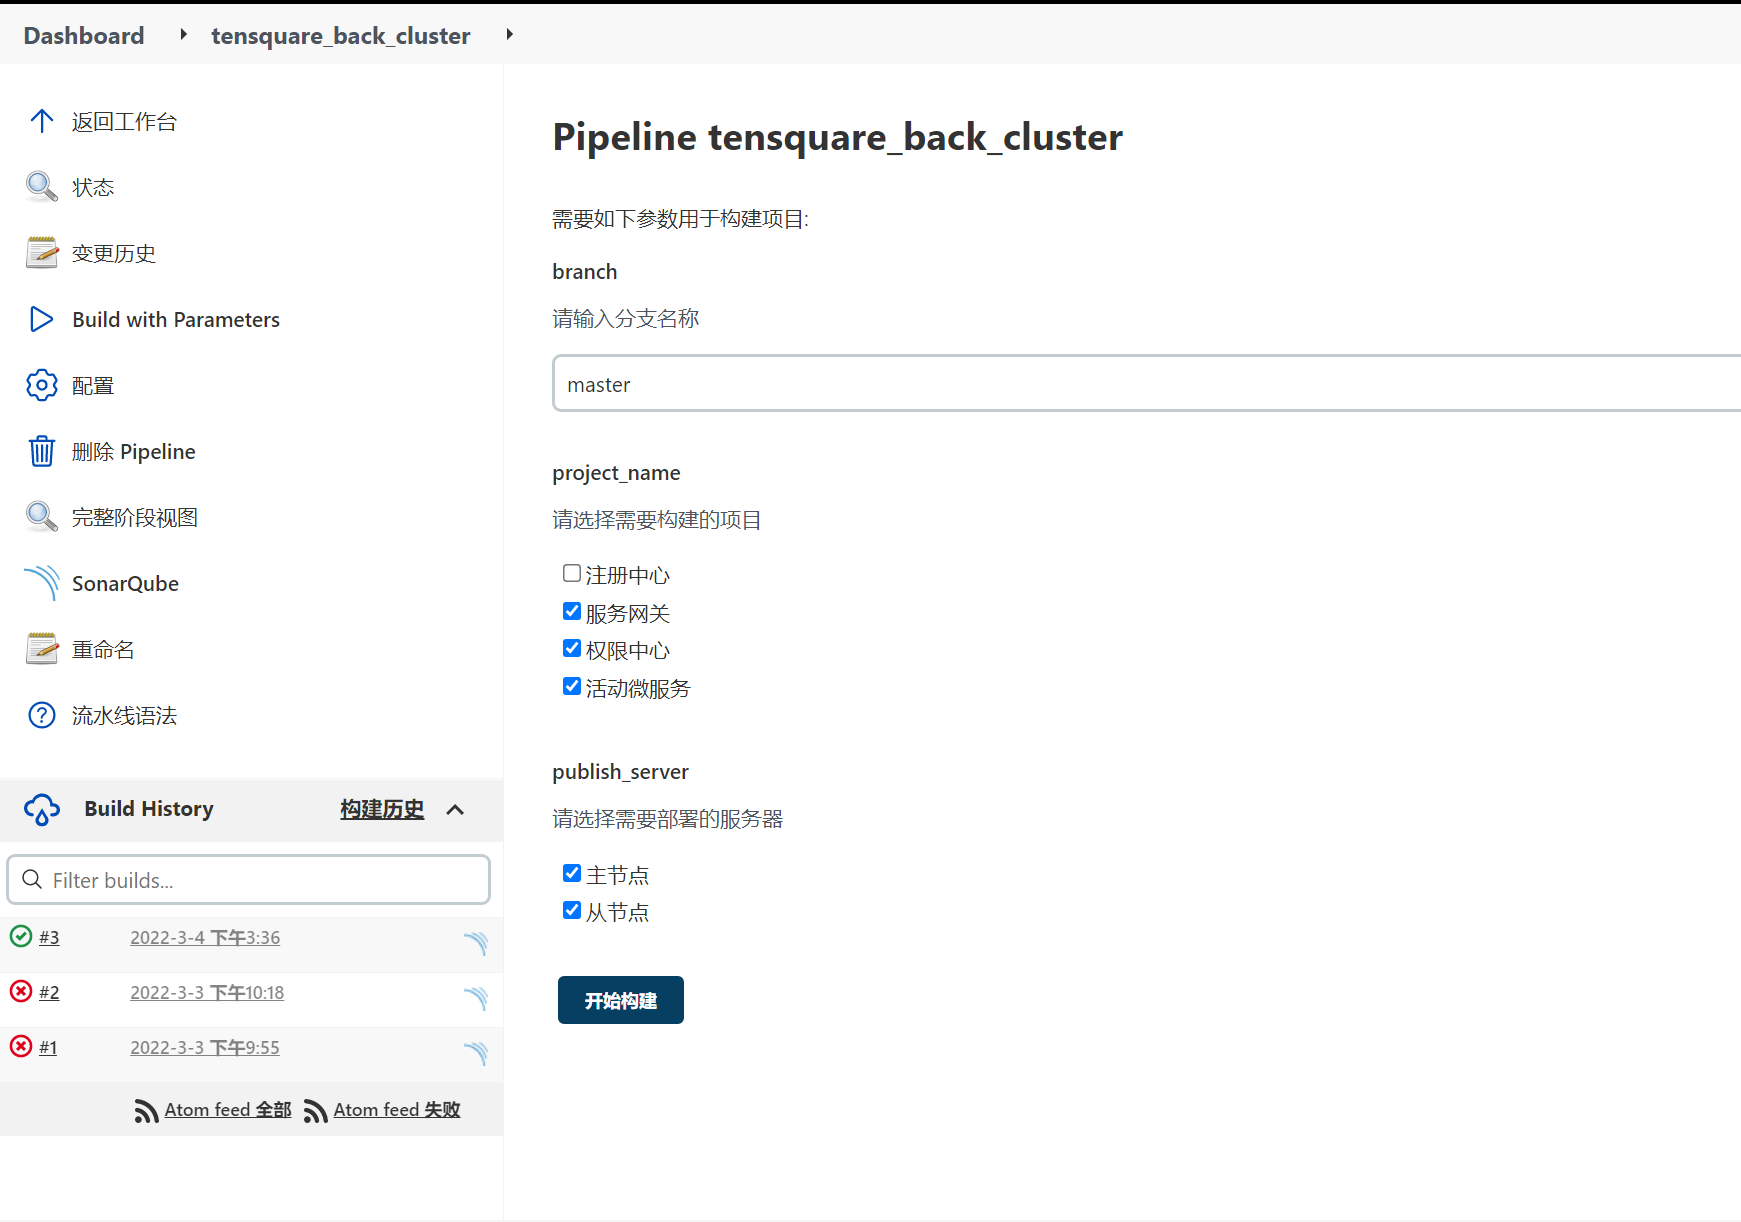
三、设计Jenkins集群项目的构建参数
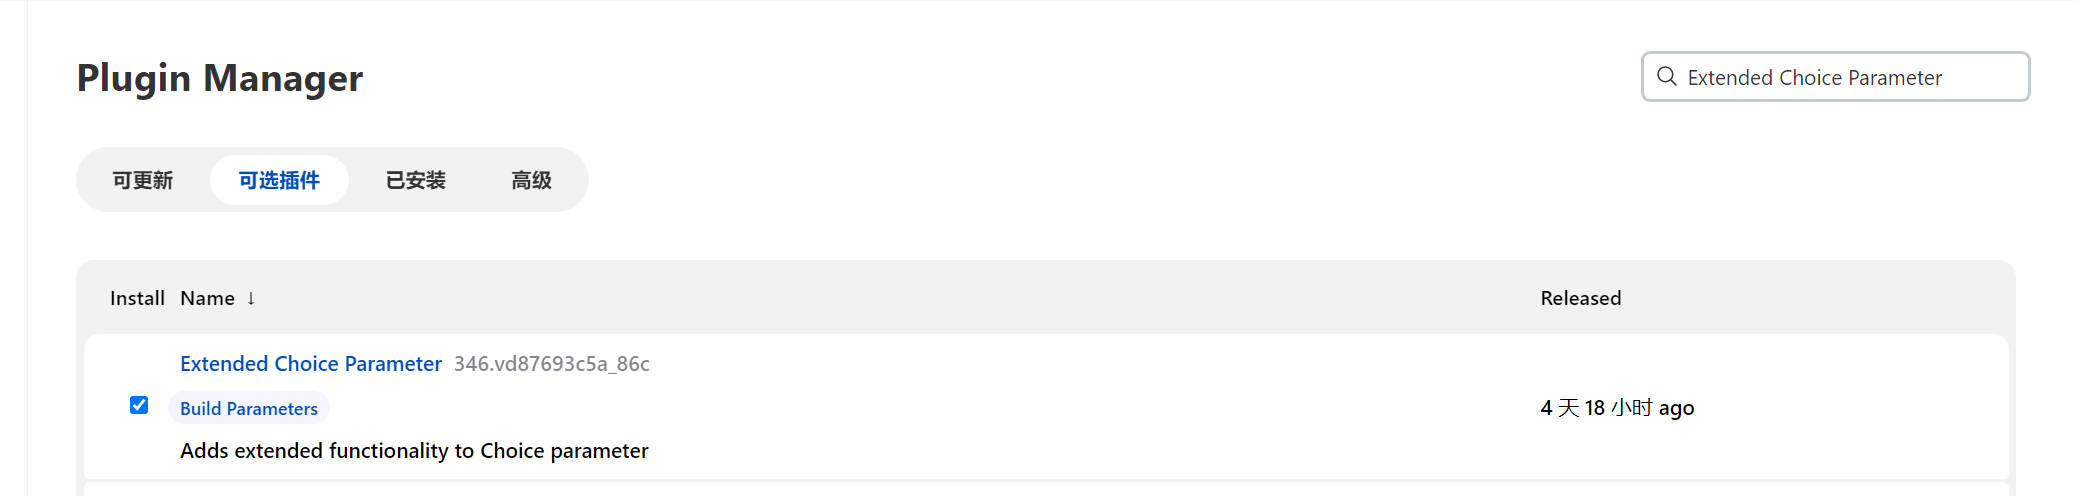
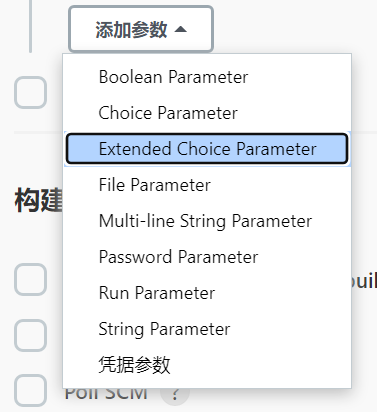
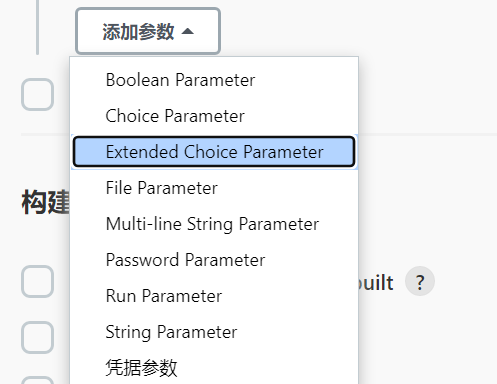
1. 安装Extended Choice Parameter插件
该插件可以支持多选框
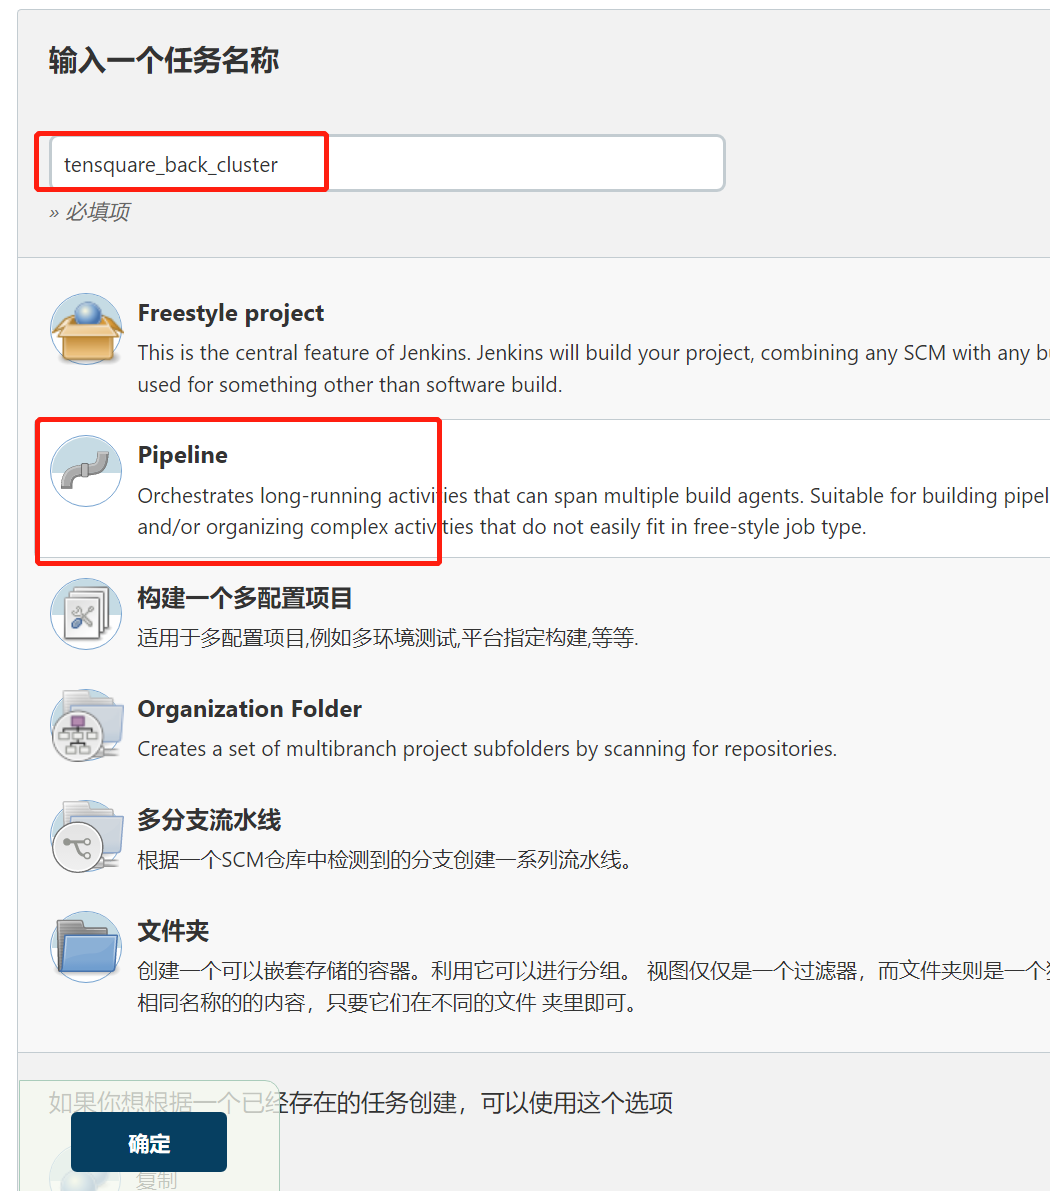
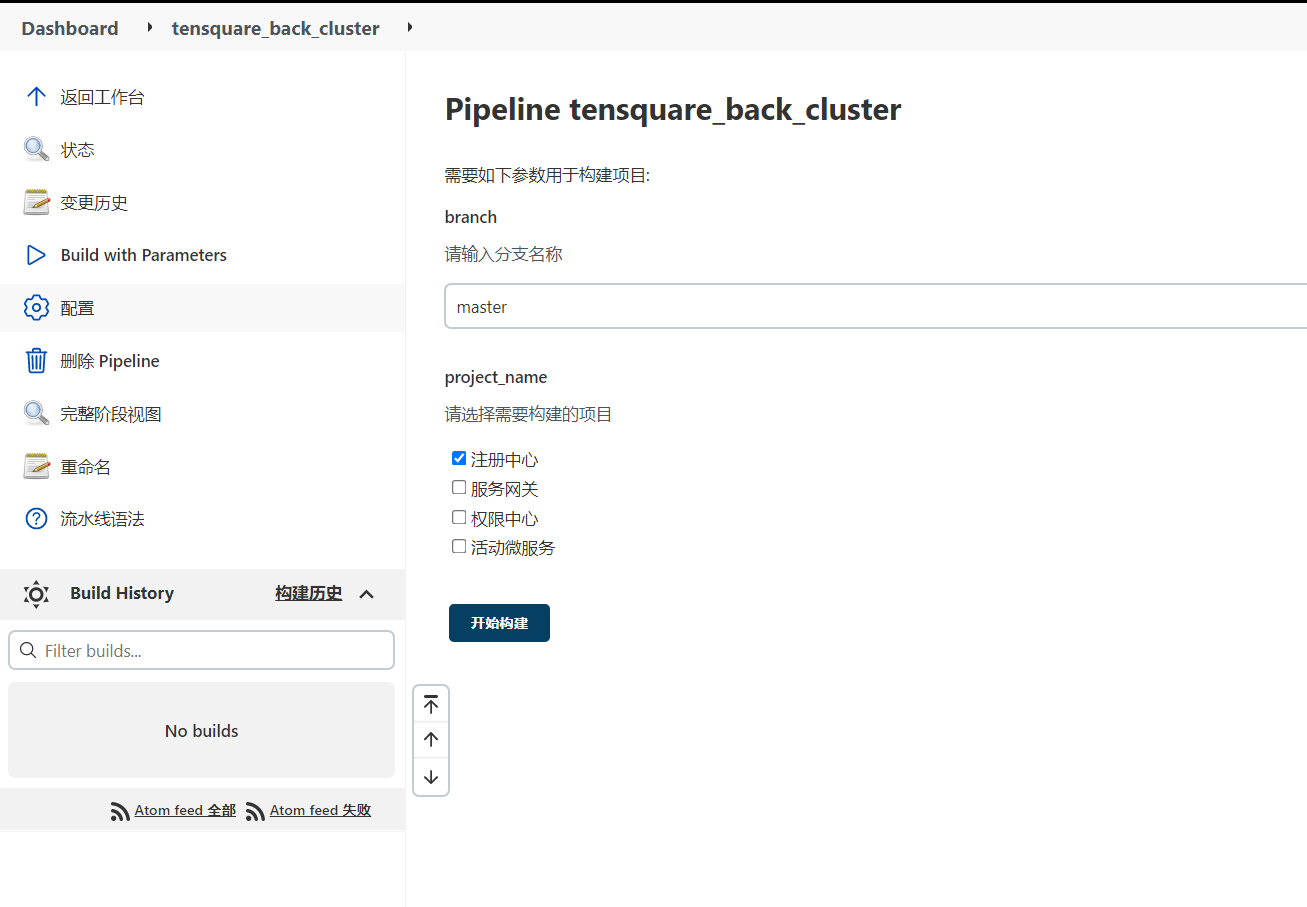
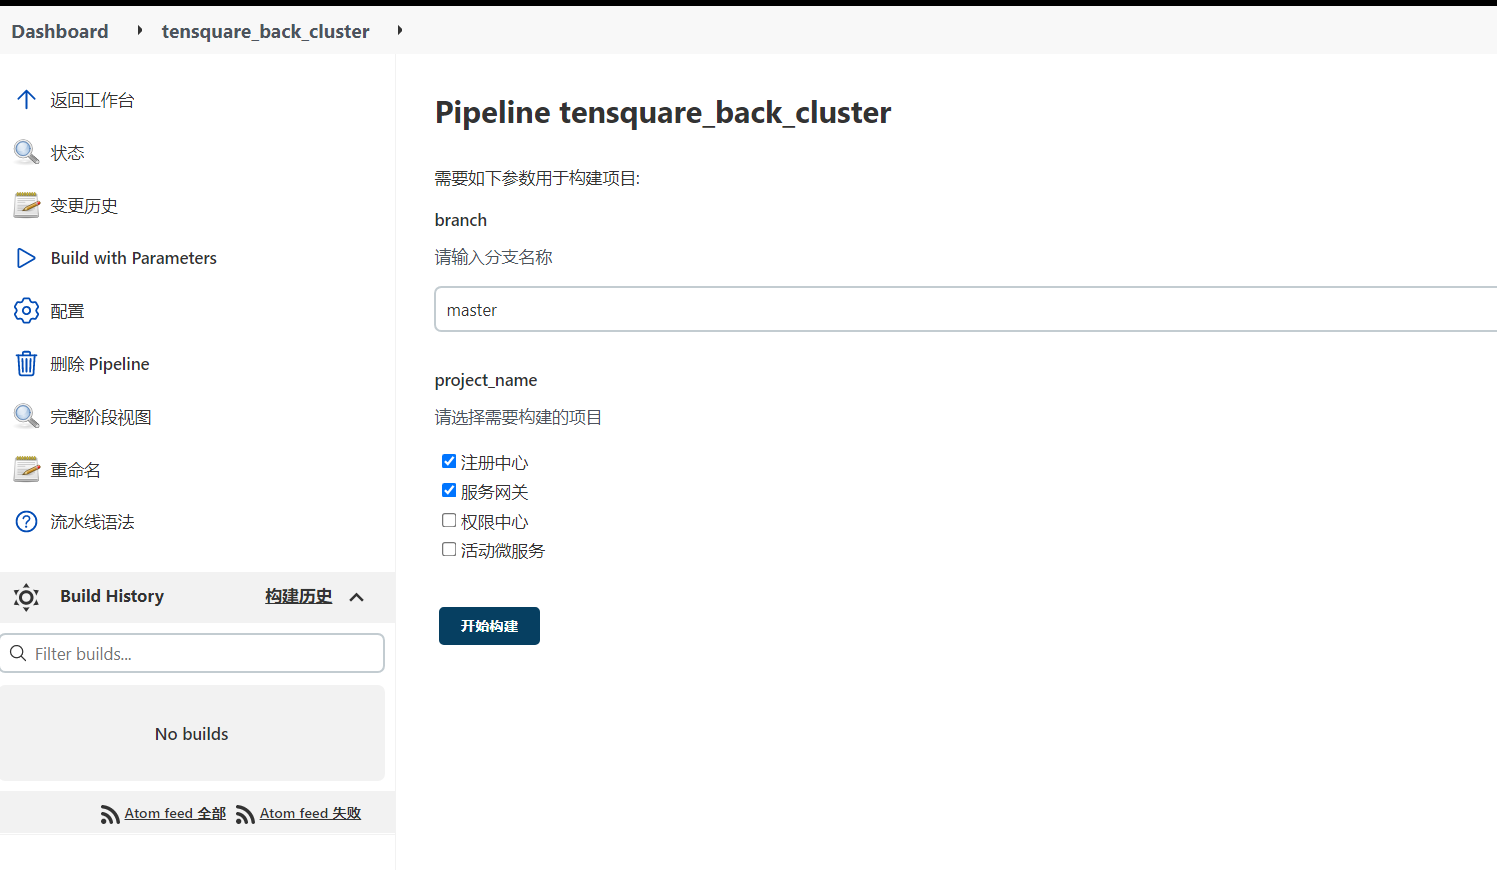
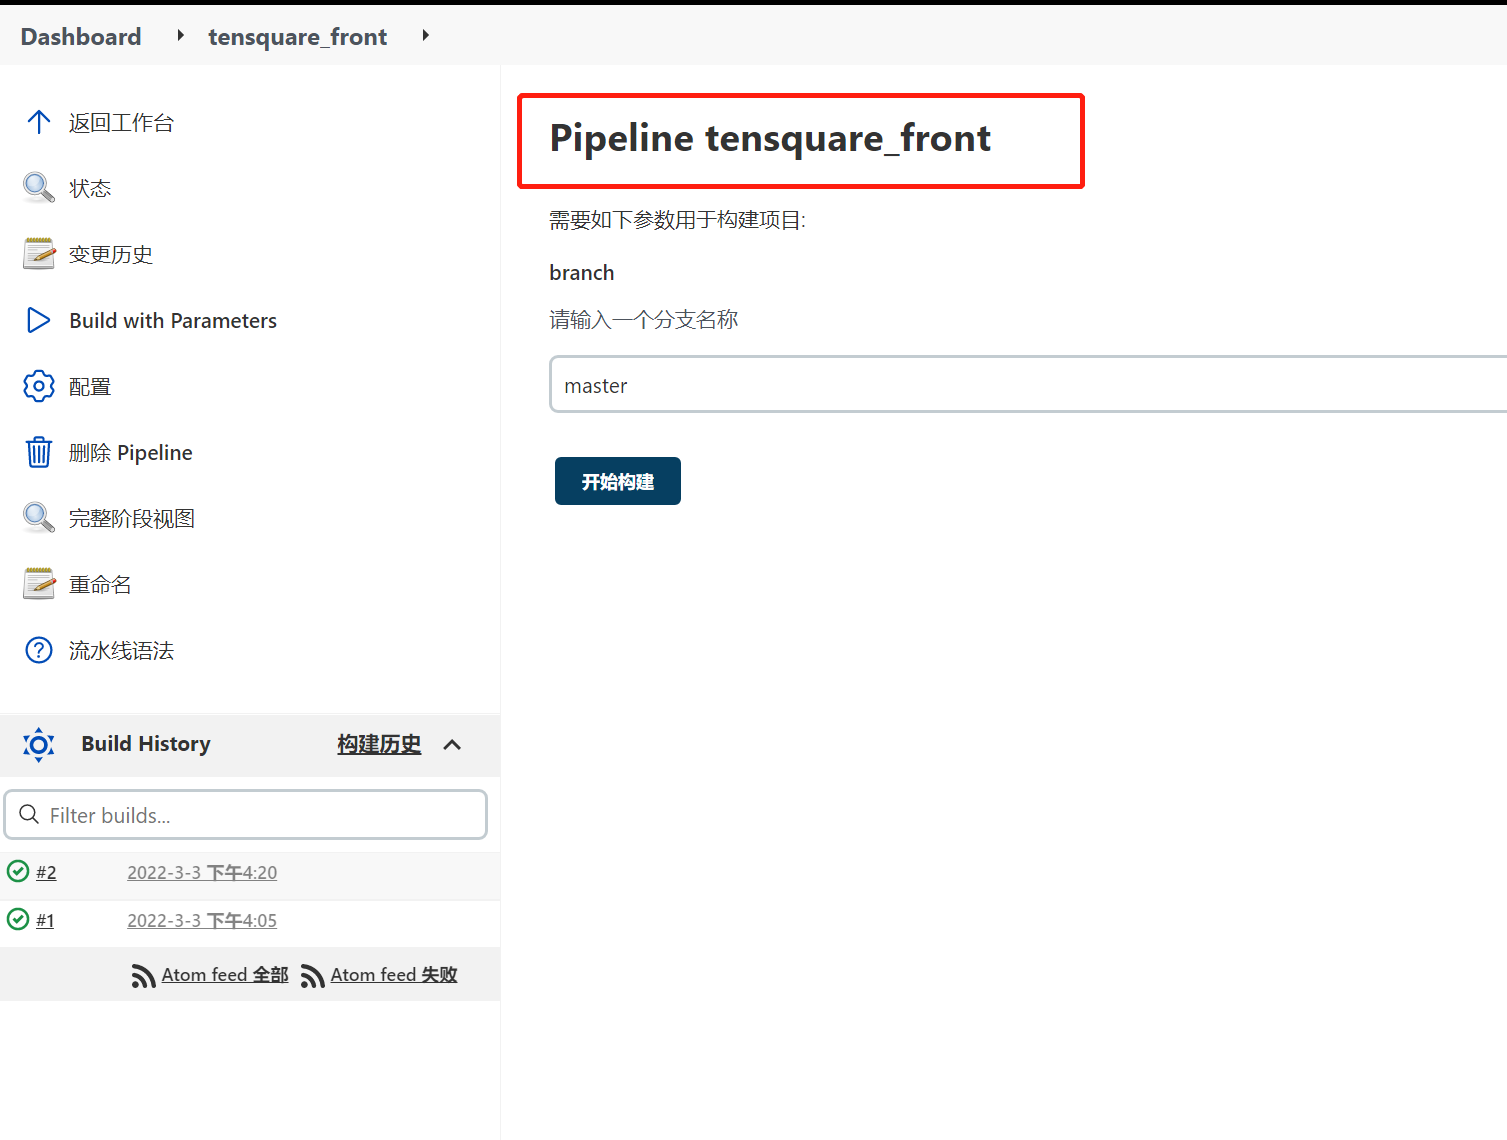
2. 创建流水线项目
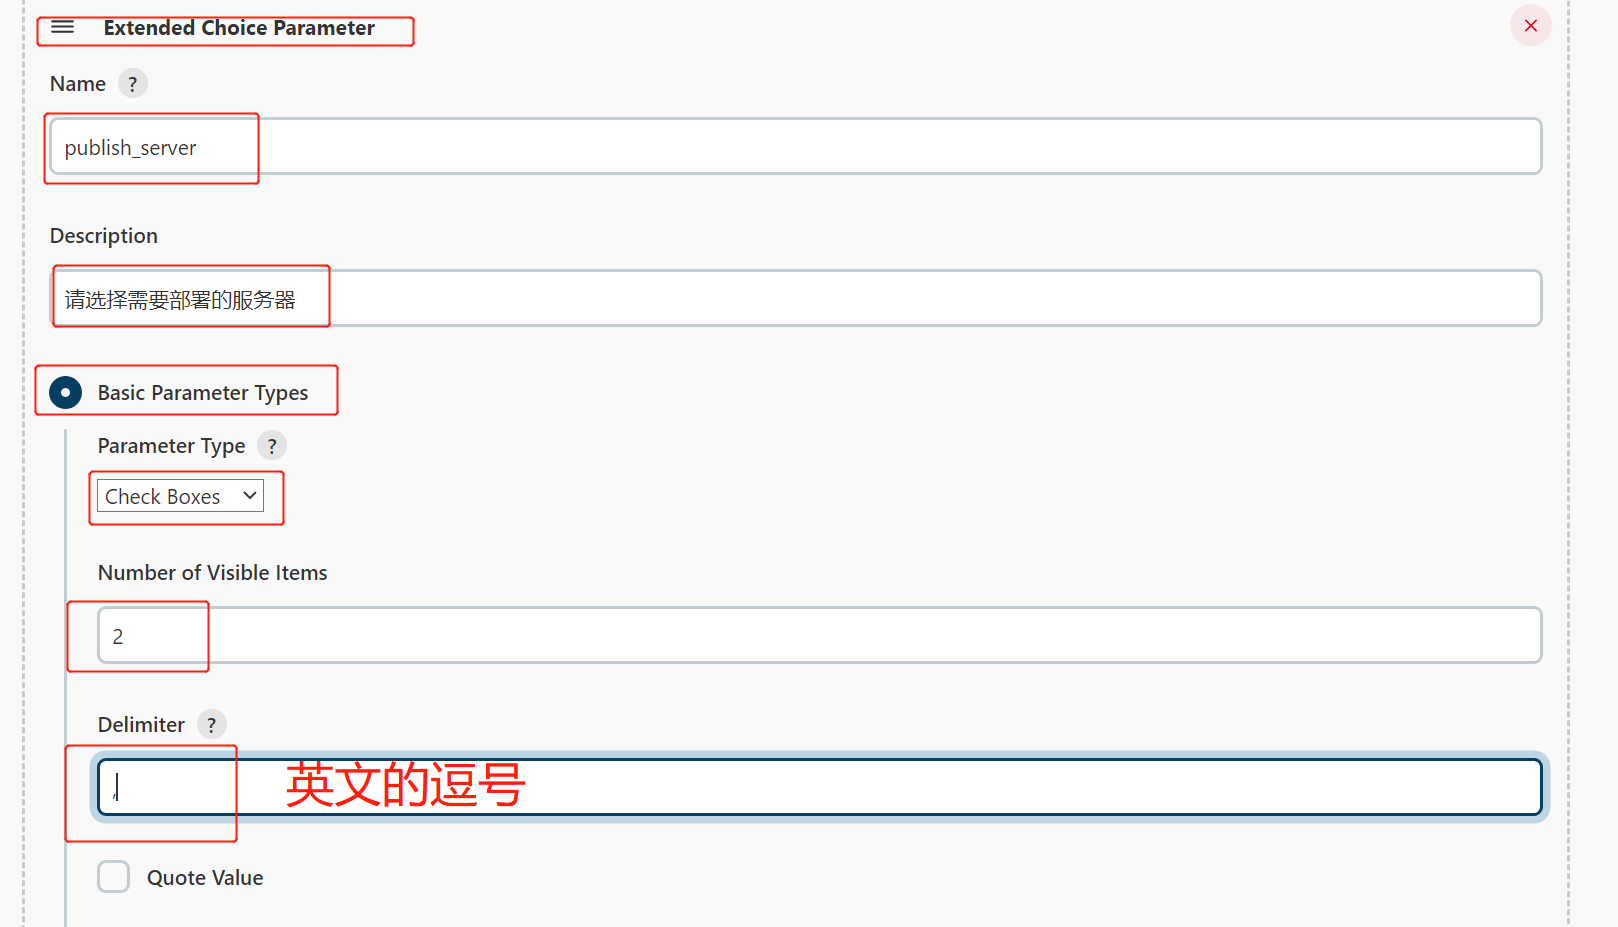
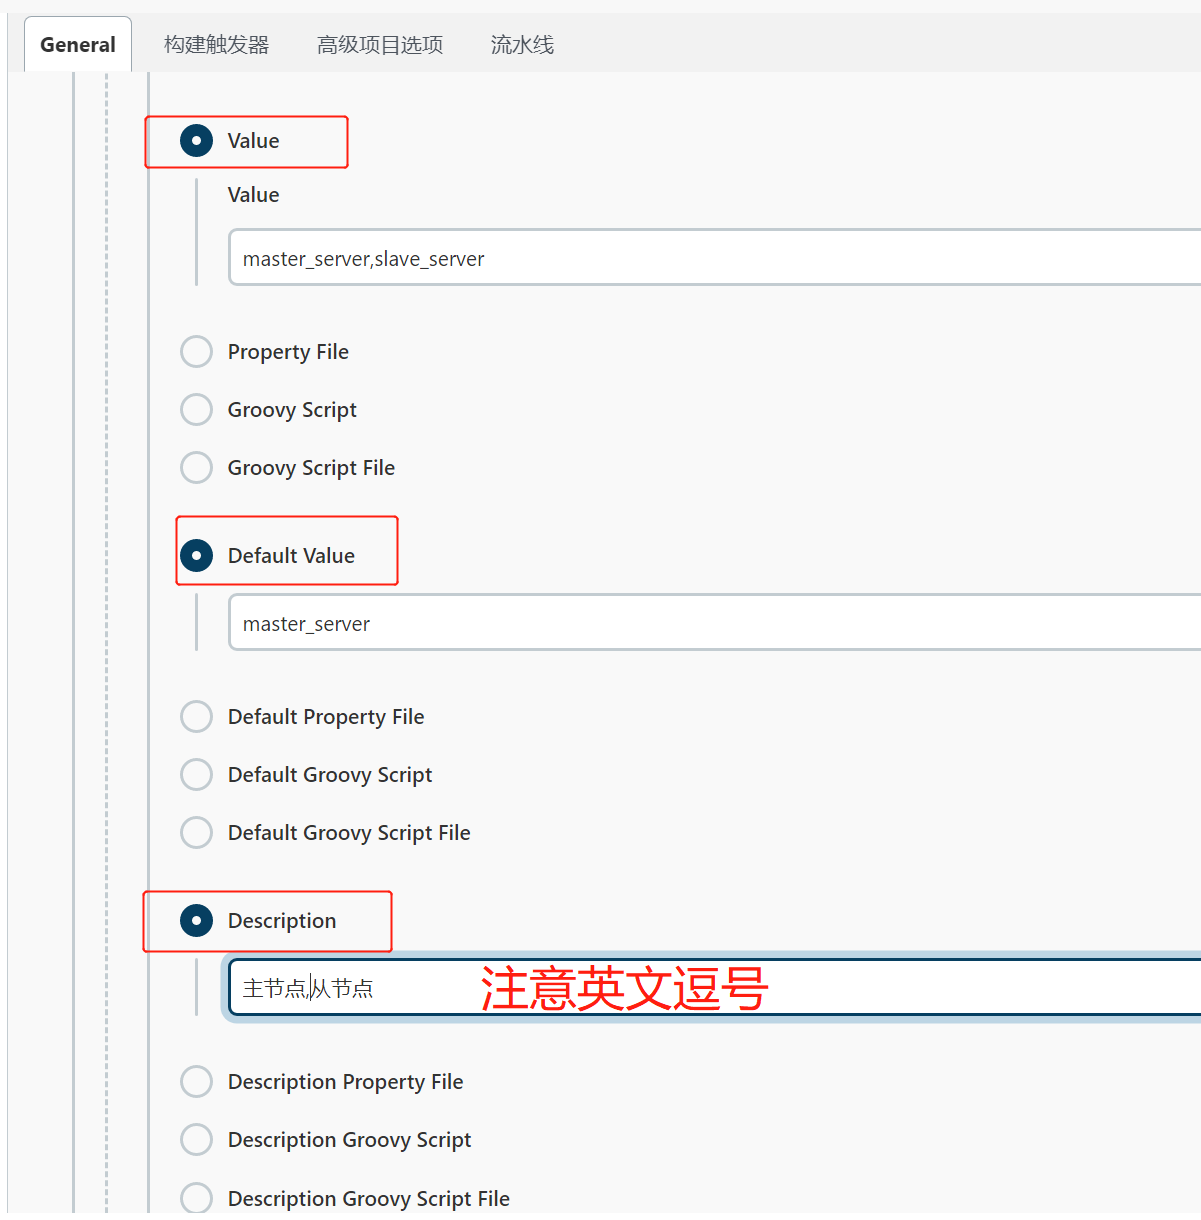
3. 配置项目参数
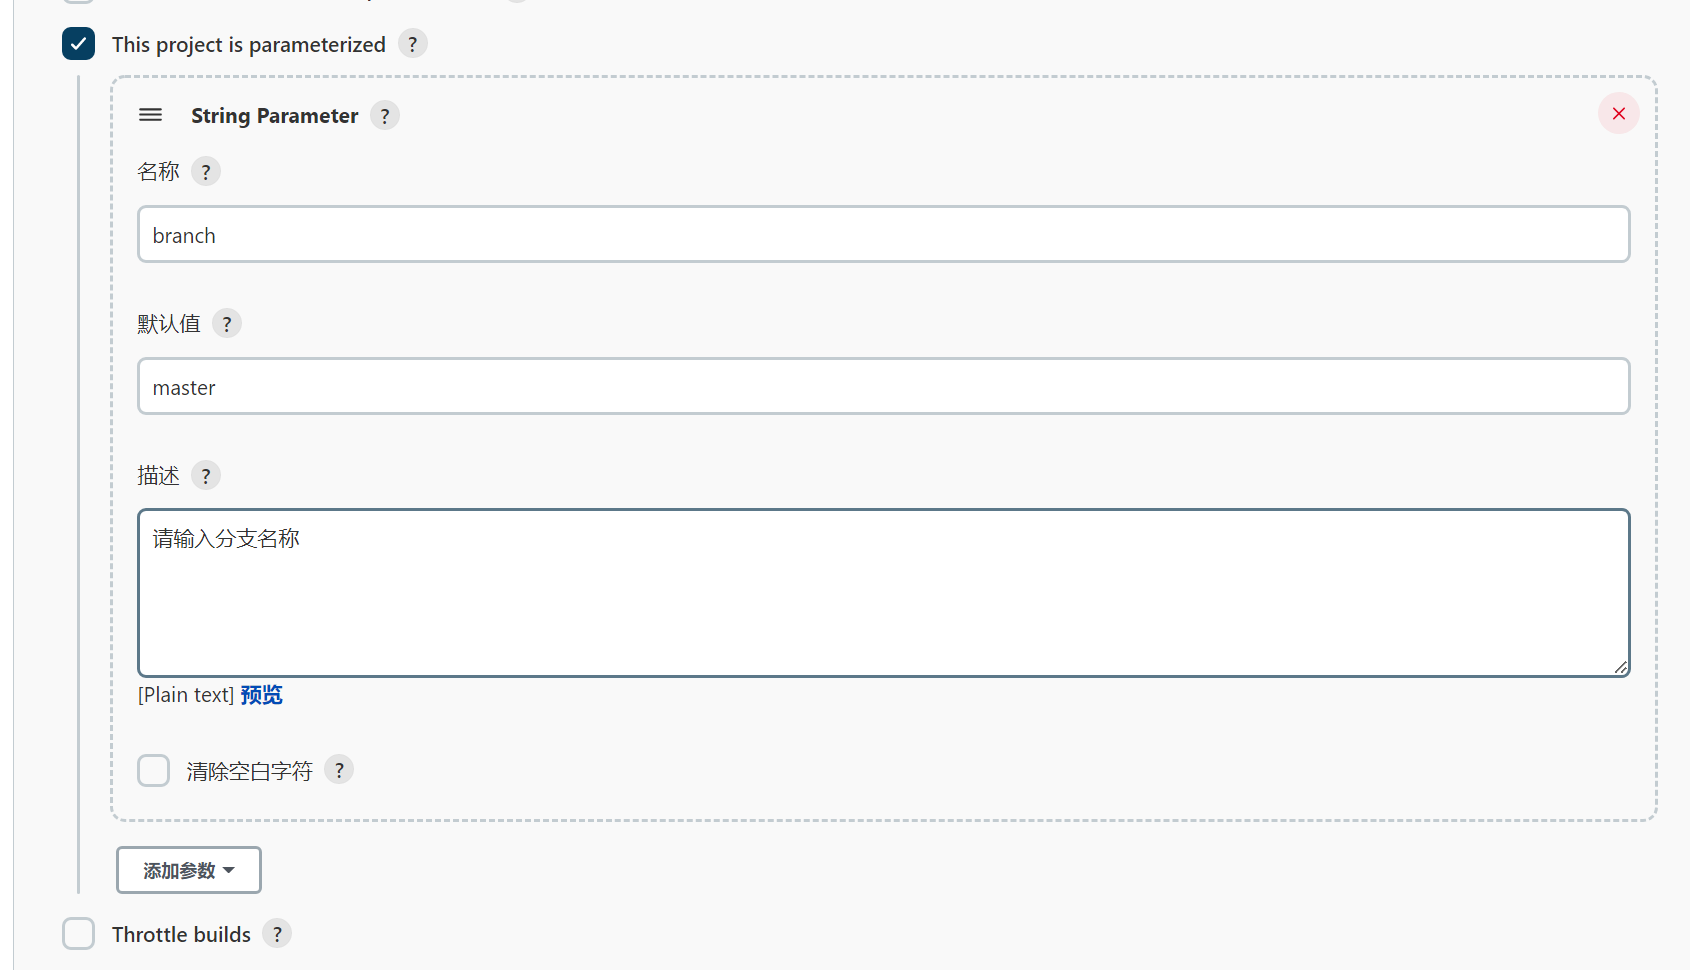
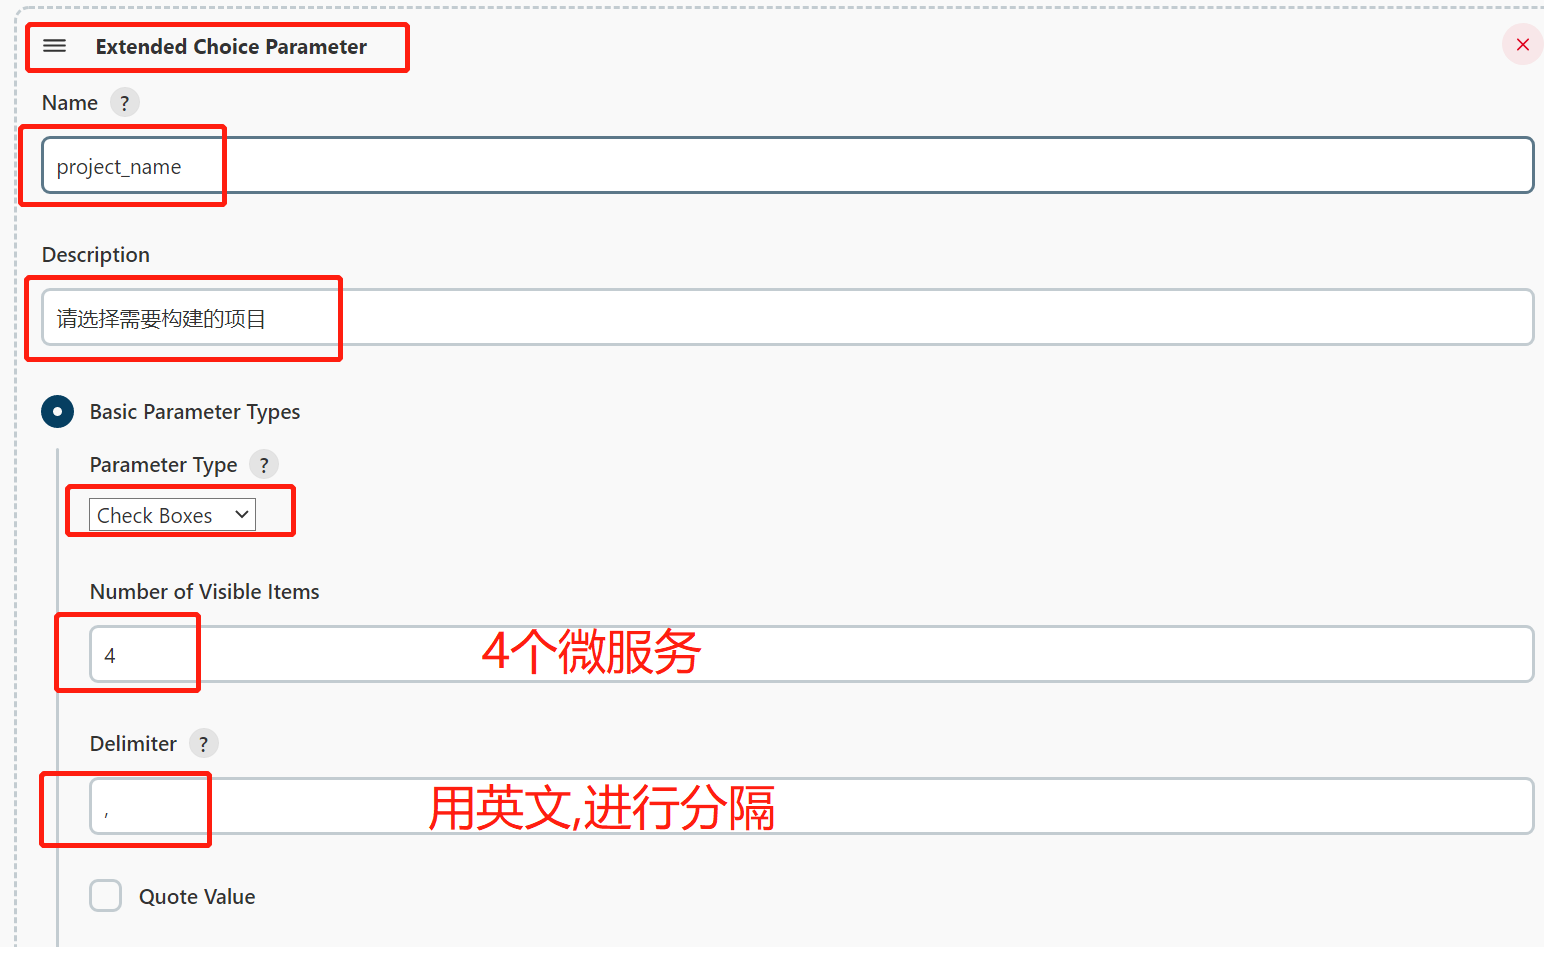
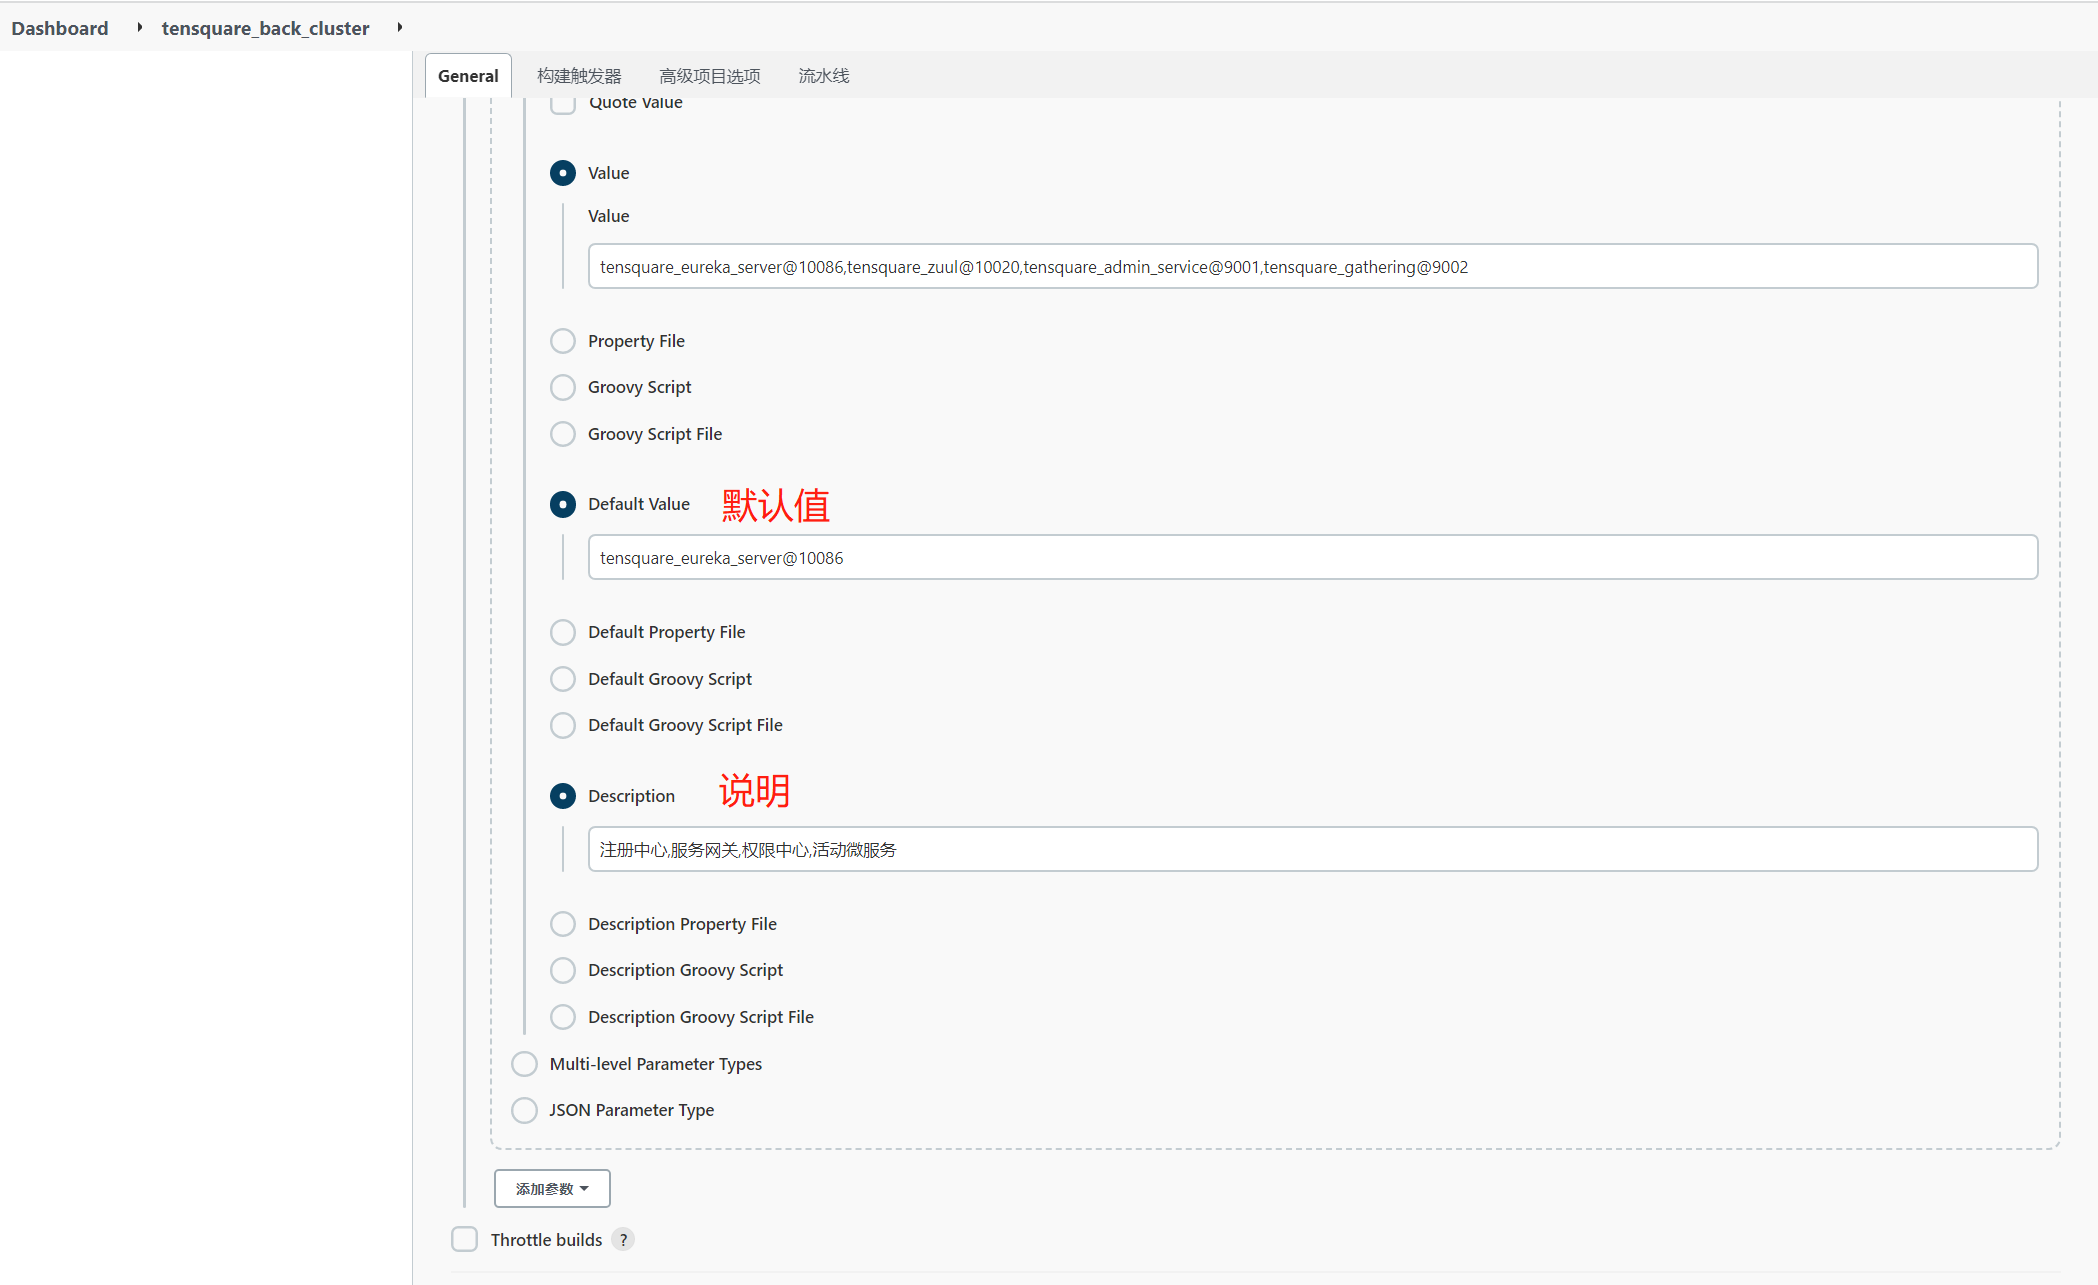
逗号必须得是英文,否则出错
tensquare_eureka_server@10086,tensquare_zuul@10020,tensquare_admin_service@9001,tensquare_gathering@9002
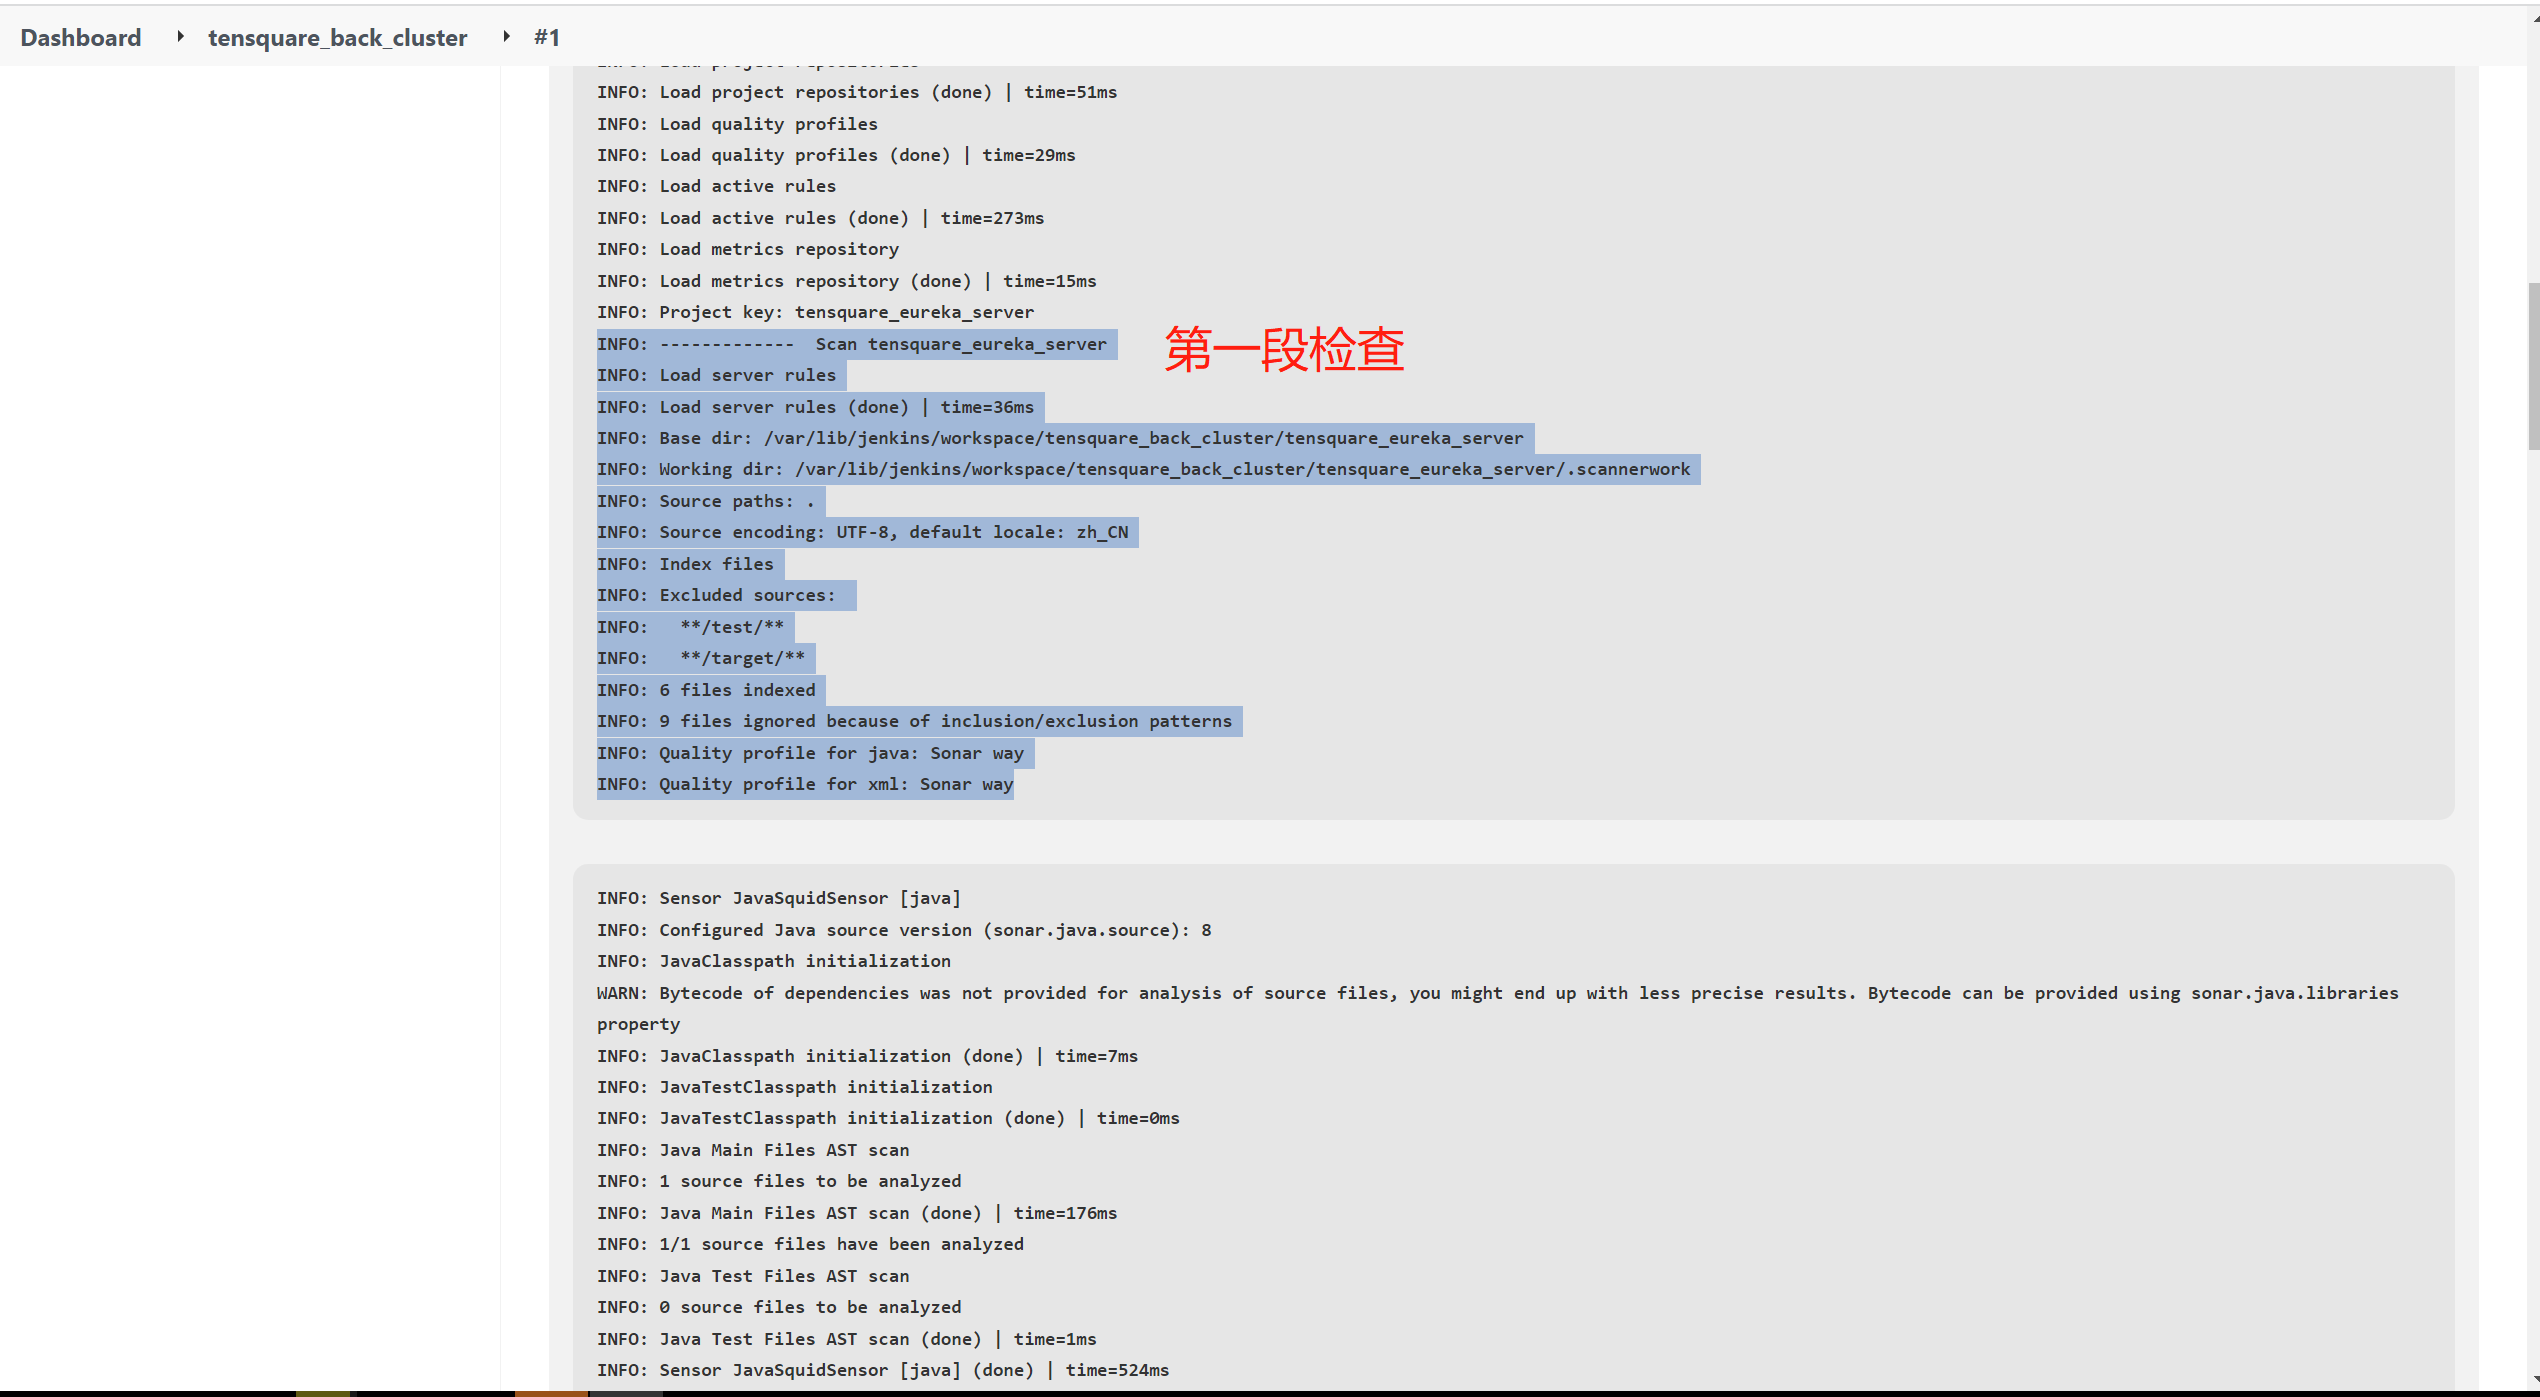
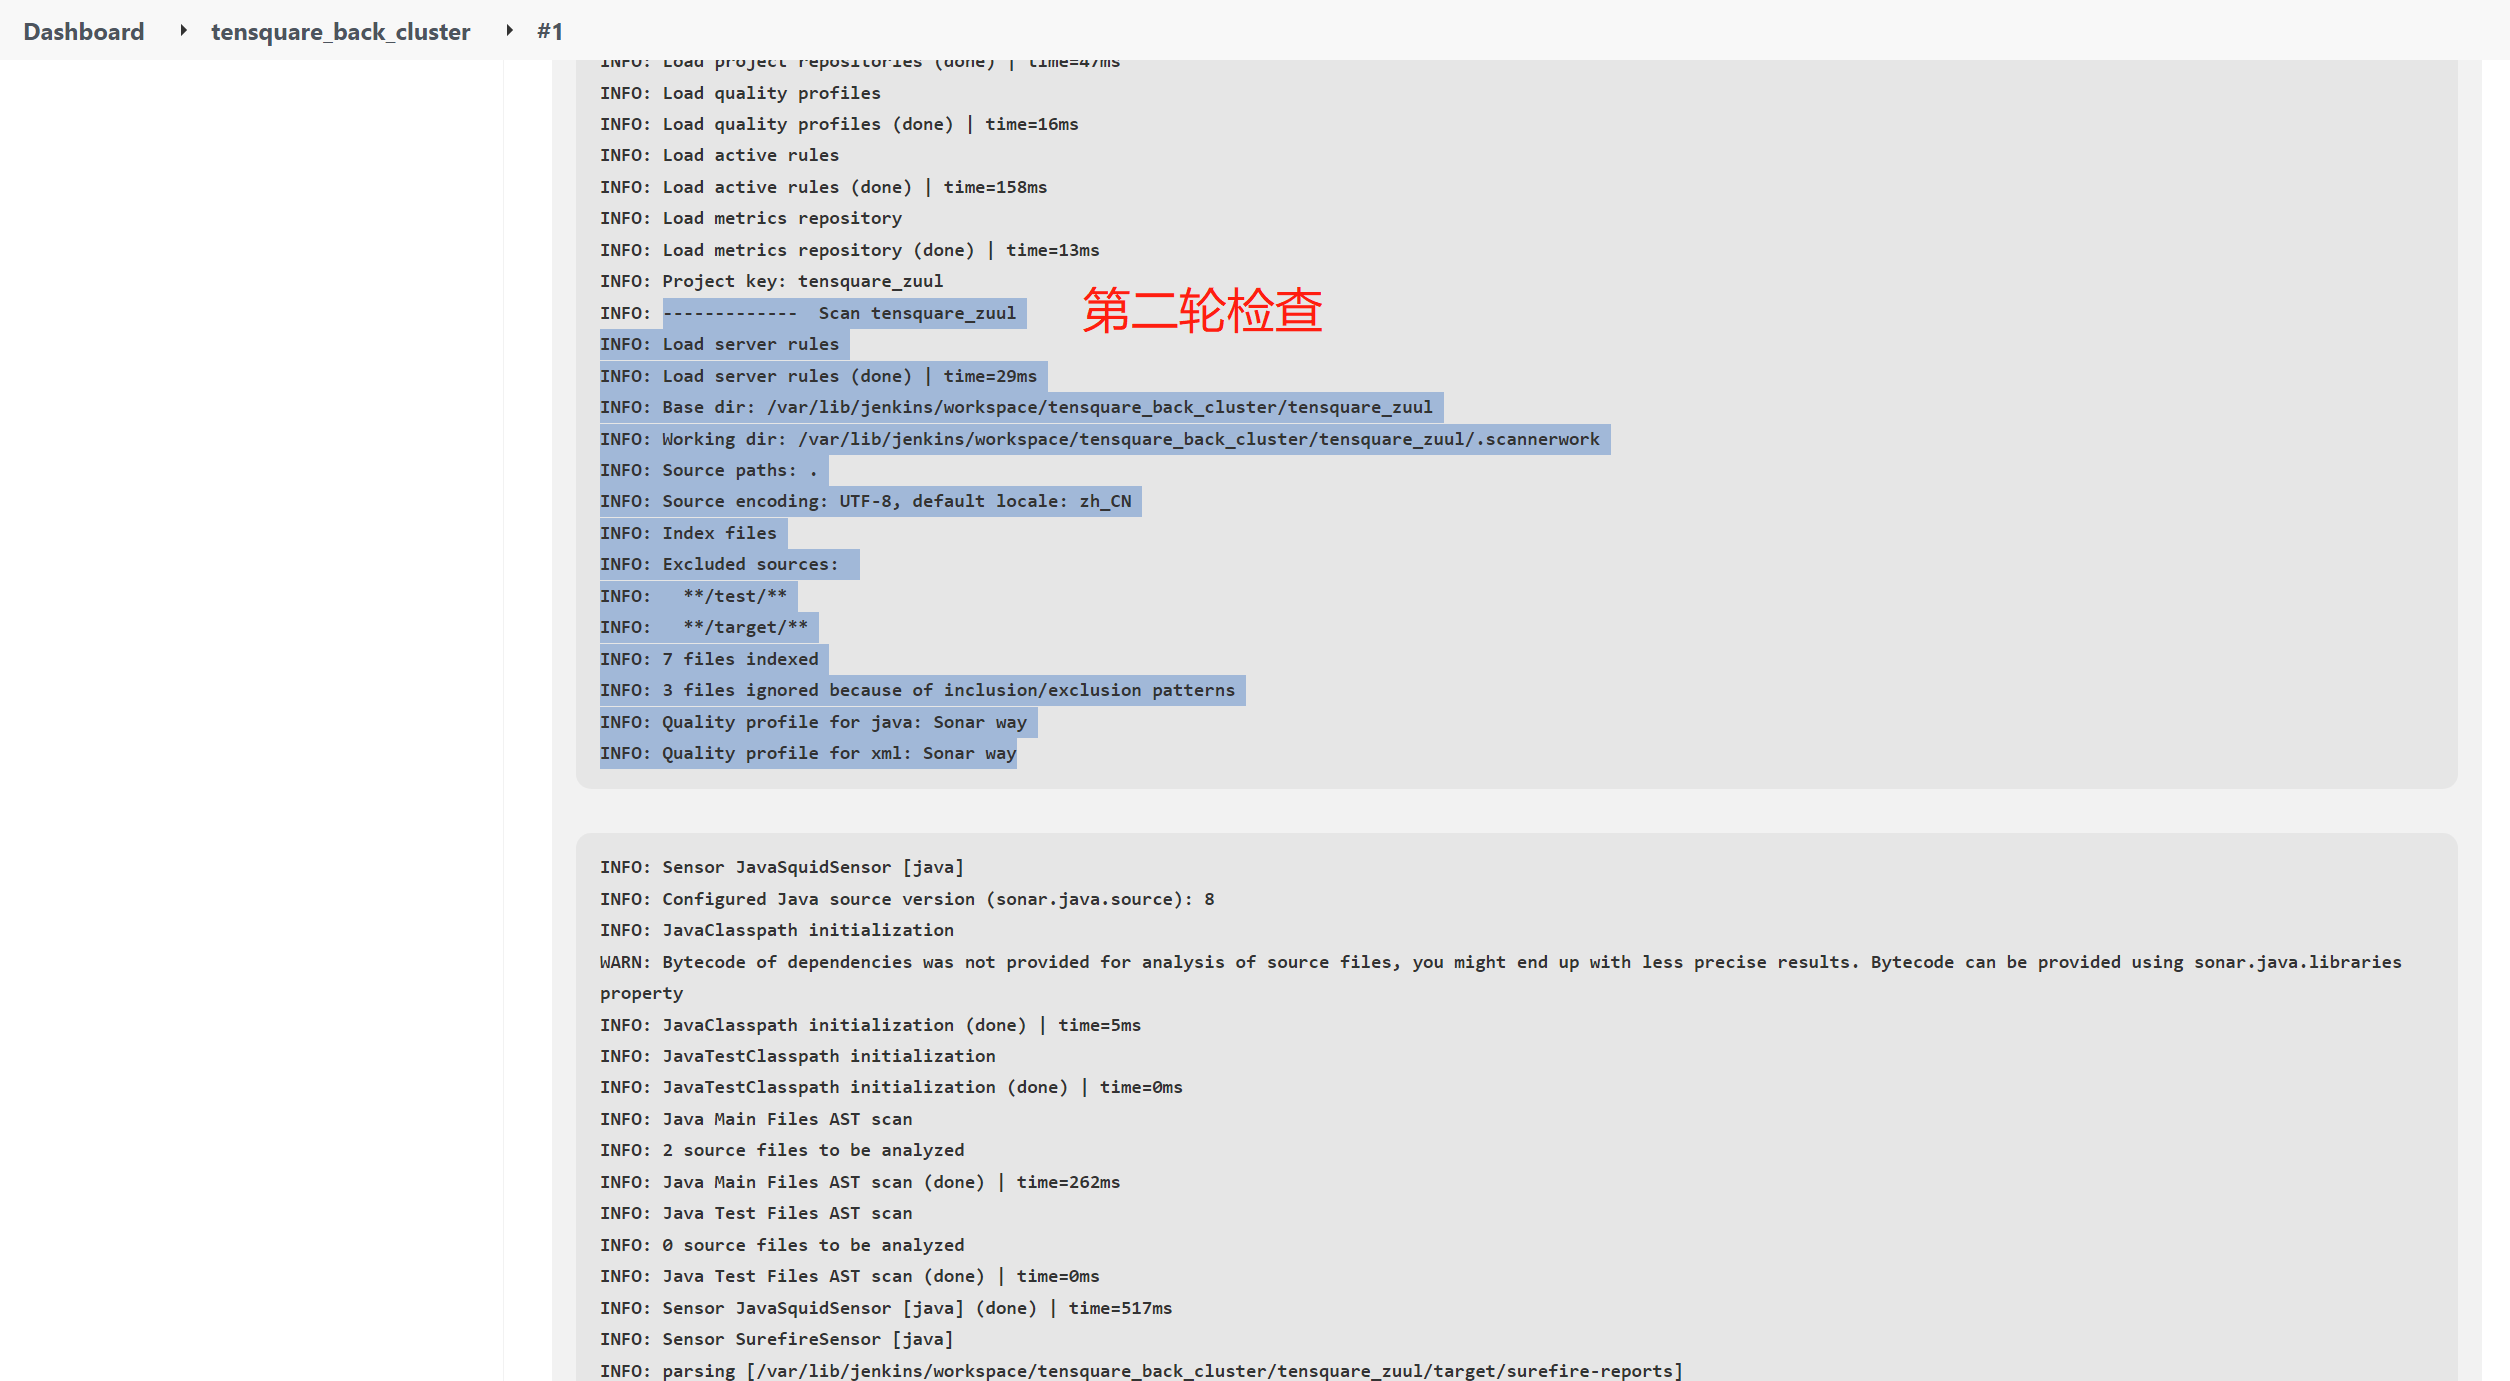
4. 测试代码循环构建
循环测试代码检查
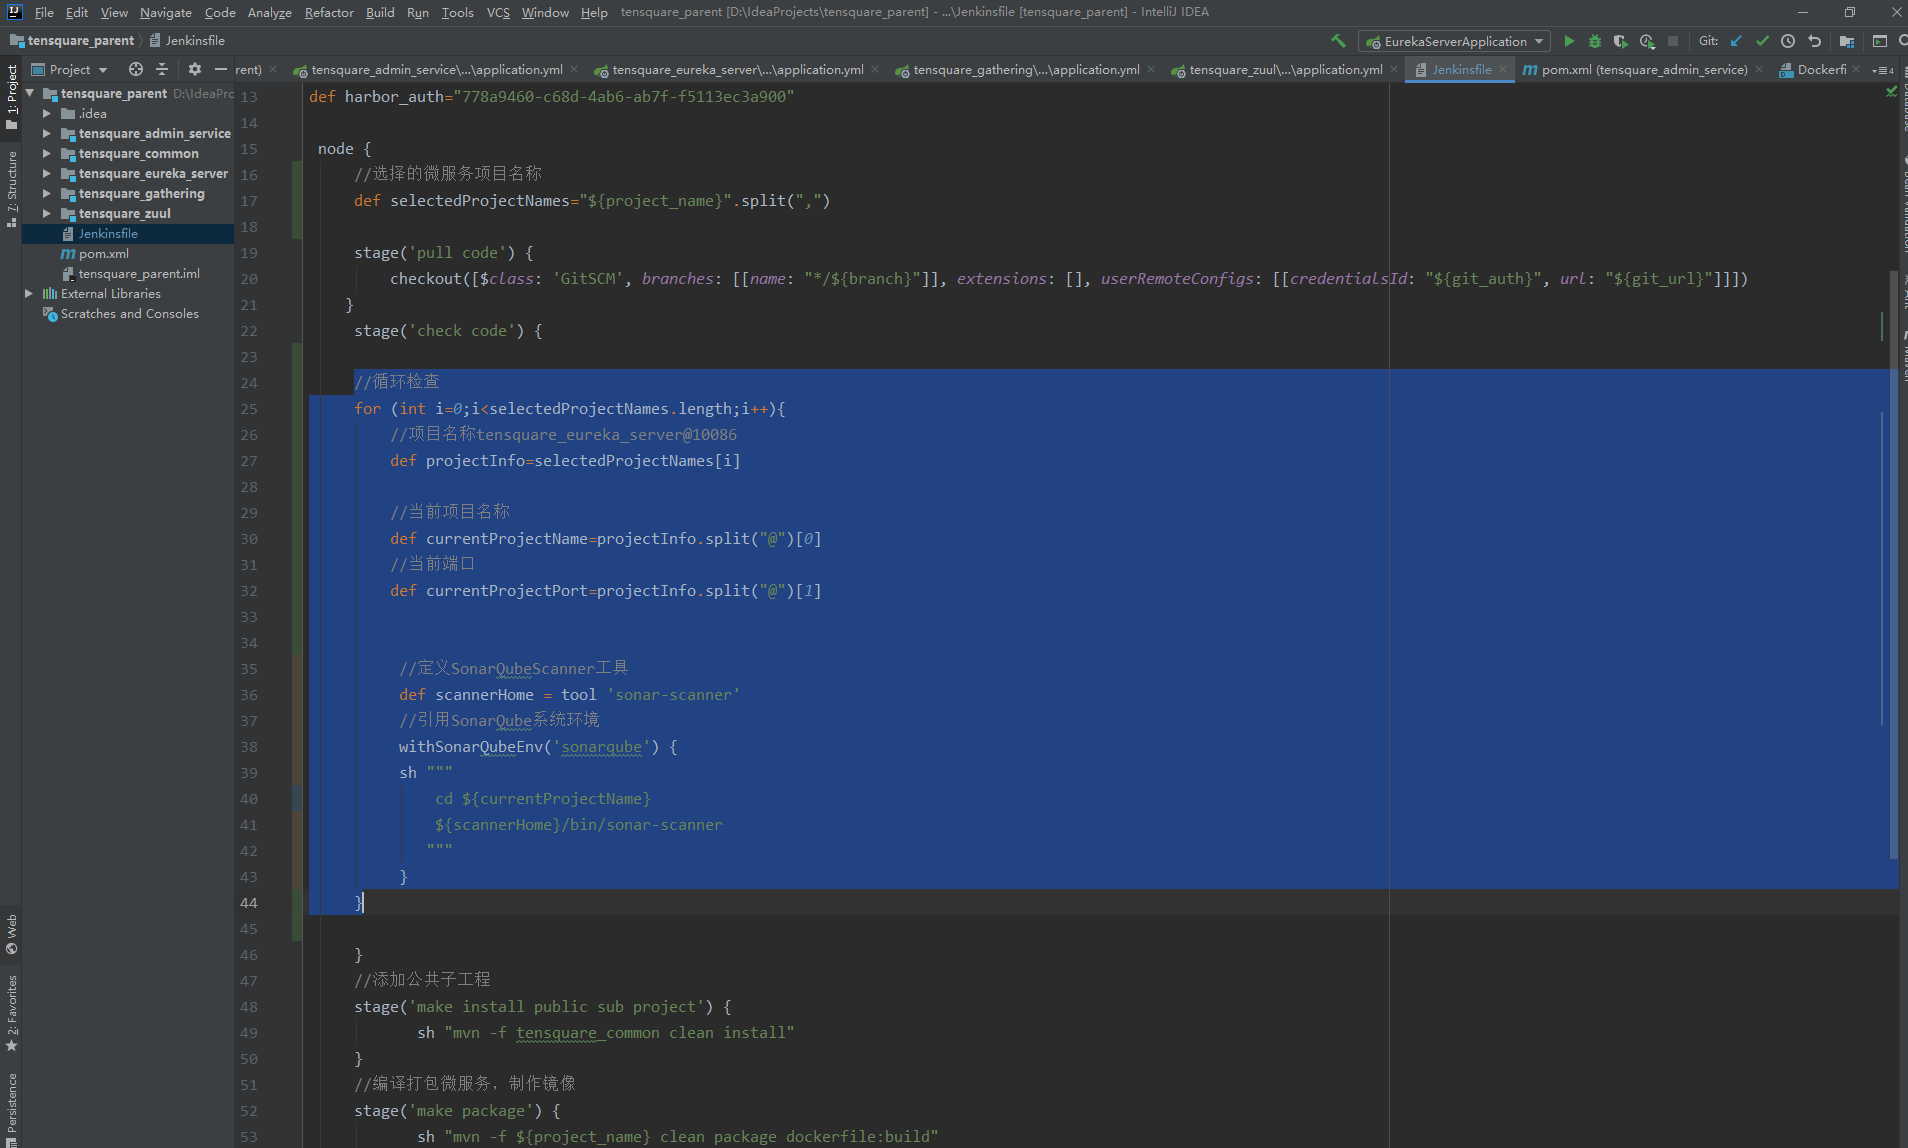
循环打包编译
//添加公共子工程
stage('make install public sub project') {
sh "mvn -f tensquare_common clean install"
}
//编译打包微服务,制作镜像
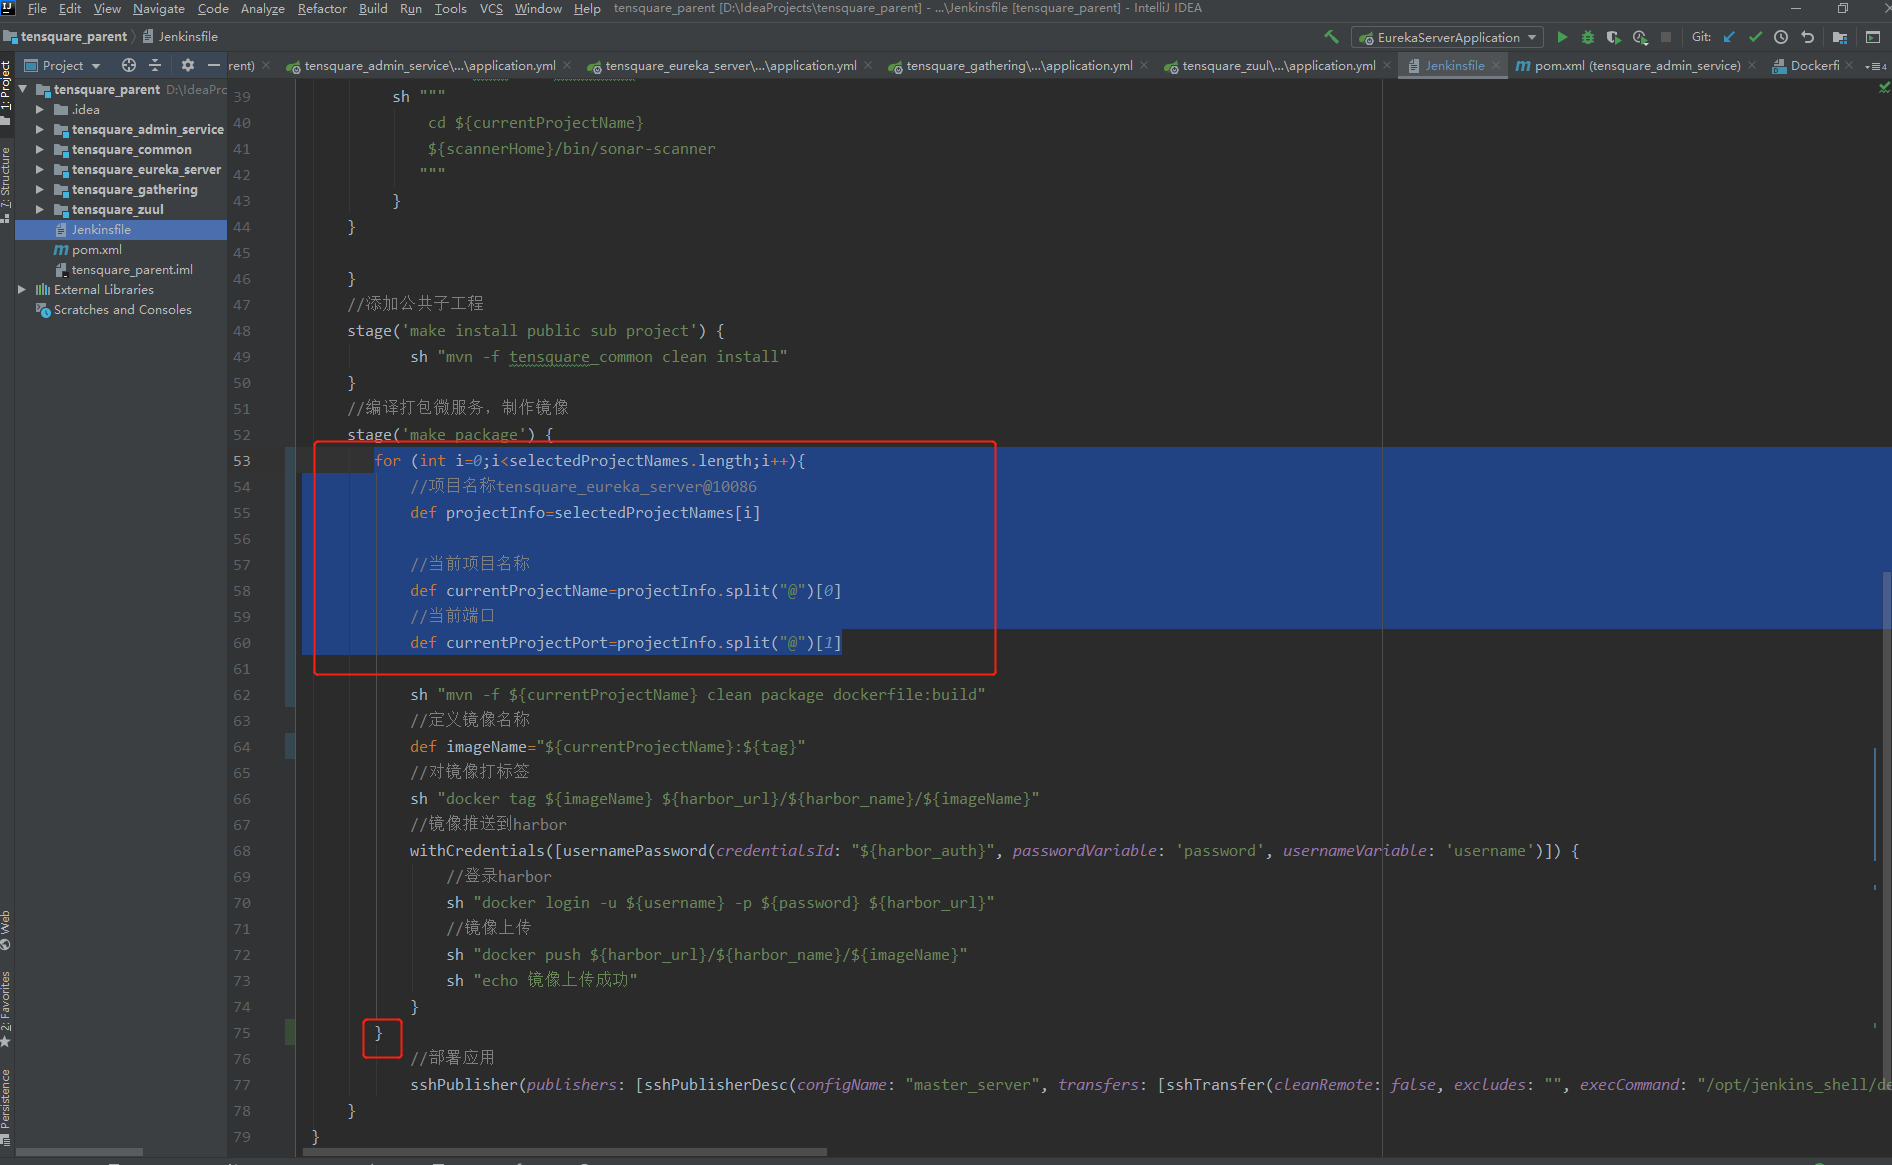
stage('make package') {
for (int i=0;i<selectedProjectNames.length;i++){
//项目名称tensquare_eureka_server@10086
def projectInfo=selectedProjectNames[i]
//当前项目名称
def currentProjectName=projectInfo.split("@")[0]
//当前端口
def currentProjectPort=projectInfo.split("@")[1]
sh "mvn -f ${currentProjectName} clean package dockerfile:build"
//定义镜像名称
def imageName="${currentProjectName}:${tag}"
//对镜像打标签
sh "docker tag ${imageName} ${harbor_url}/${harbor_name}/${imageName}"
//镜像推送到harbor
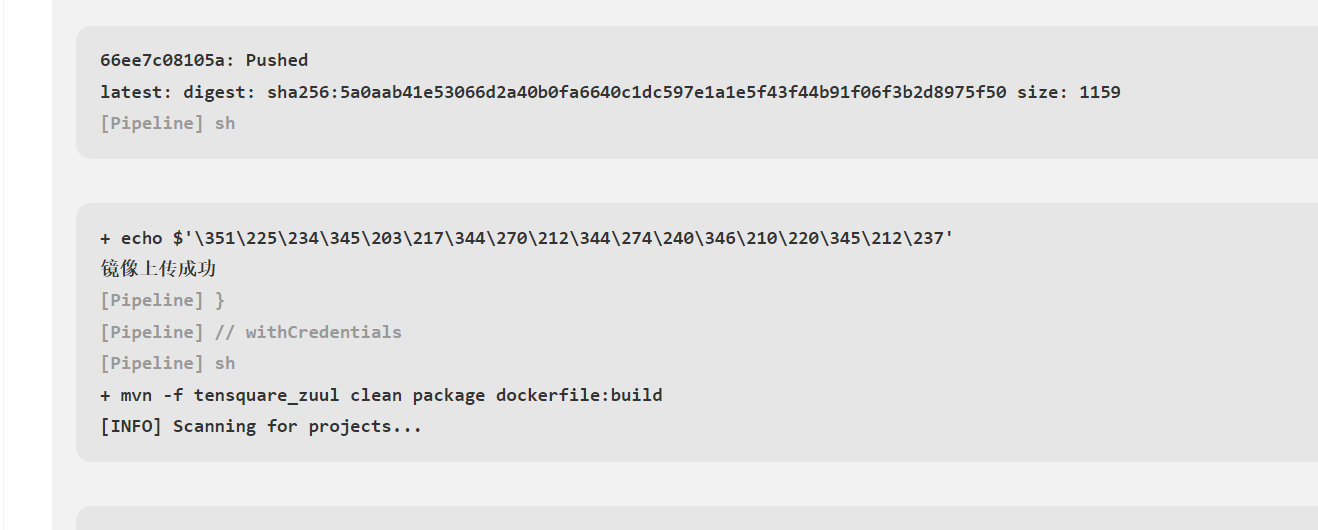
withCredentials([usernamePassword(credentialsId: "${harbor_auth}", passwordVariable: 'password', usernameVariable: 'username')]) {
//登录harbor
sh "docker login -u ${username} -p ${password} ${harbor_url}"
//镜像上传
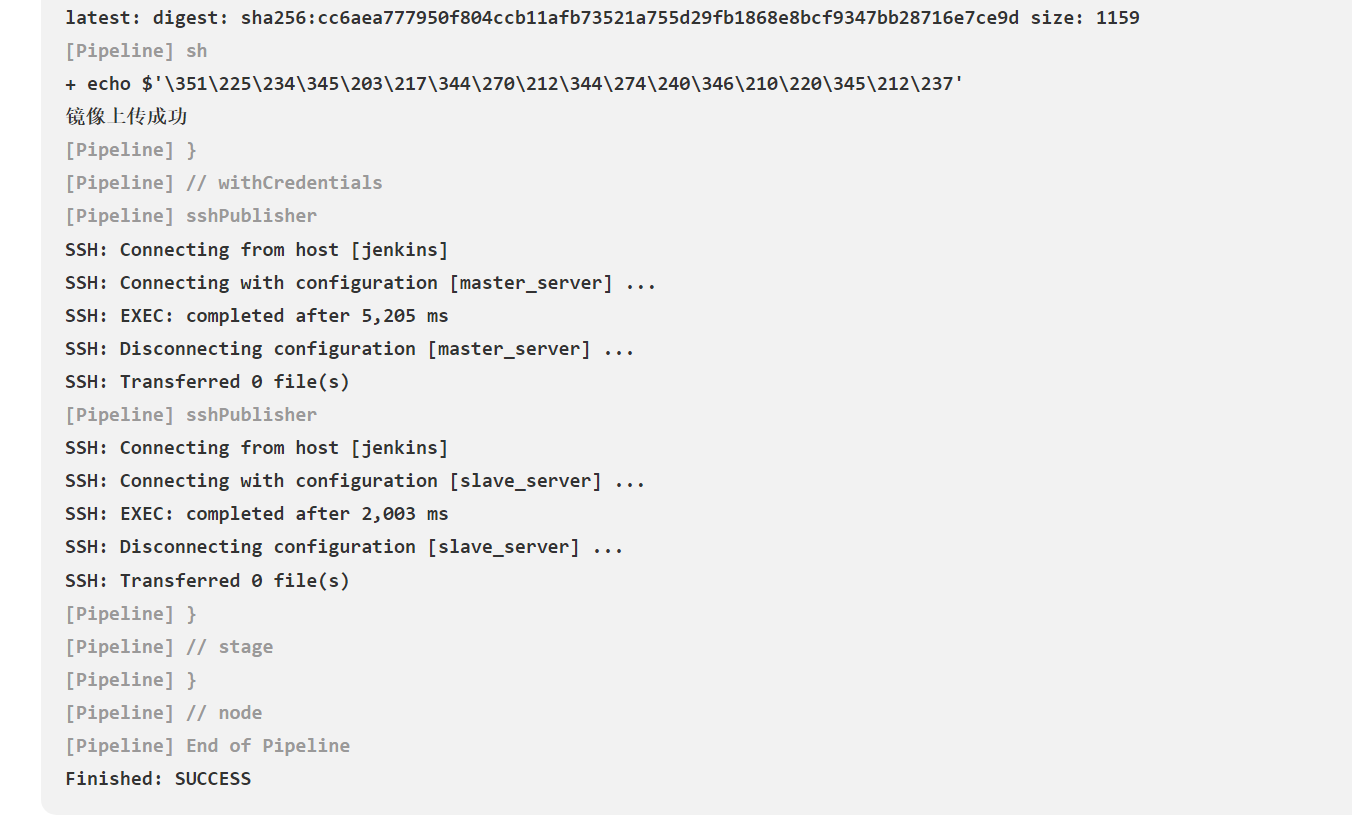
sh "docker push ${harbor_url}/${harbor_name}/${imageName}"
sh "echo 镜像上传成功"
}
}
//部署应用
sshPublisher(publishers: [sshPublisherDesc(configName: "master_server", transfers: [sshTransfer(cleanRemote: false, excludes: "", execCommand: "/opt/jenkins_shell/deploy.sh ${harbor_url} ${harbor_name} ${project_name} ${tag} ${port}", execTimeout: 120000, flatten: false, makeEmptyDirs: false, noDefaultExcludes: false, patternSeparator: "[, ]+", remoteDirectory: "", remoteDirectorySDF: false, removePrefix: "", sourceFiles: "")], usePromotionTimestamp: false, useWorkspaceInPromotion: false, verbose: false)])
}
}

四、完成微服务多服务器远程发布
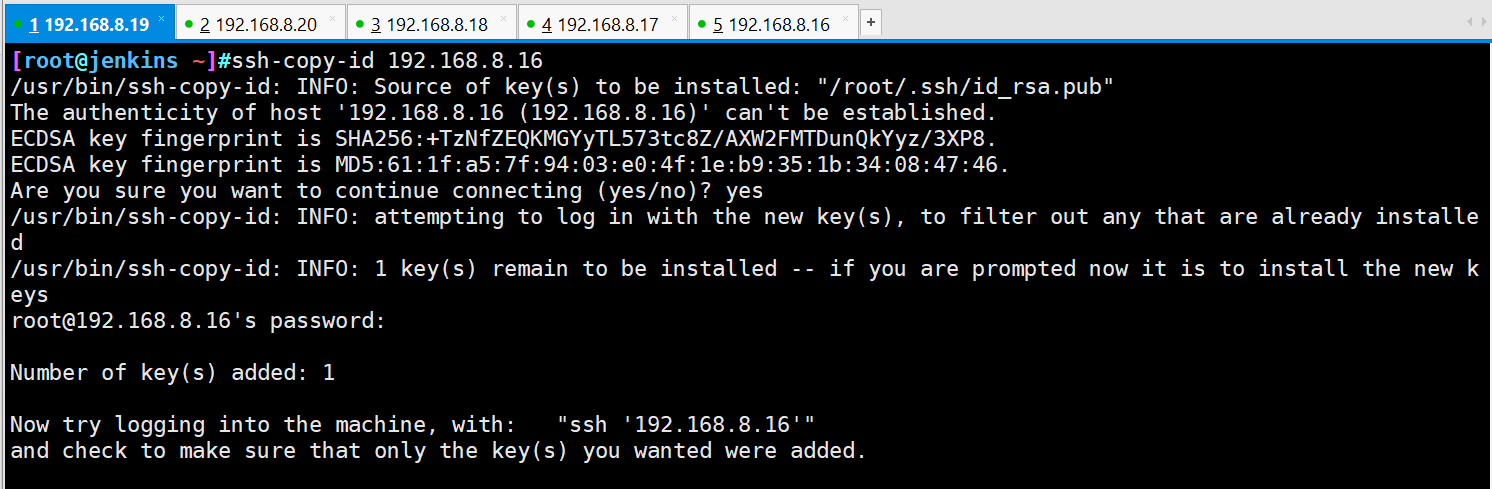
1. 配置远程部署服务器
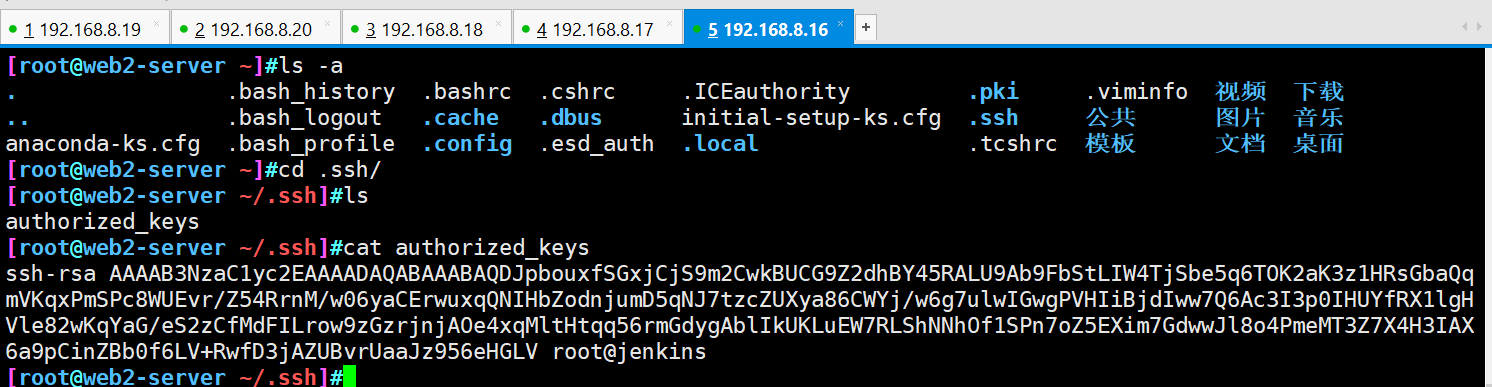
从Jenkins服务器拷贝公钥到docker2远程服务器
ssh-copy-id 192.168.8.16
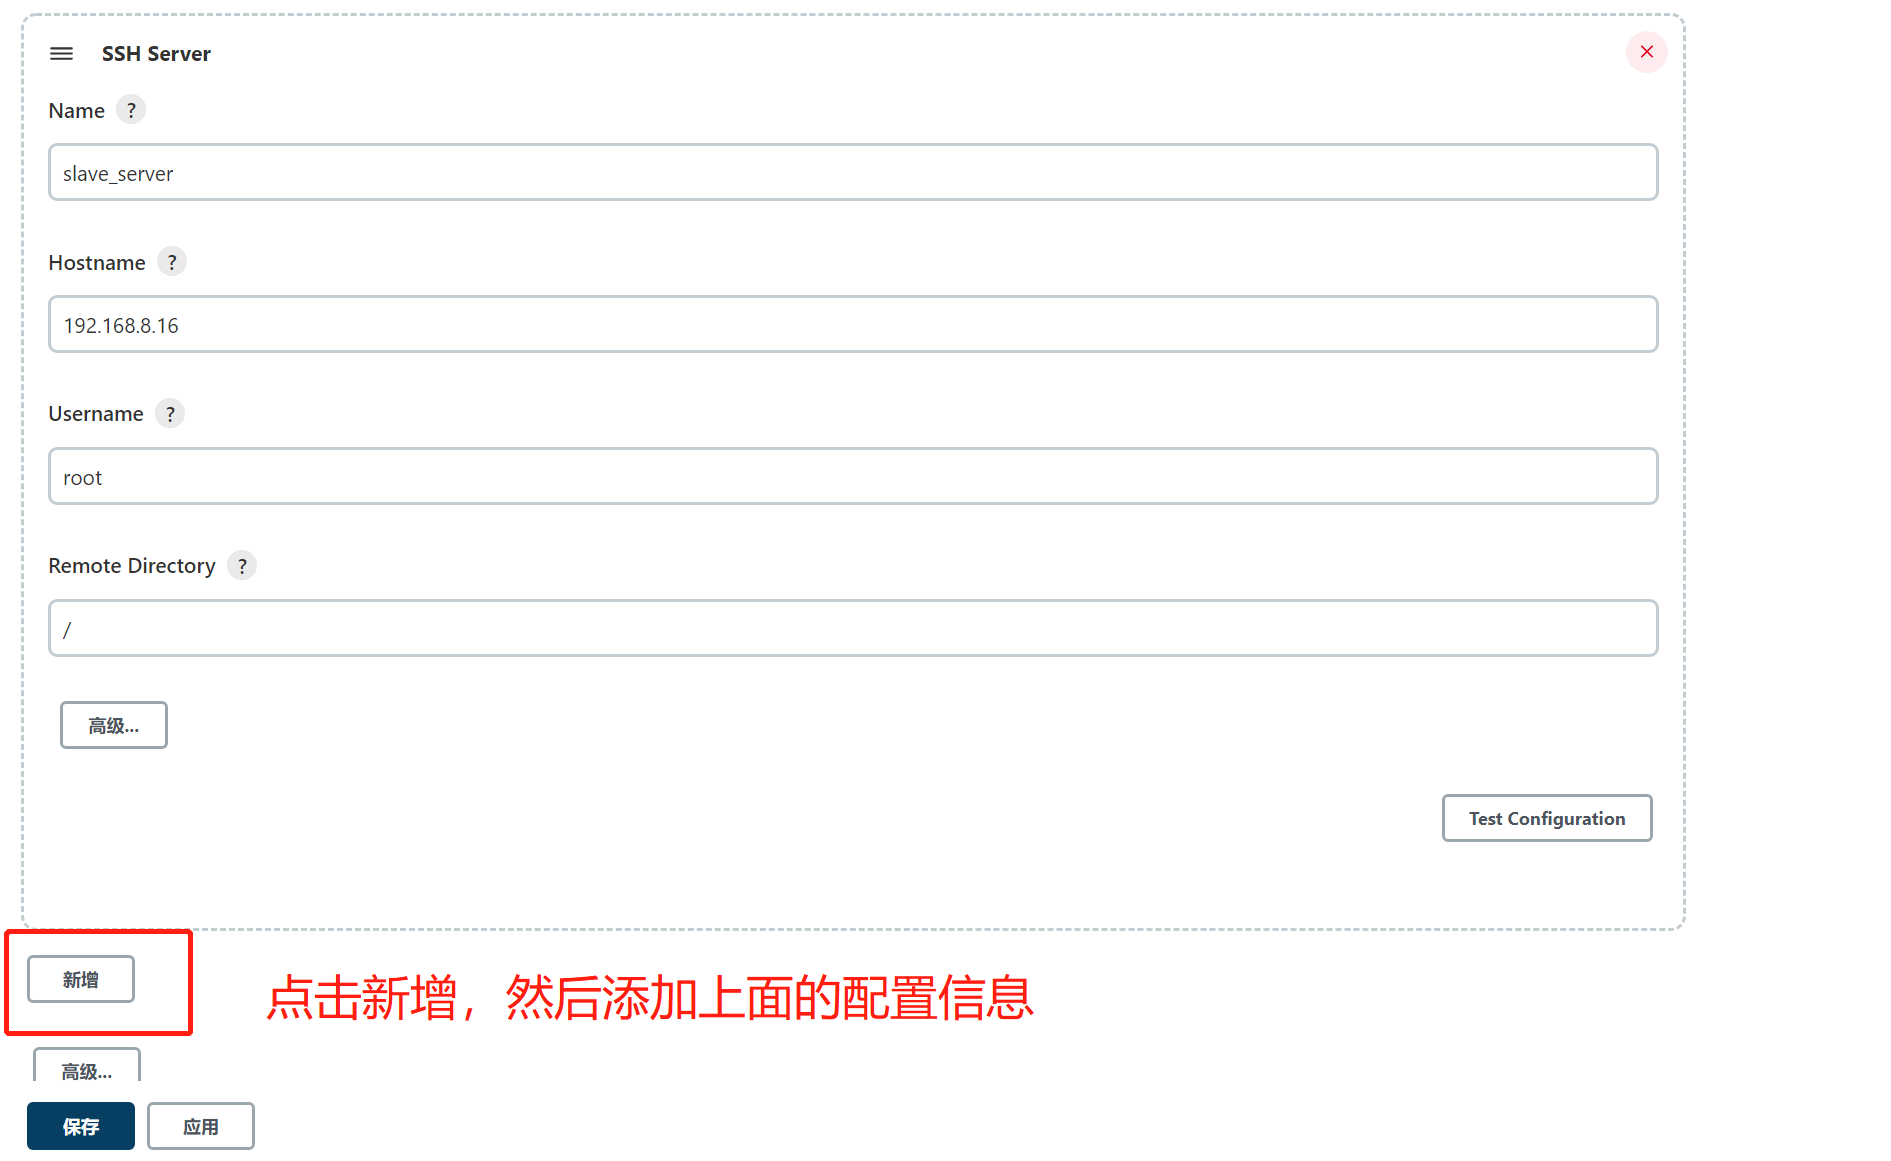
2. Jenkins中添加远程服务器
系统配置中添加远程服务器

3. 修改Docker配置信任Harbor私服地址
vim /etc/docker/daemon.json

{
  "registry-mirrors": ["https://t466r8qg.mirror.aliyuncs.com"],
"insecure-registries": ["192.168.8.20:85"]
}

systemctl restart docker
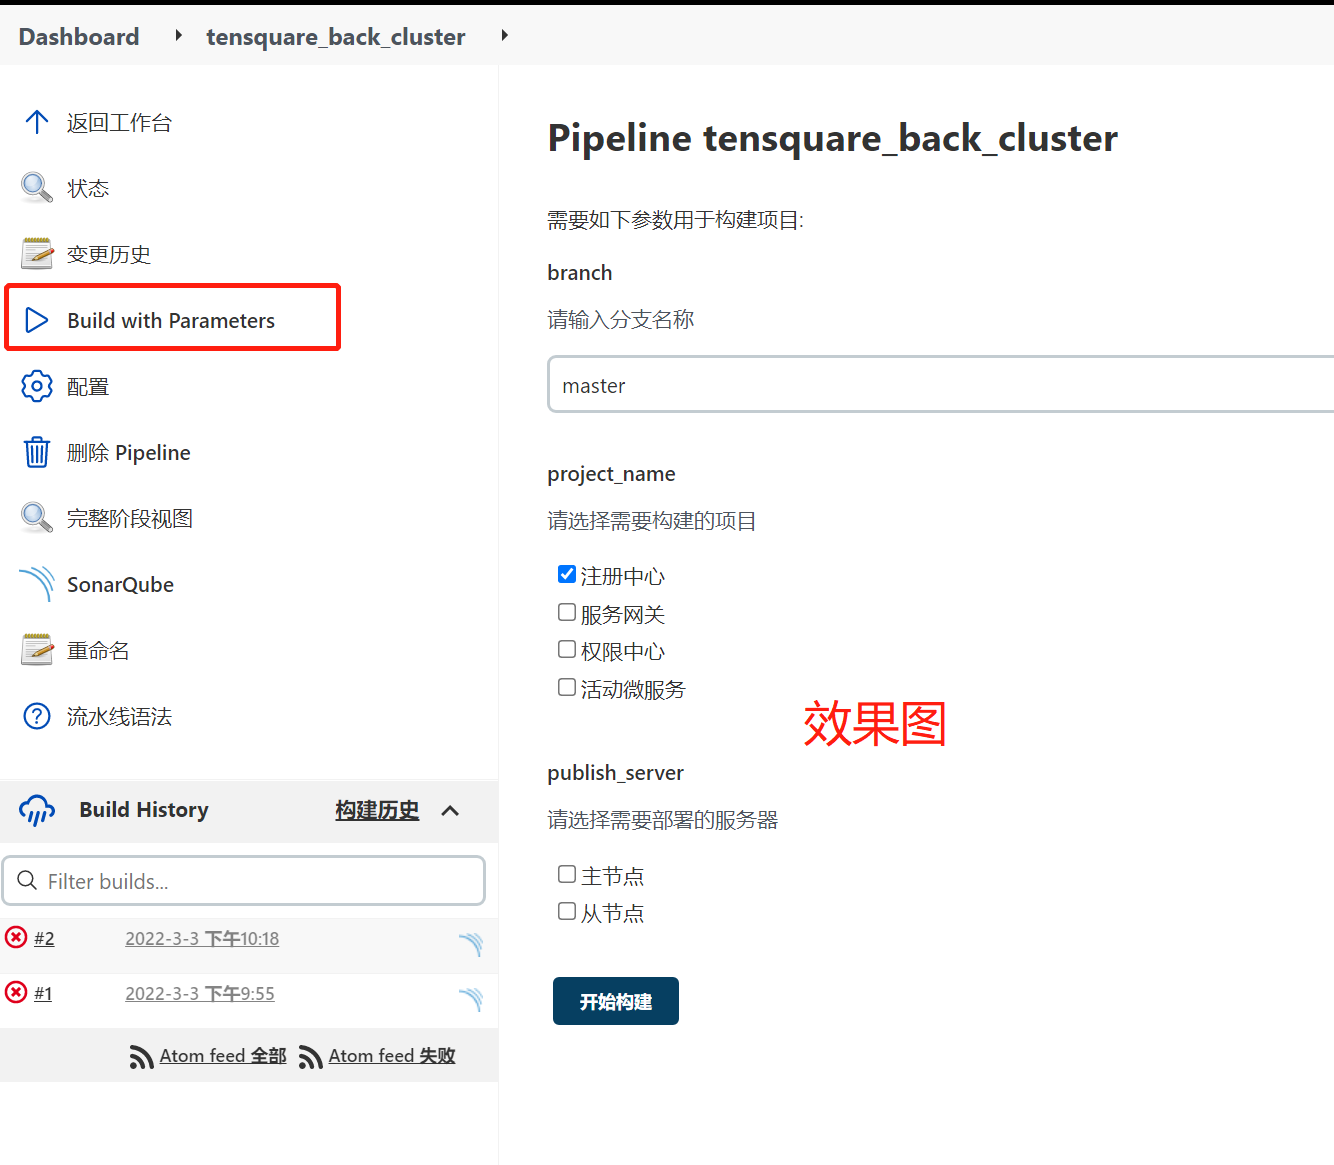
4. 项目配置参数
添加构建参数――》多选框:部署服务器
5. 修改Jenkins?le构建脚本
//定义gitlab的凭证
 def git_auth="03757112-b3bd-4955-93ef-ad84869f39a9"
 //定义gitlab的URL路径
 def git_url="git@192.168.8.18:gl/tensquare_back.git"

//镜像标签
def tag="latest"
//harbor的url地址
def harbor_url="192.168.8.20:85"
//镜像仓库名
def harbor_name="tensquare"
//harbor凭证
def harbor_auth="778a9460-c68d-4ab6-ab7f-f5113ec3a900"

 node {
     //选择的微服务项目名称
     def selectedProjectNames="${project_name}".split(",")
     //获取当前选择服务器
     def selectedServers="${publish_server}".split(",")

     stage('pull code') {
         checkout([$class: 'GitSCM', branches: [[name: "*/${branch}"]], extensions: [], userRemoteConfigs: [[credentialsId: "${git_auth}", url: "${git_url}"]]])
    }
     stage('check code') {

     //循环检查
     for (int i=0;i<selectedProjectNames.length;i++){
         //项目名称tensquare_eureka_server@10086
         def projectInfo=selectedProjectNames[i]

         //当前项目名称
         def currentProjectName=projectInfo.split("@")[0]
         //当前端口
         def currentProjectPort=projectInfo.split("@")[1]


          //定义SonarQubeScanner工具
          def scannerHome = tool 'sonar-scanner'
          //引用SonarQube系统环境
          withSonarQubeEnv('sonarqube') {
          sh """
              cd ${currentProjectName}
              ${scannerHome}/bin/sonar-scanner
             """
          }
     }

     }
     //添加公共子工程
     stage('make install public sub project') {
            sh "mvn -f tensquare_common clean install"
     }
     //编译打包微服务,制作镜像
     stage('make package') {
        for (int i=0;i<selectedProjectNames.length;i++){
            //项目名称tensquare_eureka_server@10086
            def projectInfo=selectedProjectNames[i]

            //当前项目名称
            def currentProjectName=projectInfo.split("@")[0]
            //当前端口
            def currentProjectPort=projectInfo.split("@")[1]

            sh "mvn -f ${currentProjectName} clean package dockerfile:build"
            //定义镜像名称
            def imageName="${currentProjectName}:${tag}"
            //对镜像打标签
            sh "docker tag ${imageName} ${harbor_url}/${harbor_name}/${imageName}"
            //镜像推送到harbor
            withCredentials([usernamePassword(credentialsId: "${harbor_auth}", passwordVariable: 'password', usernameVariable: 'username')]) {
                //登录harbor
                sh "docker login -u ${username} -p ${password} ${harbor_url}"
                //镜像上传
                sh "docker push ${harbor_url}/${harbor_name}/${imageName}"
                sh "echo 镜像上传成功"
            }
            //遍历所有服务器,分别部署
            for (int j=0;j<selectedServers.length;j++){
                //获取当前服务器名称
                def currentServerName=selectedServers[j]
                //调用不同服务器模块内容--spring.profiles.active=eureka-server1/eureka-server2
                def activeProfile="--spring.profiles.active="

                //根据不同的服务器名称调用不同的服务器配置信息
                if (currentServerName=="master_server"){
                    activeProfile=activeProfile+"eureka-server1"
                }else if (currentServerName=="slave_server"){
                    activeProfile=activeProfile+"eureka-server2"
                }
            //部署应用
                sshPublisher(publishers: [sshPublisherDesc(configName: "${currentServerName}", transfers: [sshTransfer(cleanRemote: false, excludes: '', execCommand: "/opt/jenkins_shell/deployCluster.sh ${harbor_url} ${harbor_name} ${currentProjectName} ${tag} ${currentProjectPort} ${activeProfile}", execTimeout: 120000, flatten: false, makeEmptyDirs: false, noDefaultExcludes: false, patternSeparator: '[, ]+', remoteDirectory: '', remoteDirectorySDF: false, removePrefix: '', sourceFiles: '')], usePromotionTimestamp: false, useWorkspaceInPromotion: false, verbose: false)])
            }
        }
    }
}
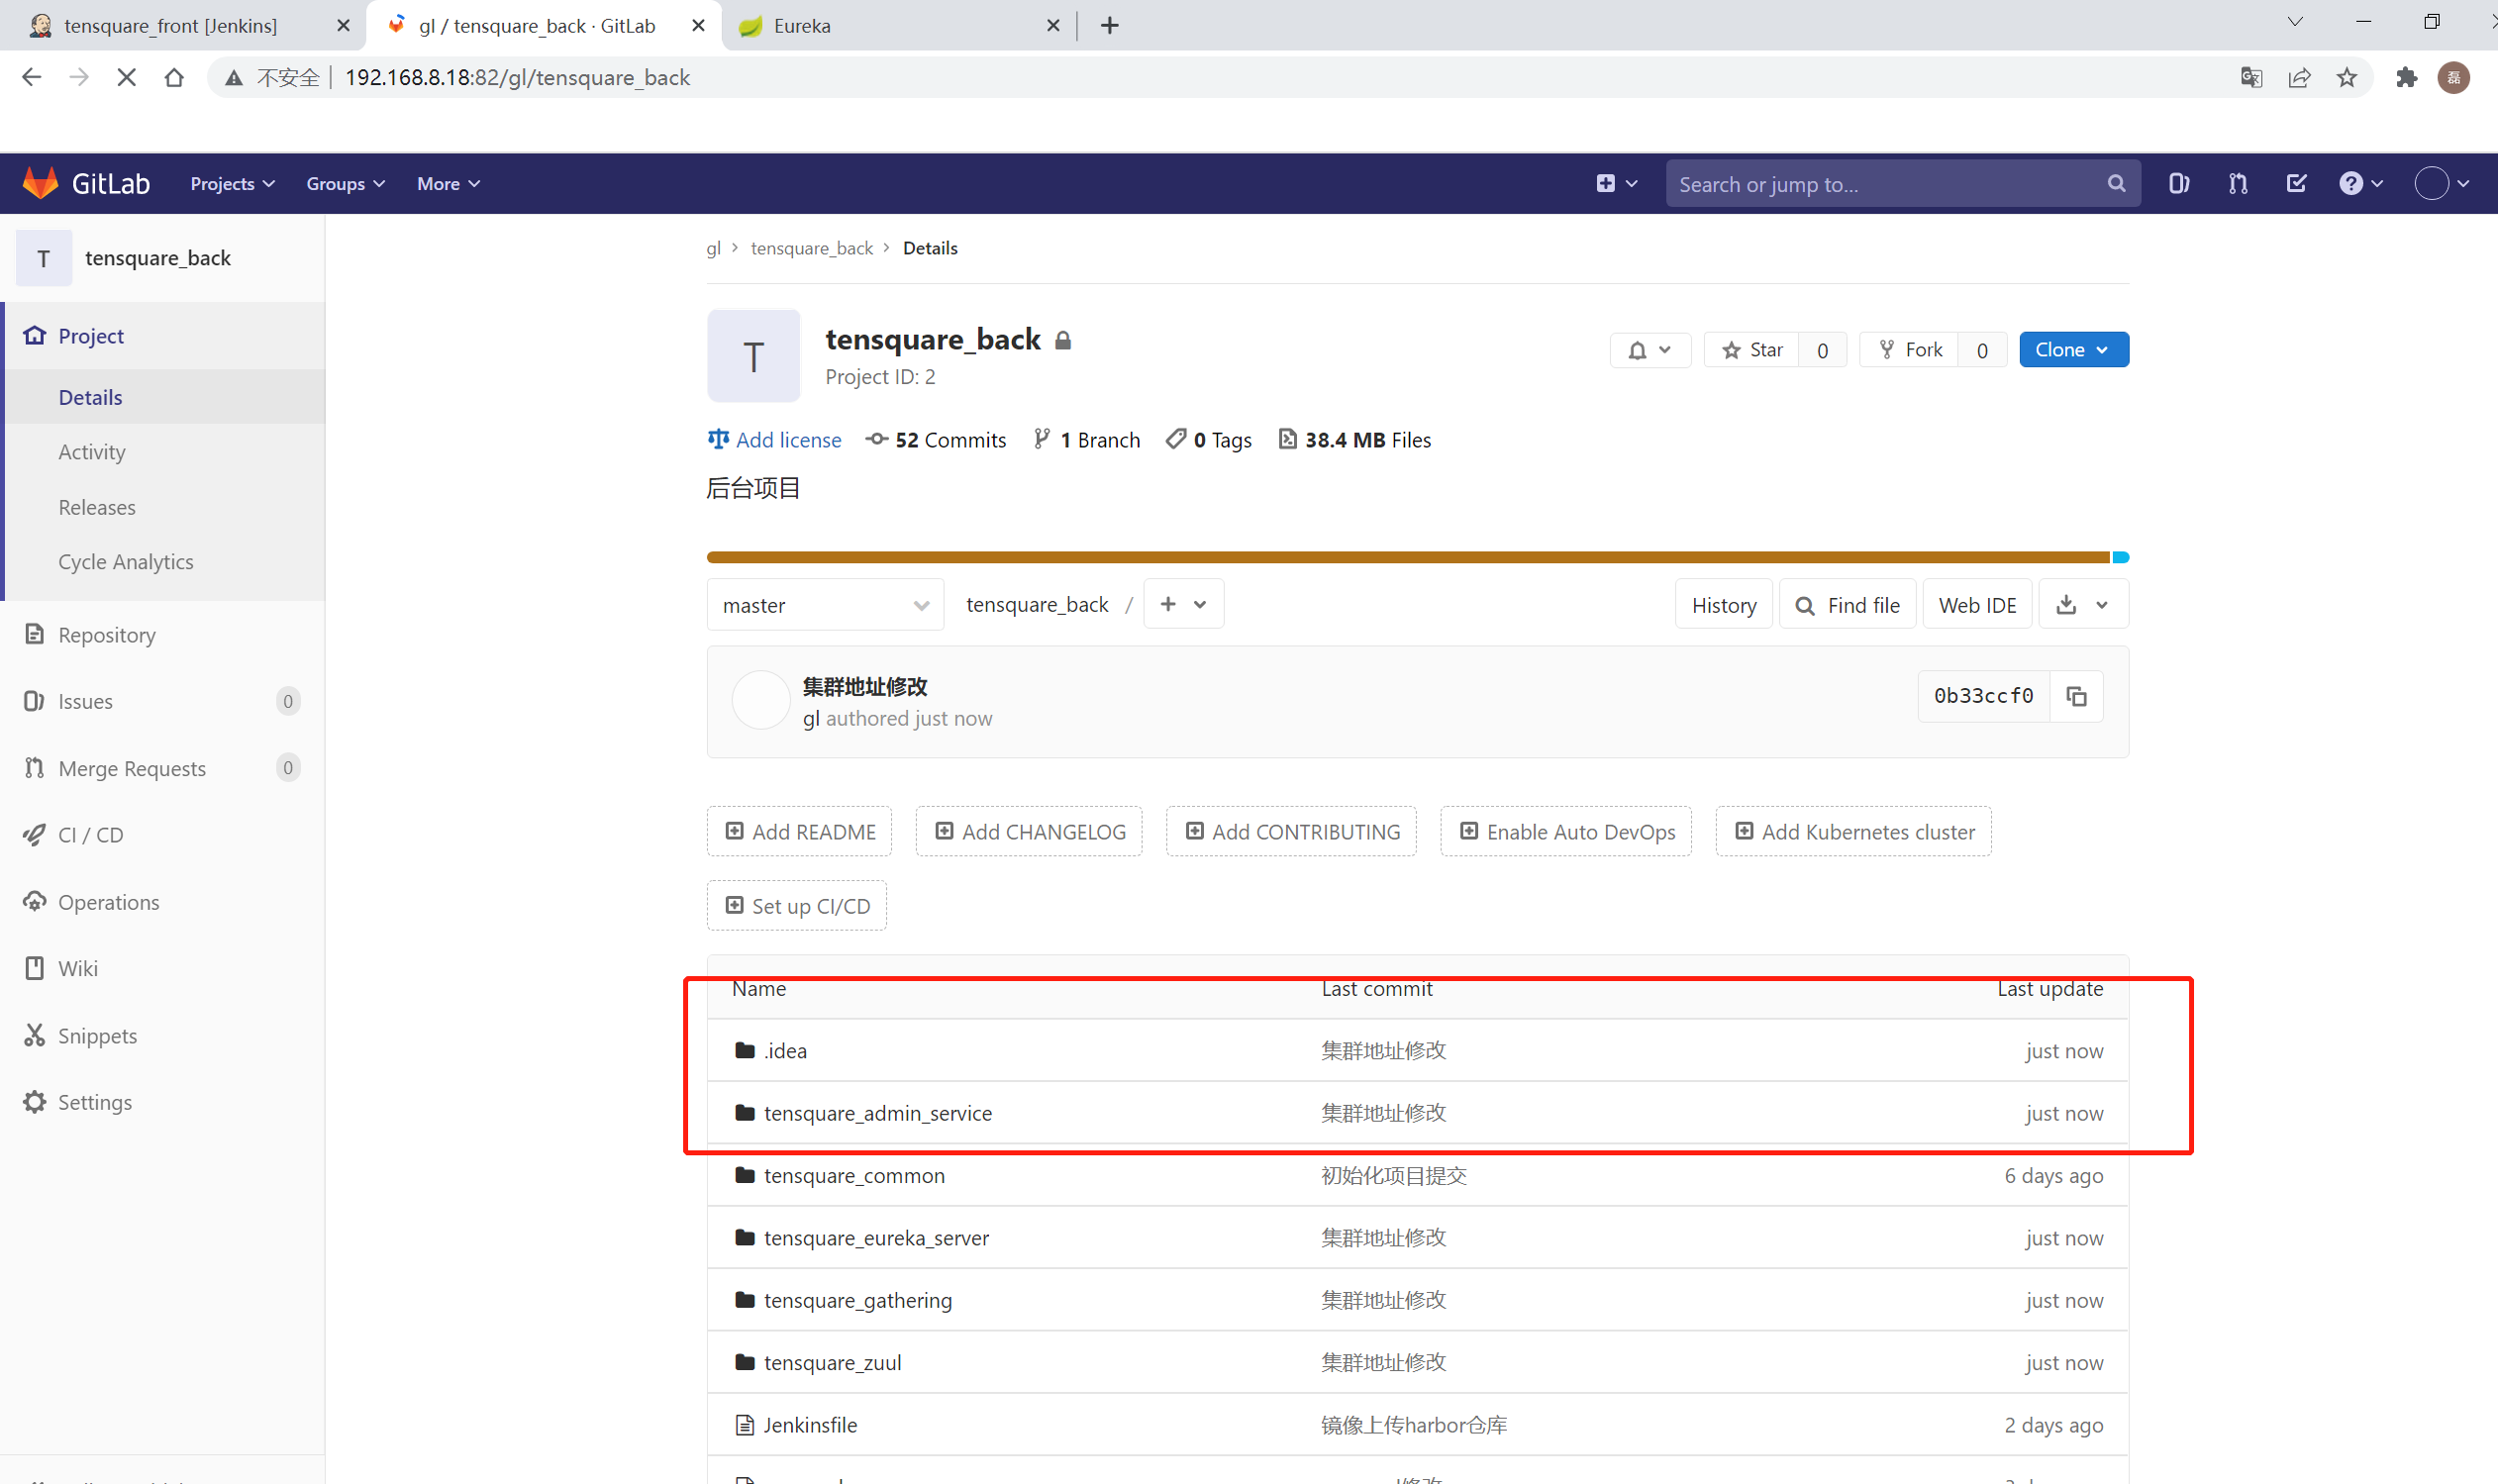
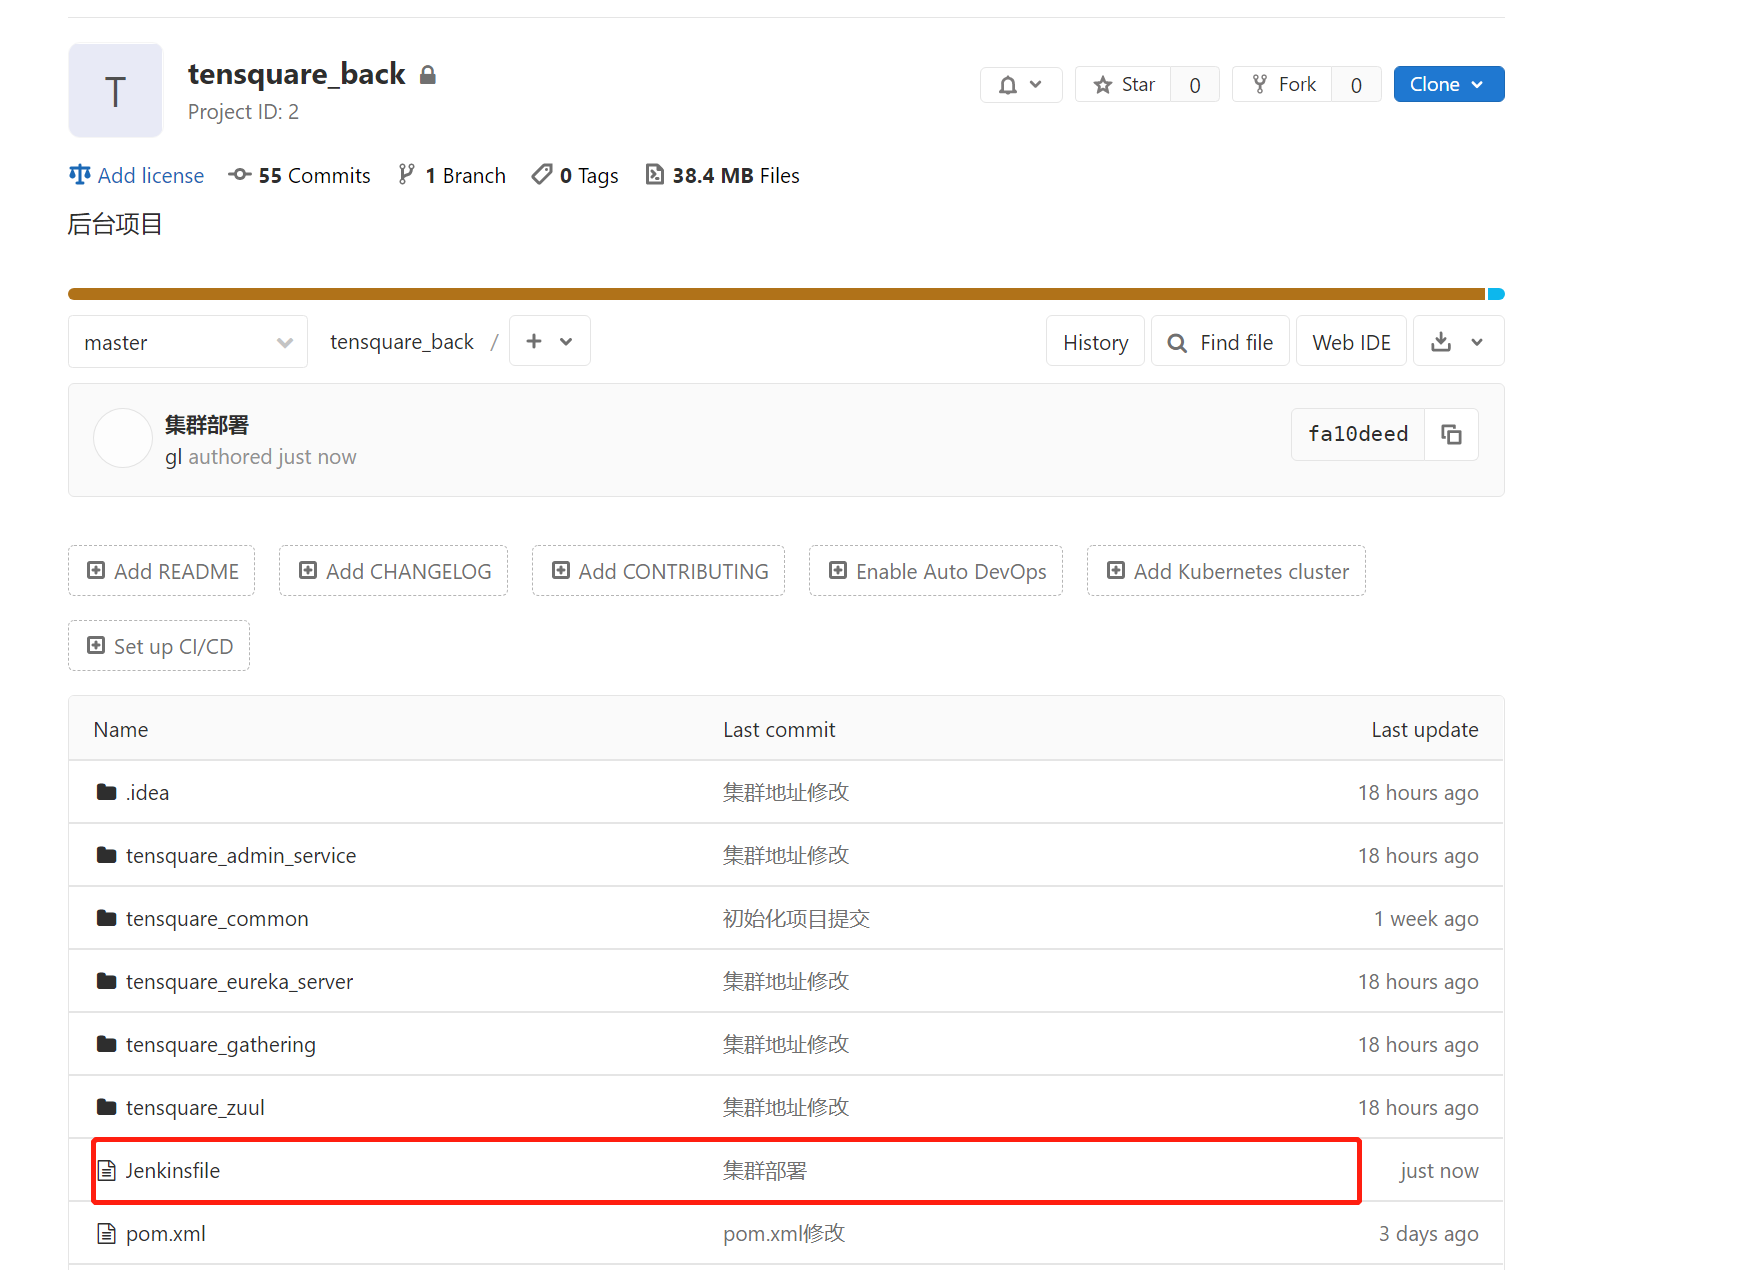
推送上传gitlab
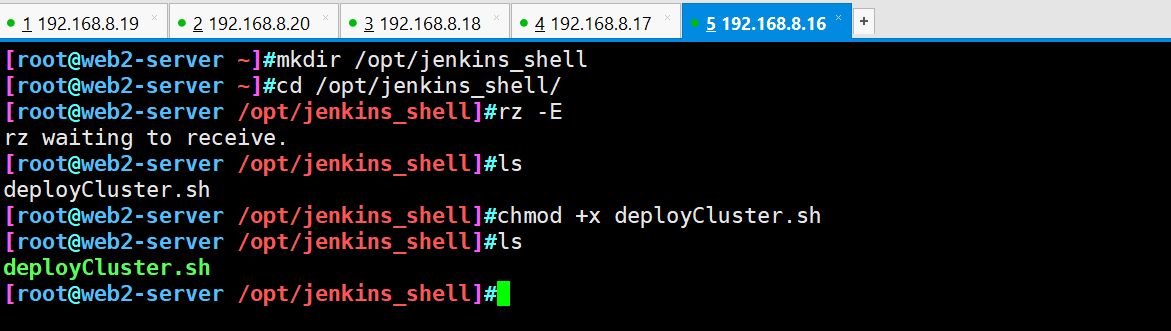
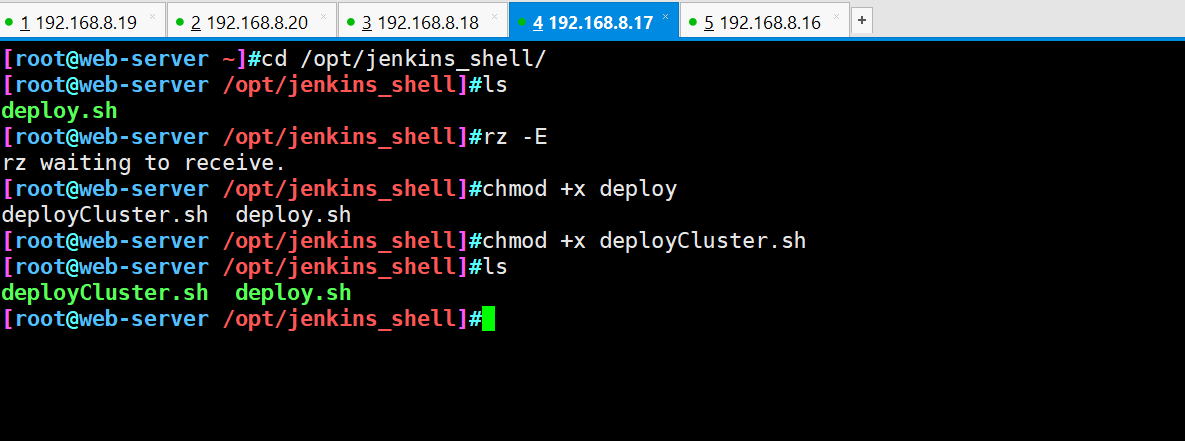
6. 编写部署脚本
编写deployCluster.sh部署脚本,放到两台生产服务器中路径:
/opt/jenkins_shell/deployCluster.sh
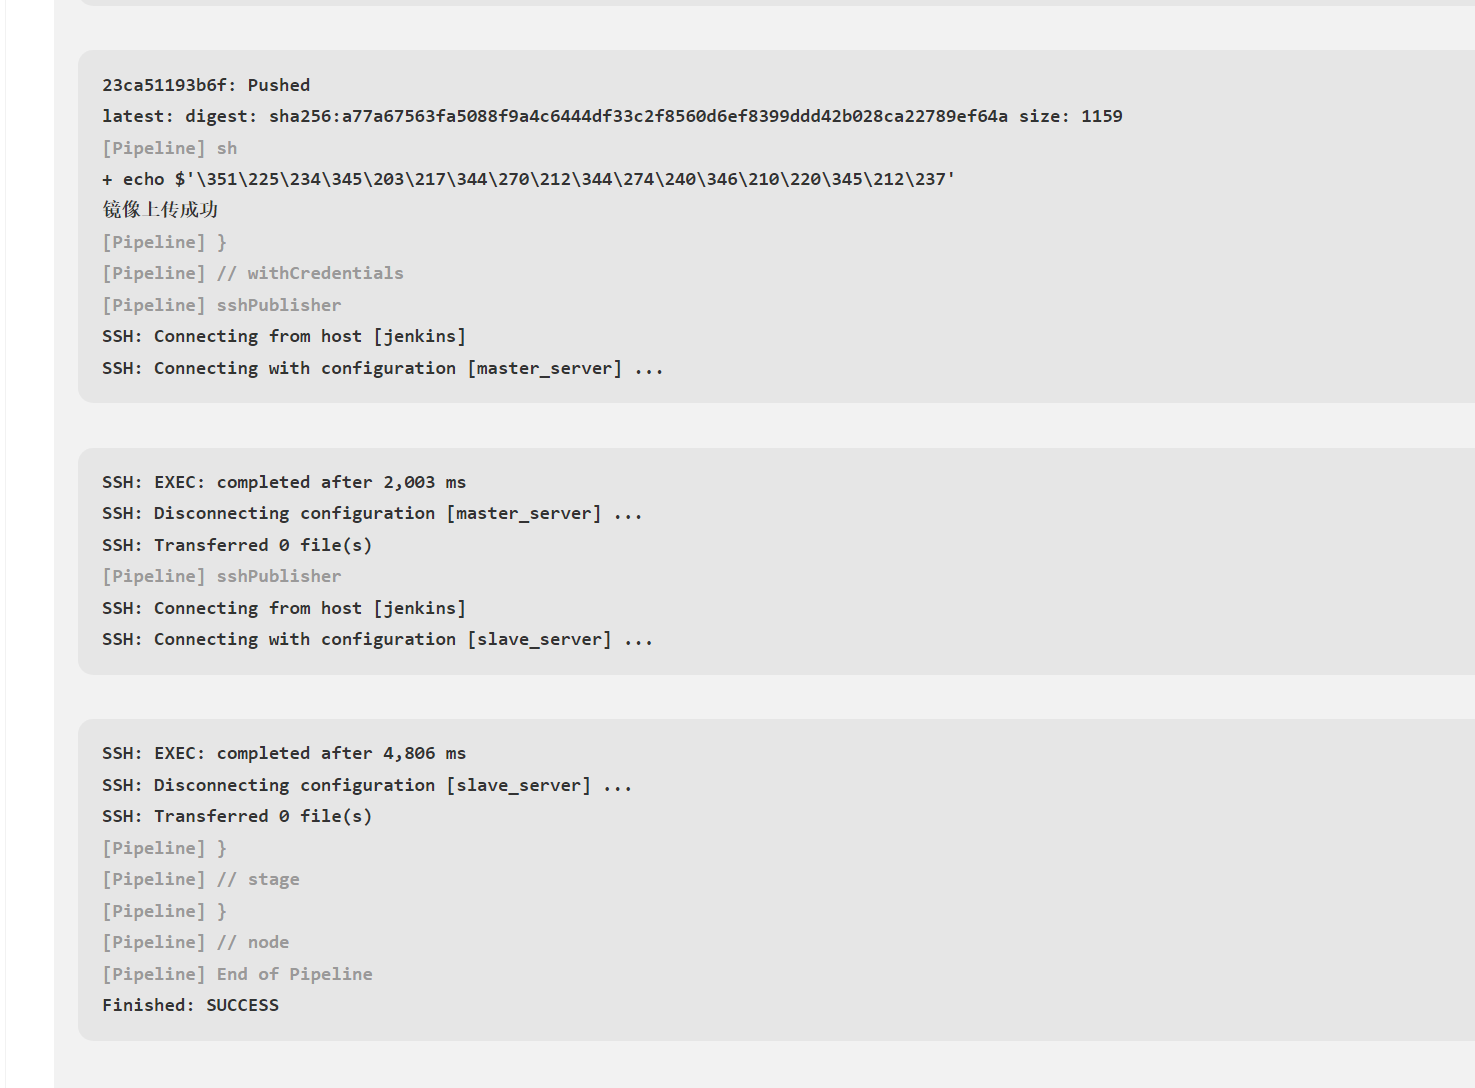
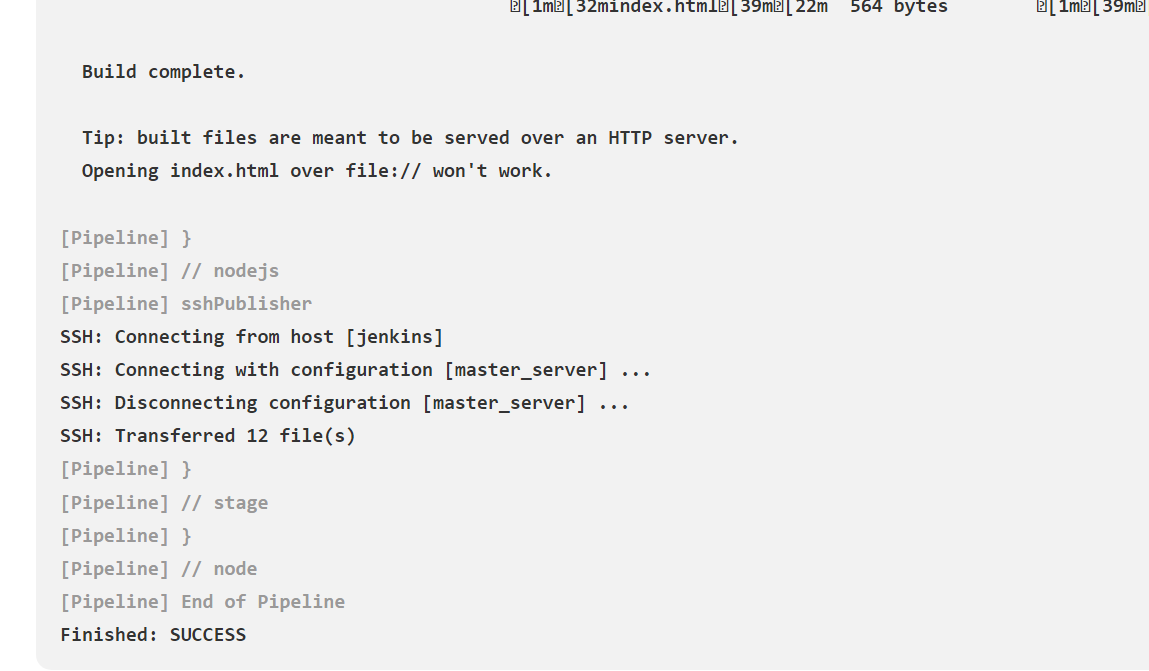
7. 进行构建测试
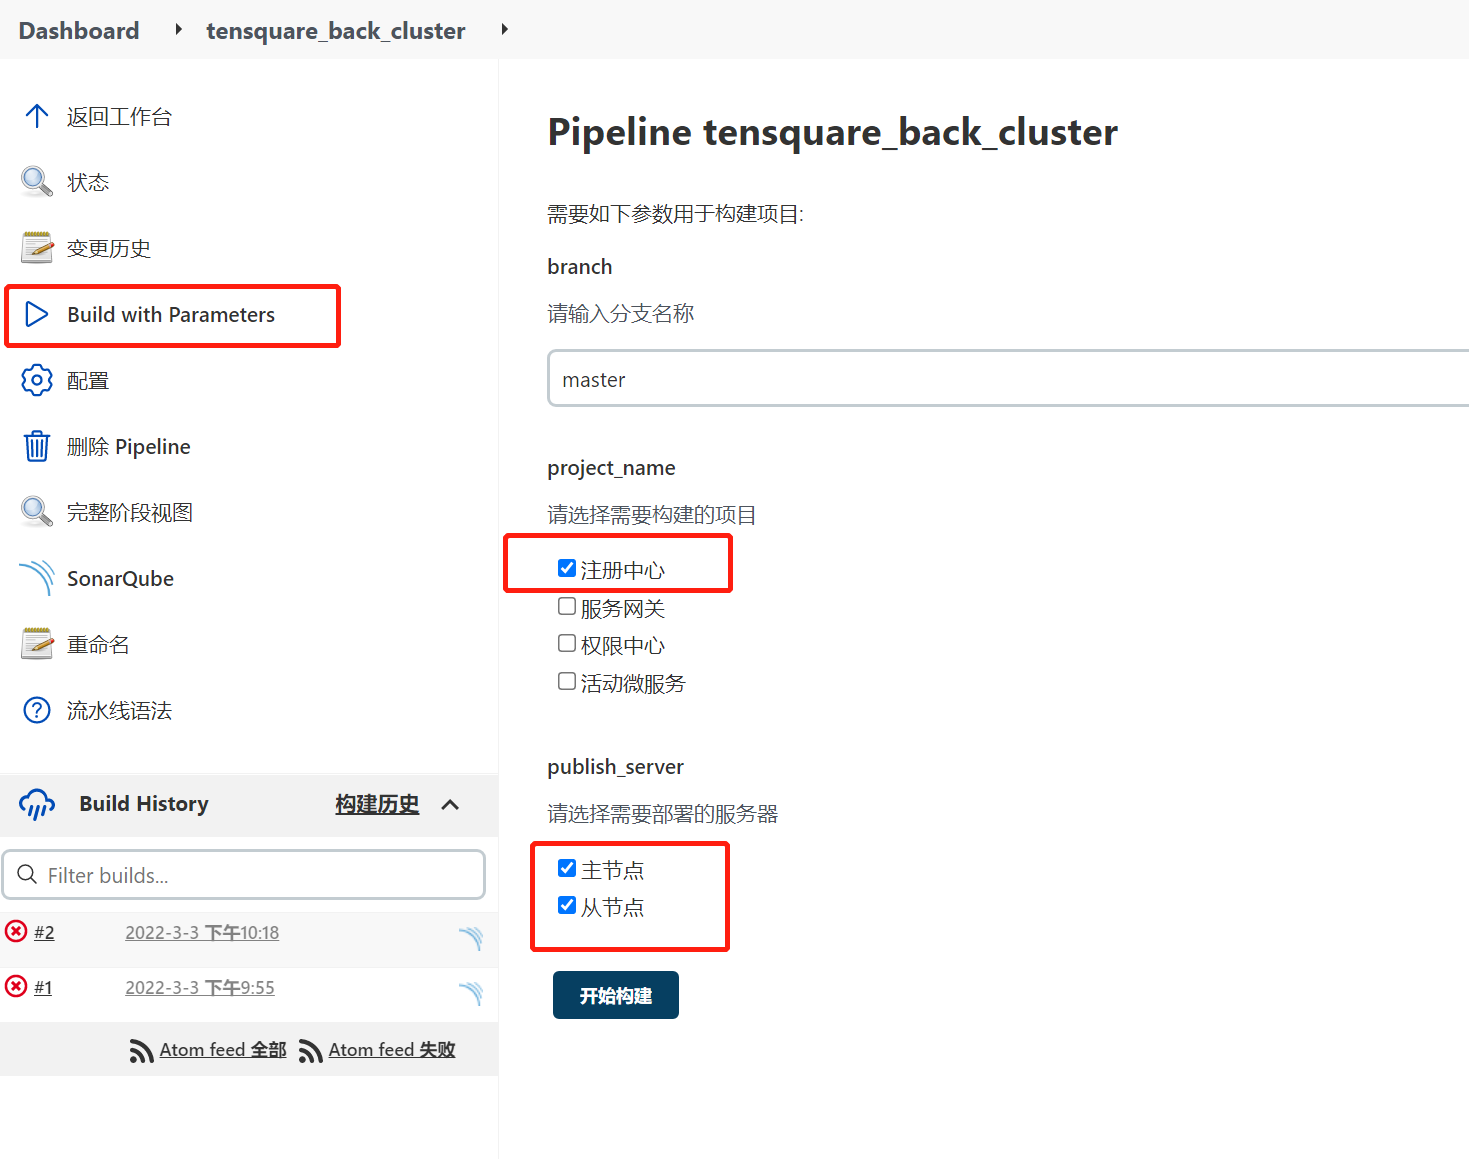
可以看到构建成功
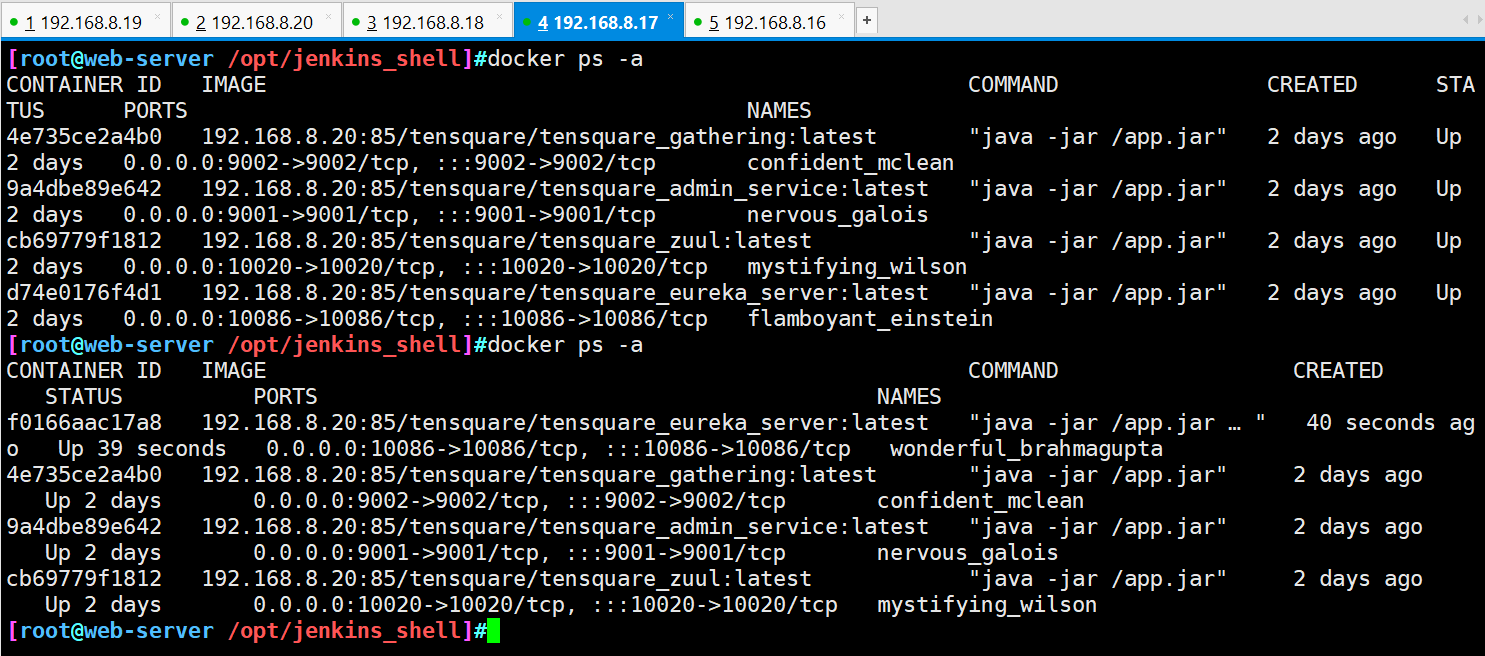
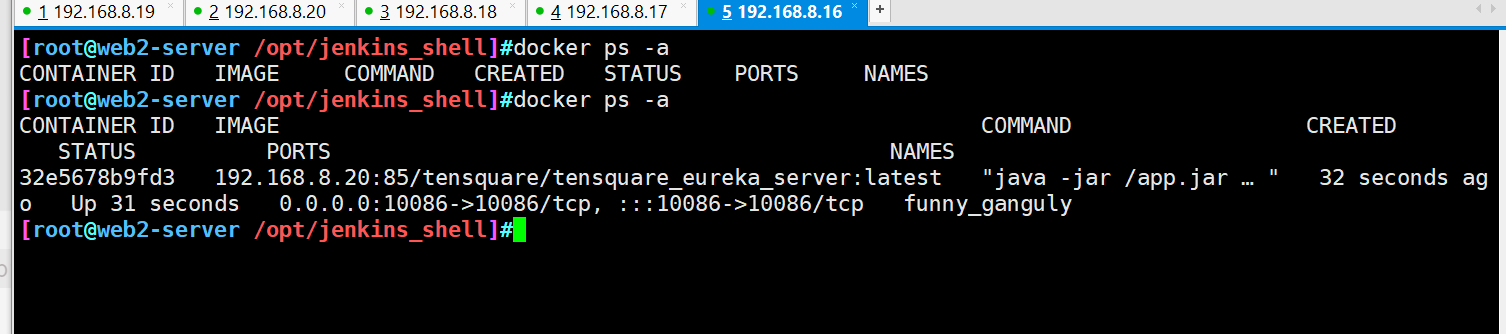
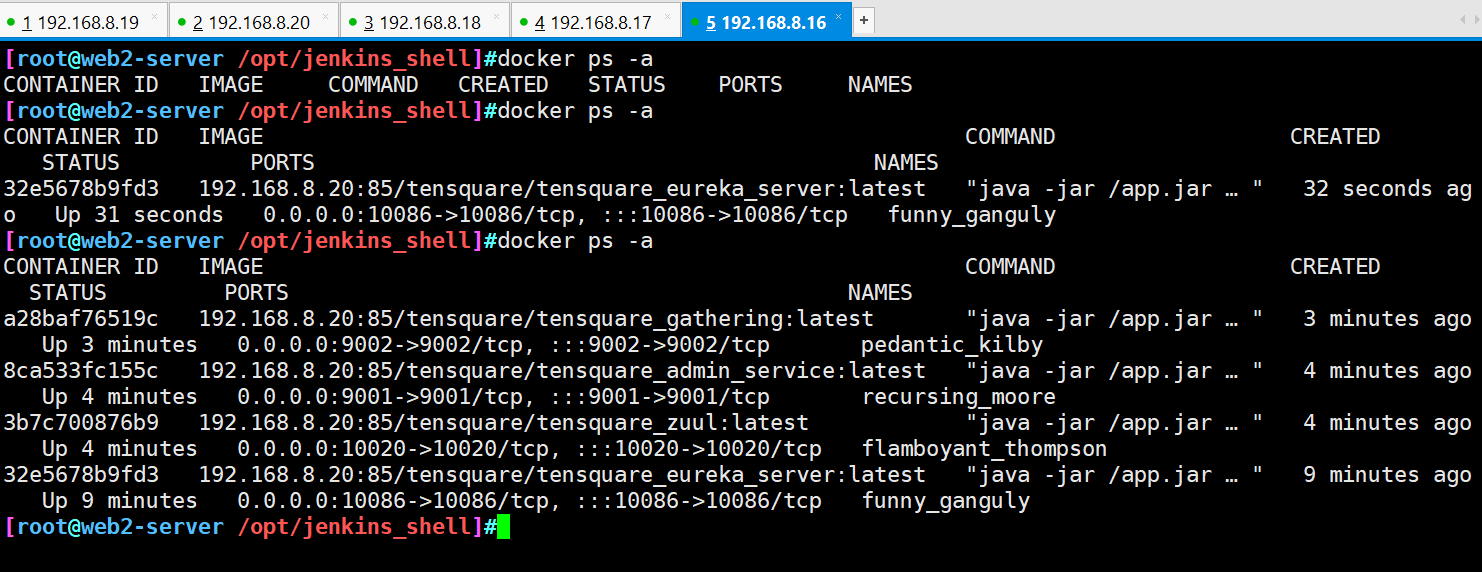
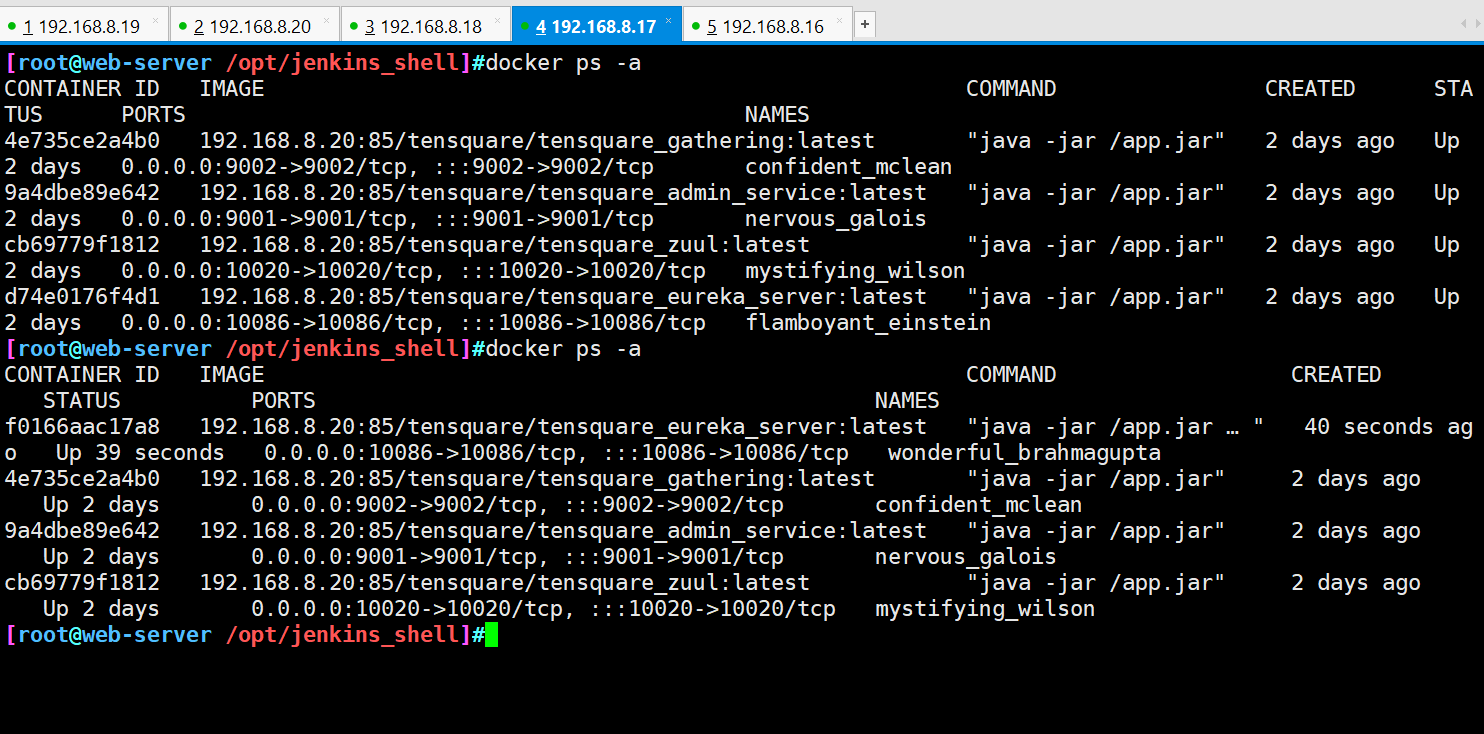
查看容器发布结果
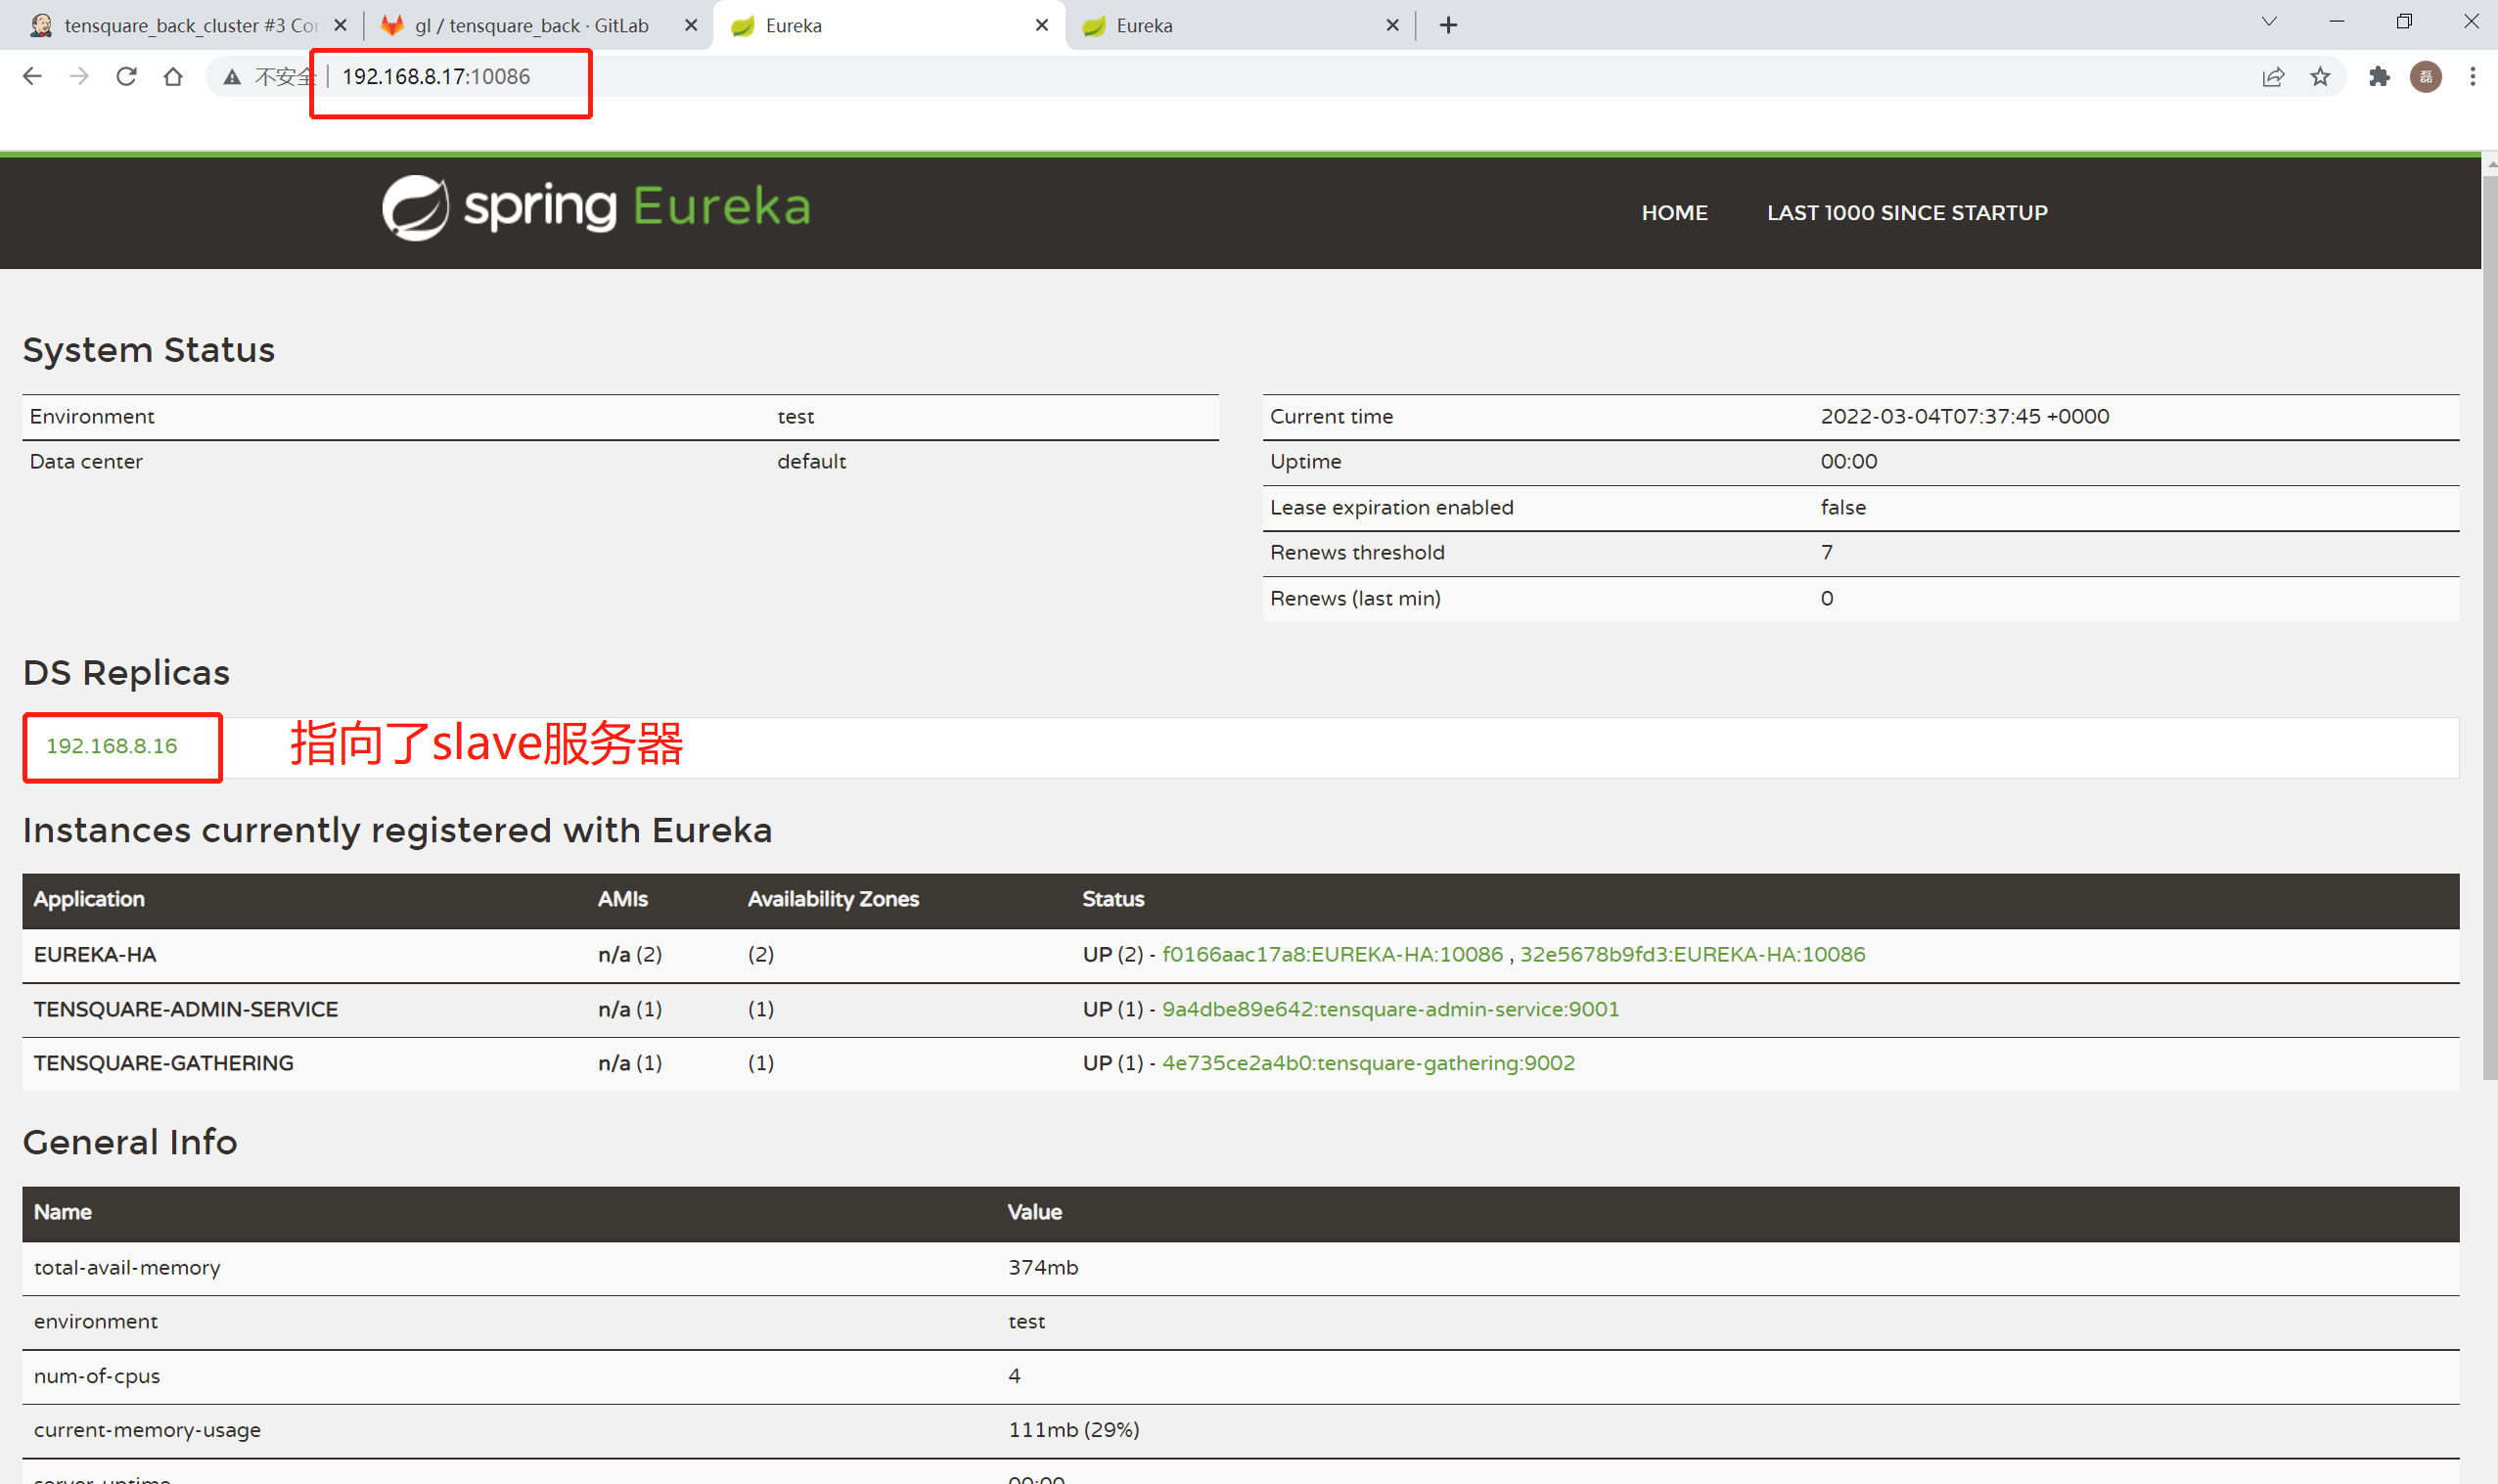
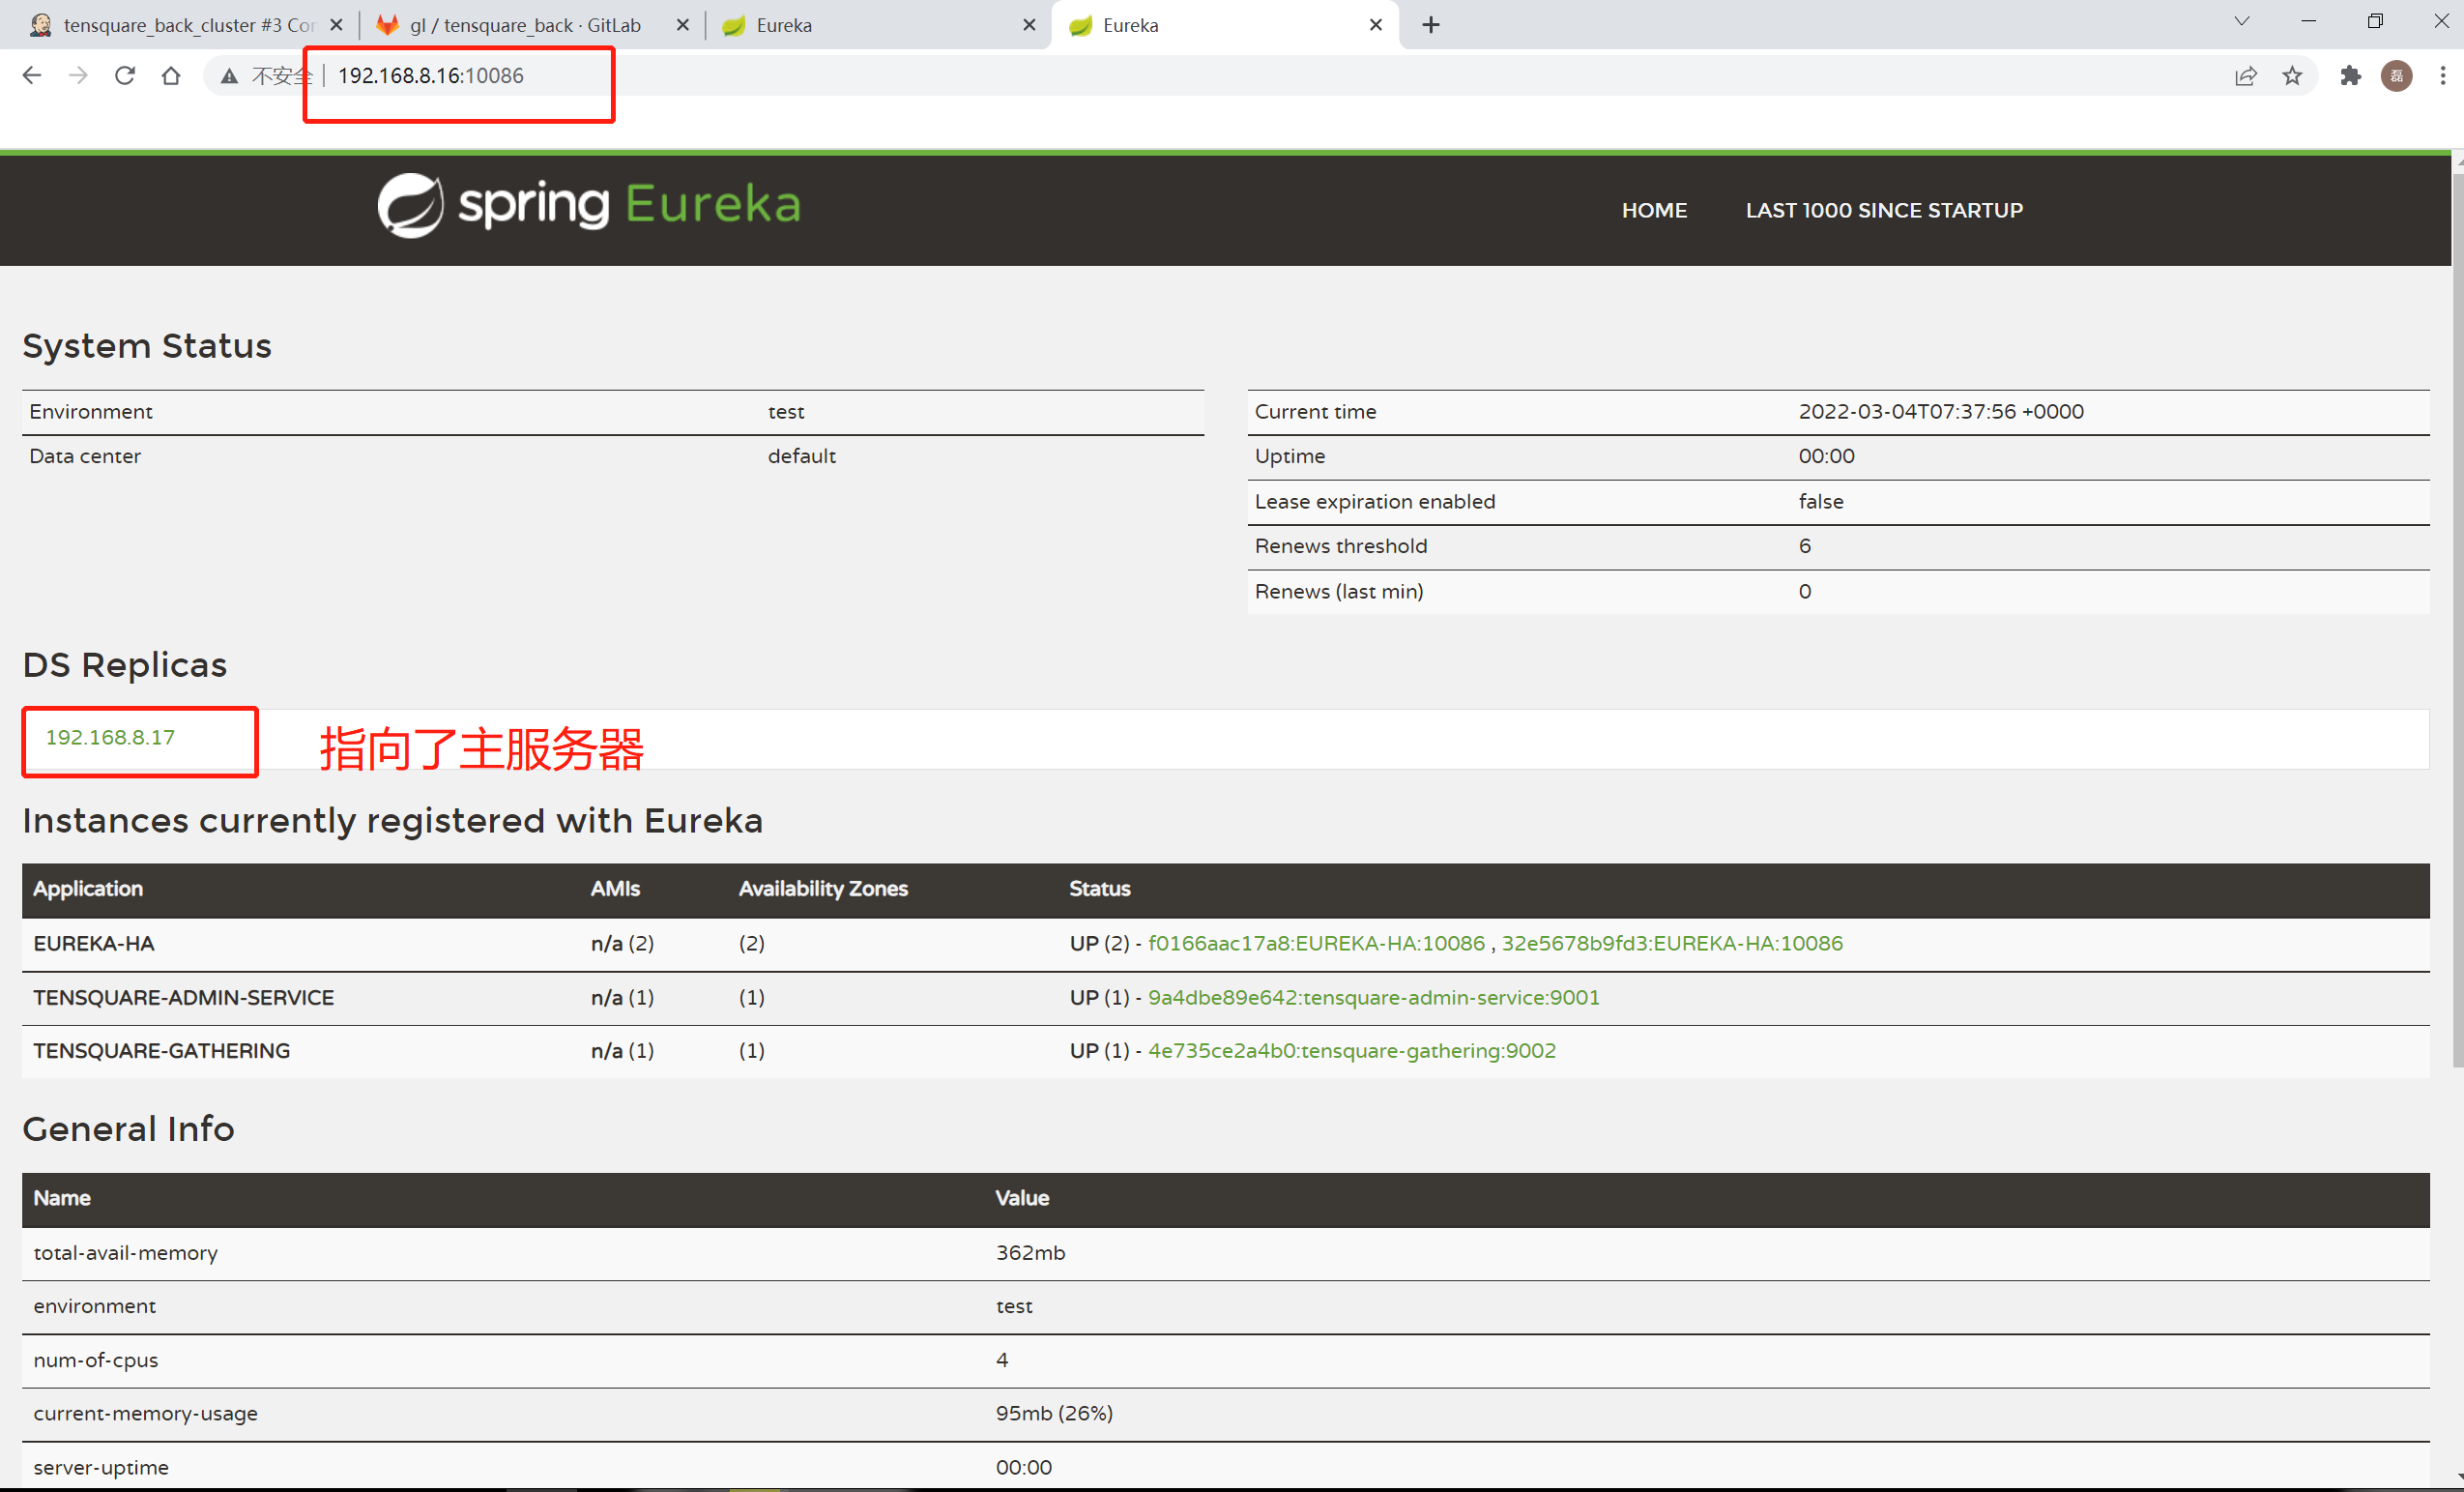
查看eureka注册结果
8. 构建剩下的集群微服务
五、Nginx+Zuul 集群实现高可用网关

1. web2-server服务器上安装nginx
yum install epel-release.noarch -y
yum install -y nginx
2. 修改nginx配置文件
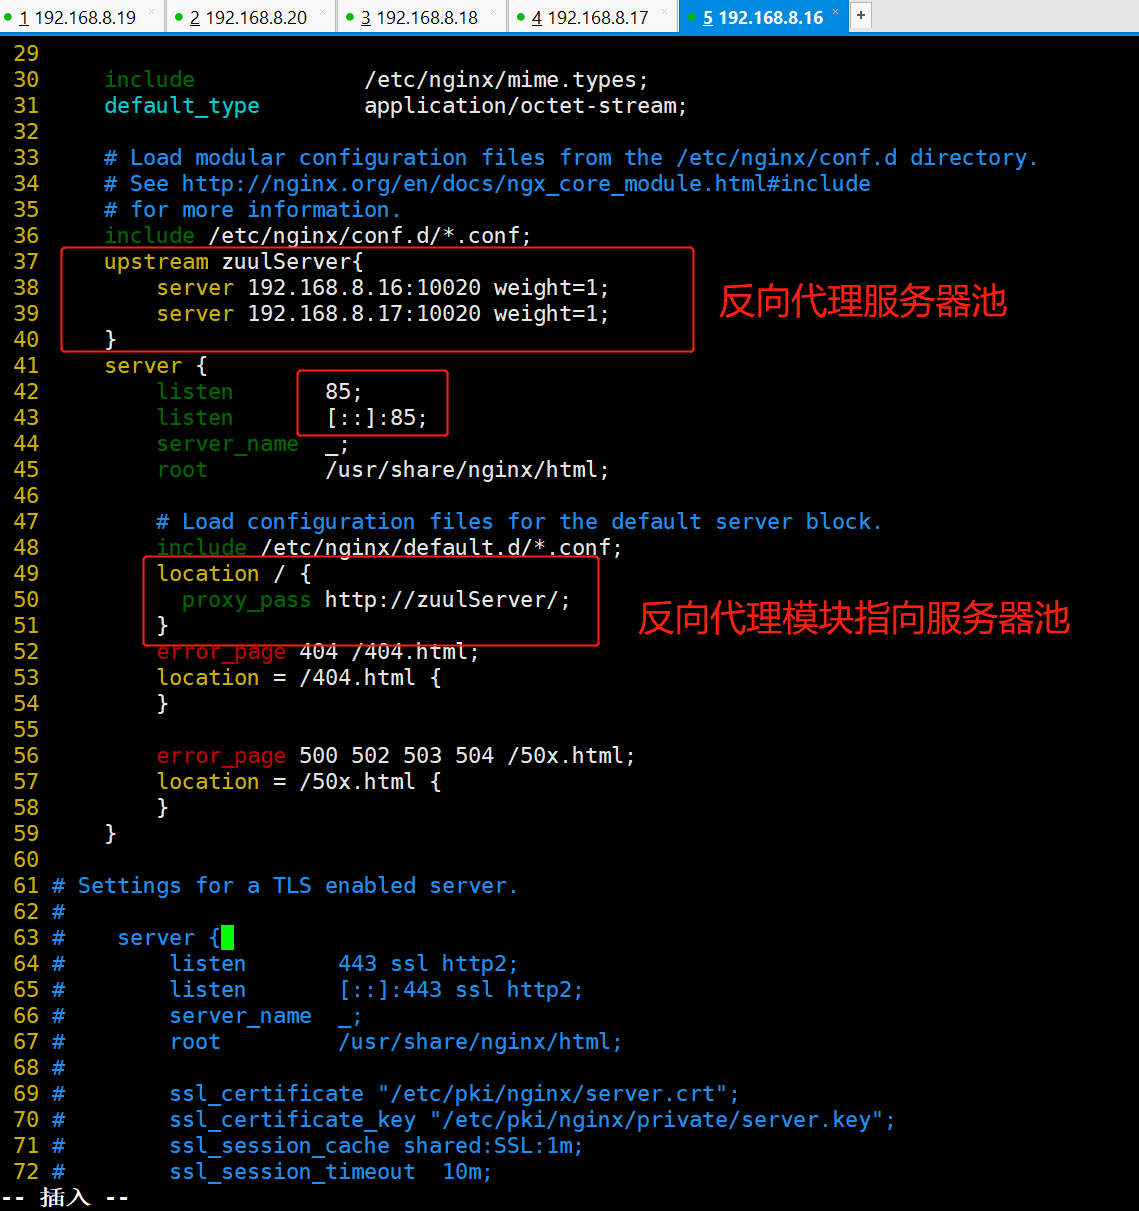
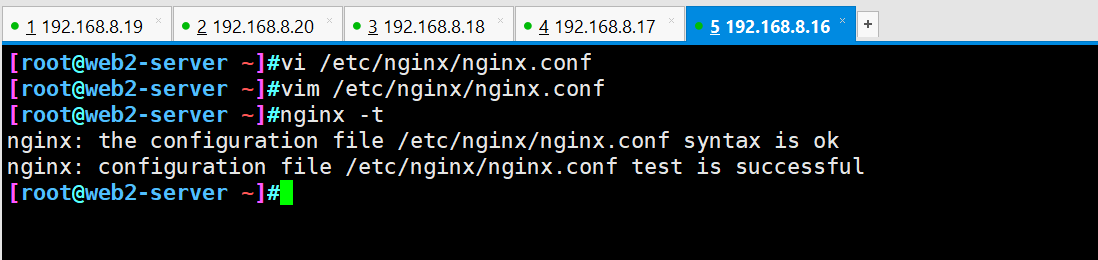
vim /etc/nginx/nginx.conf

#37行出添加反向代理服务器池,42行出修改端口号
 36     include /etc/nginx/conf.d/*.conf;
 37     upstream zuulServer{
 38         server 192.168.8.16:10020 weight=1;
 39         server 192.168.8.17:10020 weight=1;
 40     }
 41     server {
 42         listen       85;
 43         listen       [::]:85;
 44         server_name  _;
 45         root         /usr/share/nginx/html;

#49行出添加反向代理指向服务器池
 48         include /etc/nginx/default.d/*.conf;
 49         location / {
 50           proxy_pass http://zuulServer/;
 51         }
nginx -t
systemctl start nginx.service
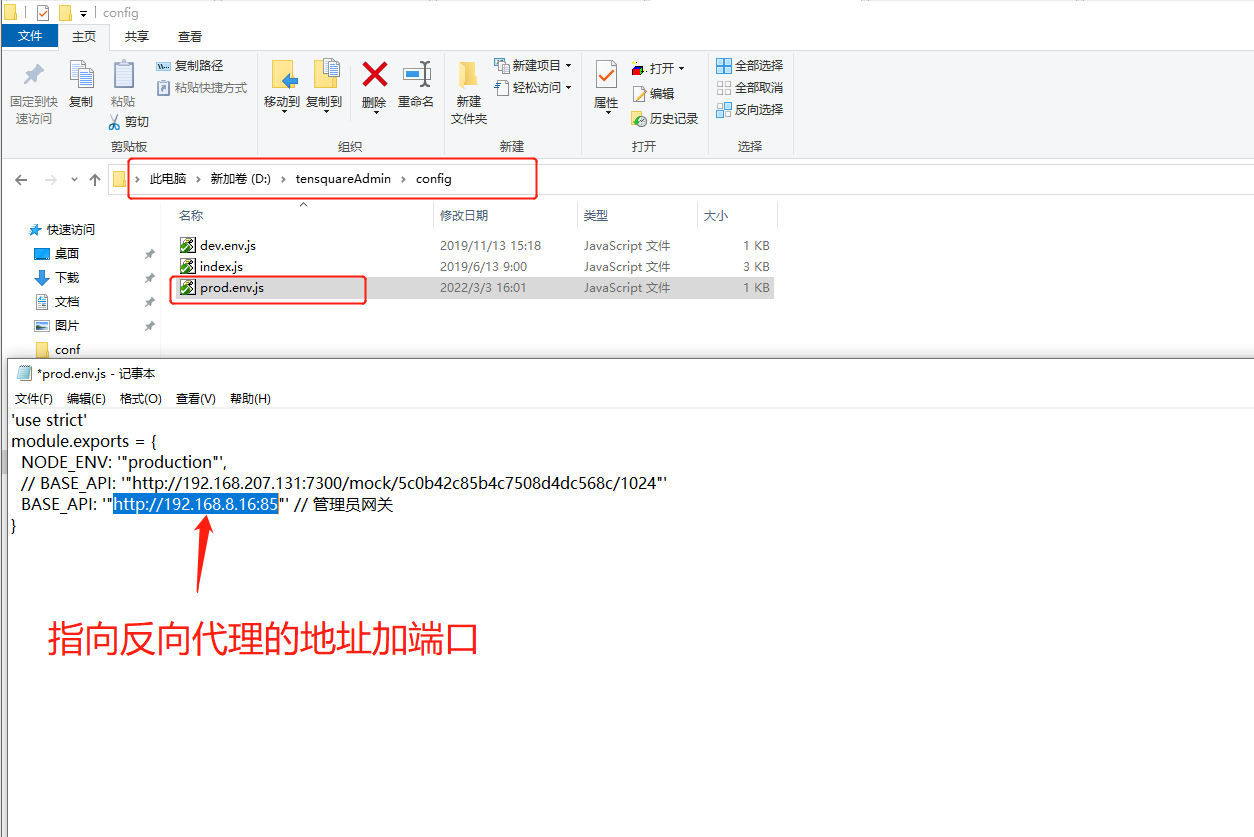
3. 修改前端Nginx的访问地址

4. Jenkins中进行前端项目构建

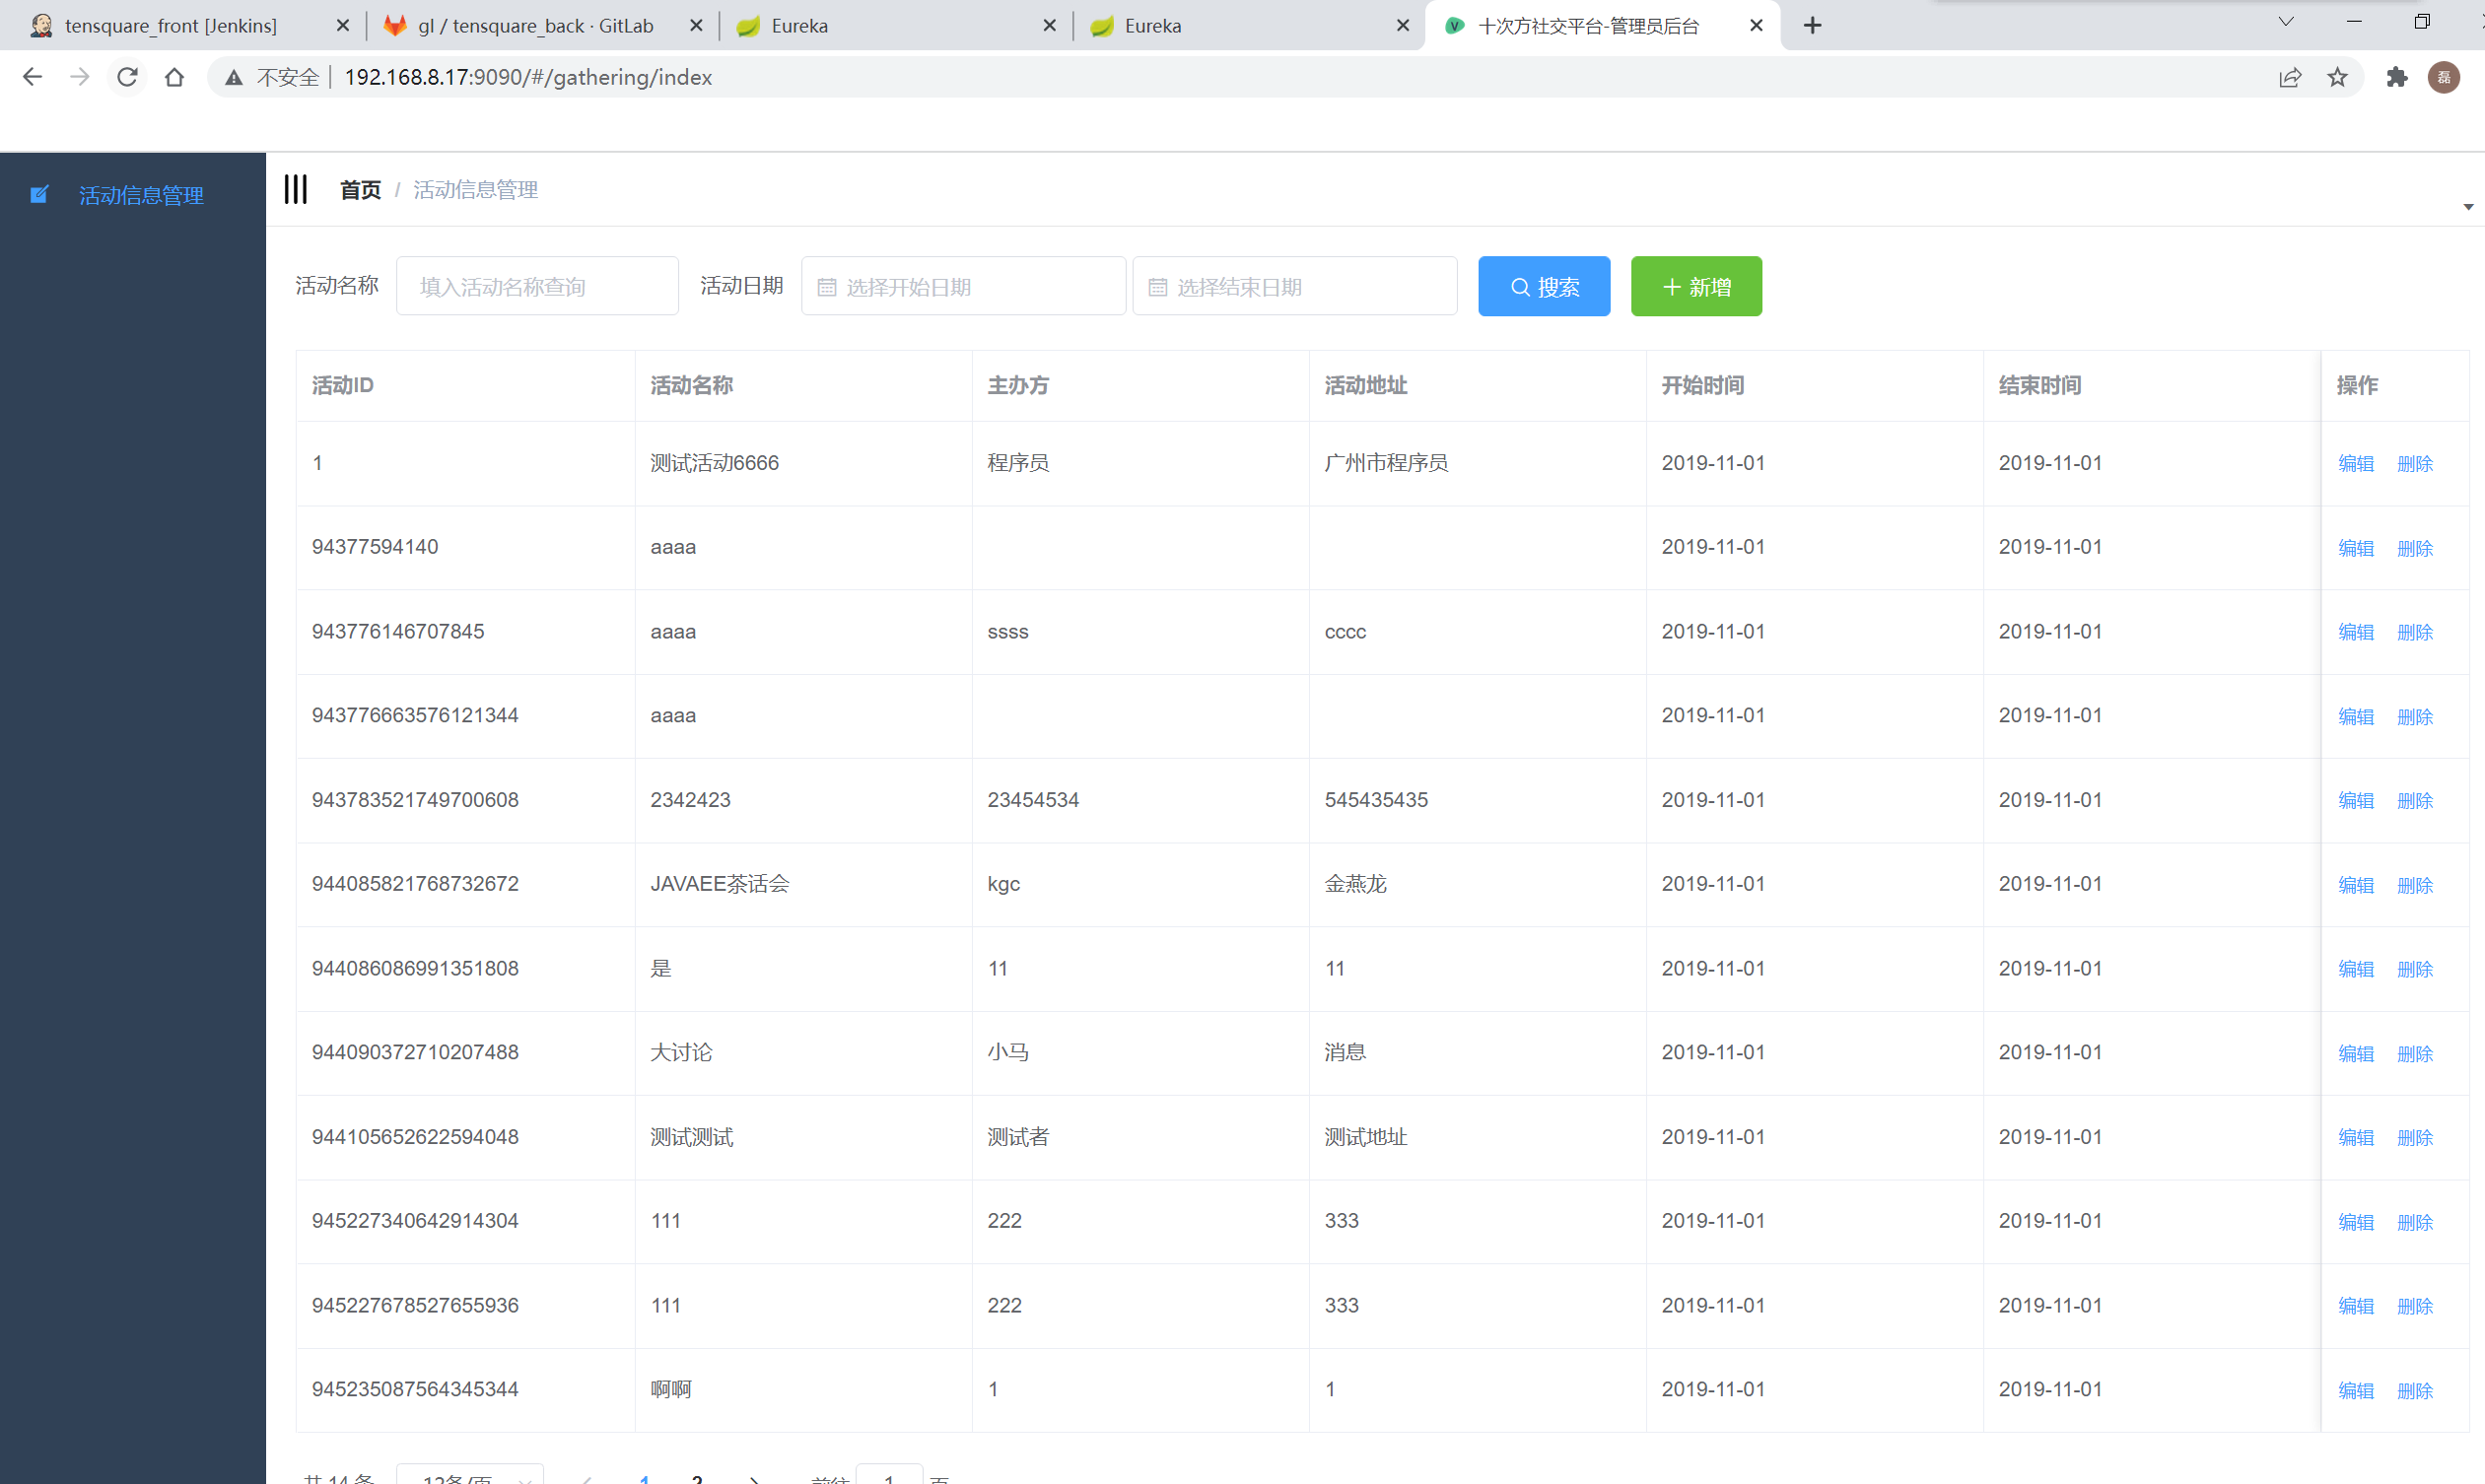
成功访问前端数据库中的数据
到此,微服务通过容器的方式进行集群式发布到此全部完成!!!