前言
harbor是vmware开源的企业级镜像仓库,目前是CNCF的毕业项目。它拥有完整的仓库管理、镜像管理、基于角色的权限控制、镜像安全扫描集成、镜像签名等。
一、安装harbor
1、使用helm下载harbor
helm repo add harbor https://helm.goharbor.io
helm fetch harbor/harbor --untar


#创建harbor namespace
kubectl create ns harbor

2、修改harbor配置
vim harbor/values.yaml
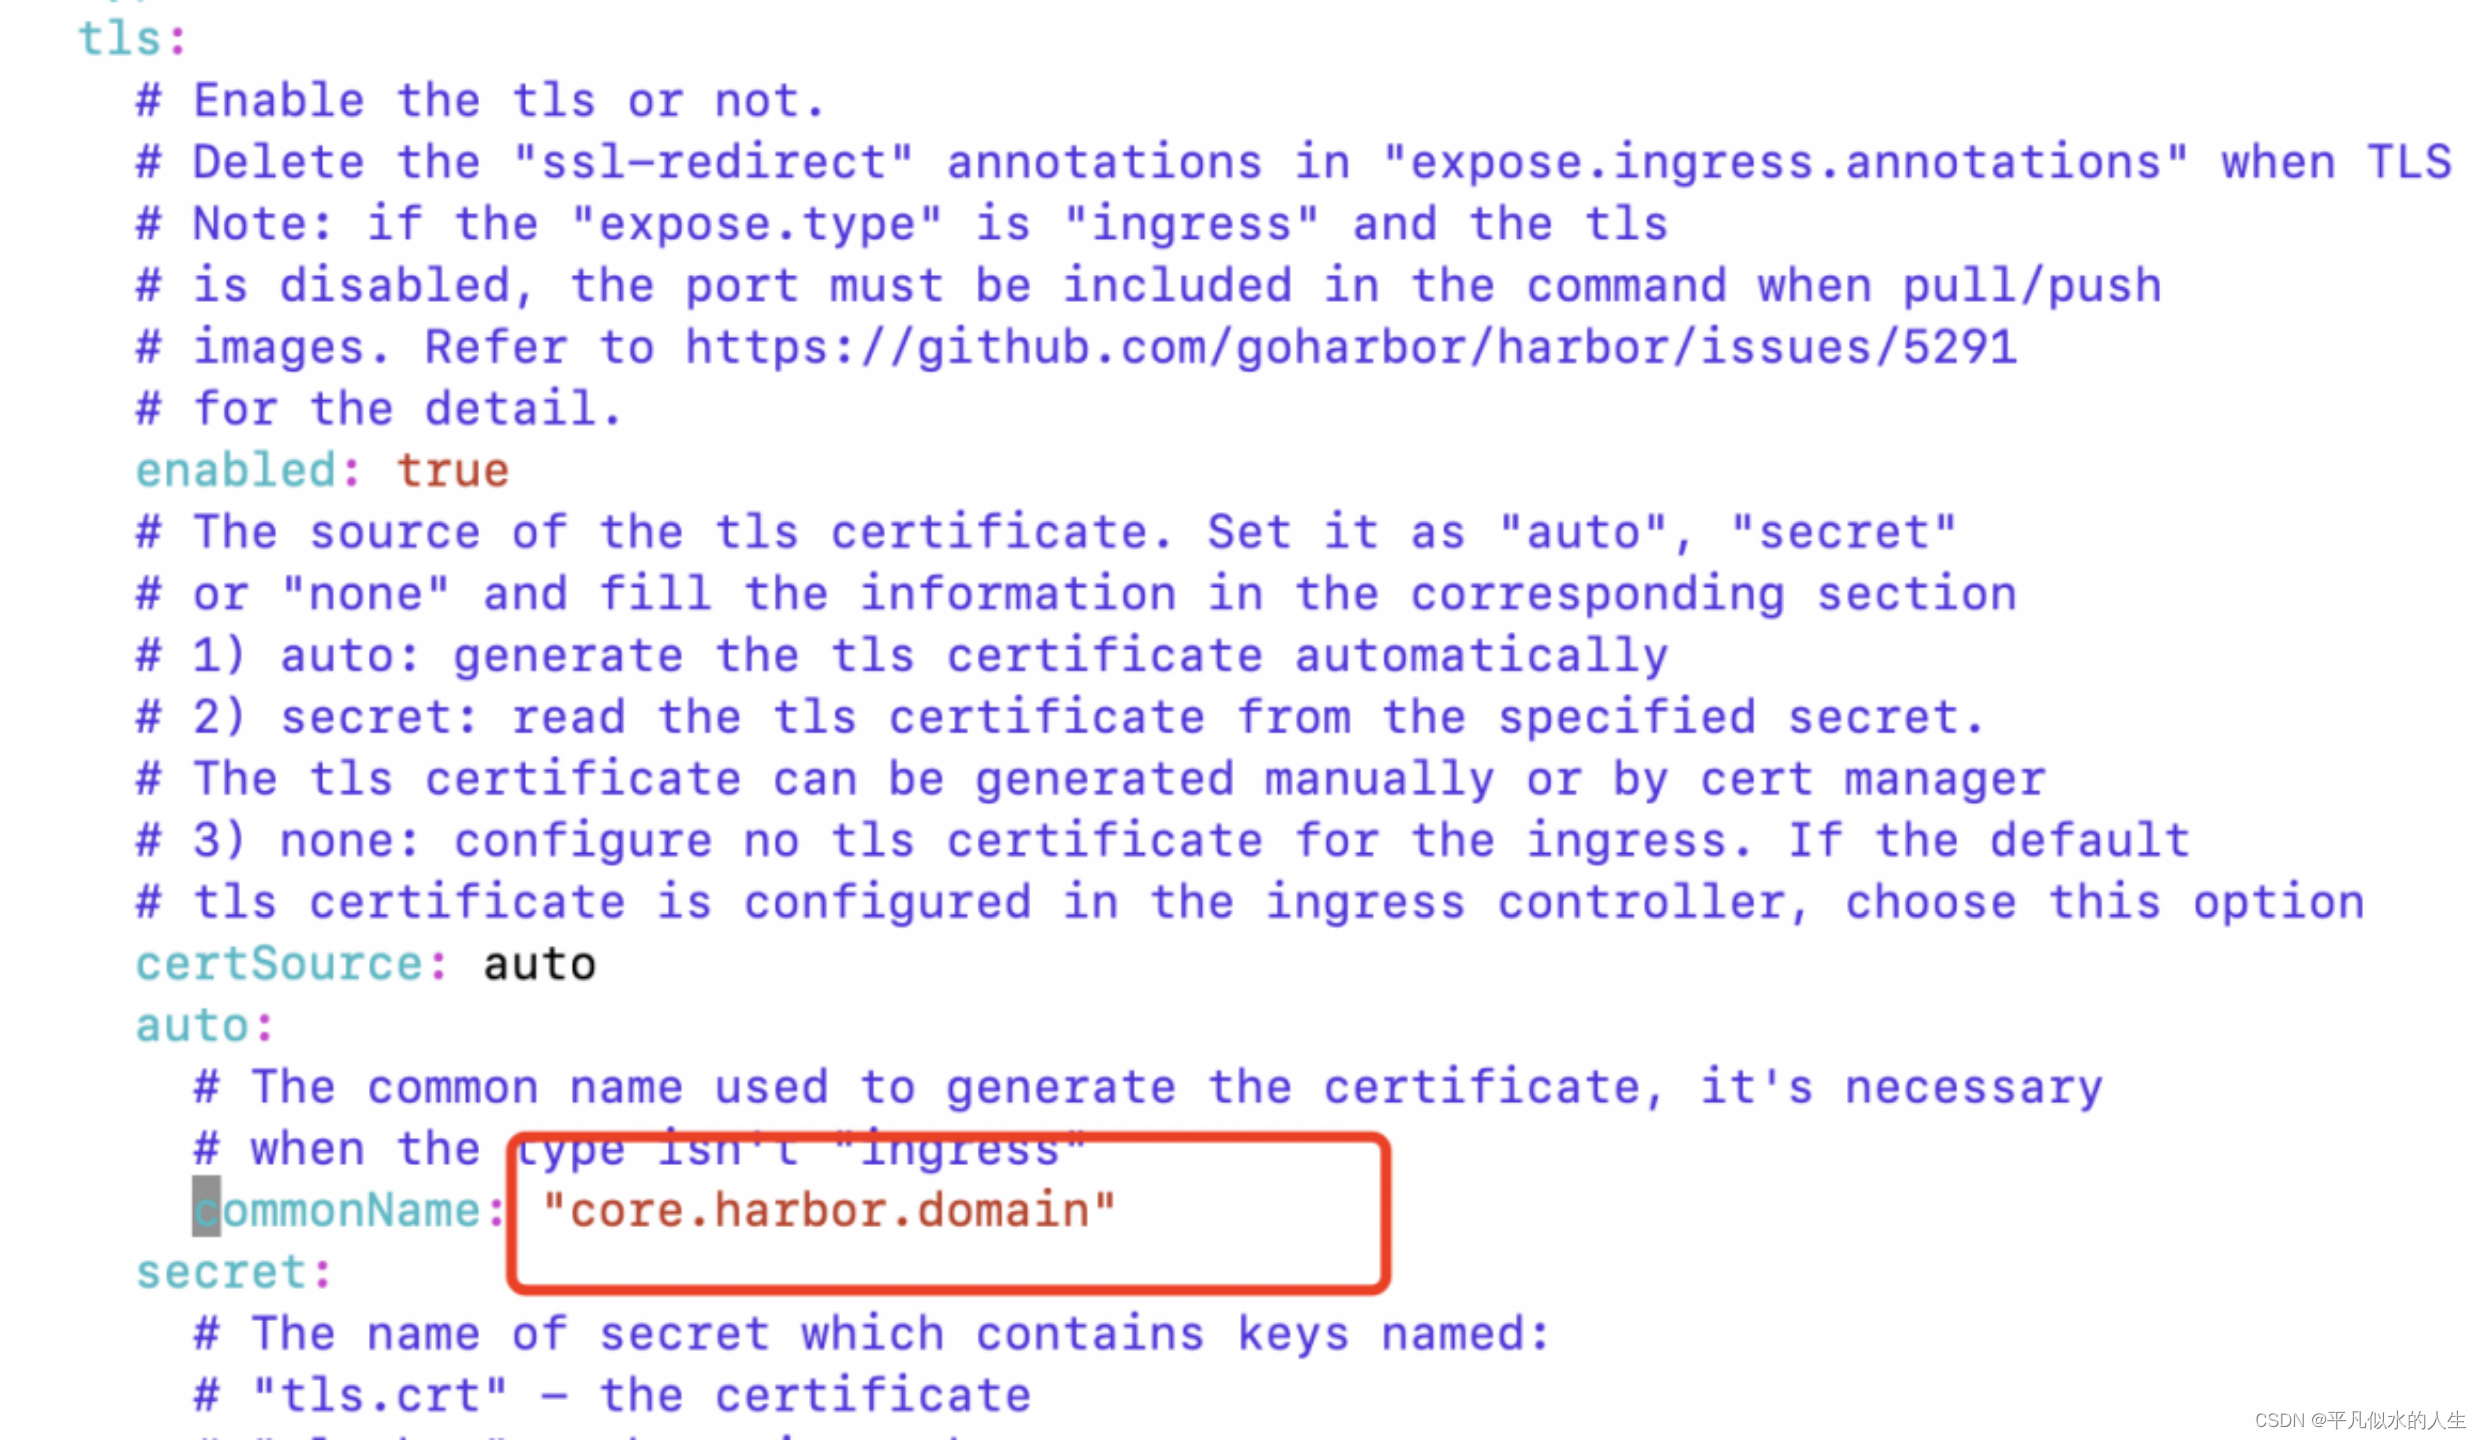
修改访问方式

修改commonName
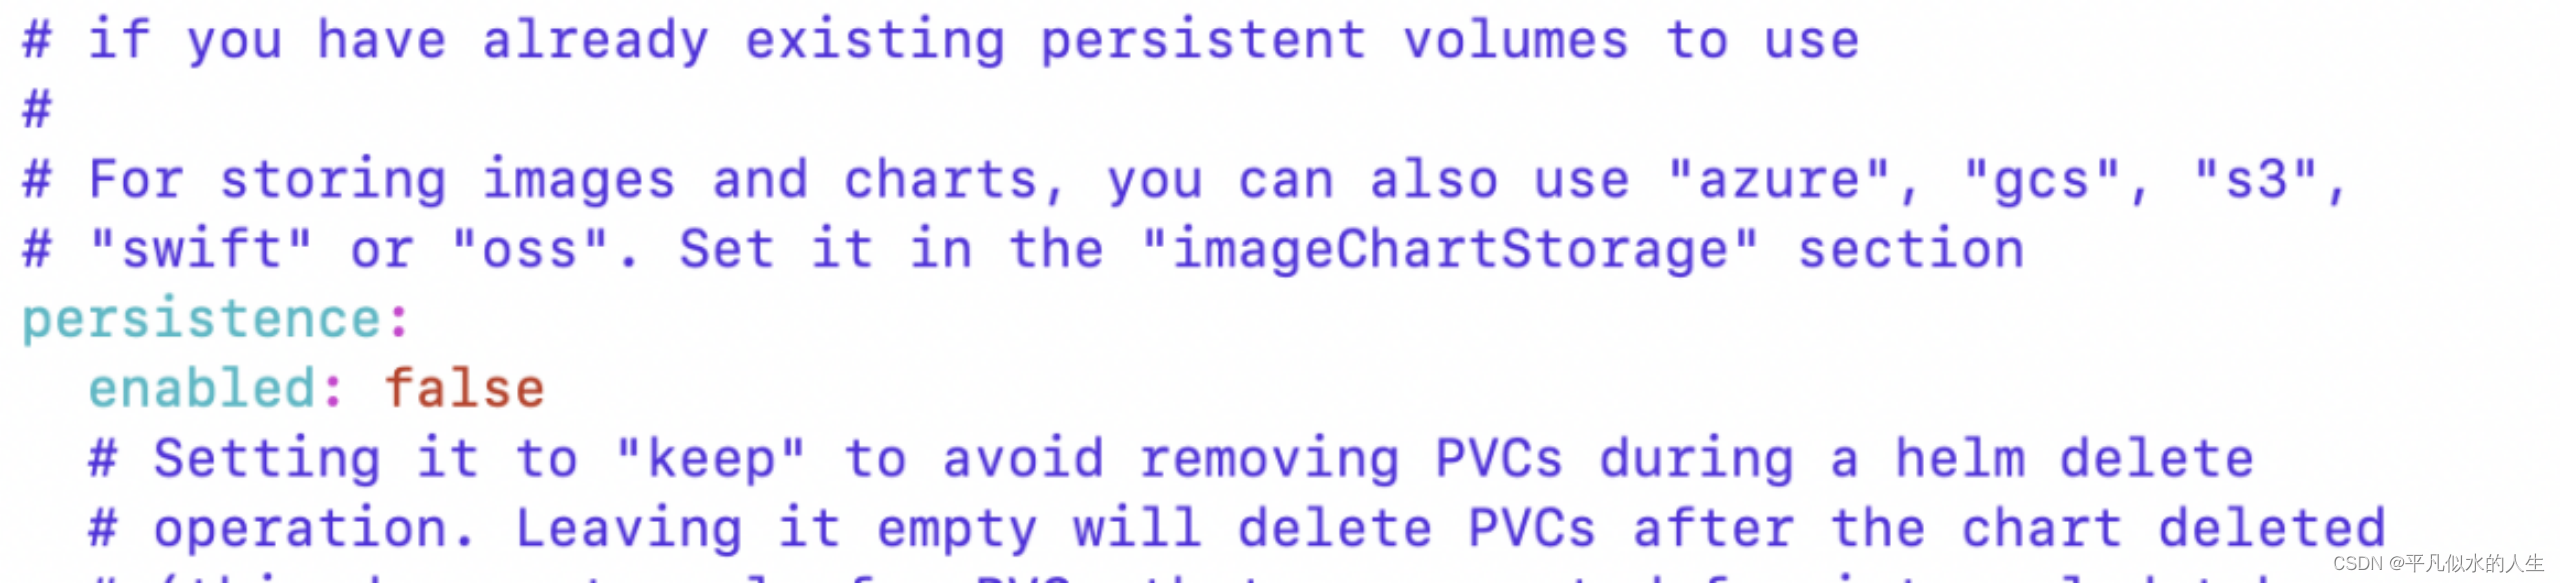
配置不使用块存储
3、安装harbor
helm install harbor ./harbor -n harbor

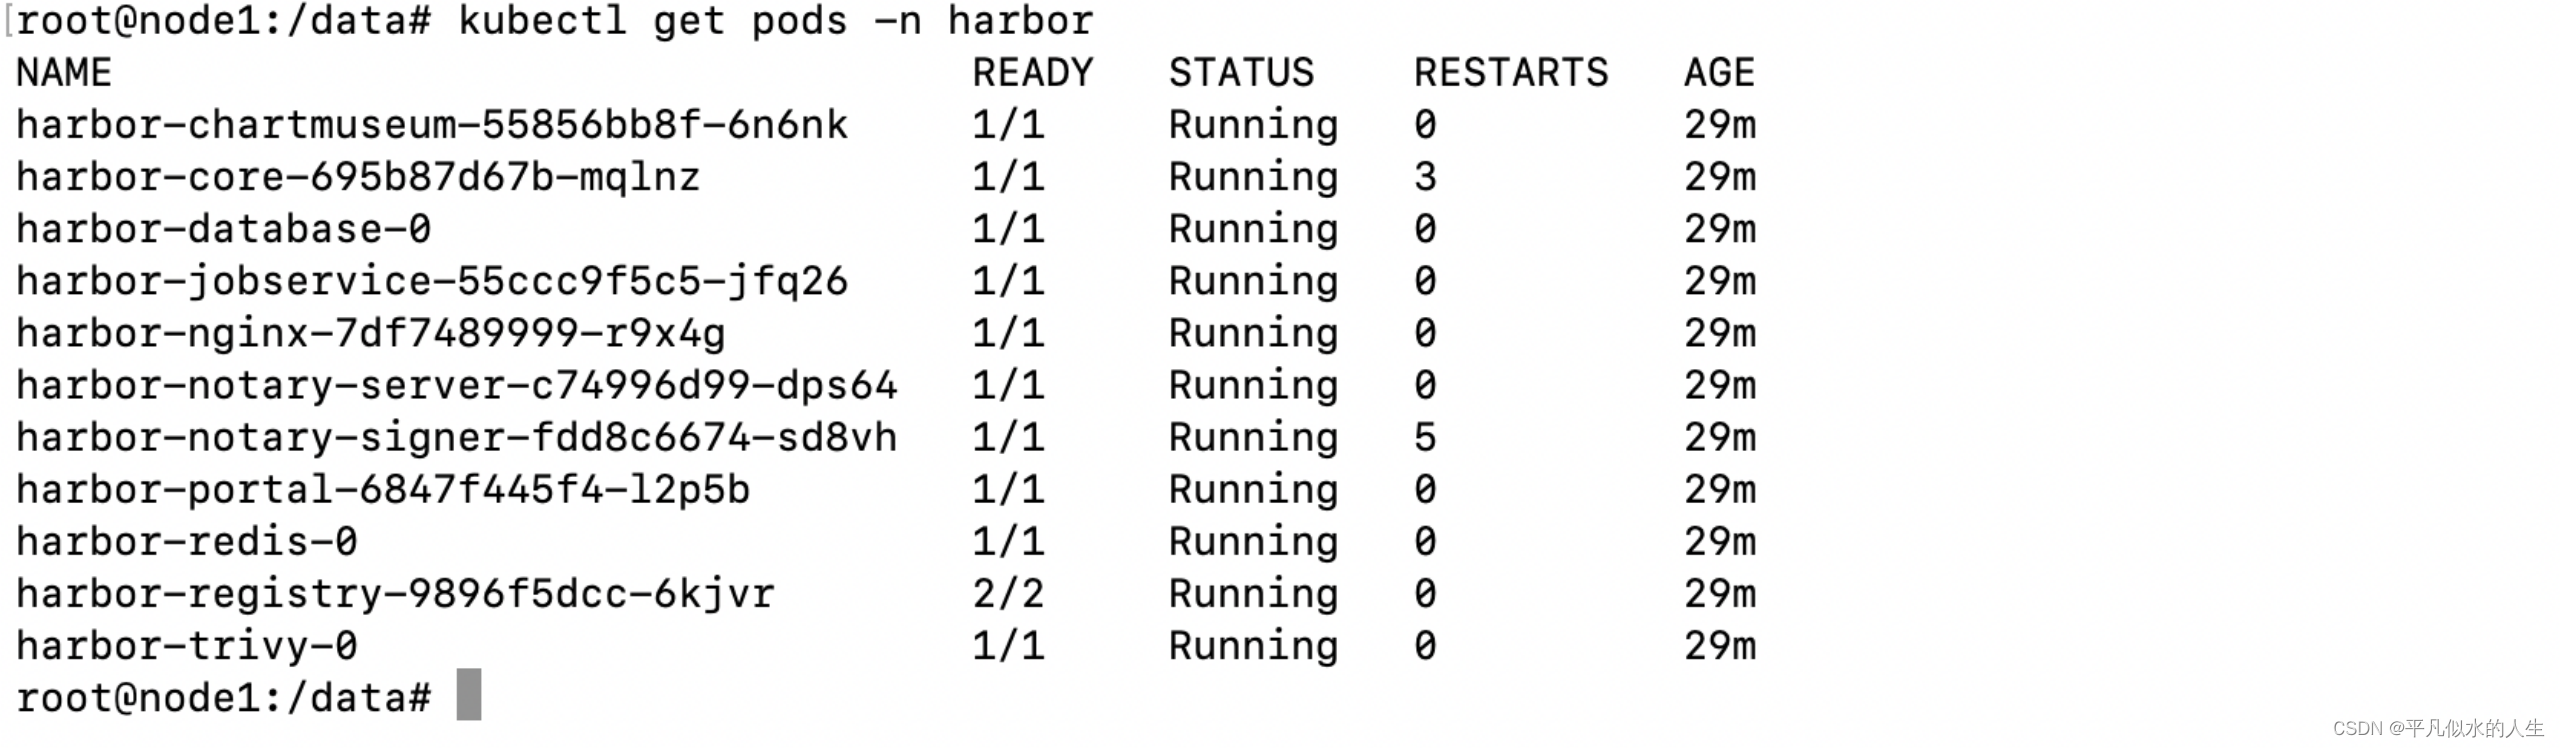
安装成功
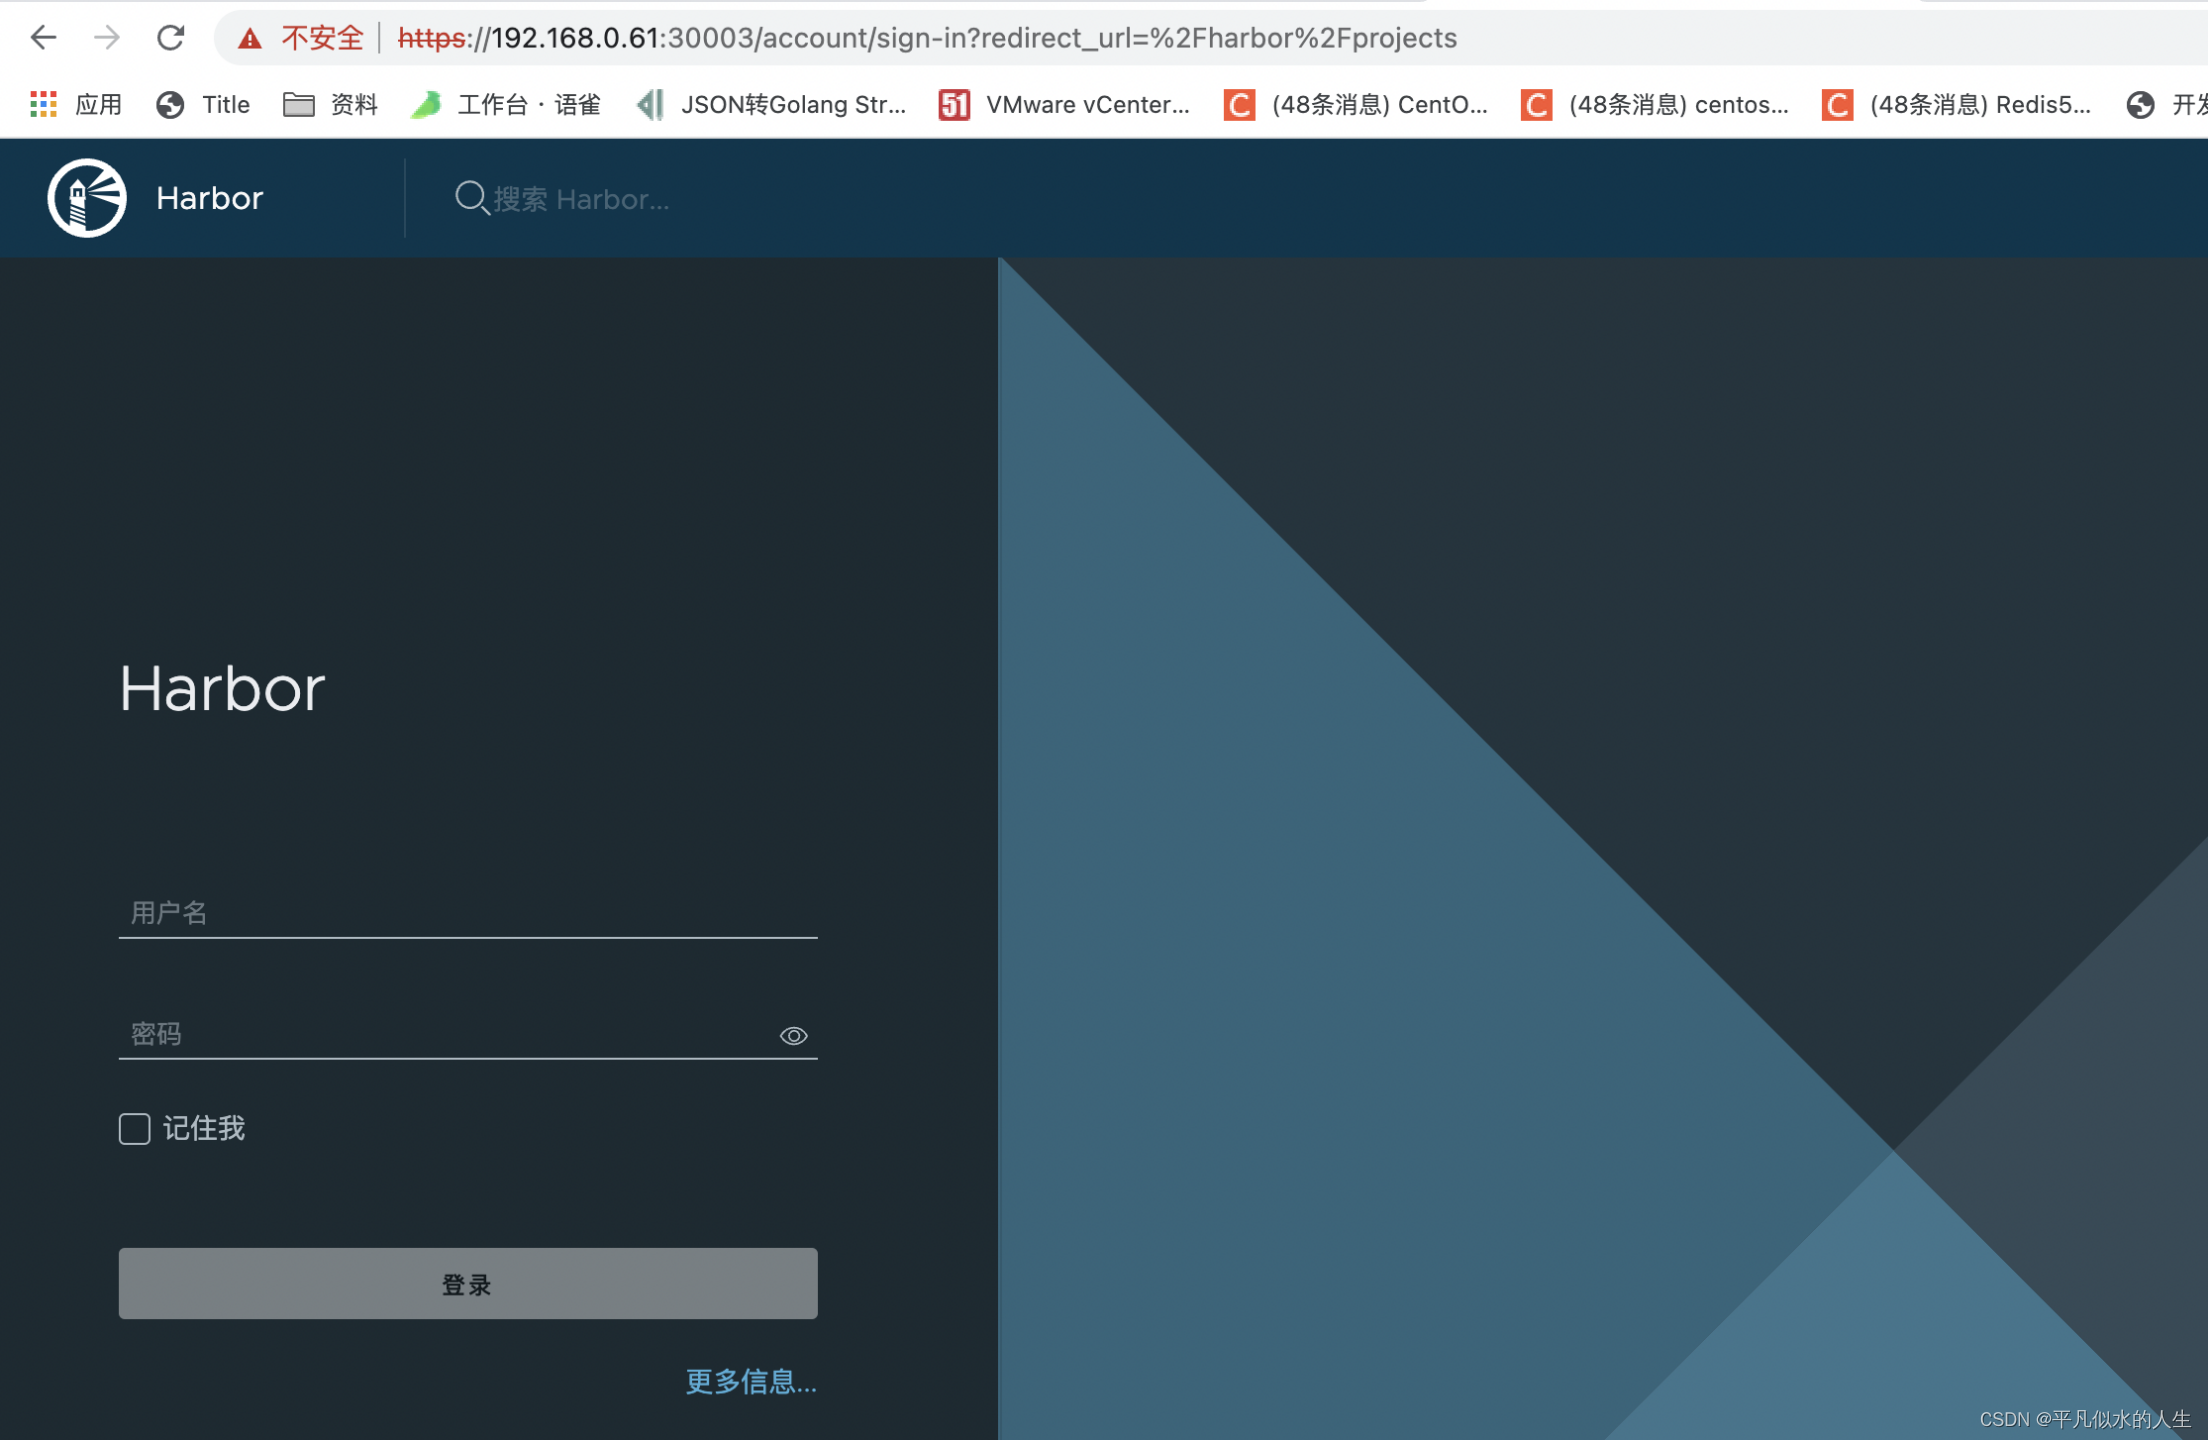
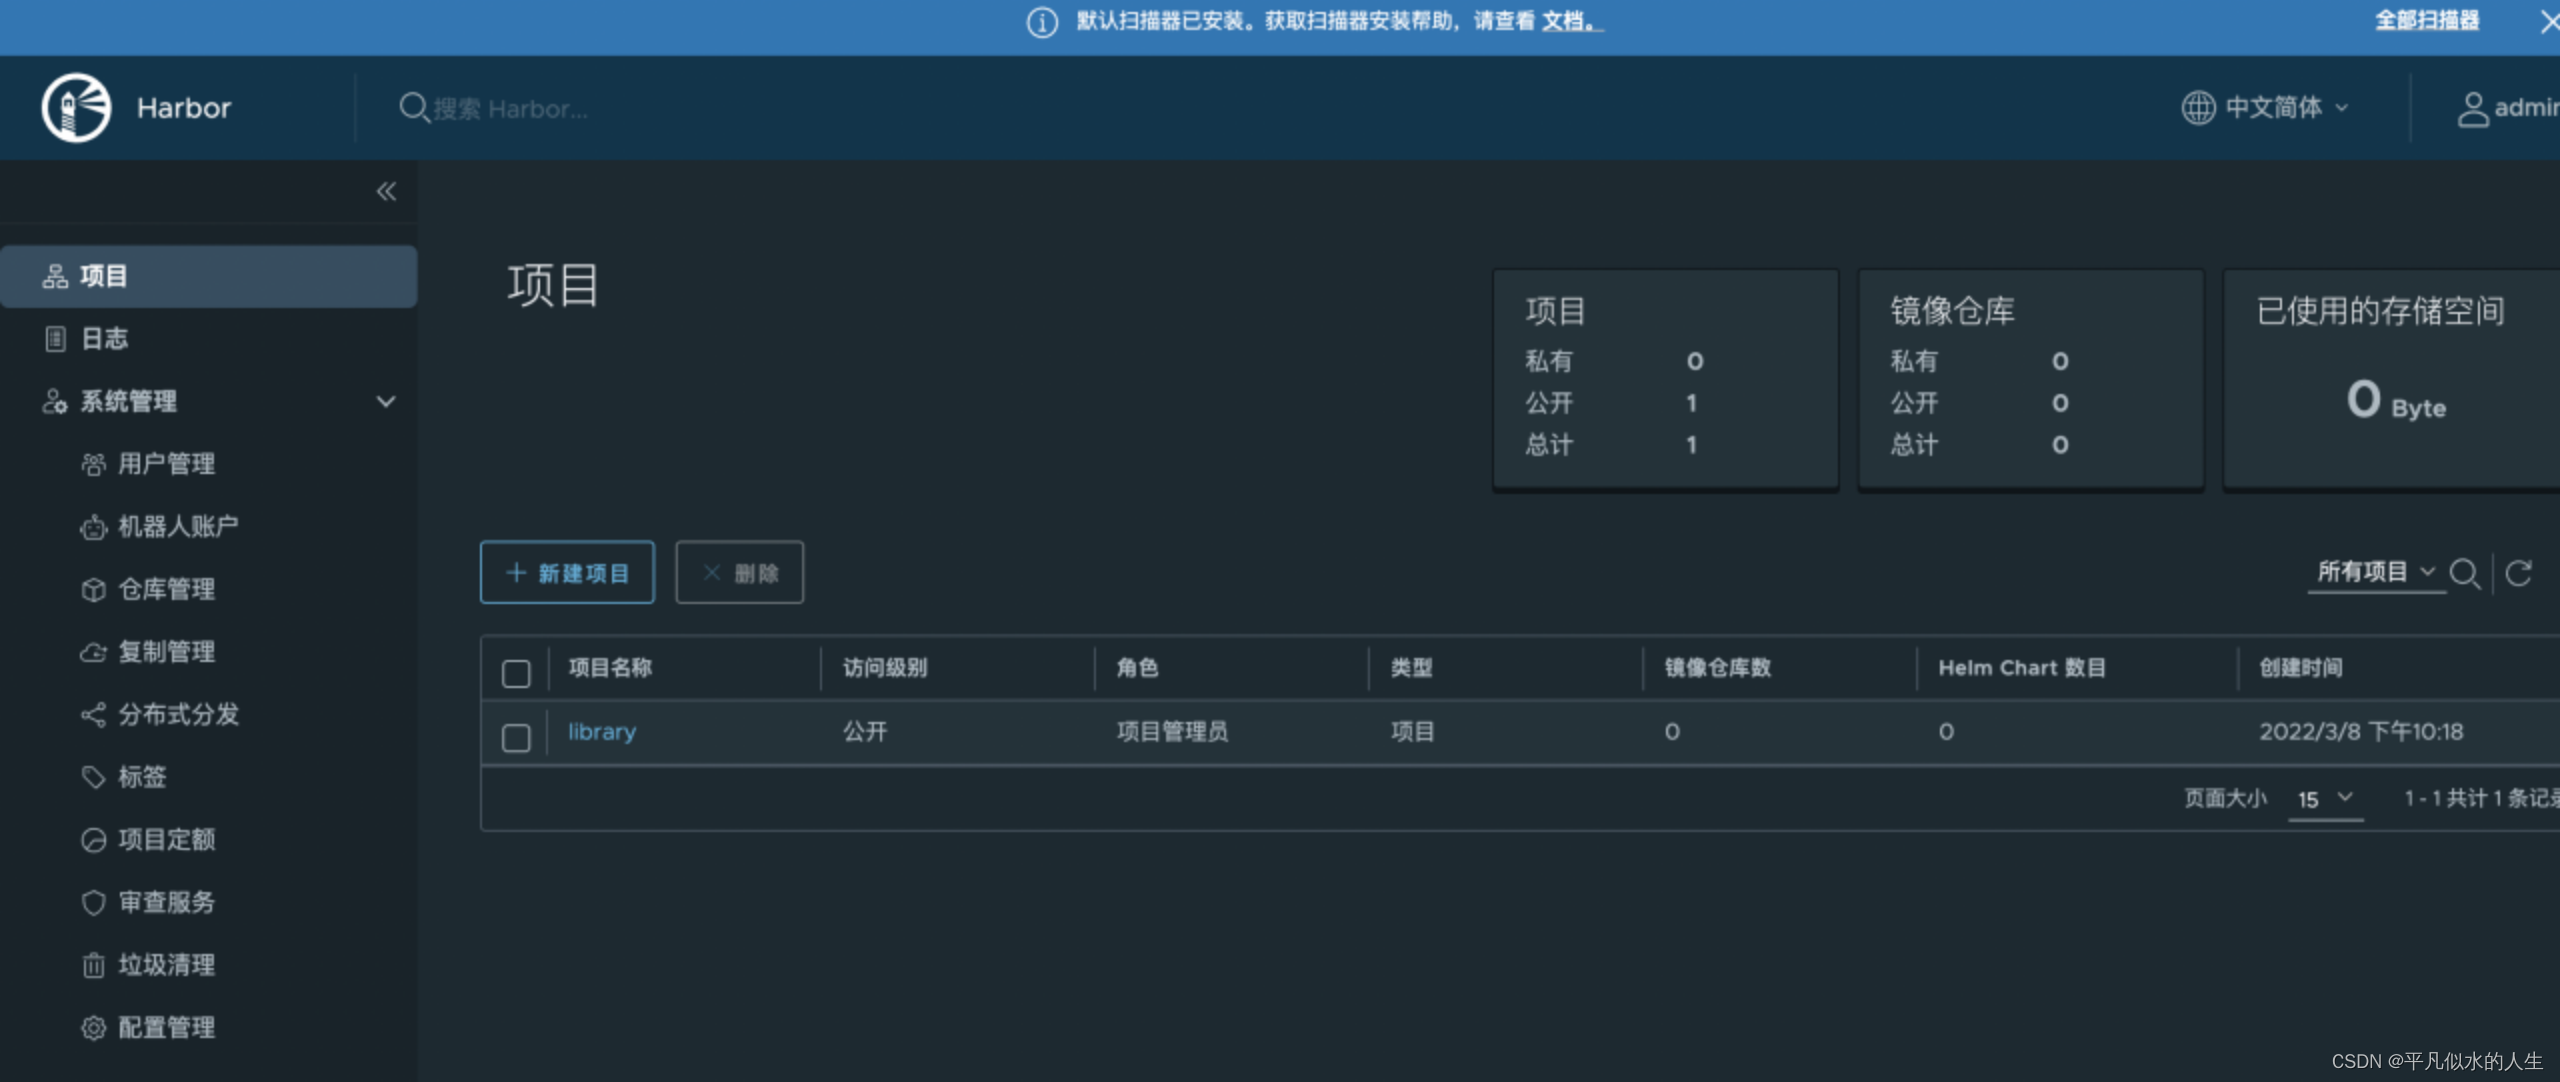
4、登陆harbor
https://192.168.0.61:30003/
admin
Harbor12345
二、使用harbor
1、下载repository certs
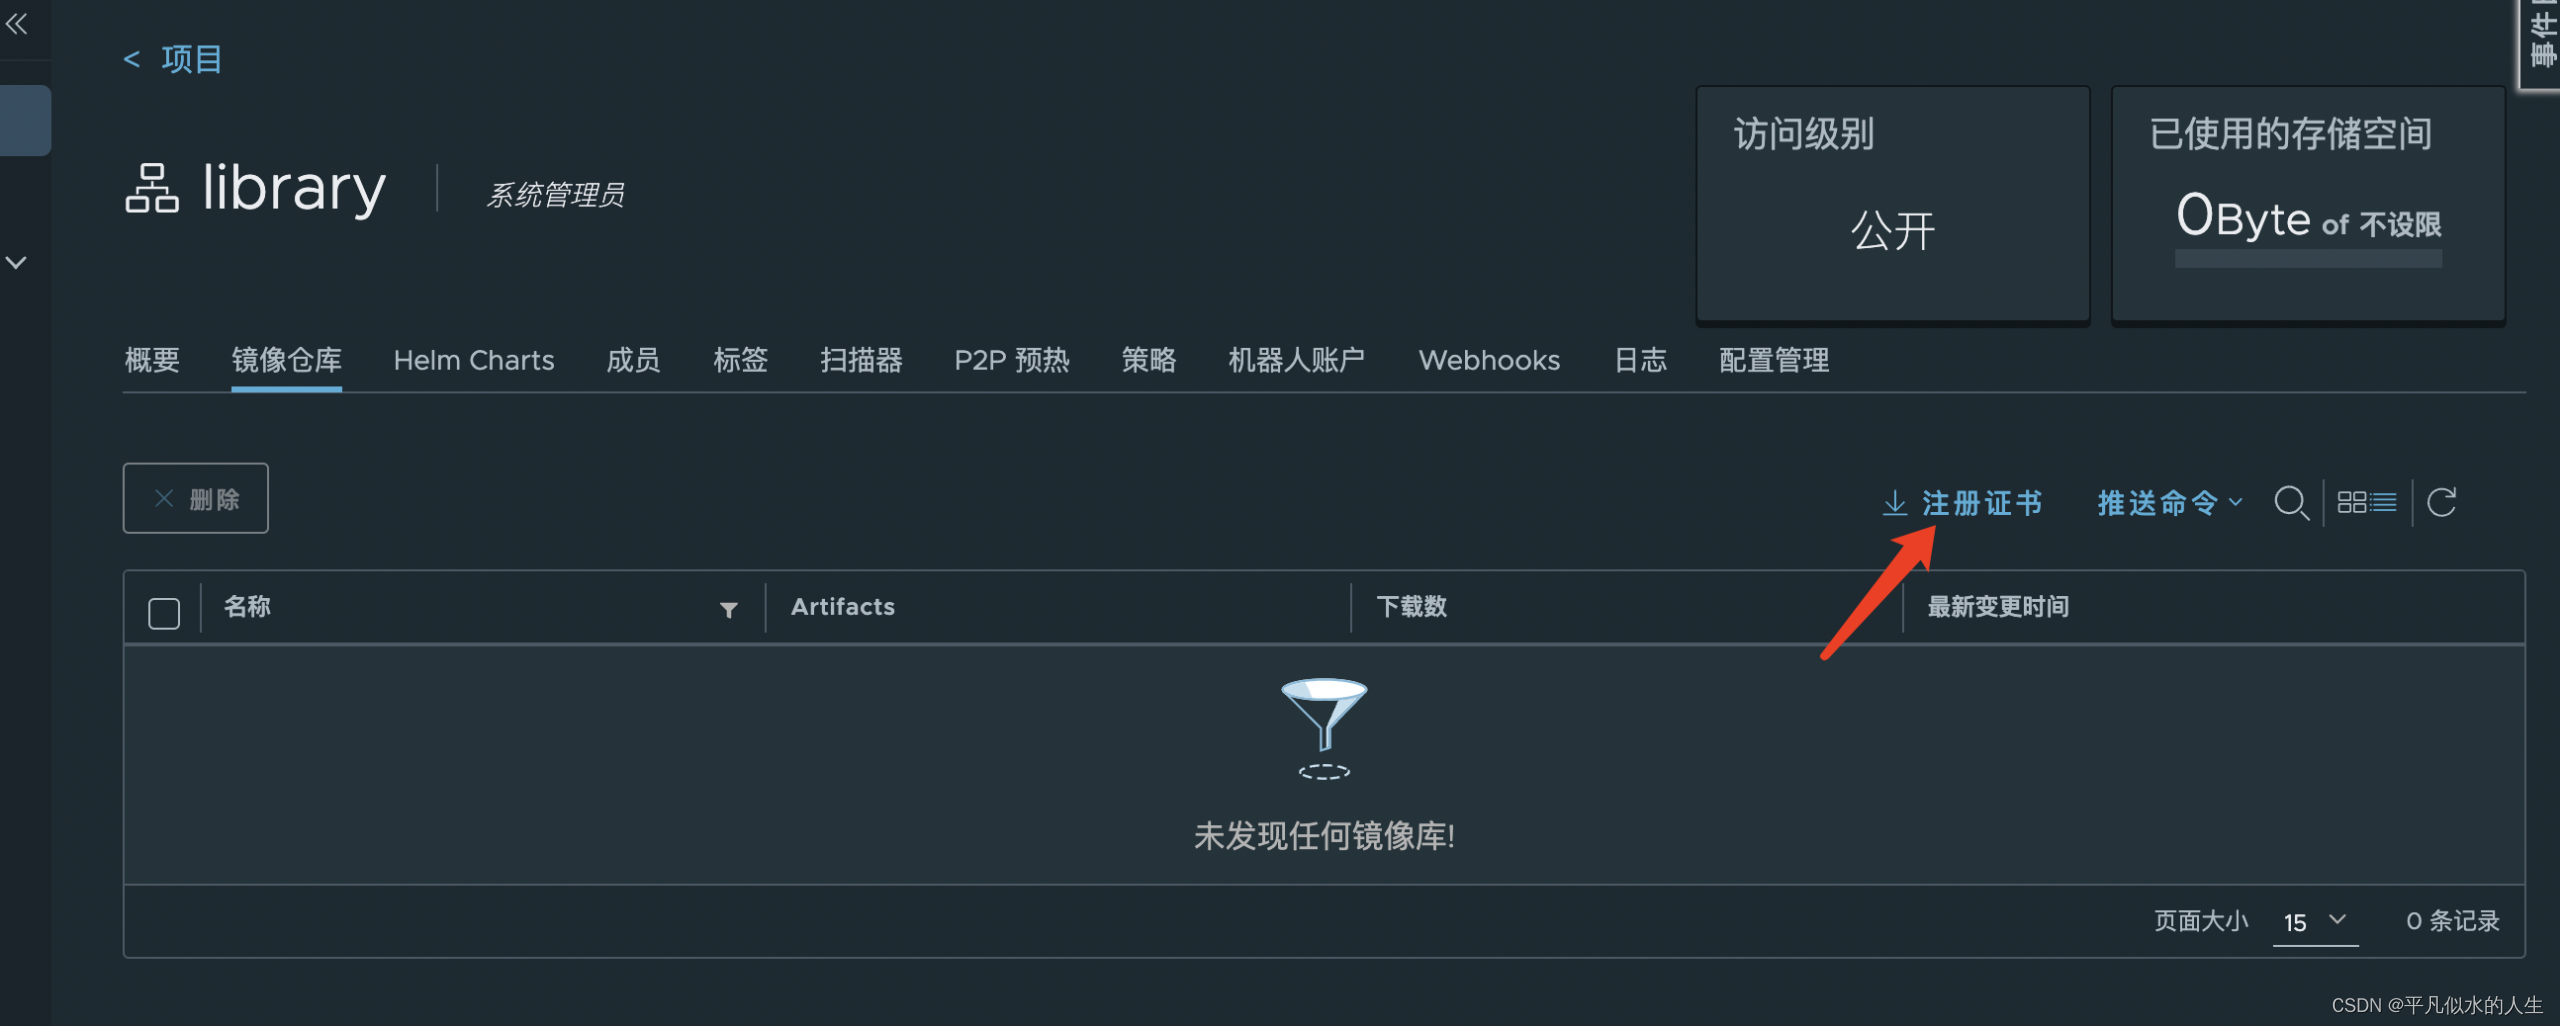
2、将下载的ca.crt复制到docker certs配置文件夹
mkdir -p /etc/docker/certs.d/core.harbor.domain
mv ca.crt /etc/docker/certs.d/core.harbor.domain
systemctl restart docker
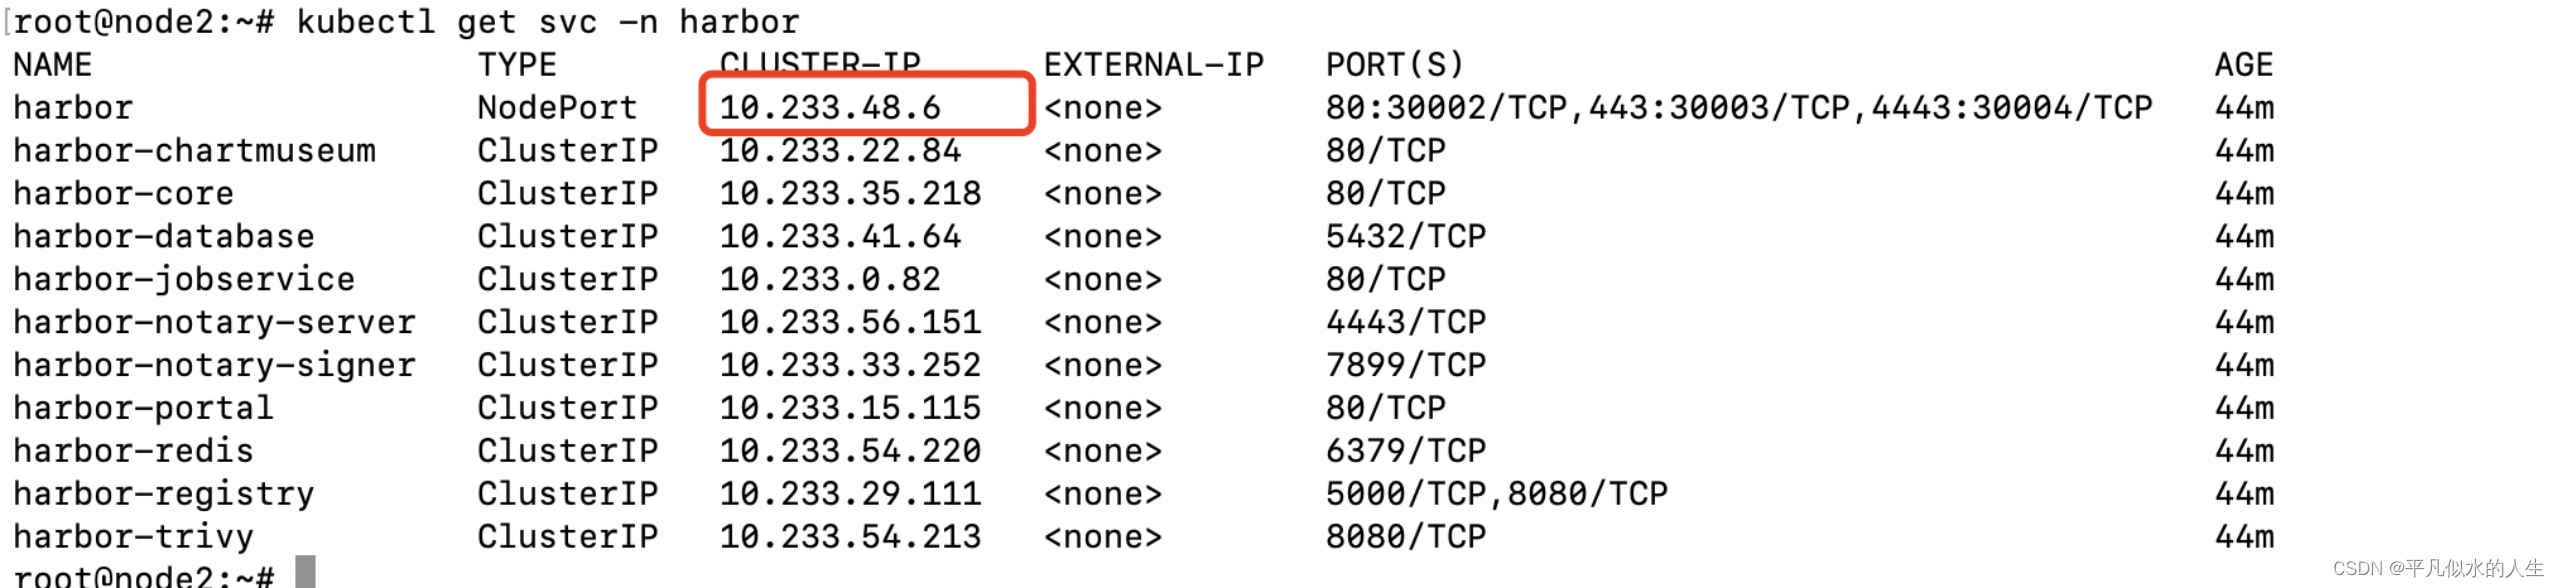
3、配置hosts
vim /etc/hosts
10.233.48.6 core.harbor.domain
4、使用docker登陆harbor
docker login -u admin -p Harbor12345 core.harbor.domain

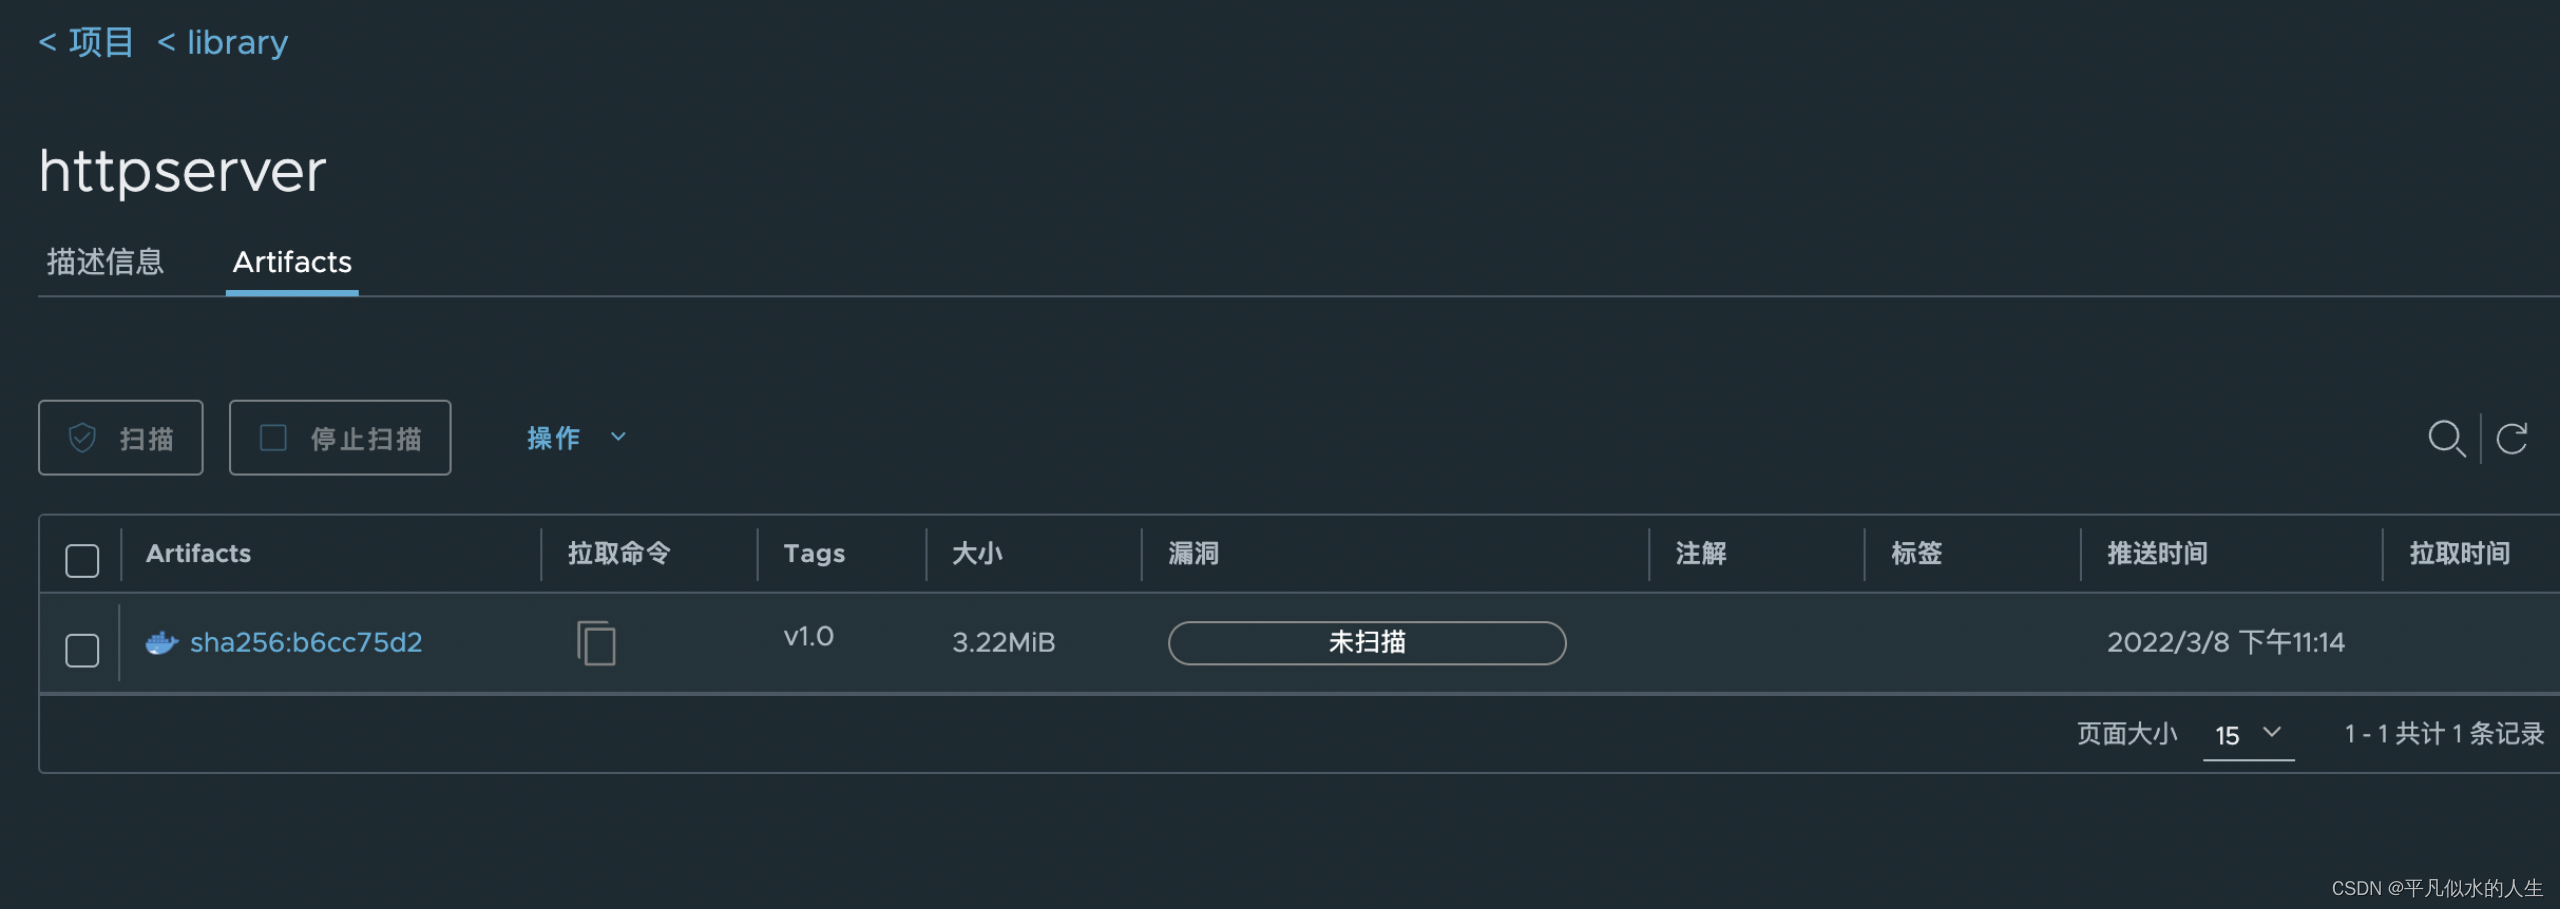
5、上传镜像到harbor
#已有镜像重新打标签
docker tag xingning03/httpserver:v1.0 core.harbor.domain/library/httpserver:v1.0

#上传镜像
docker push  core.harbor.domain/library/httpserver:v1.0

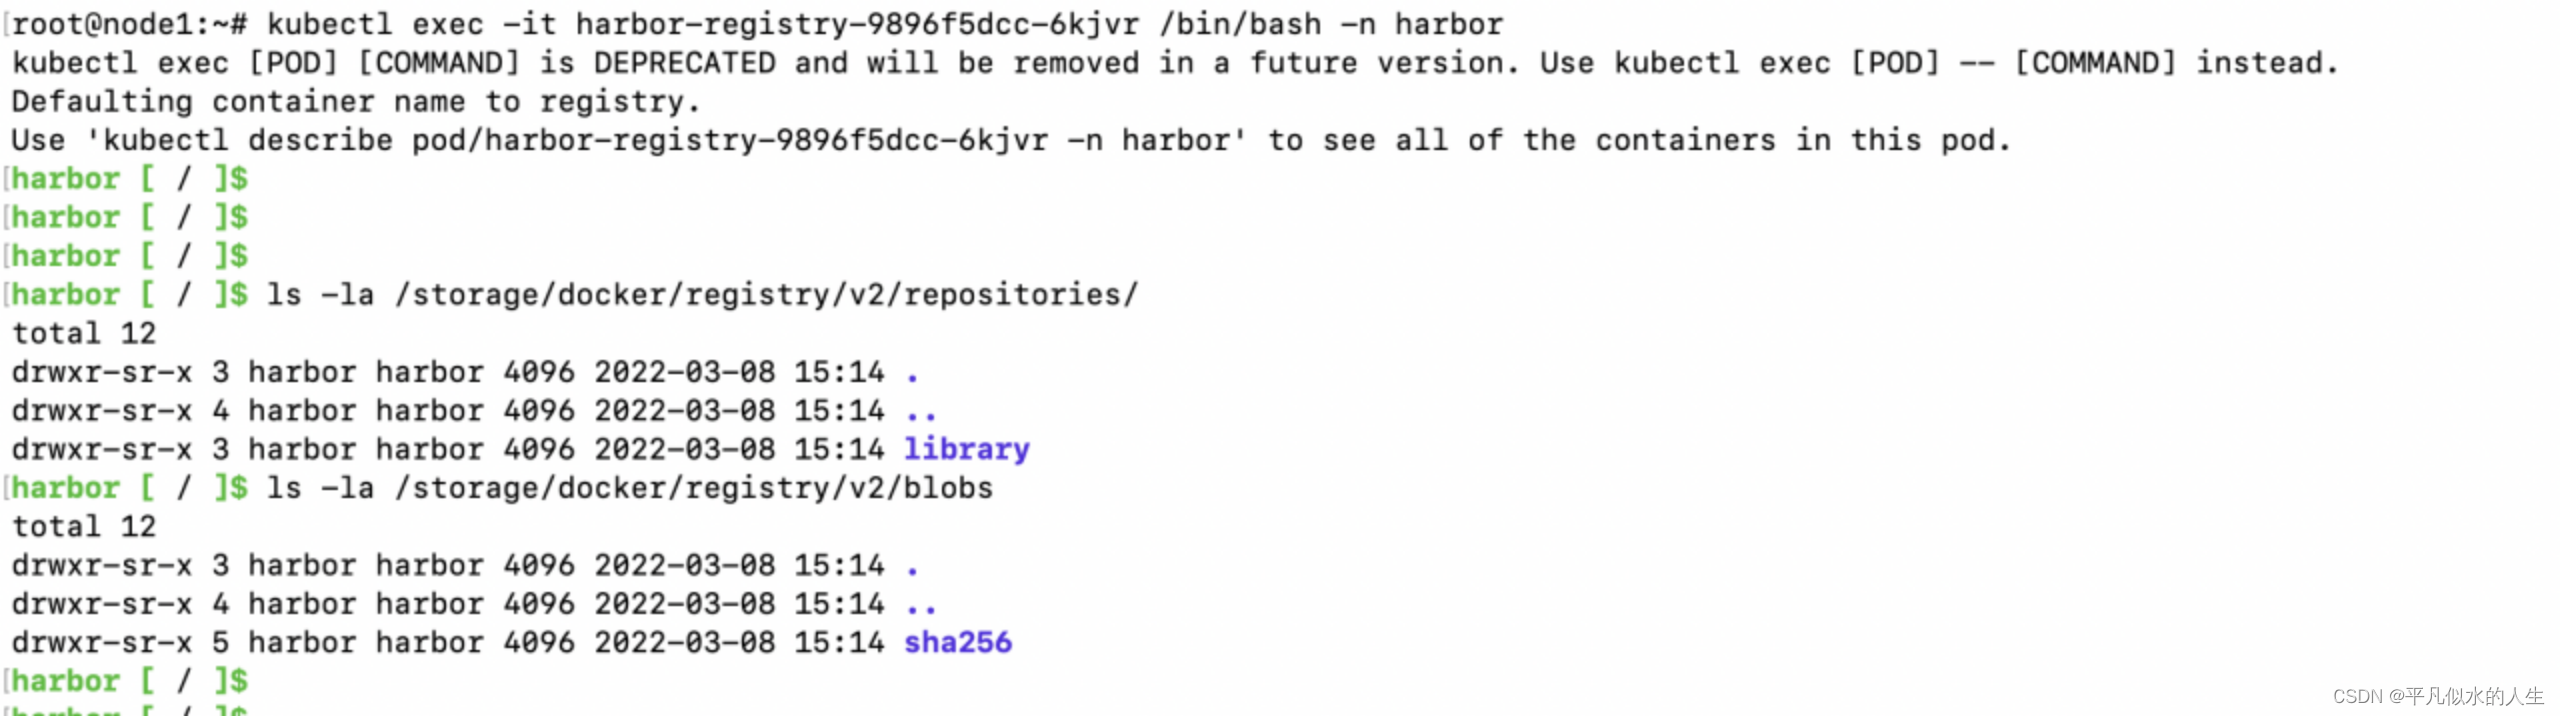
6、检查存储库和blob
kubectl exec -it harbor-registry-9896f5dcc-6kjvr /bin/bash -n harbor
7、查看数据库
kubectl exec -it harbor-database-0 -n harbor -- bash
