1.创建一个会话名字叫default,它通过dhcp获取IP地址,自动连接网络,网卡名字叫eno256
nmcli connection add con-name default type ethernet ifname eno256
2.创建一个会话名字叫static,并指定他的IP地址和网关
nmcli connection add con-name static ifname eno256 autoconnect no type ethernet ipv4.addresses 192.168.248.136/24 ipv4.gateway 192.168.248.1 ipv4.dns 114.114.114.114
3.查看当前会话:[root@localhost network-scripts]# nmcli connection show
4.查看本地网卡情况[root@localhost network-scripts]# nmcli device
进入network-scripts:[root@localhost network-scripts]# cd /etc/sysconfig/network-scripts/
***实验一***team网卡绑定
在linux中,Rhel 7之前都是使用bond机制来实现多网卡绑定同一个IP地址,来对网络提供访问,并按不同的模式来负载均衡或者轮回接替管理处理数据,而到了rhel 7 之后,提供了一种强大的工具,nmcli工具命令,使用此工具将会更具命令参数的配置来重新生成特定的配置文件来供网络接口使用,方便而又灵活。在rehl 7 中,不在使用bond机制定义,而是使用网络组team机制,把team组当作一个设备。
team网络组的模式:
broadcast:每个网卡都传送数据包
roundrobin:每个网卡轮询方式传送数据
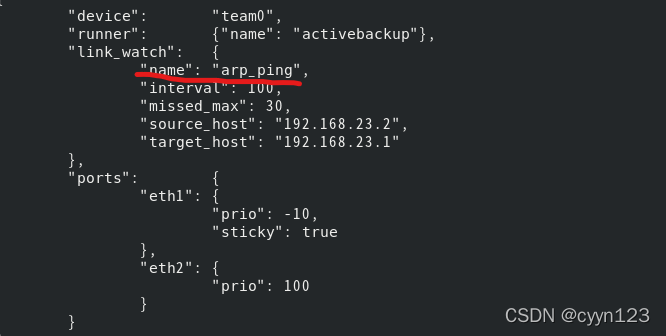
activebackup:网卡之间有主备,主传送数据包,背的不传送,主网卡down了,备才传送
loadbalance:监控流量并使用哈希函数,使得每个网卡传送的数据包打到相等
lacp:需要借助交换机,实现高级的负载均衡
team的配置:
#查看实例文件
[root@localhost ~]# cd /usr/share/doc/teamd/example_configs/
[root@localhost example_configs]# ls
#选择链路聚合配置模型
#取用以下内容

“runner”: {“name”: “activebackup”}
#创建team0设备和team0会话
[root@localhost example_configs]# nmcli connection add ifname team0 con-name team0 type team config ‘{“runner”:{“name”: “activebackup”}}’
如图所示:以下会话和设备已经创建完成

#修改team0会话的IP地址和网关以及dns等,并且更改ip地址获取为手动获取
[root@localhost network-scripts]# nmcli connection modify team0 ipv4.addresses 192.168.168.11/24 ipv4.gateway 192.168.168.1 ipv4.dns 192.168.168.1 ipv4.method manual

#添加设备到team0会话
[root@localhost network-scripts]# nmcli connection add type team-slave ifname ens 224 con-name team0-port1 master team0
[root@localhost network-scripts]# nmcli connection add type team-slave ifname ens256 con-name team0-port2 master team0
如图所以,以下已经添加完成

#激活设备
[root@localhost network-scripts]# nmcli connection up team0-port1
[root@localhost network-scripts]# nmcli connection up team0-port2
5.关闭防火墙
[root@localhost network-scripts]# systemctl stop firewalld
6.开启防火墙
[root@localhost network-scripts]# systemctl start firewalld
7.关闭开机启动
[root@localhost cyn]# systemctl disable firewalld.service
8.开启开机启动
[root@localhost cyn]# systemctl enable firewalld.service
…
9.查看当前时间
[root@localhost cyn]# date
10.查看其它时区的当前时间
[root@localhost cyn]# zdump Asia/Tokyo

11.更改时区
方法一
#使用tzselect命令查询需要的时区,按照提示操作


#添加变量到 /.bash_profile文件中,即追加类似的内容:
TZ=‘Europe/Zurich’; export TZ
[cyn@localhost ~]$ echo “TZ=‘Europe/Zurich’; export TZ” >> .bash_profile
#重新登陆即可完成
#如果不需要改的时区,则编辑刚刚追加的文件内容,删掉
[cyn@localhost ~]$ vim .bash_profile

然后新启动,就可以获得改之前的时区
方法二、
使用timedatectl命令更改时区
[root@localhost cyn]# timedatectl 查看当前时区

[root@localhost cyn]# timedatectl list-timezones 列出所有的时区

设置时区
[root@localhost cyn]# timedatectl set-timezone Asia/Urumqi

设置时间
[root@localhost cyn]# timedatectl set-time ‘2022-3-9 21:43:00’ 年-月-日 时:分:秒
配置NTP服务器:
#配置yum网络源:可以到https://developer.aliyun.com/mirror/查看
1、首先进入
[root@localhost cyn]# cd /etc/yum.repos.d/目录中
2、查看安装系统的版本
[root@localhost yum.repos.d]# cat /etc/redhat-release
3、进入上述网站中找到和自己一样版本的系统,按要求操作


[root@localhost yum.repos.d]# wget -O /etc/yum.repos.d/CentOS-Base.repo https://mirrors.aliyun.com/repo/Centos-vault-8.5.2111.repo
4、配置完成后在yum.repos.d目录中存在两个仓库,一个是Base,一个是Appstream


#接着使用yum源下载chrony包
[root@localhost yum.repos.d]# yum install chrony -y
#运行时间服务器
[root@localhost yum.repos.d]# systemctl start chronyd
#查看所使用的时间服务器
[root@localhost yum.repos.d]# chronyc sources
 *表示目前正在使用上层NTP
+连接成功,可提供时间跟新的候补服务器
-该NTP服务则其被认为不合格
#再次查询本地时间则已经准确