首先申明我也是看了别人的文章,然后第一次搞这个,本文章写的可能会比较细节,适合没搭建过的铁子。
我看的是这篇帖子,我会在他这个帖子上进行一些基础上的教程。建议可以先去看一下。
5分钟,自己做一个隧道代理-云社区-华为云隧道代理不需要自己更换 IP,使用起来非常方便。但是隧道 IP 的价格远远高于普通代理。本文介绍一种基于普通代理自己搭建隧道代理的方法,能大大节约开发费用。https://bbs.huaweicloud.com/blogs/286309首先无论是在服务器上还是windows上搭建隧道ip,都需要配置好 redis、python3、OpenResty。
redis配置:
???????最前面的可以看这篇文章
????????Linux搭建redis单机 - 仅此而已-远方 - 博客园
? ? ? ? 然后配置一下redis.conf ,允许外网访问redis。
? ? ? ? 1、注释绑定的主机地址
????????????????# bind 127.0.0.1
? ? ? ? 2、修改redis的守护进程为no,不启用
????????????????daemonize no
? ? ? ? 3、修改redis的保护模式为no,不启用
????????????????protected-mode no
? ? ? ? 修改完之后就重启一下。
OpenResty配置
? ? ? ? ? ? ? ? ? ? ? ? 具体可以看一下这篇文章,写的比较详细。
? ? ? ? ? ? ? ??Linux下安装配置OpenResty服务器 - 小得盈满 - 博客园
? ? ? ? ? ? ? ? ? ? ? ? 安装好之后修改nginx.conf的内容
? ? ? ? ? ? ? ? ? ? ? ? 原先里面的内容都不要,全部删掉,直接替换成下面这个,修改里面需要改的内容,如logs地址、redis地址密码等等,其余的不用改。
worker_processes  16;        #nginx worker 数量
error_log /usr/local/openresty/nginx/logs/error.log;   #指定错误日志文件路径 这里要根据你自己的路径来设置
events {
    worker_connections 1024;
}
stream {
    ## TCP 代理日志格式定义
    log_format tcp_proxy '$remote_addr [$time_local] '
                         '$protocol $status $bytes_sent $bytes_received '
                         '$session_time "$upstream_addr" '
                         '"$upstream_bytes_sent" "$upstream_bytes_received" "$upstream_connect_time"';
    ## TCP 代理日志配置
    access_log /usr/local/openresty/nginx/logs/access.log tcp_proxy; #这里要根据你自己的路径来设置
    open_log_file_cache off;

    ## TCP 代理配置
    upstream backend{
        server 127.0.0.2:1101;# 这里不用改
        balancer_by_lua_block {
            -- 初始化balancer
            local balancer = require "ngx.balancer"
            local host = ""
            local port = 0
            host = ngx.ctx.proxy_host
            port = ngx.ctx.proxy_port
            -- 设置 balancer
            local ok, err = balancer.set_current_peer(host, port)
            if not ok then
                ngx.log(ngx.ERR, "failed to set the peer: ", err)
            end
        }
    }
    server {
        preread_by_lua_block{

            local redis = require("resty.redis")
            --创建实例
            local redis_instance = redis:new()
            --设置超时(毫秒)
            redis_instance:set_timeout(3000)
            --建立连接,请在这里配置Redis 的 IP 地址、端口号、密码和用到的 Key
            #redis需要改一下,没有密码就把下面说的那行删掉就行了
            local rhost = "123.45.67.89"
            local rport = 6739
            local rpass = "abcdefg"
            local rkey = "proxy:pool"
            local ok, err = redis_instance:connect(rhost, rport)
            ngx.log(ngx.ERR, "1111111 ", ok, " ", err)

            -- 如果没有密码,移除下面这一行
            local res, err = redis_instance:auth(rpass)
            local res, err = redis_instance:hkeys(rkey)
            if not res then
                ngx.log(ngx.ERR,"res num error : ", err)
                return redis_instance:close()
            end
            math.randomseed(tostring(ngx.now()):reverse():sub(1, 6))
            local proxy = res[math.random(#res)]
            local colon_index = string.find(proxy, ":")
            local proxy_ip = string.sub(proxy, 1, colon_index - 1)
            local proxy_port = string.sub(proxy, colon_index + 1)
            ngx.log(ngx.ERR,"redis data = ", proxy_ip, ":", proxy_port);
            ngx.ctx.proxy_host = proxy_ip
            ngx.ctx.proxy_port = proxy_port
            redis_instance:close()
        }
        #  下面是本机的端口,也就是爬虫固定写死的端口
        #端口可以改一下,我是改成了5位数
       listen 0.0.0.0:9976; #监听本机地址和端口,当使用keeplived的情况下使用keeplived VIP
       proxy_connect_timeout 3s;
       proxy_timeout 10s;
       proxy_pass backend; #这里填写对端的地址
    }
}
改完后启动一下nginx,这一块就ok了
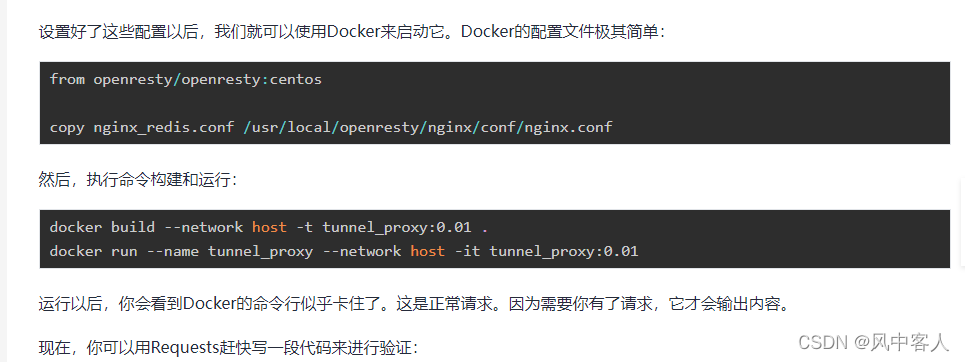
那边配置的文章中提到用Docker来启动他,你可以用,但是需要配置一下,我这边是没有用的,效果是一样的,不会影响。
?

往redis里添加Ip
? ? ? ? 这个代码里面基本上不用改,如果hset报错说参数异常,就把hset改成hmset就行了。
"""
ProxyManager.py
~~~~~~~~~~~~~~~~~~~~~
简易代理池管理工具,直接从URL中读取所有
最新的代理,并写入Redis。
"""
import yaml
import time
import json
import redis
import datetime
import requests
class ProxyManager:
    def __init__(self):
        self.config = self.read_config()
        self.redis_config = self.config['redis']
        self.client = redis.Redis(host=self.redis_config['host'],
                                  password=self.redis_config['password'],
                                  port=self.redis_config['port'])
        self.instance_dict = {}

    def read_config(self):
        with open('config.yaml') as f:
            config = yaml.safe_load(f.read())
            return config

    def read_ip(self):
        resp = requests.get(self.config['proxy']).text
        if '{' in resp:
            return []
        proxy_list = resp.split()
        return proxy_list

    def delete_ip(self, live_ips, pool_ips):
        ip_to_removed = set(pool_ips) - set(live_ips)
        if ip_to_removed:
            print('ip to be removed:', ip_to_removed)
            self.client.hdel(self.redis_config['key'], *list(ip_to_removed))

    def add_new_ips(self, live_ips, pool_ips):
        ip_to_add = set(live_ips) - set(pool_ips)
        if ip_to_add:
            print('ip to add:', ip_to_add)
            ips = {}
            for ip in ip_to_add:
                ips[ip] = json.dumps({'private_ip': ip,
                                      'ts': datetime.datetime.now().strftime('%Y-%m-%d %H:%M:%S')})
            self.client.hset(self.redis_config['key'], mapping=ips)

    def run(self):
        while True:
            live_ips = self.read_ip()
            pool_ips = [x.decode() for x in self.client.hgetall(self.redis_config['key'])]
            self.delete_ip(live_ips, pool_ips)
            self.add_new_ips(live_ips, pool_ips)
            time.sleep(40)
if __name__ == '__main__':
    manager = ProxyManager()
    manager.run()
存IP配置文档
? ? ? ? 有一点,键: 值 中间一点要有个空格,不要就会被识别为一整个字符串。?
redis:
  host: redis IP地址
  port: 6379
  password: 密码,没有随便写点啥或者删掉就行了
  key: 'proxy:pool'
proxy:
  '这里写去ip代理的url'
?到这里配置完之后基本上是没有什么问题了。
欢迎随时技术交流与探讨,wx:w2786886635