零、前言
Jenkins是一个自动部署的平台,可以极大的帮助我们自动部署项目,把注意力放在书写代码上。
教程环境说明:
系统:ubuntu20
配置:2核4G
软件:JAVA11
安装方式:APT(不使用Docker)
注意: 您至少需要预留256MB的内存空间,推荐1G内存空间,实测占用1G左右,安装所需要的环境,可以查阅官网的入门指南
一、软件安装
1.添加用于安装的密钥到您的系统里
curl -fsSL https://pkg.jenkins.io/debian-stable/jenkins.io.key | sudo tee \
    /usr/share/keyrings/jenkins-keyring.asc > /dev/null
2.添加安装Jenkins所需的软件源
echo deb [signed-by=/usr/share/keyrings/jenkins-keyring.asc] \
    https://pkg.jenkins.io/debian-stable binary/ | sudo tee \
    /etc/apt/sources.list.d/jenkins.list > /dev/null
3.更新软件列表
sudo apt-get update
4.安装fontconfig和openjdk-11-jre两个依赖
sudo apt-get install fontconfig openjdk-11-jre
5.安装Jenkins
sudo apt-get install jenkins
提醒:安装会自动新建一个名为jenkins的用户,这个很重要!
这里附上官网的下载页面
6.打开网址进行配置
http://ip:8080
7.此处需要输入一个配置密码,按提示到相应位置寻找即可
8.安装推荐的插件
有极大的可能会有部分插件没法安装,可以先跳过,之后会在进入系统后修复这个问题
9.按照指引,配置一个管理用户
10.配置访问域名
如果您打算配置反向代理,建议先去配置好反向代理后,再确认此处的访问域名
如果此处已经配置,但又有配置反向代理的计划,请查看文末的解决办法
11.完成配置,进入系统
12.前往系统管理->插件管理->高级配置国内的镜像源

我使用清华大学镜像源
https://mirrors.tuna.tsinghua.edu.cn/jenkins/updates/update-center.json
13.重新安装失败的插件
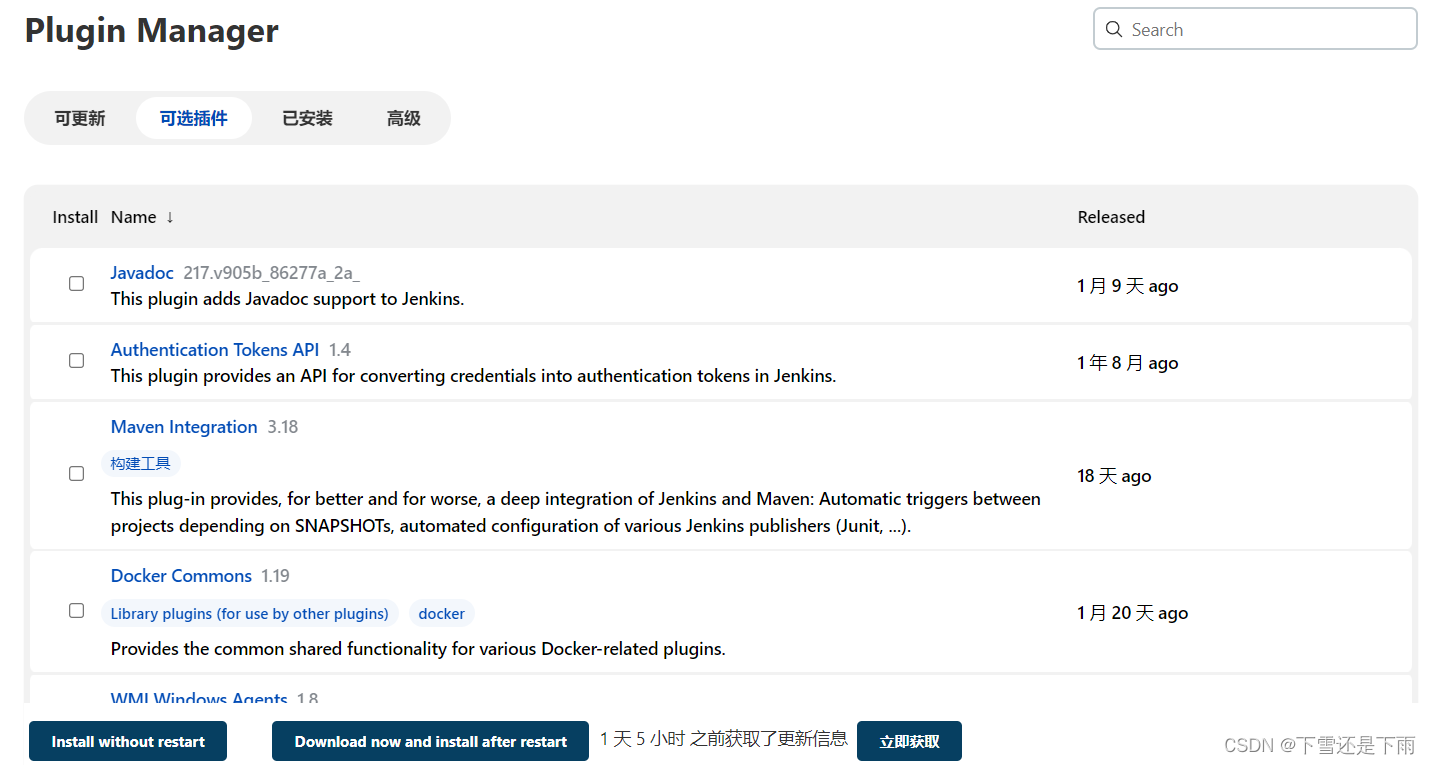
14.重启,安装结束
为了更好的安装,这里建议使用root用户
*此处假设你已经安装好了pip并配置好了国内镜像源
1.使用pip安装
pip install supervisor
2、获取一份启动服务脚本(将supervisor设为服务,虽然是centos的,但也可以用啦)
wget https://raw.githubusercontent.com/Supervisor/initscripts/master/centos-systemd-etcs -O /usr/lib/systemd/system/systemd-supervisor.service
3.使用Supervisor自带的配置文件模板生成配置文件
echo_supervisord_conf > /etc/supervisord.conf
生成好的配置文件应该长这样
; Sample supervisor config file.
;
; For more information on the config file, please see:
; http://supervisord.org/configuration.html
;
; Notes:
;  - Shell expansion ("~" or "$HOME") is not supported.  Environment
;    variables can be expanded using this syntax: "%(ENV_HOME)s".
;  - Quotes around values are not supported, except in the case of
;    the environment= options as shown below.
;  - Comments must have a leading space: "a=b ;comment" not "a=b;comment".
;  - Command will be truncated if it looks like a config file comment, e.g.
;    "command=bash -c 'foo ; bar'" will truncate to "command=bash -c 'foo ".
;
; Warning:
;  Paths throughout this example file use /tmp because it is available on most
;  systems.  You will likely need to change these to locations more appropriate
;  for your system.  Some systems periodically delete older files in /tmp.
;  Notably, if the socket file defined in the [unix_http_server] section below
;  is deleted, supervisorctl will be unable to connect to supervisord.

[unix_http_server]
file=/tmp/supervisor.sock   ; the path to the socket file
;chmod=0700                 ; socket file mode (default 0700)
;chown=nobody:nogroup       ; socket file uid:gid owner
;username=user              ; default is no username (open server)
;password=123               ; default is no password (open server)

; Security Warning:
;  The inet HTTP server is not enabled by default.  The inet HTTP server is
;  enabled by uncommenting the [inet_http_server] section below.  The inet
;  HTTP server is intended for use within a trusted environment only.  It
;  should only be bound to localhost or only accessible from within an
;  isolated, trusted network.  The inet HTTP server does not support any
;  form of encryption.  The inet HTTP server does not use authentication
;  by default (see the username= and password= options to add authentication).
;  Never expose the inet HTTP server to the public internet.

;[inet_http_server]         ; inet (TCP) server disabled by default
;port=127.0.0.1:9001        ; ip_address:port specifier, *:port for all iface
;username=user              ; default is no username (open server)
;password=123               ; default is no password (open server)

[supervisord]
logfile=/tmp/supervisord.log ; main log file; default $CWD/supervisord.log
logfile_maxbytes=50MB        ; max main logfile bytes b4 rotation; default 50MB
logfile_backups=10           ; # of main logfile backups; 0 means none, default 10
loglevel=info                ; log level; default info; others: debug,warn,trace
pidfile=/tmp/supervisord.pid ; supervisord pidfile; default supervisord.pid
nodaemon=false               ; start in foreground if true; default false
silent=false                 ; no logs to stdout if true; default false
minfds=1024                  ; min. avail startup file descriptors; default 1024
minprocs=200                 ; min. avail process descriptors;default 200
;umask=022                   ; process file creation umask; default 022
;user=supervisord            ; setuid to this UNIX account at startup; recommended if root
;identifier=supervisor       ; supervisord identifier, default is 'supervisor'
;directory=/tmp              ; default is not to cd during start
;nocleanup=true              ; don't clean up tempfiles at start; default false
;childlogdir=/tmp            ; 'AUTO' child log dir, default $TEMP
;environment=KEY="value"     ; key value pairs to add to environment
;strip_ansi=false            ; strip ansi escape codes in logs; def. false

; The rpcinterface:supervisor section must remain in the config file for
; RPC (supervisorctl/web interface) to work.  Additional interfaces may be
; added by defining them in separate [rpcinterface:x] sections.

[rpcinterface:supervisor]
supervisor.rpcinterface_factory = supervisor.rpcinterface:make_main_rpcinterface

; The supervisorctl section configures how supervisorctl will connect to
; supervisord.  configure it match the settings in either the unix_http_server
; or inet_http_server section.

[supervisorctl]
serverurl=unix:///tmp/supervisor.sock ; use a unix:// URL  for a unix socket
;serverurl=http://127.0.0.1:9001 ; use an http:// url to specify an inet socket
;username=chris              ; should be same as in [*_http_server] if set
;password=123                ; should be same as in [*_http_server] if set
;prompt=mysupervisor         ; cmd line prompt (default "supervisor")
;history_file=~/.sc_history  ; use readline history if available

; The sample program section below shows all possible program subsection values.
; Create one or more 'real' program: sections to be able to control them under
; supervisor.

;[program:theprogramname]
;command=/bin/cat              ; the program (relative uses PATH, can take args)
;process_name=%(program_name)s ; process_name expr (default %(program_name)s)
;numprocs=1                    ; number of processes copies to start (def 1)
;directory=/tmp                ; directory to cwd to before exec (def no cwd)
;umask=022                     ; umask for process (default None)
;priority=999                  ; the relative start priority (default 999)
;autostart=true                ; start at supervisord start (default: true)
;startsecs=1                   ; # of secs prog must stay up to be running (def. 1)
;startretries=3                ; max # of serial start failures when starting (default 3)
;autorestart=unexpected        ; when to restart if exited after running (def: unexpected)
;exitcodes=0                   ; 'expected' exit codes used with autorestart (default 0)
;stopsignal=QUIT               ; signal used to kill process (default TERM)
;stopwaitsecs=10               ; max num secs to wait b4 SIGKILL (default 10)
;stopasgroup=false             ; send stop signal to the UNIX process group (default false)
;killasgroup=false             ; SIGKILL the UNIX process group (def false)
;user=chrism                   ; setuid to this UNIX account to run the program
;redirect_stderr=true          ; redirect proc stderr to stdout (default false)
;stdout_logfile=/a/path        ; stdout log path, NONE for none; default AUTO
;stdout_logfile_maxbytes=1MB   ; max # logfile bytes b4 rotation (default 50MB)
;stdout_logfile_backups=10     ; # of stdout logfile backups (0 means none, default 10)
;stdout_capture_maxbytes=1MB   ; number of bytes in 'capturemode' (default 0)
;stdout_events_enabled=false   ; emit events on stdout writes (default false)
;stdout_syslog=false           ; send stdout to syslog with process name (default false)
;stderr_logfile=/a/path        ; stderr log path, NONE for none; default AUTO
;stderr_logfile_maxbytes=1MB   ; max # logfile bytes b4 rotation (default 50MB)
;stderr_logfile_backups=10     ; # of stderr logfile backups (0 means none, default 10)
;stderr_capture_maxbytes=1MB   ; number of bytes in 'capturemode' (default 0)
;stderr_events_enabled=false   ; emit events on stderr writes (default false)
;stderr_syslog=false           ; send stderr to syslog with process name (default false)
;environment=A="1",B="2"       ; process environment additions (def no adds)
;serverurl=AUTO                ; override serverurl computation (childutils)

; The sample eventlistener section below shows all possible eventlistener
; subsection values.  Create one or more 'real' eventlistener: sections to be
; able to handle event notifications sent by supervisord.

;[eventlistener:theeventlistenername]
;command=/bin/eventlistener    ; the program (relative uses PATH, can take args)
;process_name=%(program_name)s ; process_name expr (default %(program_name)s)
;numprocs=1                    ; number of processes copies to start (def 1)
;events=EVENT                  ; event notif. types to subscribe to (req'd)
;buffer_size=10                ; event buffer queue size (default 10)
;directory=/tmp                ; directory to cwd to before exec (def no cwd)
;umask=022                     ; umask for process (default None)
;priority=-1                   ; the relative start priority (default -1)
;autostart=true                ; start at supervisord start (default: true)
;startsecs=1                   ; # of secs prog must stay up to be running (def. 1)
;startretries=3                ; max # of serial start failures when starting (default 3)
;autorestart=unexpected        ; autorestart if exited after running (def: unexpected)
;exitcodes=0                   ; 'expected' exit codes used with autorestart (default 0)
;stopsignal=QUIT               ; signal used to kill process (default TERM)
;stopwaitsecs=10               ; max num secs to wait b4 SIGKILL (default 10)
;stopasgroup=false             ; send stop signal to the UNIX process group (default false)
;killasgroup=false             ; SIGKILL the UNIX process group (def false)
;user=chrism                   ; setuid to this UNIX account to run the program
;redirect_stderr=false         ; redirect_stderr=true is not allowed for eventlisteners
;stdout_logfile=/a/path        ; stdout log path, NONE for none; default AUTO
;stdout_logfile_maxbytes=1MB   ; max # logfile bytes b4 rotation (default 50MB)
;stdout_logfile_backups=10     ; # of stdout logfile backups (0 means none, default 10)
;stdout_events_enabled=false   ; emit events on stdout writes (default false)
;stdout_syslog=false           ; send stdout to syslog with process name (default false)
;stderr_logfile=/a/path        ; stderr log path, NONE for none; default AUTO
;stderr_logfile_maxbytes=1MB   ; max # logfile bytes b4 rotation (default 50MB)
;stderr_logfile_backups=10     ; # of stderr logfile backups (0 means none, default 10)
;stderr_events_enabled=false   ; emit events on stderr writes (default false)
;stderr_syslog=false           ; send stderr to syslog with process name (default false)
;environment=A="1",B="2"       ; process environment additions
;serverurl=AUTO                ; override serverurl computation (childutils)

; The sample group section below shows all possible group values.  Create one
; or more 'real' group: sections to create "heterogeneous" process groups.

;[group:thegroupname]
;programs=progname1,progname2  ; each refers to 'x' in [program:x] definitions
;priority=999                  ; the relative start priority (default 999)

; The [include] section can just contain the "files" setting.  This
; setting can list multiple files (separated by whitespace or
; newlines).  It can also contain wildcards.  The filenames are
; interpreted as relative to this file.  Included files *cannot*
; include files themselves.

;[include]
;files = /etc/supervisor/*.conf
此处;的作用类似于注释
4.修改配置
注意最后两行的include部分
取消注释并按需修改(此处配置的是Supervisor用于创建服务的配置文件的位置)
此处,我配置的是
[include]
files = /etc/supervisor/*.conf
5.绑定配置文件
supervisord -c /etc/supervisord.conf
*创建服务的配置文件将会在配置完Jenkins后配置
二、配置Jenkins
1.前往系统管理->安全->Manage Credentials

2.按照图中横线标识往里点
首先点击此处

再点击此处

直到出现这个页面

正如所见,我已经创建了两个凭证,接下来我将教您配置这两个凭据
配置github-token
1.进入Github
2.进入设置中的Developer settings
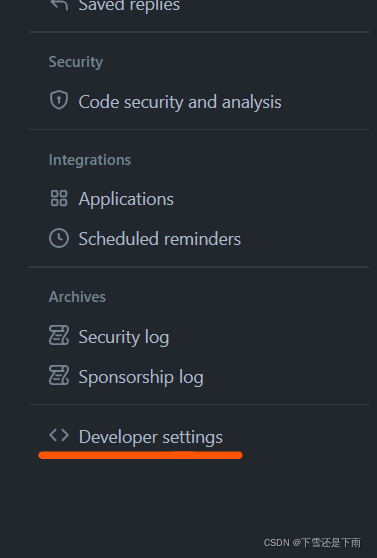
3.选择Personal access token并点击右上角Generate new token
按自己的需求生成密钥(为了方便,我给与了token所有权限)

4.复制生成的token
注意:该token只会显示一次

5.回到Jenkins的控制台,点击左侧添加凭据

6.选择类型为Secret text,在Secret字段中粘贴您刚刚复制的token
在描述中添加一些描述(空着也行,但是凭据多了不利于区分),ID空着,jenkins会自己生成

7.确定后完成
配置SSH-KEY
注意:此操作一定要在jenkins用户下进行
1.首先打开终端
先切换为root用户,在切换为jenkins用户(这样做就不用输入Jenkins的密码了)
su
Password:<root用户的密码>
su jenkins
2.生成SSH公私钥
ssh-keygen -t rsa -C
一路回车
3.转换公钥格式
cd #敲一下cd进入用户根目录
cd .ssh #进入SSH目录
ssh-keygen -m PEM -t rsa -f <yourfile>#将公钥转化为PEM格式
4.找到刚刚生成的密钥
sudo cat /etc/passwd #该命令可以帮您列出用户列表,以及用户根目录

不出意外的话,您的ssh目录下应该有以上几个文件
我们需要使用id_rsa.pub和id_rsa.pub.pub两个文件
5.打开Github,进入settings中的SSH and GPG keys
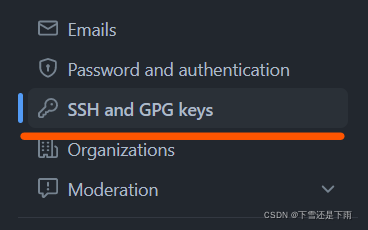
6.添加一个新的KEY,并将id_rsa.pub.pub中的内容复制进去
7.回到Jenkins中继续添凭据,将类型改为SSH Username with private key
Username输入您的Github ID
勾选Enter directly ,并将id_rsa.pub中的内容复制进去

8.凭据配置完成
1.新建任务,选择自由风格的软件项目

2.添加项目URL(如果没有,可能是Github插件未安装)
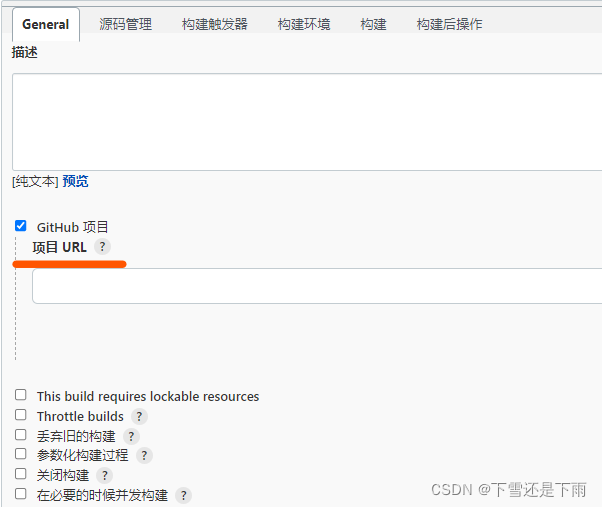
3.添加Git仓库,并选择刚刚创建好的SSH凭据
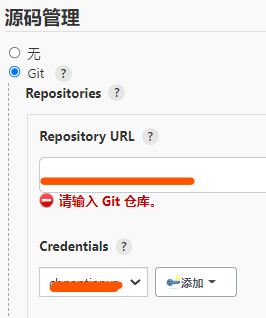
4.按图示选择Hook
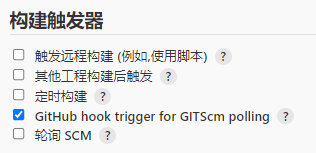
5.在构建环境中绑定刚刚的Secret text

6.添加一个构建步骤执行shell

7.先保存,之后会添加shell脚本
8.还记得supervisor吗?,接下来,我将未我们的程序创建一个守护进程的配置文件
9.在/etc/supervisor/中创建一个配置文件,例如:golang.conf
(如果您在配置supervisor时选择的位置与我不同,请在实际位置添加)
10.寻找jenkins的工作空间目录,如果没有修改配置,工作空间的目录应该位于
/var/lib/jenkins/workspace/<任务名称>
11.输入配置
示例:
[program:<此处填写程序的名称>]
command=/var/lib/jenkins/workspace/<任务名称>/<编译后的二进制文件>
directory=/home/ubuntu/config/
autostart=true
autorestart=true
startsecs=10
stdout_logfile=/var/log/<此处填写程序的名称>.log
stdout_logfile_maxbytes=1MB
stdout_logfile_backups=10
stdout_capture_maxbytes=1MB
stderr_logfile=/var/log/<此处填写程序的名称>.log
stderr_logfile_maxbytes=1MB
stderr_logfile_backups=10
stderr_capture_maxbytes=1MB
command应为二进制文件位置
directory应为程序运行的目录(如果要读一些配置文件啥的,就需要谨慎配置)
stdout_logfile为生成运行日志的目录位置一定要有操作权限,不然跑不起来QAQ
stderr_logfile为生成错误日志的目录位置一定要有操作权限,不然跑不起来QAQ
12.添加Jenkins的构建脚本(假设已经拥有了构建的环境)
此处为构建Go的示例叫脚本
go env -w GO111MODULE=on
go env -w GOPROXY=https://goproxy.cn,direct
go build main.go
sudo supervisorctl restart <此处填写程序的名称>
此脚本将会生成一个名为main的可执行文件在工作目录下
您可能需要给这个文件一个可执行的权限?
14.立即构建
正常情况下supervisor会报错,找不到进程
15.重启supervisor
supervisorctl reload
16.再次立即构建
supervisor错误将会消失
1.进入Github仓库的设置页
2.添加Webhook,并做下图的配置

注意地址后还需要/github-webhook
3.配置完成后,github将会做一次请求尝试,如果没有问题将会提示200

4.Push一次代码做测试
5.您会在Jenkins的Github Hook Log里看到对应的日志

至此基础配置已经全部完成
🎉🎉🎉🎉
高级
配置完Jenkins后再配置反向代理(以Nginx为例)
将以下配置添加到nginx.conf中
upstream jenkins {
  keepalive 32; # keepalive connections
  server 127.0.0.1:8080; # jenkins ip and port
}

# Required for Jenkins websocket agents
map $http_upgrade $connection_upgrade {
  default upgrade;
  '' close;
}

server {
  listen          80;       # Listen on port 80 for IPv4 requests

  server_name     jenkins.example.com;  # replace 'jenkins.example.com' with your server domain name

  # this is the jenkins web root directory
  # (mentioned in the output of "systemctl cat jenkins")
  root            /var/run/jenkins/war/;

  access_log      /var/log/nginx/jenkins.access.log;
  error_log       /var/log/nginx/jenkins.error.log;

  # pass through headers from Jenkins that Nginx considers invalid
  ignore_invalid_headers off;

  location ~ "^/static/[0-9a-fA-F]{8}\/(.*)$" {
    # rewrite all static files into requests to the root
    # E.g /static/12345678/css/something.css will become /css/something.css
    rewrite "^/static/[0-9a-fA-F]{8}\/(.*)" /$1 last;
  }

  location /userContent {
    # have nginx handle all the static requests to userContent folder
    # note : This is the $JENKINS_HOME dir
    root /var/lib/jenkins/;
    if (!-f $request_filename){
      # this file does not exist, might be a directory or a /**view** url
      rewrite (.*) /$1 last;
      break;
    }
    sendfile on;
  }

  location / {
      sendfile off;
      proxy_pass         http://jenkins;
      proxy_redirect     default;
      proxy_http_version 1.1;

      # Required for Jenkins websocket agents
      proxy_set_header   Connection        $connection_upgrade;
      proxy_set_header   Upgrade           $http_upgrade;

      proxy_set_header   Host              $host;
      proxy_set_header   X-Real-IP         $remote_addr;
      proxy_set_header   X-Forwarded-For   $proxy_add_x_forwarded_for;
      proxy_set_header   X-Forwarded-Proto $scheme;
      proxy_max_temp_file_size 0;

      #this is the maximum upload size
      client_max_body_size       10m;
      client_body_buffer_size    128k;

      proxy_connect_timeout      90;
      proxy_send_timeout         90;
      proxy_read_timeout         90;
      proxy_buffering            off;
      proxy_request_buffering    off; # Required for HTTP CLI commands
      proxy_set_header Connection ""; # Clear for keepalive
  }

}
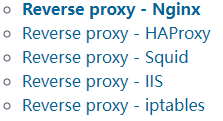
您也可以再官方文档的右侧菜单找到其他服务器的配置文件模板
🎉🎉🎉🎉