引言
前几天Openshift更新到了4.10, 红帽官方提供了阿里云下的搭建教程,跟着官方的教程实操了一遍,使用的是[快速安装集群方式], 刚做完顺手记录下来。
准备在阿里云上安装
- 拥有红帽账号

- 阿里云账号,可用额度 110元以上,因为创建虚拟机、使用阿里云网络都会扣费,如果可能额度低于100,阿里云什么资源都创建不。

- 阿里云账号中有已经完成备案的域名

创建所需的阿里云资源
准备堡垒机,并设置AccessKey
-
提前在阿里云中[香港地域]创建一台[堡垒机],堡垒机的用途主要是通过命令行部署openshift和后期运维用途。 ( 我这里用的是 2核、4G内存、40G磁盘、CentOS7.9、有公网IP的虚拟机,注意是香港地域,为啥不是国内的,你懂的)
-
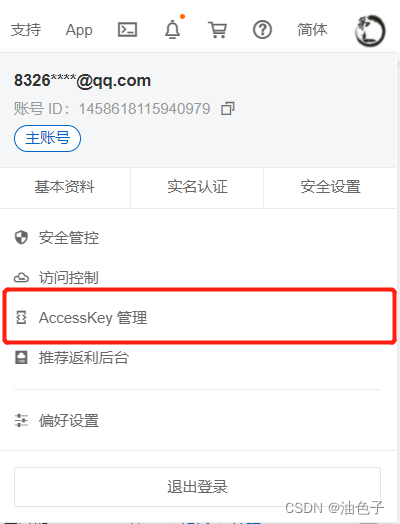
登陆到阿里云,在AccessKey中,创建密钥。(这使用的是个人账号玩玩,没有和官网一样创建子RAM用户)

-
密钥创建好后,将信息存放到[堡垒机]的
~/.alibabacloud/credentials文件中。(后续openshift会使用PHP,调用阿里云API接口,在阿里云上创建各种资源)[default] type = access_key access_key_id = 你的Key access_key_secret = 你的secret

配置CCO (Cloud Credential Operator)
它是有 ccoctl 命令工具实现, 这家伙用途就是集群外部创建和管理云凭证。
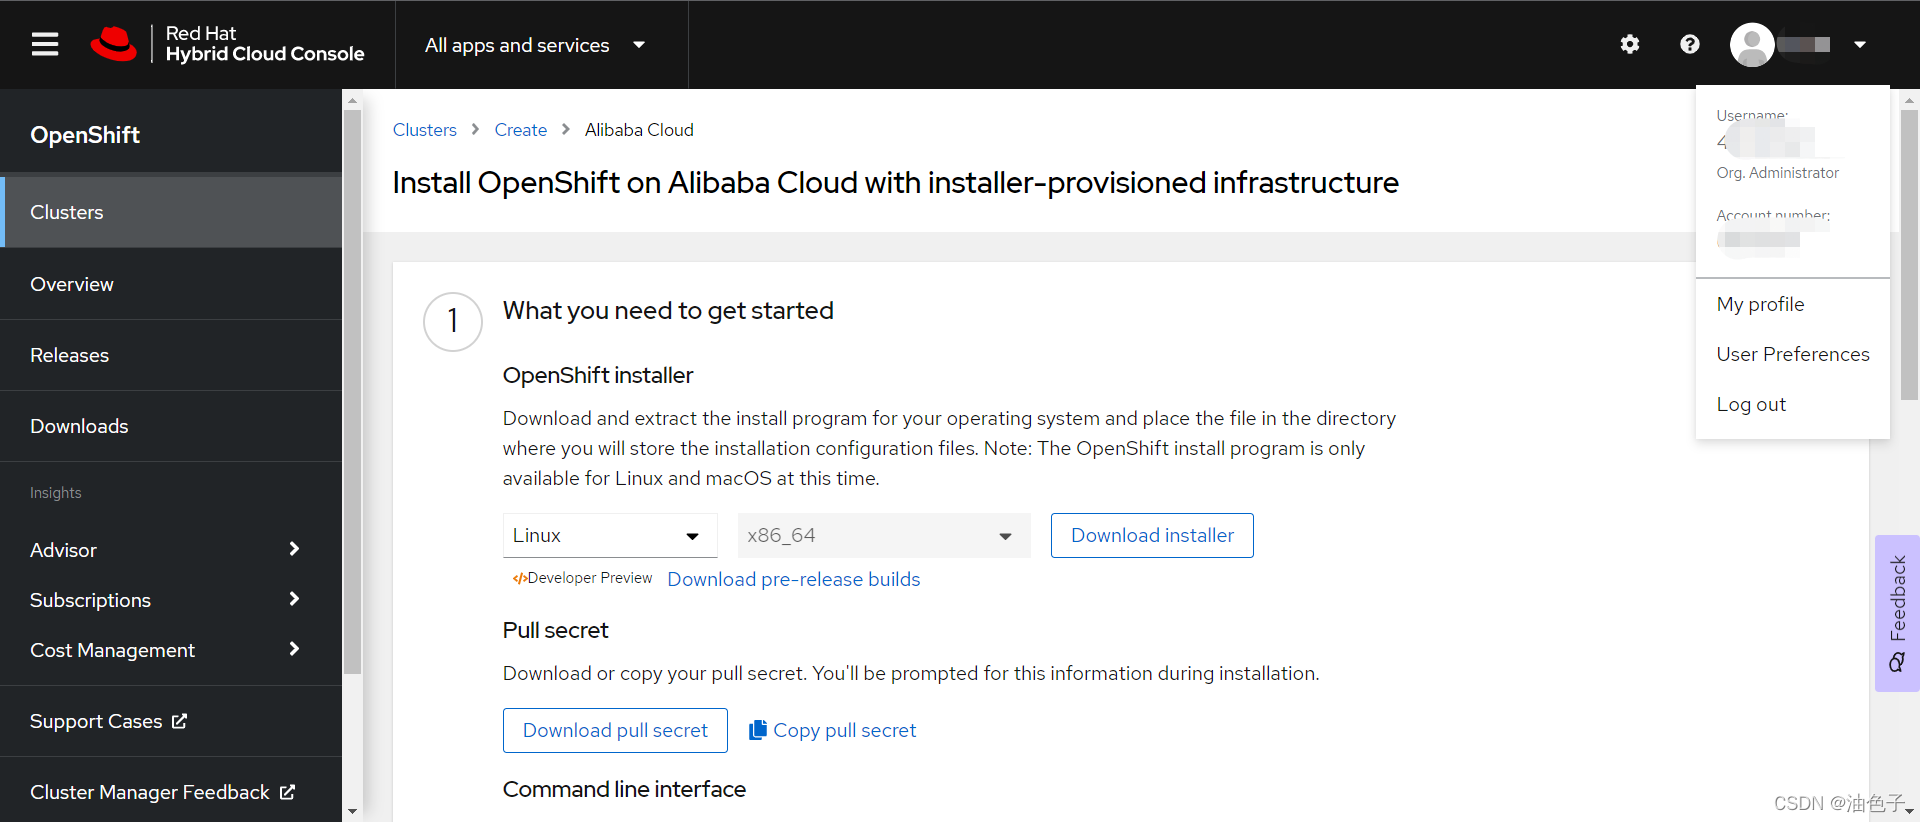
做之前,我们需要先去红帽这里拿两个压缩包 和 pull-secret 文件
openshift-install-linux.tar.gz [OpenShift 安装程序]
.pull-secret [密钥,我这里文件名是.pull-secret]
openshift-client-linux.tar.gz [命令行工具]
把两个文件给解压了,放到 /usr/bin 目录下
[root@iZj6c3kpsf1din2xy3rm0lZ ~]# tar -zxvf openshift-client-linux.tar.gz
[root@iZj6c3kpsf1din2xy3rm0lZ ~]# tar -zxvf openshift-install-linux.tar.gz
[root@iZj6c3kpsf1din2xy3rm0lZ ~]# mv oc kubectl openshift-install /usr/bin/


接着,继续开始获得 ccoctl命令工具
-
获取 OpenShift Container Platform 发布镜像
$ RELEASE_IMAGE=$(./openshift-install version | awk '/release image/ {print $3}') -
从 OpenShift Container Platform 发布镜像中获取 CCO 容器镜像:
$ CCO_IMAGE=$(oc adm release info --image-for='cloud-credential-operator' $RELEASE_IMAGE) -
ccoctl从 OpenShift Container Platform 发布镜像中的 CCO 容器镜像中提取二进制文件
$ oc image extract $CCO_IMAGE --file="/usr/bin/ccoctl" -a ~/.pull-secret -
更改权限以使其
ccoctl可执行,(一般习惯把二进制命令扔到/usr/bin目录下 )chmod 775 ccoctl mv ccoctl /usr/bin/ -
要验证是否
ccoctl可以使用,请显示帮助文件[root@iZj6c3kpsf1din2xy3rm0lZ ~]# ccoctl --help OpenShift credentials provisioning tool Usage: ccoctl [command] Available Commands: alibabacloud Manage credentials objects for alibaba cloud aws Manage credentials objects for AWS cloud completion generate the autocompletion script for the specified shell gcp Manage credentials objects for Google cloud help Help about any command ibmcloud Manage credentials objects for IBM Cloud Flags: -h, --help help for ccoctl Use "ccoctl [command] --help" for more information about a command.
在阿里云上快速安装
为集群节点 SSH 访问生成密钥对
[root@iZj6c3kpsf1din2xy3rm0lZ ~]# ssh-keygen
回车几次,会在~/.ssh目录下生成[id_rsa]和[id_rsa.pub]文件
创建安装配置文件
阿里云默认提供的是root用户,在root目录下创建个目录installation_directory
[root@iZj6c3kpsf1din2xy3rm0lZ ~]# mkdir -p /root/installation_directory
创建install-config.yaml文件
执行创建命令
[root@iZj6c3kpsf1din2xy3rm0lZ ~]# openshift-install create install-config --dir installation_directory
执行命令后,会出现一个引导界面,通过键盘方向键移动,回车键确认,下图是选择之前创建的密钥对

下图选择的是云供应商,咱们用阿里云的,回车就行

下图选择地域,咱用的香港,选择香港 [cn-hongkong]

下面选择域名,我阿里云账号下有两个域名,第一域名比较敏感上个码。这里选择[i2docker.site]域名 ,此处显示域名就是因为之前配置了 [~/.alibabacloud/credentials]文件。

下图设置集群名称,随意取,但是不能使用过的。例如这里输入 tanker, 它后续会使用 tanker.i2docker.site , *.tanker.i2docker.site 等一系列域名。

下图 输入密钥,就是 cat .pull-secret 一长串的内容,粘贴到这里

跟着上面配置,install-config.yaml 基本算完成了,但是
官方有说"将集群安装到阿里云需要 Cloud Credential Operator (CCO) 在手动模式下运行。修改install-config.yaml文件以将credentialsMode参数设置为Manual"
所以咱们要编辑下 installation_directory目录下的install-config.yaml 文件,加上[credentialsMode: Manual ]
apiVersion: v1
baseDomain: i2docker.site
credentialsMode: Manual
compute:
- architecture: amd64
  hyperthreading: Enabled
改完最后,我们把 install-config.yaml 文件 做个备份
生成所需的安装清单
用命令生成[安装清单]
[root@iZj6c3kpsf1din2xy3rm0lZ ~]# mkdir -p /root/installation_directory
[root@iZj6c3kpsf1din2xy3rm0lZ ~]# openshift-install create manifests --dir /root/installation_directory
ccoctl 工具创建凭证
之前花老大功夫弄得 ccoctl 工具,派上用场了,它用途是生成一些[凭据文件],放到上面[安装清单]中。
-
提取对象列表
mkdir -p /root/path_to_directory_with_list_of_credentials_requests/credrequests oc adm release extract --credentials-requests --cloud=alibabacloud --to=/root/path_to_directory_with_list_of_credentials_requests/credrequests quay.io/openshift-release-dev/ocp-release:4.10.5-x86_64 -
ccoctl工具处理对象mkdir -p /root/path_to_ccoctl_output_dir ccoctl alibabacloud create-ram-users --name alitanker --region=hongkong --credentials-requests-dir=/root/path_to_directory_with_list_of_credentials_requests/credrequests --output-dir=/root/path_to_ccoctl_output_dir -
生成文件放到安装清单
cp /root/path_to_ccoctl_output_dir/manifests/*credentials.yaml /root/installation_directory/manifests/
部署集群
齐活开始部署集群,整个部署过程我花费了INFO Time elapsed: 34m41s ,记得要有耐心。
一行命令部署:
openshift-install create cluster --dir /root/installation_directory  \
    --log-level=debug
执行这行命令,建议通过阿里云VNC执行。 因为我网络不稳定,也没放到后台执行,SSH堡垒机断过。
查看上面命令的输出内容,openshift安装过程中频繁的调用了阿里云的API,去创建各类资源。
同时我邮箱里也收到大量的阿里云邮件。

等待了34m41s后,控制输入如下内容,表示你创建成功了。
INFO Waiting up to 10m0s (until 3:53PM) for the openshift-console route to be created...
DEBUG Route found in openshift-console namespace: console
DEBUG OpenShift console route is admitted
INFO Install complete!
INFO To access the cluster as the system:admin user when using 'oc', run 'export KUBECONFIG=/root/ocp-install/auth/kubeconfig'
INFO Access the OpenShift web-console here: https://console-openshift-console.apps.tanker.i2docker.site
INFO Login to the console with user: "kubeadmin", and password: "IcAxR-jxb4U-zDF9T-AxyTy"
DEBUG Time elapsed per stage:
DEBUG            cluster: 1m51s
DEBUG          bootstrap: 42s
DEBUG Bootstrap Complete: 15m17s
DEBUG                API: 3m18s
DEBUG  Bootstrap Destroy: 27s
DEBUG  Cluster Operators: 16m18s
INFO Time elapsed: 34m41s
其实部署可以不用花这么久的,原因是nat网关绑定的公网IP ,给创建的5MB按量付费带宽,我就纳闷咱都按量付费,你给个5MB带宽干啥, 手动变下配置,改成峰值200MB。
可以使用浏览器,进行访问
地址:https://console-openshift-console.apps.tanker.i2docker.site
账号:kubeadmin
密码:IcAxR-jxb4U-zDF9T-AxyTy
