ubuntu 20.04 snmp 配置 agentx
设置 ubuntu 20.04 静态IP地址
sudo vi /etc/netplan/01-network-manager-all.yaml
# Let NetworkManager manage all devices on this system
network:
  ethernets:
    ens33:
      dhcp4: no
      addresses: [192.168.99.32/24] # 修改成自己的IP地址
      optional: true
      gateway4: 192.168.99.1
      nameservers:
        addresses: [8.8.8.8,8.8.4.4]
  version: 2
  renderer: NetworkManager
应用配置
sudo netplan apply
使用ip addr检查新地址
ip addr
安装 ssh服务
sudo apt install openssh-server
sudo ufw status
sudo vi /etc/ssh/sshd_config
#/etc/ssh/sshd_config
#其它根据个人需要进行修改,本文只介绍最基本的ssh配置

#Port 22 #ssh的端口设置,建议修改,可以避免端口扫描
Port 22222 #建议修改为5位数的端口,此处作为示例

#PermitRootLogin prohibit-password
PermitRootLogin no #禁止使用root用户连接
sudo systemctl restart sshd
安装 snmpd
sudo apt-get install snmpd snmp
验证
snmpwalk --help
查看端口访问情况
sudo netstat -antup | grep 161

修改/etc/snmp/snmpd.conf配置文件,大概在15行,将下面一行注释掉:
agentAddress udp:127.0.0.1:161
同时去掉下面这一行的注释:
#agentAddress udp:161,udp6:[::1]:161
重启snmpd 服务
sudo service snmpd status

sudo service snmpd restart
命令snmpwalk
snmpwalk -v 2c -c public localhost 1.3.6.1.2.1.1.1

mibs配置文件位置
/usr/share/snmp/mibs

配置文件
sudo vi /etc/snmp/snmpd.conf
python agentx
sudo curl https://bootstrap.pypa.io/pip/2.7/get-pip.py --output get-pip.py
sudo python2 get-pip.py
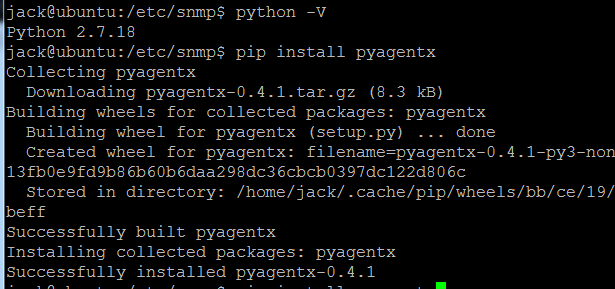
sudo pip install pyagentx
sudo pip install redis

https://github.com/hosthvo/pyagentx
sudo apt install snmp-mibs-downloader
如果 /usr/share/snmp/mibs 里面的文件不全,需要执行上面的命令
参考
linux ubantu snmp服务,ubuntu 20.04 snmp安装配置
https://blog.csdn.net/weixin_32102305/article/details/116701098
用到的指令
snmptranslate -Tp -IR TEST-SET-MIB::testSet
snmpwalk -v 2c -c public 192.168.99.32 1.3.6.1.4.1.77587
snmpwalk -v 2c -c public 192.168.99.31 1.3.6.1.4.1.77587
snmpget -v 2c -c public 192.168.99.31 1.3.6.1.4.1.77587.1800
snmpget -v 2c -c public 192.168.99.31 1.3.6.1.4.1.77587.1765
snmpget -v 2c -c public 192.168.99.31 1.3.6.1.4.1.77587.1827
snmpget -v 2c -c public 192.168.99.31 1.3.6.1.4.1.77587.1765
snmpget -v 2c -c public 192.168.99.31 1.3.6.1.4.1.77587.1827
H:\snmp_task\pysnmp-4.4.12\examples\hlapi\asyncore\sync\manager\cmdgen
pull-whole-mib.py
snmpset 指令 可以使用
https://blog.csdn.net/u011857683/article/details/79931197
###########################################################################
#
# snmpd.conf
# An example configuration file for configuring the Net-SNMP agent ('snmpd')
# See snmpd.conf(5) man page for details
#
###########################################################################
# SECTION: System Information Setup
#

# syslocation: The [typically physical] location of the system.
#   Note that setting this value here means that when trying to
#   perform an snmp SET operation to the sysLocation.0 variable will make
#   the agent return the "notWritable" error code.  IE, including
#   this token in the snmpd.conf file will disable write access to
#   the variable.
#   arguments:  location_string
sysLocation    Sitting on the Dock of the Bay
sysContact     Me <me@example.org>

# sysservices: The proper value for the sysServices object.
#   arguments:  sysservices_number
sysServices    72


###########################################################################
# SECTION: Agent Operating Mode
#
#   This section defines how the agent will operate when it
#   is running.

# master: Should the agent operate as a master agent or not.
#   Currently, the only supported master agent type for this token
#   is "agentx".
#
#   arguments: (on|yes|agentx|all|off|no)

master  agentx
#agentxSocket tcp:localhost:705

#agentxTimeout 5000

#agentxRetries 0
# agentaddress: The IP address and port number that the agent will listen on.
#   By default the agent listens to any and all traffic from any
#   interface on the default SNMP port (161).  This allows you to
#   specify which address, interface, transport type and port(s) that you
#   want the agent to listen on.  Multiple definitions of this token
#   are concatenated together (using ':'s).
#   arguments: [transport:]port[@interface/address],...

#agentaddress  127.0.0.1,[::1]
agentAddress udp:161


###########################################################################
# SECTION: Access Control Setup
#
#   This section defines who is allowed to talk to your running
#   snmp agent.

# Views
#   arguments viewname included [oid]

#  system + hrSystem groups only
view   systemonly  included   .1.3.6.1.2.1.1
view   systemonly  included   .1.3.6.1.2.1.25.1
view   systemonly  included   .1.3.6.1.4.1.77587
view   systemonly  included   .1.3.6.1.4.1.8072.2


# rocommunity: a SNMPv1/SNMPv2c read-only access community name
#   arguments:  community [default|hostname|network/bits] [oid | -V view]

# Read-only access to everyone to the systemonly view
#rocommunity  public default -V systemonly
#rocommunity6 public default -V systemonly
#
rocommunity  public default
rwcommunity  private default
rocommunity6  public default
rwcommunity6  private default

# SNMPv3 doesn't use communities, but users with (optionally) an
# authentication and encryption string. This user needs to be created
# with what they can view with rouser/rwuser lines in this file.
#
