0. 编译PX4固件
参考仿真平台基础配置教程(中文详细教程)
仿真平台基础配置 · 语雀 (yuque.com)![]() https://www.yuque.com/xtdrone/manual_cn/basic_config
https://www.yuque.com/xtdrone/manual_cn/basic_config
按照教程,成功编译后运行launch

一. 安装Ceres依赖:
1、软件包下载:
安装及下载地址: ?Installation — Ceres Solverhttp://ceres-solver.org/installation.html
2、安装编译Ceres库所需依赖项:
| 1 |
|
# CMake
sudo apt-get install cmake
# google-glog + gflags
sudo apt-get install libgoogle-glog-dev libgflags-dev
# Use ATLAS for BLAS & LAPACK
sudo apt-get install libatlas-base-dev
# Eigen3
sudo apt-get install libeigen3-dev
# SuiteSparse and CXSparse (optional)
sudo apt-get install libsuitesparse-dev
?可能会出现无法定位libcxsoarse3.1.2的问题
解决方法:
| 1 2 3 4 5 6 7 8 |
|
?3、编译安装:
| 1 2 3 4 |
|
4、测试
tar zxf ceres-solver-2.1.0.tar.gz
mkdir ceres-bin
cd ceres-bin
cmake ../ceres-solver-2.1.0
make -j3
make test
# Optionally install Ceres, it can also be exported using CMake which
# allows Ceres to be used without requiring installation, see the documentation
# for the EXPORT_BUILD_DIR option for more information.
make install

运行测试demo:
./simple_bundle_adjuster /home/haowang/workspace/ceres-solver/data/problem-16-22106-pre.txt
This runs Ceres for a maximum of 10 iterations using the DENSE_SCHUR linear solver. The output should look something like this.

  iter      cost      cost_change  |gradient|   |step|    tr_ratio  tr_radius  ls_iter  iter_time  total_time
     0  4.185660e+06    0.00e+00    1.09e+08   0.00e+00   0.00e+00  1.00e+04       0    7.59e-02    3.37e-01
     1  1.062590e+05    4.08e+06    8.99e+06   5.36e+02   9.82e-01  3.00e+04       1    1.65e-01    5.03e-01
     2  4.992817e+04    5.63e+04    8.32e+06   3.19e+02   6.52e-01  3.09e+04       1    1.45e-01    6.48e-01
     3  1.899774e+04    3.09e+04    1.60e+06   1.24e+02   9.77e-01  9.26e+04       1    1.43e-01    7.92e-01
     4  1.808729e+04    9.10e+02    3.97e+05   6.39e+01   9.51e-01  2.78e+05       1    1.45e-01    9.36e-01
     5  1.803399e+04    5.33e+01    1.48e+04   1.23e+01   9.99e-01  8.33e+05       1    1.45e-01    1.08e+00
     6  1.803390e+04    9.02e-02    6.35e+01   8.00e-01   1.00e+00  2.50e+06       1    1.50e-01    1.23e+00

Solver Summary (v 2.1.0-eigen-(3.4.0)-lapack-suitesparse-(5.10.1)-cxsparse-(3.2.0)-acceleratesparse-eigensparse-no_openmp)

                                     Original                  Reduced
Parameter blocks                        22122                    22122
Parameters                              66462                    66462
Residual blocks                         83718                    83718
Residuals                              167436                   167436

Minimizer                        TRUST_REGION

Dense linear algebra library            EIGEN
Trust region strategy     LEVENBERG_MARQUARDT

                                        Given                     Used
Linear solver                     DENSE_SCHUR              DENSE_SCHUR
Threads                                     1                        1
Linear solver ordering              AUTOMATIC                 22106,16
Schur structure                         2,3,9                    2,3,9

Cost:
Initial                          4.185660e+06
Final                            1.803390e+04
Change                           4.167626e+06

Minimizer iterations                        7
Successful steps                            7
Unsuccessful steps                          0

Time (in seconds):
Preprocessor                         0.121654

  Residual only evaluation           0.065968 (7)
  Jacobian & residual evaluation     0.303356 (7)
  Linear solver                      0.436650 (7)
Minimizer                            0.890535

Postprocessor                        0.001684
Total                                1.013873

Termination:                      CONVERGENCE (Function tolerance reached. |cost_change|/cost: 1.769756e-09 <= 1.000000e-06)
5、install安装
sudo make install
二、 编译VINS-Fusion

    cd ~/catkin_ws/src
    git clone https://github.com/HKUST-Aerial-Robotics/VINS-Fusion.git
    cd ../
    catkin_make
    source ~/catkin_ws/devel/setup.bash
VINS-Fusion仿真
注意把EKF设置为视觉定位,详见PX4飞控EKF配置教程。
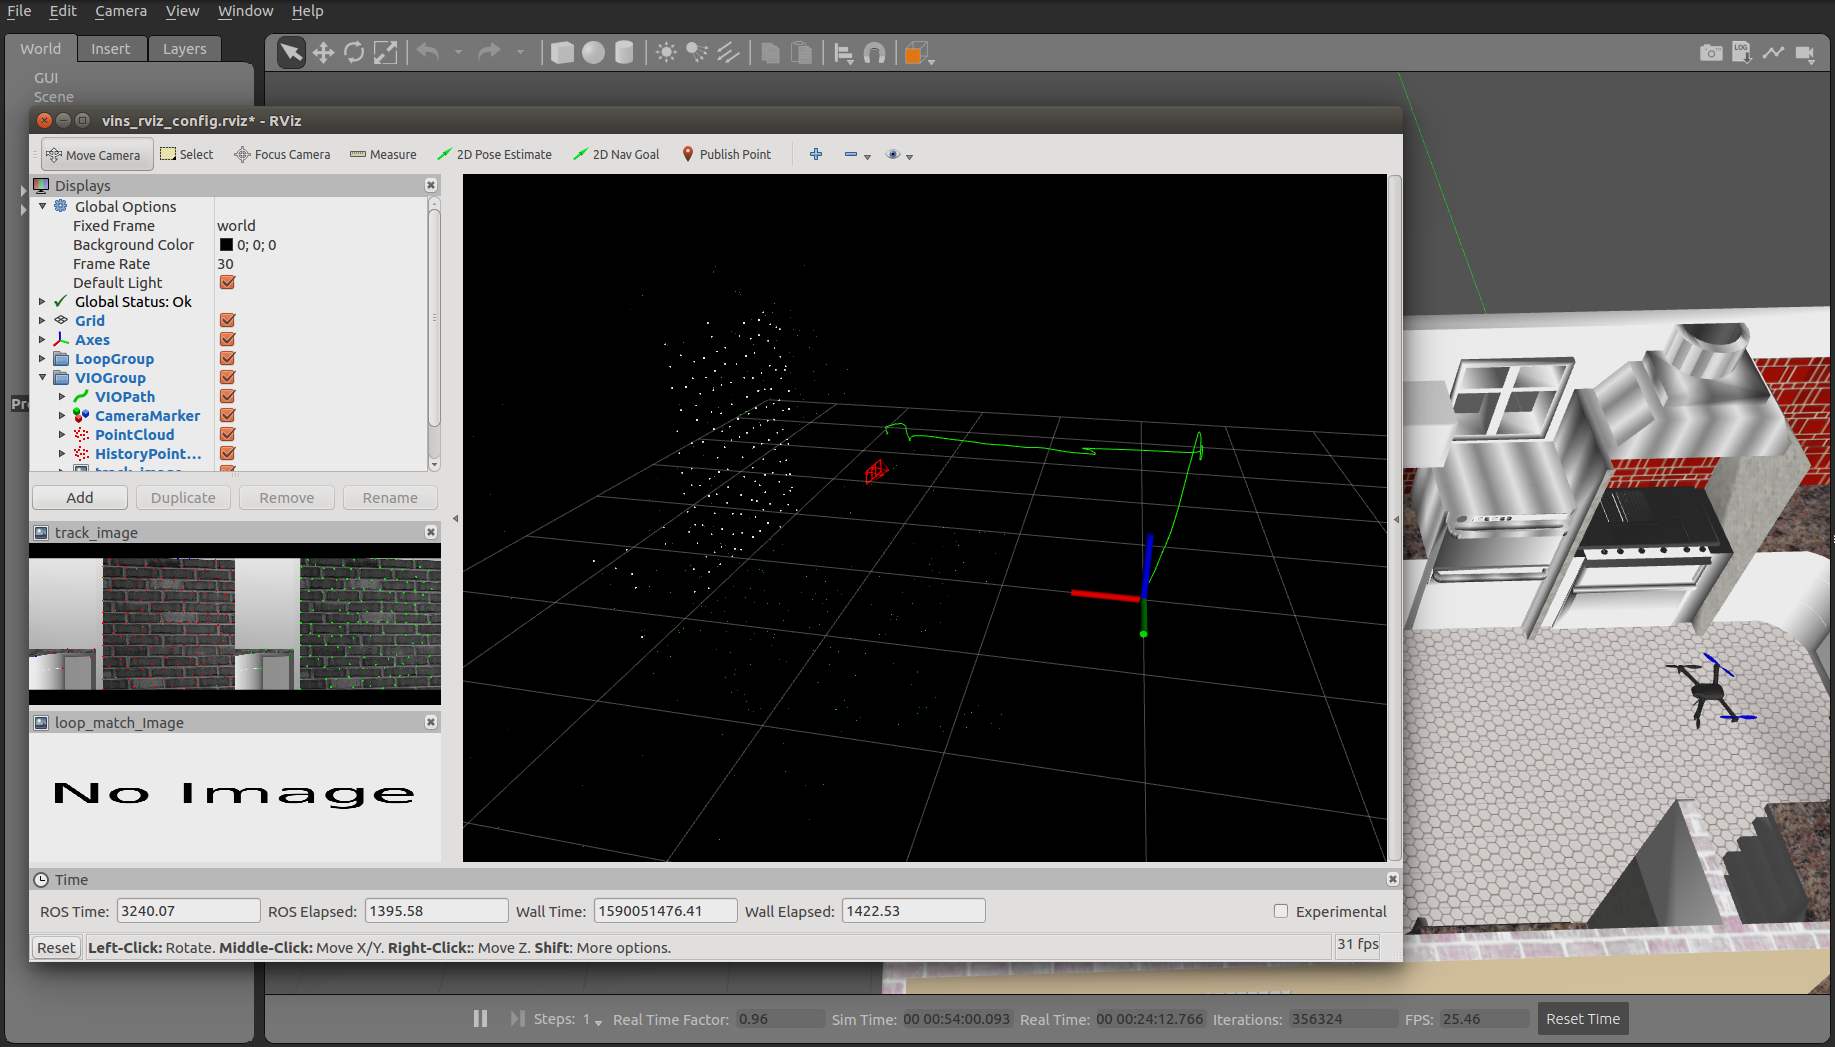
启动仿真程序,注意launch文件中使用的是iris_stereo_camera.sdf
cd PX4_Firmware
roslaunch px4 indoor1.launch
启动VINS-Fusion,注意其默认订阅的话题是iris_0的,如果要换别的vehicle,需要对应修改。另外临时文件存储路径也要对应修改。
gedit ~/catkin_ws/src/VINS-Fusion/config/xtdrone_sitl/px4_sitl_stereo_imu_config.yamlimu_topic: "/iris_0/imu_gazebo" image0_topic: "/iris_0/stereo_camera/left/image_raw" image1_topic: "/iris_0/stereo_camera/right/image_raw" output_path: "/home/robin/catkin_ws/vins_output" . . . pose_graph_save_path: "/home/robin/catkin_ws/vins_output/pose_graph/" # save and load pathcd catkin_ws bash scripts/xtdrone_run_vio.sh这时VINS-Fusion就启动了

?
由于VINS-Fusion发布的是Odometry类型的话题,我们要将其对应转为PX4所需的话题
cd ~/XTDrone/sensing/slam/vio
python vins_transfer.py iris 0
?
这时PX4仿真终端出现如下所示输出,代表视觉信息融合成功
INFO  [ecl/EKF] 1213644000: reset position to ev position
INFO  [ecl/EKF] 1213644000: commencing external vision position fusion
INFO  [ecl/EKF] 1213644000: commencing external vision yaw fusion
然后建立通信,键盘控制起飞即可
cd ~/XTDrone/communication
python multirotor_communication.py iris 0
cd ~/XTDrone/control/keyboard
python multirotor_keyboard_control.py iris 1 vel
VIO的初始化
VINS-Fusion的双目+IMU可以在静止条件下完成初始化,因此不用额外考虑。但单目+IMU以及ORBSLAM3的单目/双目+IMU均需要在运动中初始化,在实物系统中,我们可以用手晃一晃飞机实现初始化,而仿真中必须起飞才能让无人机运动,但PX4的offboard模式如果没有定位数据,又无法起飞,这就造成了矛盾。因此仿真里只能用Gazebo真值给PX4定位,然后在飞行过程中初始化VIO,VIO的输出只用于测试精度,并不实际给无人机定位用。


