目录
一、搭建Nginx
1、创建用户组和用户
#创建用户组
groupadd nginx

#创建用户
useradd -g nginx nginx  #第一个参数用户组,第二个参数用户名

#设置密码
passwd nginx

删除用户
userdel nginx

#删除用户组
groupdel nginx

#删除用户所在目录
rm -rf nginx如果在创建用户过程总发生?Creating mailbox file: File exists错误
执行如下命令
rm -rf /var/spool/mail/nginx #nginx为对应的用户名2、从阿里云申请ssl证书
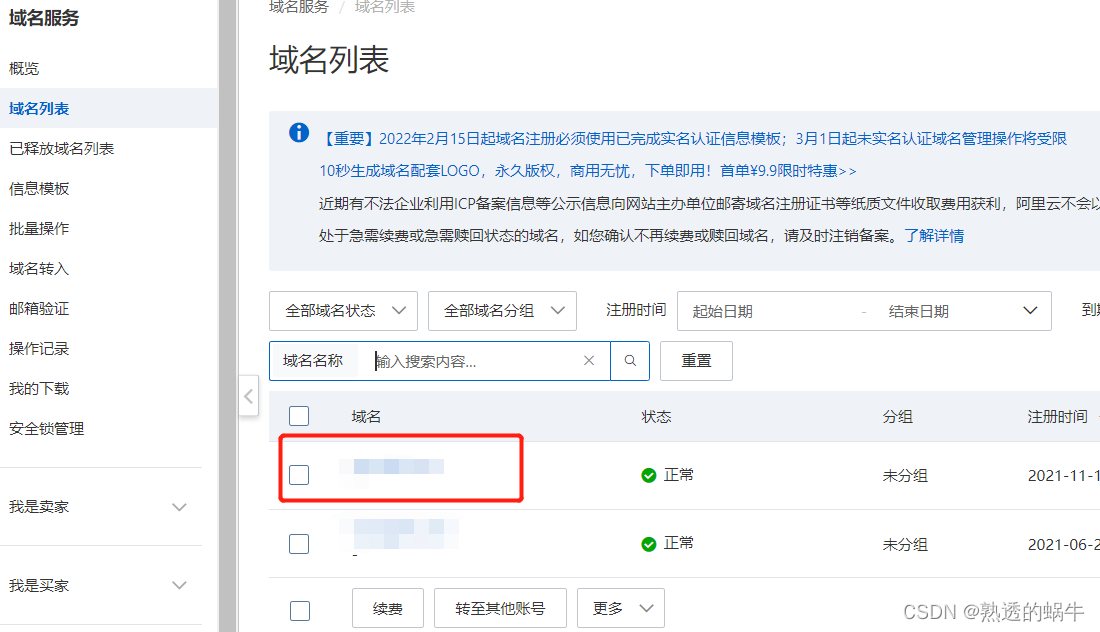
a、
?
b、
?
c、
?
?d、

?e、这里我们选择SSL证书这个,有免费的证书

?f、点击申请证书,填写你的信息,等待审核通过后,下载证书

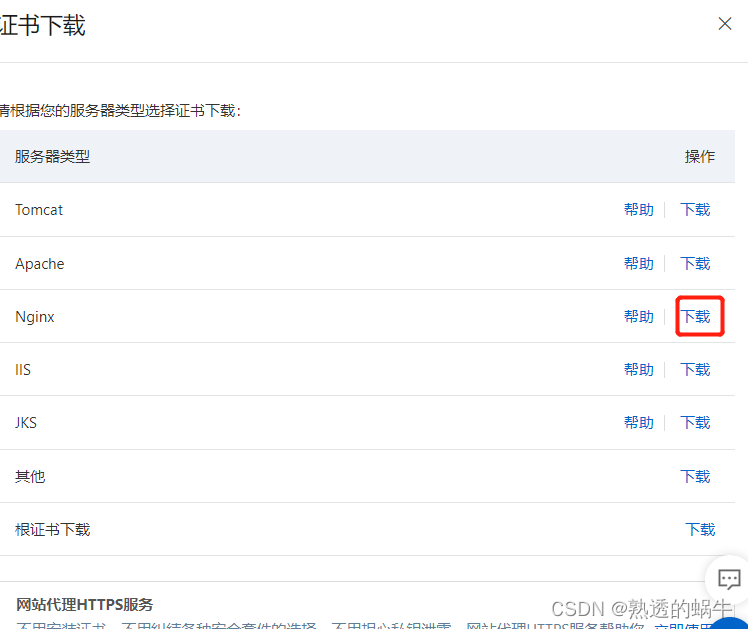
?g、下载证书,我们选择nginx证书下载

?3、阿里云域名解析配置
a、请确保你的域名已经实名认证

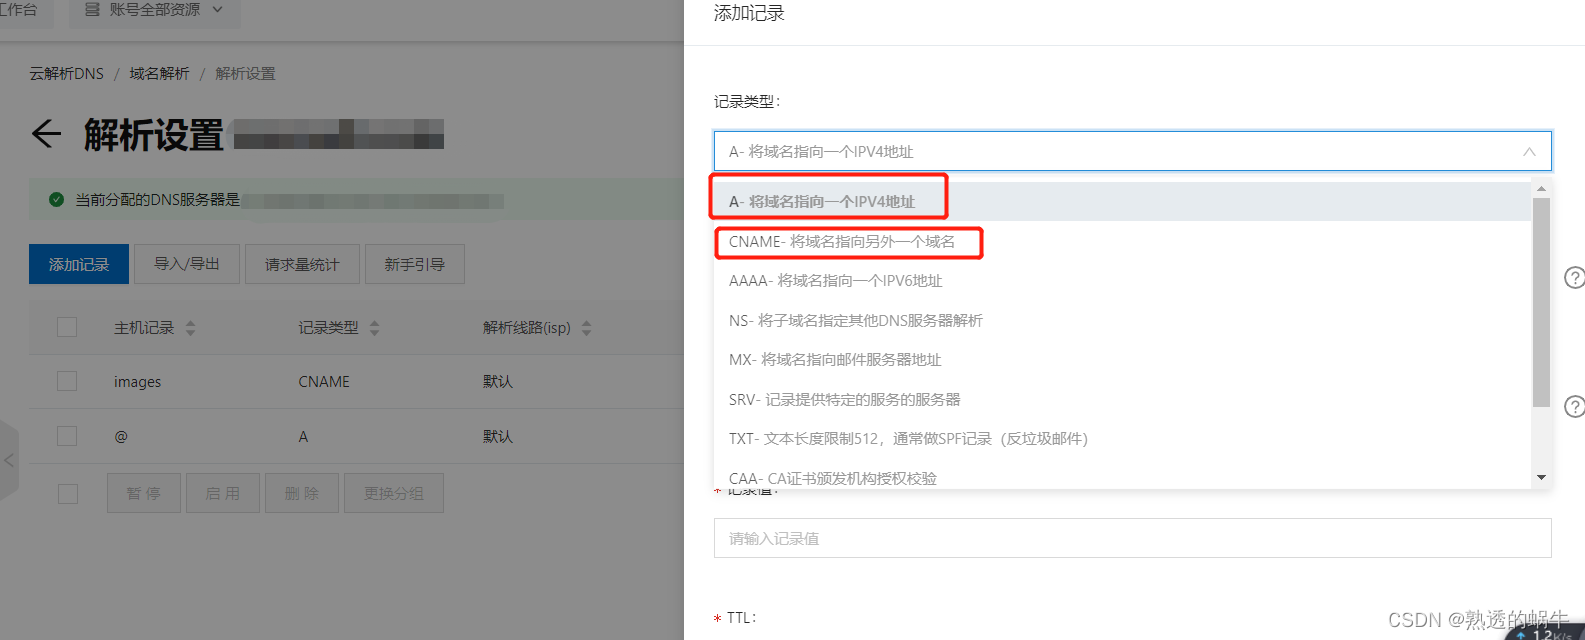
?b、添加记录

?A是将域名指向一个ip 。
CNAME :当需要将域名指向另一个域名,再由另一个域名提供 IP 地址,就需要添加 CNAME 记录,最常用到 CNAME 的场景包括做 CDN、企业邮箱、全局流量管理等。
c、配置完成后,ping一下你的域名,如果能ping通,证明你的域名DNS解析成功
?4、docker创建Nginx
mkdir -p /data/nginx/{conf,conf.d,html,logs,certs}a、将上面下载的证书解压之后,上传到/data/nginx/certs目录下
b、在/data/conf文件下创建nginx.conf文件
user  nginx;
worker_processes  auto; #一般为cpu核数

error_log  /var/log/nginx/error.log notice;
pid        /var/run/nginx.pid;


events {
    worker_connections  1024;
}


http {
    include       /etc/nginx/mime.types;
    default_type  application/octet-stream;
	#log格式
    log_format  main  '$remote_addr - $remote_user [$time_local] "$request" '
                      '$status $body_bytes_sent "$http_referer" '
                      '"$http_user_agent" "$http_x_forwarded_for"';

    access_log  /var/log/nginx/access.log  main;

    sendfile        on;
    #tcp_nopush     on;

    keepalive_timeout  65;

    gzip  on; #开启压缩

    include /etc/nginx/conf.d/*.conf;
}
c、在/data/html文件下创建html文件 index.html
<!DOCTYPE html>
<html>
<head>
<title>Welcome to nginx!</title>
<style>
html { color-scheme: light dark; }
body { width: 35em; margin: 0 auto;
font-family: Tahoma, Verdana, Arial, sans-serif; }
</style>
</head>
<body>
<h1>Welcome to nginx!</h1>
<p>If you see this page, the nginx web server is successfully installed and
working. Further configuration is required.</p>

<p>For online documentation and support please refer to
<a href="http://nginx.org/">nginx.org</a>.<br/>
Commercial support is available at
<a href="http://nginx.com/">nginx.com</a>.</p>

<p><em>Thank you for using nginx.</em></p>
</body>
</html>
d、在/data/nginx/conf.d/目录创建default.conf
server {
    listen       80;
    listen  [::]:80;
	server_name www.example.com; #填写域名
	#将所有HTTP请求通过rewrite指令重定向到HTTPS
    rewrite ^(.*) https://$server_name$1 permanent;
}

#配置443端口
server {
		listen 443 ssl;  # 1.1版本后这样写
        server_name www.example.com; #填写域名

        ssl_certificate certs/1_www.example.com.pem;  #需要将cert-file-name.pem替换成已上传的证书文件的名称。
		ssl_certificate_key certs/1_www.example.com.key; #需要将cert-file-name.key替换成已上传的证书私钥文件的名称。

        ssl_session_timeout 5m;
        #表示使用的加密套件的类型。
		ssl_protocols TLSv1.1 TLSv1.2 TLSv1.3; #表示使用的TLS协议的类型。
		ssl_prefer_server_ciphers on;
        ssl_ciphers ECDHE-RSA-AES128-GCM-SHA256:ECDHE:ECDH:AES:HIGH:!NULL:!aNULL:!MD5:!ADH:!RC4;

		ssl_session_cache shared:SSL:1m;

        fastcgi_param  HTTPS        on;
        fastcgi_param  HTTP_SCHEME     https;

	location / {
		proxy_set_header   X-Real-IP         $remote_addr;
		proxy_set_header   Host              $http_host;
		proxy_set_header   X-Forwarded-For   $proxy_add_x_forwarded_for;
        root html;
        index index.html index.htm;
    }
}
e、授权文件给nginx用户
chown -R nginx:nginx /data/nginxf、创建容器并启动
docker run --name nginx -d -p 80:80 \
 -p 443:443 \
 -v /data/nginx/conf/nginx.conf:/etc/nginx/nginx.conf  \
 -v /data/nginx/conf.d/:/etc/nginx/conf.d \
 -v /data/nginx/html:/etc/nginx/html \
 -v /data/nginx/logs:/var/log/nginx \
 -v /data/nginx/certs:/etc/nginx/certs \
 -v /etc/localtime:/etc/localtime:ro \
 nginx:1.21.4
二、创建图片服务器
?1、在/data/nginx/html目录下创建images目录并将图片文件上传到该目录
?2、添加images.conf
server {
	listen  8090 ssl ;	#图片服务器监听的端口
	server_name images.example.com; #域名

    #新的证书,需要将新的证书上传到/certs目录下
	ssl_certificate certs/8_images.example.com.pem;
	ssl_certificate_key certs/8_images.example.com.key;

	ssl_session_timeout 5m;
	ssl_protocols TLSv1.1 TLSv1.2 TLSv1.3;
	ssl_prefer_server_ciphers on;
	ssl_ciphers ECDHE-RSA-AES128-GCM-SHA256:ECDHE:ECDH:AES:HIGH:!NULL:!aNULL:!MD5:!ADH:!RC4;

	ssl_session_cache shared:SSL:1m;

	fastcgi_param  HTTPS        on;
	fastcgi_param  HTTP_SCHEME     https;


	location /images/ {
		expires 24h;
		root html;
		autoindex on;
	}

	error_page   500 502 503 504  /50x.html;
        location = /50x.html {
		root   html;
    }
}
3、重新创建nginx容器
docker run --name nginx -d -p 80:80 \
 -p 443:443 \
 -p 8090:8090 \
 -v /data/nginx/conf/nginx.conf:/etc/nginx/nginx.conf  \
 -v /data/nginx/conf.d/:/etc/nginx/conf.d \
 -v /data/nginx/html:/etc/nginx/html \
 -v /data/nginx/logs:/var/log/nginx \
 -v /data/nginx/certs:/etc/nginx/certs \
 -v /etc/localtime:/etc/localtime:ro \
 nginx:1.21.4
8090为图片服务器监听的端口,切记一定要映射出该端口!!!
4、访问为https访问,http访问会报400的错误。?

