nginx-strean代理
yum安装nginx、启动、查看nginx服务状态
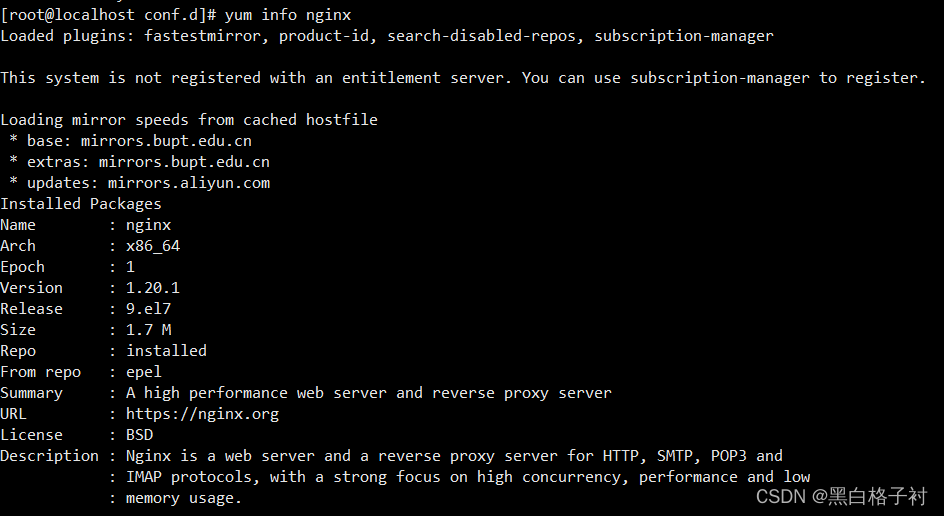
 1. yum info nginx
 2. yum -y install nginx
 3. systemctl start nginx
 4. systemctl status nginx
stream模块是动态加载的模块,动态模块的路径是
/usr/lib64/nginx/modules。默认情况下,未安装动态模块,所以/usr/lib64/nginx/modules是空目录
安装stream模块
yum -y install nginx-mod-stream
安装所有动态模块
yum -y install nginx-all-modules
查看动态模块配置文件(/usr/lib64/nginx/modules)是否存在文件
[root@localhost modules]# ll -ls /usr/lib64/nginx/modules
total 360
 28 -rwxr-xr-x. 1 root root  24600 Oct 19  2021 ngx_http_image_filter_module.so
 24 -rwxr-xr-x. 1 root root  24528 Oct 19  2021 ngx_http_perl_module.so
 24 -rwxr-xr-x. 1 root root  24576 Oct 19  2021 ngx_http_xslt_filter_module.so
108 -rwxr-xr-x. 1 root root 110280 Oct 19  2021 ngx_mail_module.so
176 -rwxr-xr-x. 1 root root 179864 Oct 19  2021 ngx_stream_module.so
设置 nginx stream代理
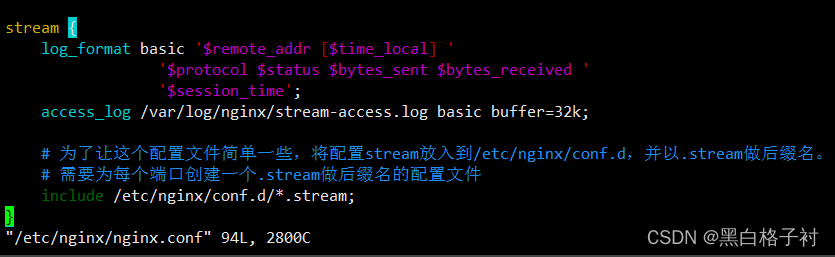
修改/etc/nginx/nginx.conf
vim /etc/nginx/nginx.conf
末尾添加
stream {
    log_format basic '$remote_addr [$time_local] '
                 '$protocol $status $bytes_sent $bytes_received '
                 '$session_time';
    access_log /var/log/nginx/stream-access.log basic buffer=32k;

    # 为了让这个配置文件简单一些,将配置stream放入到/etc/nginx/conf.d,并以.stream做后缀名。
    # 需要为每个端口创建一个.stream做后缀名的配置文件
    include /etc/nginx/conf.d/*.stream;
}
配置完毕!添加stream代理
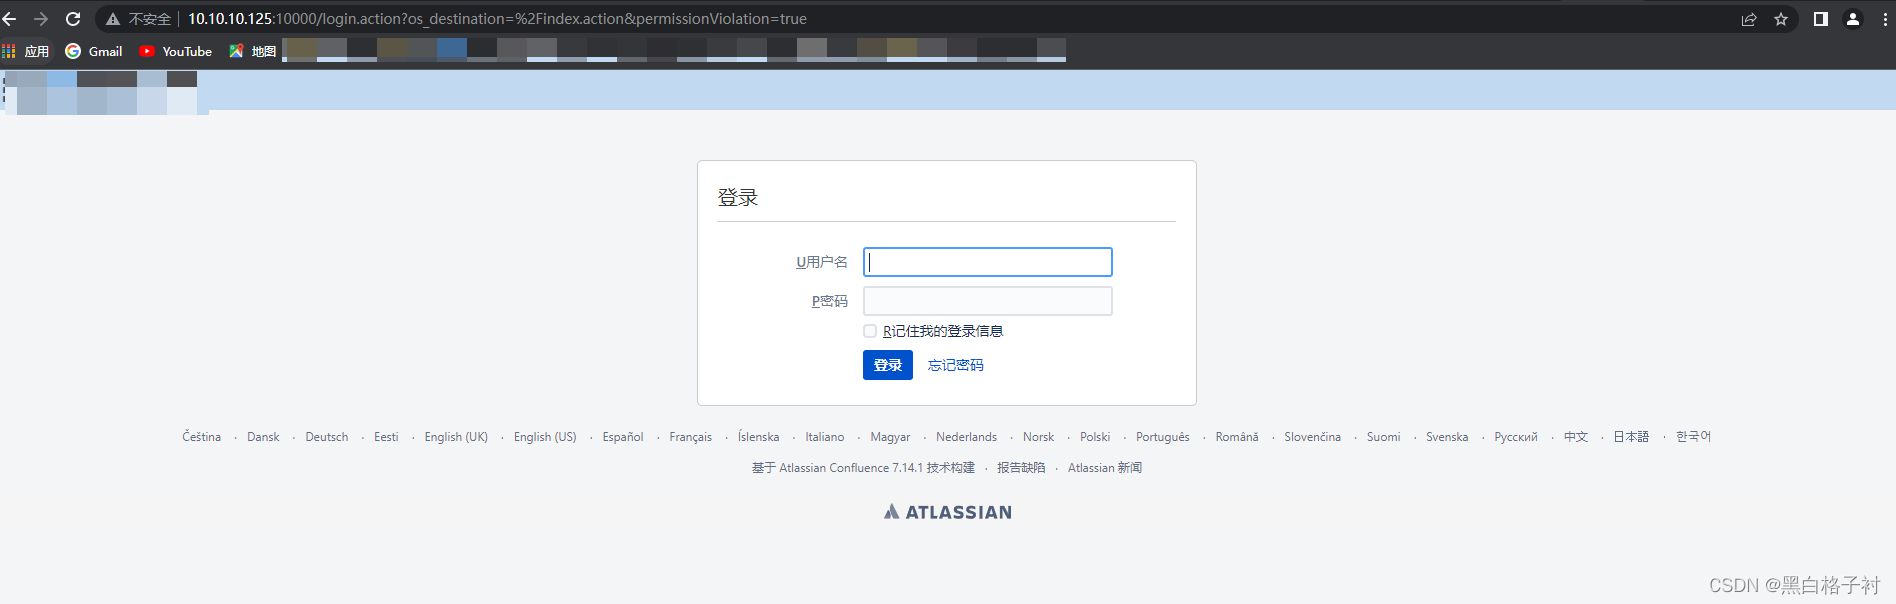
可以根据服务端口自行添加,我这里以docker 部署的wiki服务为例,服务IP为10.10.10.24、端口为8090,代理 IP为:10.10.10.125 端口为10000
cd /etc/nginx/conf.d/
vim wiki.stream
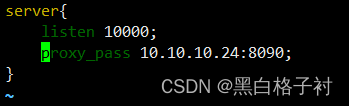
server{
listen 10000;
proxy_pass 10.10.10.24:8090;
}
检查配置
nginx -t

重启nginx 访问代理IP+端口即可