Two Factor Authentication 简称 "2FA"; 通过组合2种不同的验证方式来进行用户身份验证的机制
即用户需要通过2种不同的方式进行认证
-
服务器本身的用户名/密码
-
借助其他工具提供用户预先不知道的信息(如短信验证码、银行的电子令牌等等...)
?
主流双因素认证使用的技术

TOTP, Time base One-time Password 基于时间的一次性密码,是公认可靠的解决方案(RFC 6238)
常用的工具: Google Authenticator(支持 Linux/Android/IOS 自行下载)
附件: Android 版本

?
实验

在 CentOS 7/8 上对 ssh 使用双因素认证
1.安装 google-authenticator
[root@localhost?~]#?yum?-y?install?epel-release
[root@localhost?~]#?yum?-y?install?google-authenticator
2.配置 google-authenticator
[root@localhost?~]#?google-authenticator
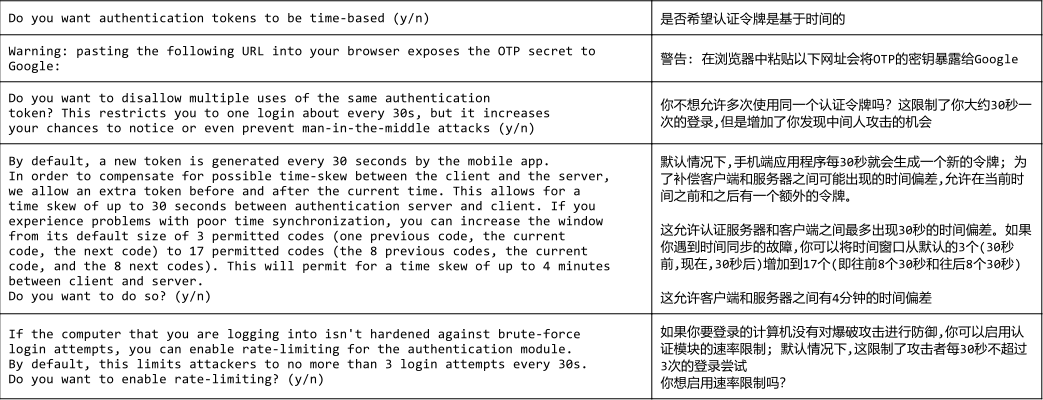
Do?you?want?authentication?tokens?to?be?time-based?(y/n)?y
Warning:?pasting?the?following?URL?into?your?browser?exposes?the?OTP?secret?to?Google:
https://www.google.com/chart?chs=200x200&chld=M|0&cht=qr&chl
=otpauth://totp/root@localhost.localdomain%3Fsecret%3DK3L4YTH2WPE2DOJLVMJGYH5RII%26issuer%3Dlocalhost.localdomain

Your?new?secret?key?is:?K3L4YTH2WPE2DOJLVMJGYH5RII
Your?verification?code?is?538087
Your?emergency?scratch?codes?are:
86712045
77396403
32965136
37749850
76399812
Do?you?want?me?to?update?your?"/root/.google_authenticator"?file??(y/n)?y
Do?you?want?to?disallow?multiple?uses?of?the?same?authentication
token??This?restricts?you?to?one?login?about?every?30s,?but?it?increases
your?chances?to?notice?or?even?prevent?man-in-the-middle?attacks?(y/n)?y
By?default,?a?new?token?is?generated?every?30?seconds?by?the?mobile?app.
In?order?to?compensate?for?possible?time-skew?between?the?client?and?the?server,
we?allow?an?extra?token?before?and?after?the?current?time.?This?allows?for?a
time?skew?of?up?to?30?seconds?between?authentication?server?and?client.?If?you
experience?problems?with?poor?time?synchronization,?you?can?increase?the?window
from?its?default?size?of?3?permitted?codes?(one?previous?code,?the?current
code,?the?next?code)?to?17?permitted?codes?(the?8?previous?codes,?the?current
code,?and?the?8?next?codes).?This?will?permit?for?a?time?skew?of?up?to?4?minutes
between?client?and?server.
Do?you?want?to?do?so??(y/n)?n
If?the?computer?that?you?are?logging?into?isn't?hardened?against?brute-force
login?attempts,?you?can?enable?rate-limiting?for?the?authentication?module.
By?default,?this?limits?attackers?to?no?more?than?3?login?attempts?every?30s.
Do?you?want?to?enable?rate-limiting??(y/n)?y
[root@localhost?~]#
解释配置

3.打开手机上的 google-authenticator,扫描上面的二维码后,软件就能自动显示出数字令牌(由于无法截图,没法展示)
4.查看 google-authenticator 提供的 PAM 模块路径
[root@localhost?~]#?rpm?-ql?google-authenticator?|?grep?pam
/usr/lib64/security/pam_google_authenticator.la
/usr/lib64/security/pam_google_authenticator.so
/usr/share/man/man8/pam_google_authenticator.8.gz
5.编辑 /etc/pam.d/sshd 文件,在文件内容最后一行添加
#%PAM-1.0
auth?required?pam_sepermit.so
auth?substack?password-auth
auth?include?postlogin
#?Used?with?polkit?to?reauthorize?users?in?remote?sessions
-auth?optional?pam_reauthorize.so?prepare
account?required?pam_nologin.so
account?include?password-auth
password?include?password-auth
#?pam_selinux.so?close?should?be?the?first?session?rule
session?required?pam_selinux.so?close
session?required?pam_loginuid.so
#?pam_selinux.so?open?should?only?be?followed?by?sessions?to?be?executed?in?the?user?context
session?required?pam_selinux.so?open?env_params
session?required?pam_namespace.so
session?optional?pam_keyinit.so?force?revoke
session?include?password-auth
session?include?postlogin
#?Used?with?polkit?to?reauthorize?users?in?remote?sessions
-session?optional?pam_reauthorize.so?prepare
auth?required?/usr/lib64/security/pam_google_authenticator.so
6.修改 ssh 配置文件 /etc/ssh/sshd_config, 将 ChallengeResponseAuthentication no 改为 yes
ChallengeResponseAuthentication?yes
7.重启 sshd 服务
[root@localhost?~]#?systemctl?restart?sshd
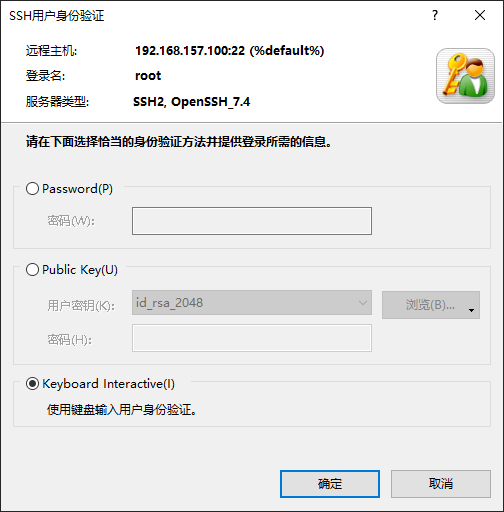
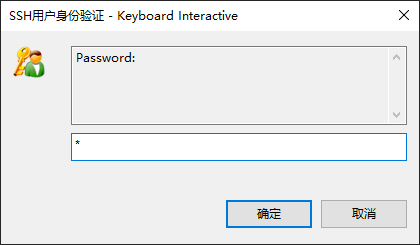
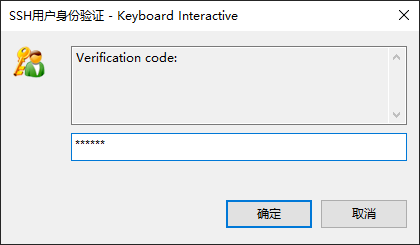
8.此时使用 XShell 登录,必须要使用 "Keyboard Interactive" 方式; 先输入密码,然后输入令牌,正确后才能登录系统


一次性紧急登录代码
google_authenticator 的配置文件默认在 ~/.google_authenticator
[root@localhost?~]#?cat?.google_authenticator
K3L4YTH2WPE2DOJLVMJGYH5RII
"?RATE_LIMIT?3?30?1652456528
"?DISALLOW_REUSE?55081884
"?TOTP_AUTH
86712045
77396403
32965136
37749850
76399812
[root@localhost?~]#
如遇到不可抗力的情况,需要登录系统,可以使用紧急代码进行临时登录,上图绿色字体部分; 用完即永久失效, 文件中的紧急代码会被删除掉;
但可以自己手动添加紧急代码,建议自行手动多加几个自己记得住的紧急代码
