系统环境:
ubuntu20.04
1.下载nginx 和nginx-http-flv-module
因为之前安装过nginx ,先卸载
sudo apt-get --purge remove nginx

sudo apt-get --purge remove nginx-common

dpkg --get-selections|grep nginx
此时已经清理了 nginx.
?
?

wget http://nginx.org/download/nginx-1.20.0.tar.gz

git clone https://github.com/winshining/nginx-http-flv-module.git

tar -zxvf nginx-1.20.0.tar.gz

cd nginx-1.20.0/

./configure --prefix=/usr/local/nginx --add-module=../nginx-http-flv-module

make

sudo make install

sudo ln -s /usr/local/nginx/sbin/nginx /usr/local/sbin/
?
2. 编辑 /usr/local/nginx/conf/nginx.conf
#user  nobody;
worker_processes  1;

#error_log  logs/error.log;
#error_log  logs/error.log  notice;
#error_log  logs/error.log  info;

#pid        logs/nginx.pid;


events {
    worker_connections  1024;
}

rtmp {                #RTMP服务
   server {
       listen 1935;  #//服务端口
       chunk_size 4096;   #//数据传输块的大小

   	application vod {
		play /opt/video/vod; #//视频文件存放位置。
   	}

   	application live{
		live on;
		record off;
   	}
   }
}

http {
    include       mime.types;
    default_type  application/octet-stream;

    #log_format  main  '$remote_addr - $remote_user [$time_local] "$request" '
    #                  '$status $body_bytes_sent "$http_referer" '
    #                  '"$http_user_agent" "$http_x_forwarded_for"';

    #access_log  logs/access.log  main;

    sendfile        on;
    #tcp_nopush     on;

    #keepalive_timeout  0;
    keepalive_timeout  65;

    #gzip  on;

    server {
        listen       80;
        server_name  localhost;

        #charset koi8-r;

        #access_log  logs/host.access.log  main;
        # 新增部分-----start----------
        # rtmpLive 自定义
       location /rtmpLive {
           flv_live on;
           chunked_transfer_encoding  on; #open 'Transfer-Encoding: chunked' response
           add_header 'Access-Control-Allow-Credentials' 'true'; #add additional HTTP header
           add_header 'Access-Control-Allow-Origin' '*'; #add additional HTTP header
           add_header Access-Control-Allow-Headers X-Requested-With;
           add_header Access-Control-Allow-Methods GET,POST,OPTIONS;
           add_header 'Cache-Control' 'no-cache';
        }
         # 新增部分-----end----------

        location / {
            root   html;
            index  index.html index.htm;
        }

        #error_page  404              /404.html;

        # redirect server error pages to the static page /50x.html
        #
        error_page   500 502 503 504  /50x.html;
        location = /50x.html {
            root   html;
        }

        # proxy the PHP scripts to Apache listening on 127.0.0.1:80
        #
        #location ~ \.php$ {
        #    proxy_pass   http://127.0.0.1;
        #}

        # pass the PHP scripts to FastCGI server listening on 127.0.0.1:9000
        #
        #location ~ \.php$ {
        #    root           html;
        #    fastcgi_pass   127.0.0.1:9000;
        #    fastcgi_index  index.php;
        #    fastcgi_param  SCRIPT_FILENAME  /scripts$fastcgi_script_name;
        #    include        fastcgi_params;
        #}

        # deny access to .htaccess files, if Apache's document root
        # concurs with nginx's one
        #
        #location ~ /\.ht {
        #    deny  all;
        #}
    }


    # another virtual host using mix of IP-, name-, and port-based configuration
    #
    #server {
    #    listen       8000;
    #    listen       somename:8080;
    #    server_name  somename  alias  another.alias;

    #    location / {
    #        root   html;
    #        index  index.html index.htm;
    #    }
    #}


    # HTTPS server
    #
    #server {
    #    listen       443 ssl;
    #    server_name  localhost;

    #    ssl_certificate      cert.pem;
    #    ssl_certificate_key  cert.key;

    #    ssl_session_cache    shared:SSL:1m;
    #    ssl_session_timeout  5m;

    #    ssl_ciphers  HIGH:!aNULL:!MD5;
    #    ssl_prefer_server_ciphers  on;

    #    location / {
    #        root   html;
    #        index  index.html index.htm;
    #    }
    #}

}
?这里将整个nginx.conf 贴出来, 方便查看。
重启nginx 服务
sudo nginx -s reload3. 安装FFmpeg
可以 sudo apt-get instal ffmpeg , 也可以下载源码安装。
4.测试推流
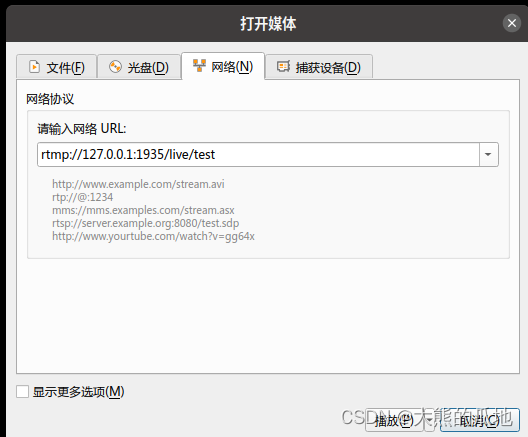
ffmpeg -re -i /home/xshx/code/VideoStation/res/my.mp4 -vcodec copy -acodec copy -f flv "rtmp://127.0.0.1:1935/live/test"
在vlc 播放中观看

参考资料:
Ubuntu搭建基于nginx-http-flv-module的流媒体服务_flyawayl的博客-CSDN博客
Ubuntu搭建基于nginx-http-flv-module媒体服务_丿醉灬日臻的博客-CSDN博客
?
很有参考价值的源码:
https://github.com/jacksonliam/mjpg-streamer.git